I’ve had my dual extruder module for about 2 weeks now and I haven’t had a successful print yet and I can’t seem to figure out why they keep failing. They print fine to start but they keep under extruding at random parts of the print. I’ve played with the temperature, I’ve messed around with bed leveling, tried with each of the nozzles, I’ve removed the tubes, I’ve changed how the filament is hung while it’s feeding, I can’t seem to pin point the issue. If anyone has any suggestions I would love to hear them!

all of my extrusion issues that look like this were about the heat control in the nozzle cooling areas. if they get to warm they extrude like this. however, i have never had a case when the toolhead gets swamped with heat like that where the top layers get better. the pictures looks like there are top layers that are more substantial then the strings underneath.
Yeah I’ve had prints where this happens about 3 times before one of the segments detaches and I start printing plastic spaghetti. Other times it does this and then just clogs and stops printing so I’m not entirely sure what’s going on.
The wedge did it for me.
I printed it with Z +10%.
Thank you, I’ll give this a try when I get home and let you know how it goes!
Hi there xchrisd;
I’m having issues with the dual extruder as well and I’m relatively new to this, with only about a dozen print in my belt. When you say you printed it with a Z +10% I assume you refer to the distance between the print head and the bed. That calibration is done with the calibration card or automatic (my issue). How would you set Z+10%?
The issue I ended up having was with the fans and something called heat creep and not feeder at the top being loose. Essentially the fans weren’t dispersing the heat enough which causes the filament to overheat and actually expand. When the filament expands it can’t be pushed through the nozzle as effectively or at all which results in the under extrusion (the separating layers) or full on clogs. So I bought a tiny little fan to add some additional cooling while I’m printing and my prints have been working fine ever since. I know this doesn’t really answer your question but I hope this helps you with your prints!

do you have a dry box and bowden tubes from it to the extruder?
If so Dual Extruder design / Dry box setups explains some issues i had with it at first.
I printed the wedge with +10% dimension offset, this means you would have to expand the part by about 0.4mm in the height.
This has to be done in your prefered slicer (probably luban or cura) , in the object settings like movement on the build plate.
Maybe the wedge is good for you, mine was way too small.
myA350dualblock.stl (1.3 KB)
here is a new block for those that want one. i found that the hard rubber blocks have been really good as well.
front plate to print plas
myA350dxfrontplate.stl (239.5 KB)

this addresses a lot of the heat creep issues. if you have an enclosure this will print with front door open and no fan, using plas and long(8+ hours) prints
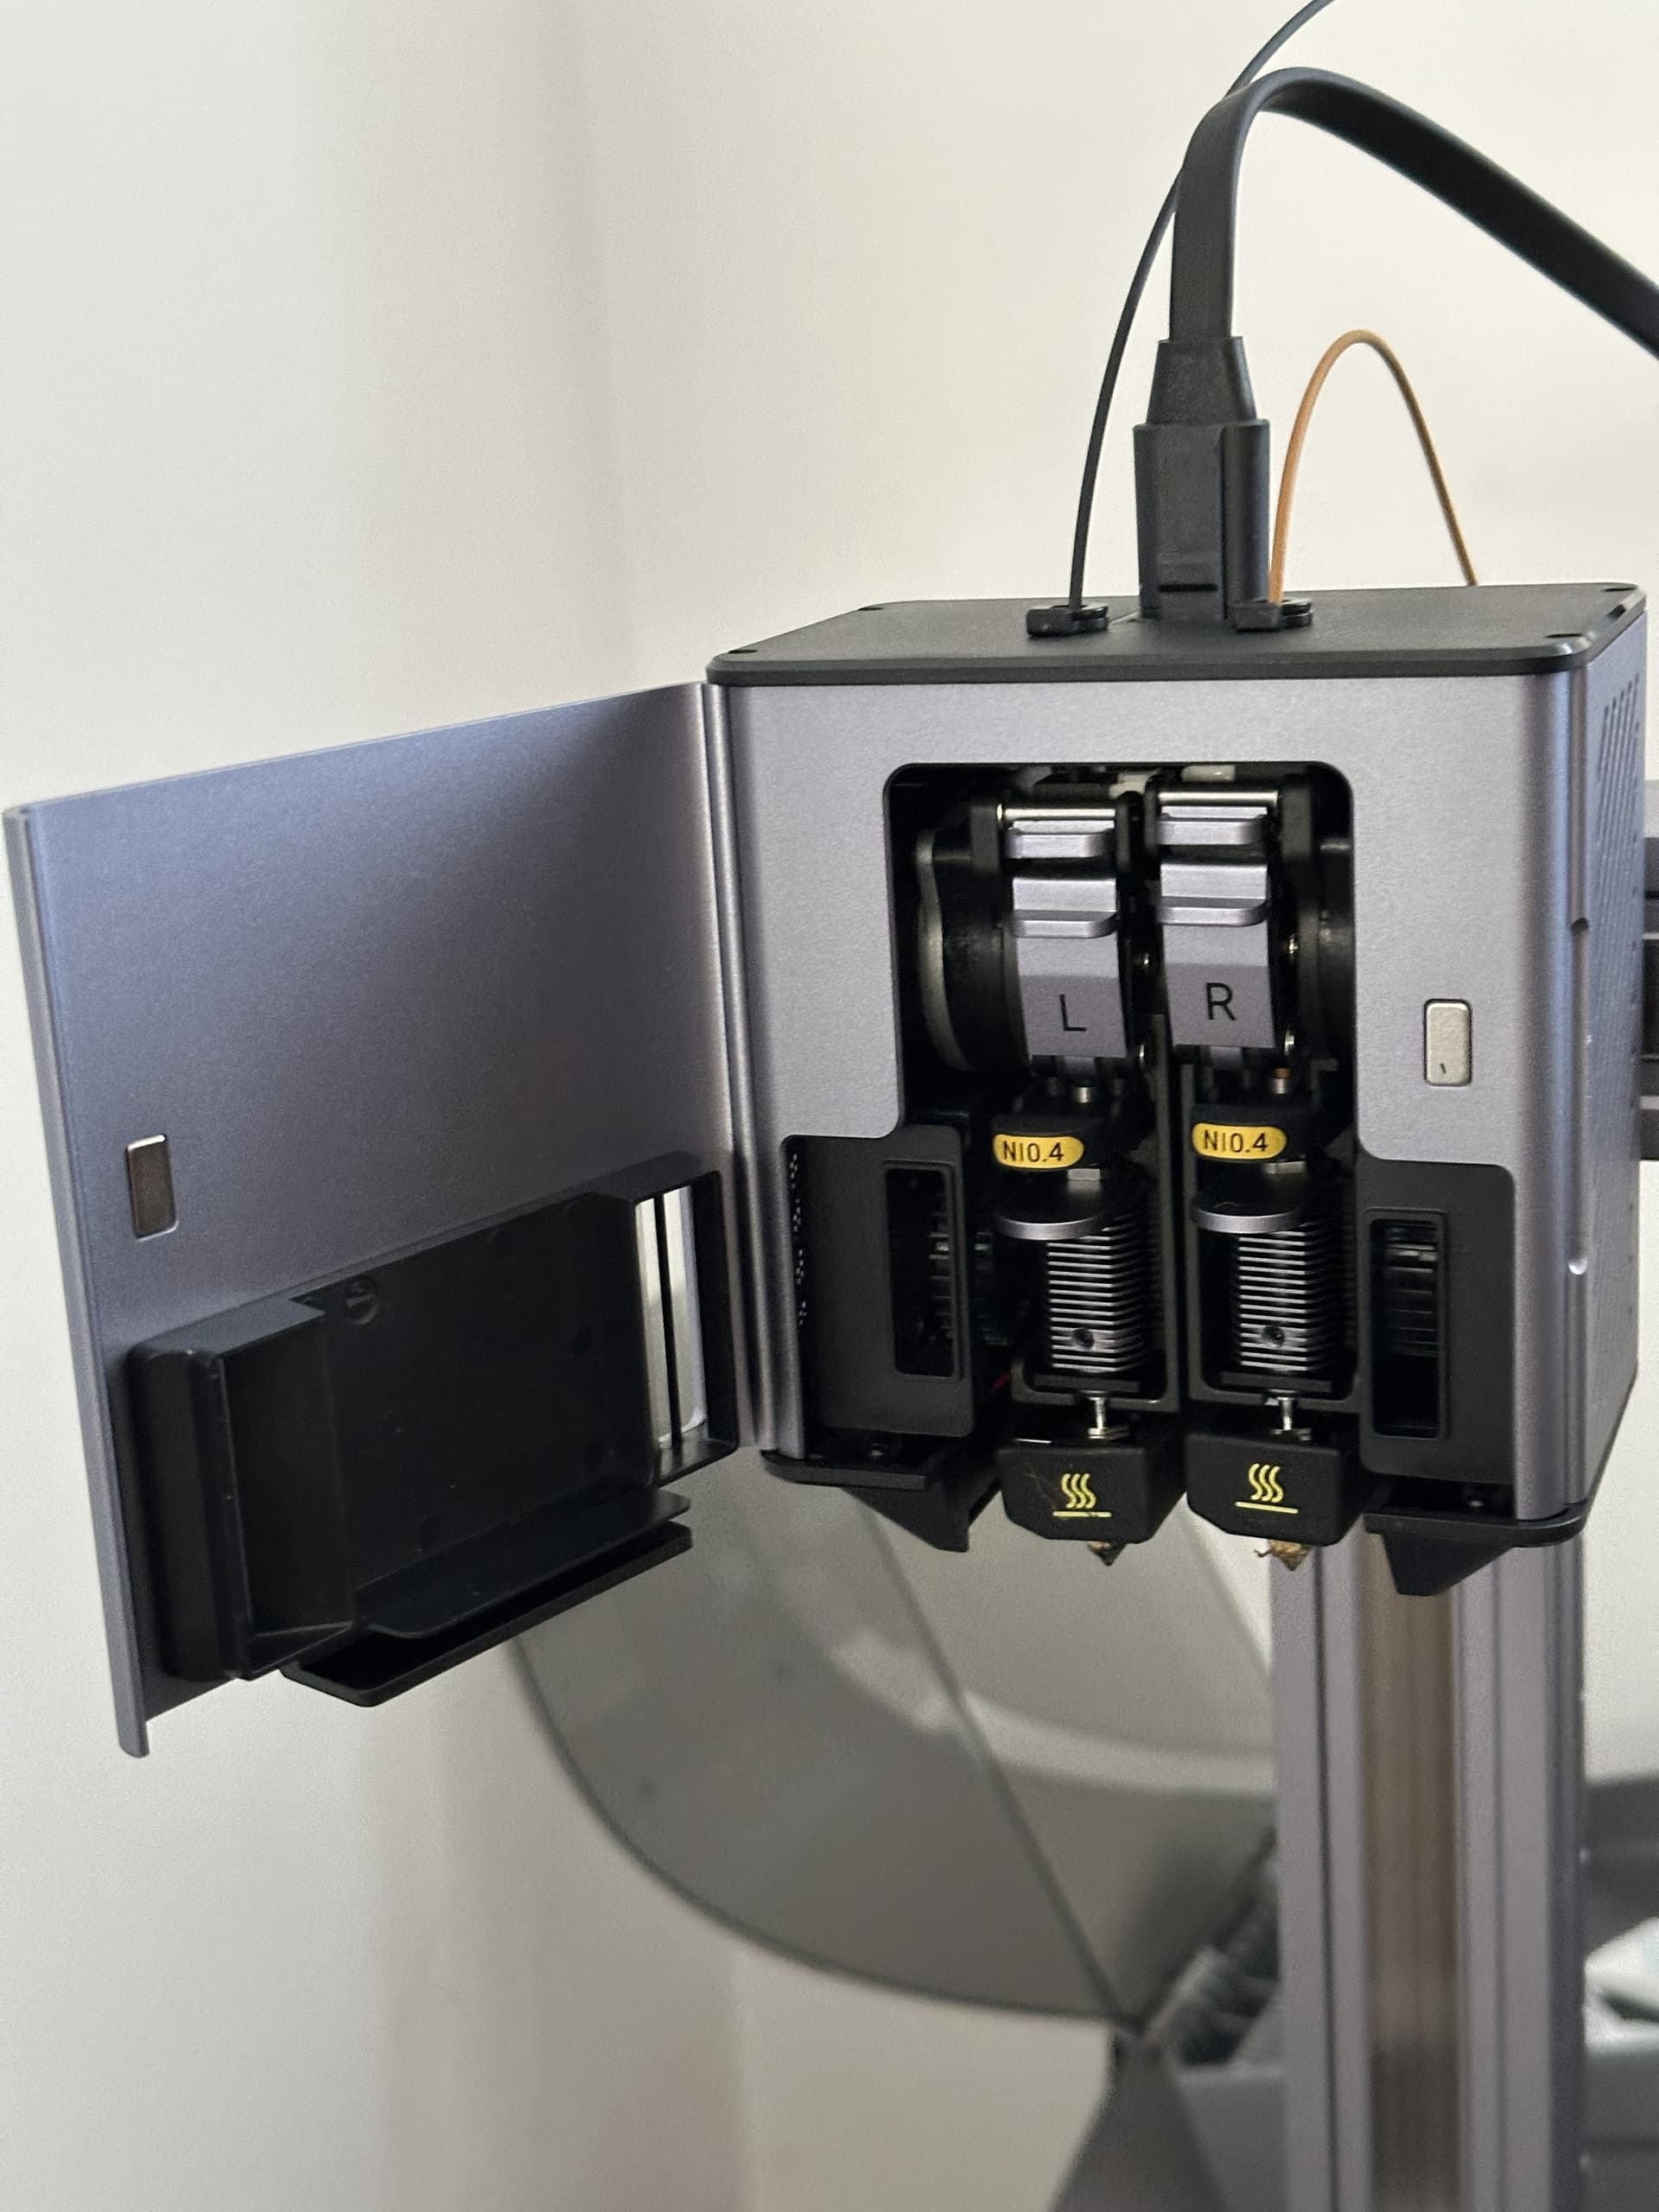
also some notes. the print head and the x module trade heat back and forth. at first the x module is a heat sink but as it heats past critical it becomes a heat source. this means that the left extruder wont be cooled like the right extruder because it is closer to the module mount. in fact my first success was setting the enclosure in a way that the enclosure fan would pull air across the head AND x module.
this suggests that if you are using two different print temps. then the warmest print temp should be on the left.
so any temp issues that you are fighting may be alleviated by a small fan blowing across the x module from the front of the enclosure
i also had issues with the left feeder mechanically. the feed tube below the gears was loose and slid up and down. during the print it would slide down leaving me with this…

this sent me down a rabbit hole because the feeder fail was greatly influenced by heat
on the right you can see the yellow feed into the tube and how high the tube should be
Had the dual extruder head sat in a box for 2 years (delivered Aug 23), just installed it today. What a disappointment, mostly makes an oozy mess of almost anything, or knocks the tower over and fails. I’ve had 1 successful print out of 5.
I’ve been through this thread, but it’s old now. So was wondering is there some final thread or post somewhere that combines everything learnt? I’m wondering if it even makes sense to be using this in 2025
Wanted to do some dual colour prints, but the speed penalty (my Centauri Carbon costs less than the head alone and prints 5x faster) and the time that it’ll take to tune it…hmm…really not sure.
Any encouragement or discouragement to try work with it welcome. At the moment tempted to switch back to the single head which is at least reliable.
hi there, for the most part a dual has the same issues as a single. leveling the bed at the desired print temp is the first thing. setting the print temp to the upper middle of print range is a good start. as far as it still being relevant…once you get it working it should just work.
there were some issues with some early heads and there is an upgrade/fix kit available if you contact snapmaker support
anyhow show pictures of the mess and we can help guess
Send us a picture of the dual extruder (especially the door), so we can get sure you have the latest hardware design.
Thanks, the mess is in the trash already! but next time I’ll take a picture

Search in your emails for coupon or reach out to snapmaker so you should be able to get a free replacement/upgrade kit:
This should help to prevent heat creep, this and defective runout sensors were common issues with the old design.
No the hardware side should be cleaned.
Waiting for some pictures, showing print defects ![]() .
.
thanks so much, I’ll give this a go! Will wait for this mod before trying to print again