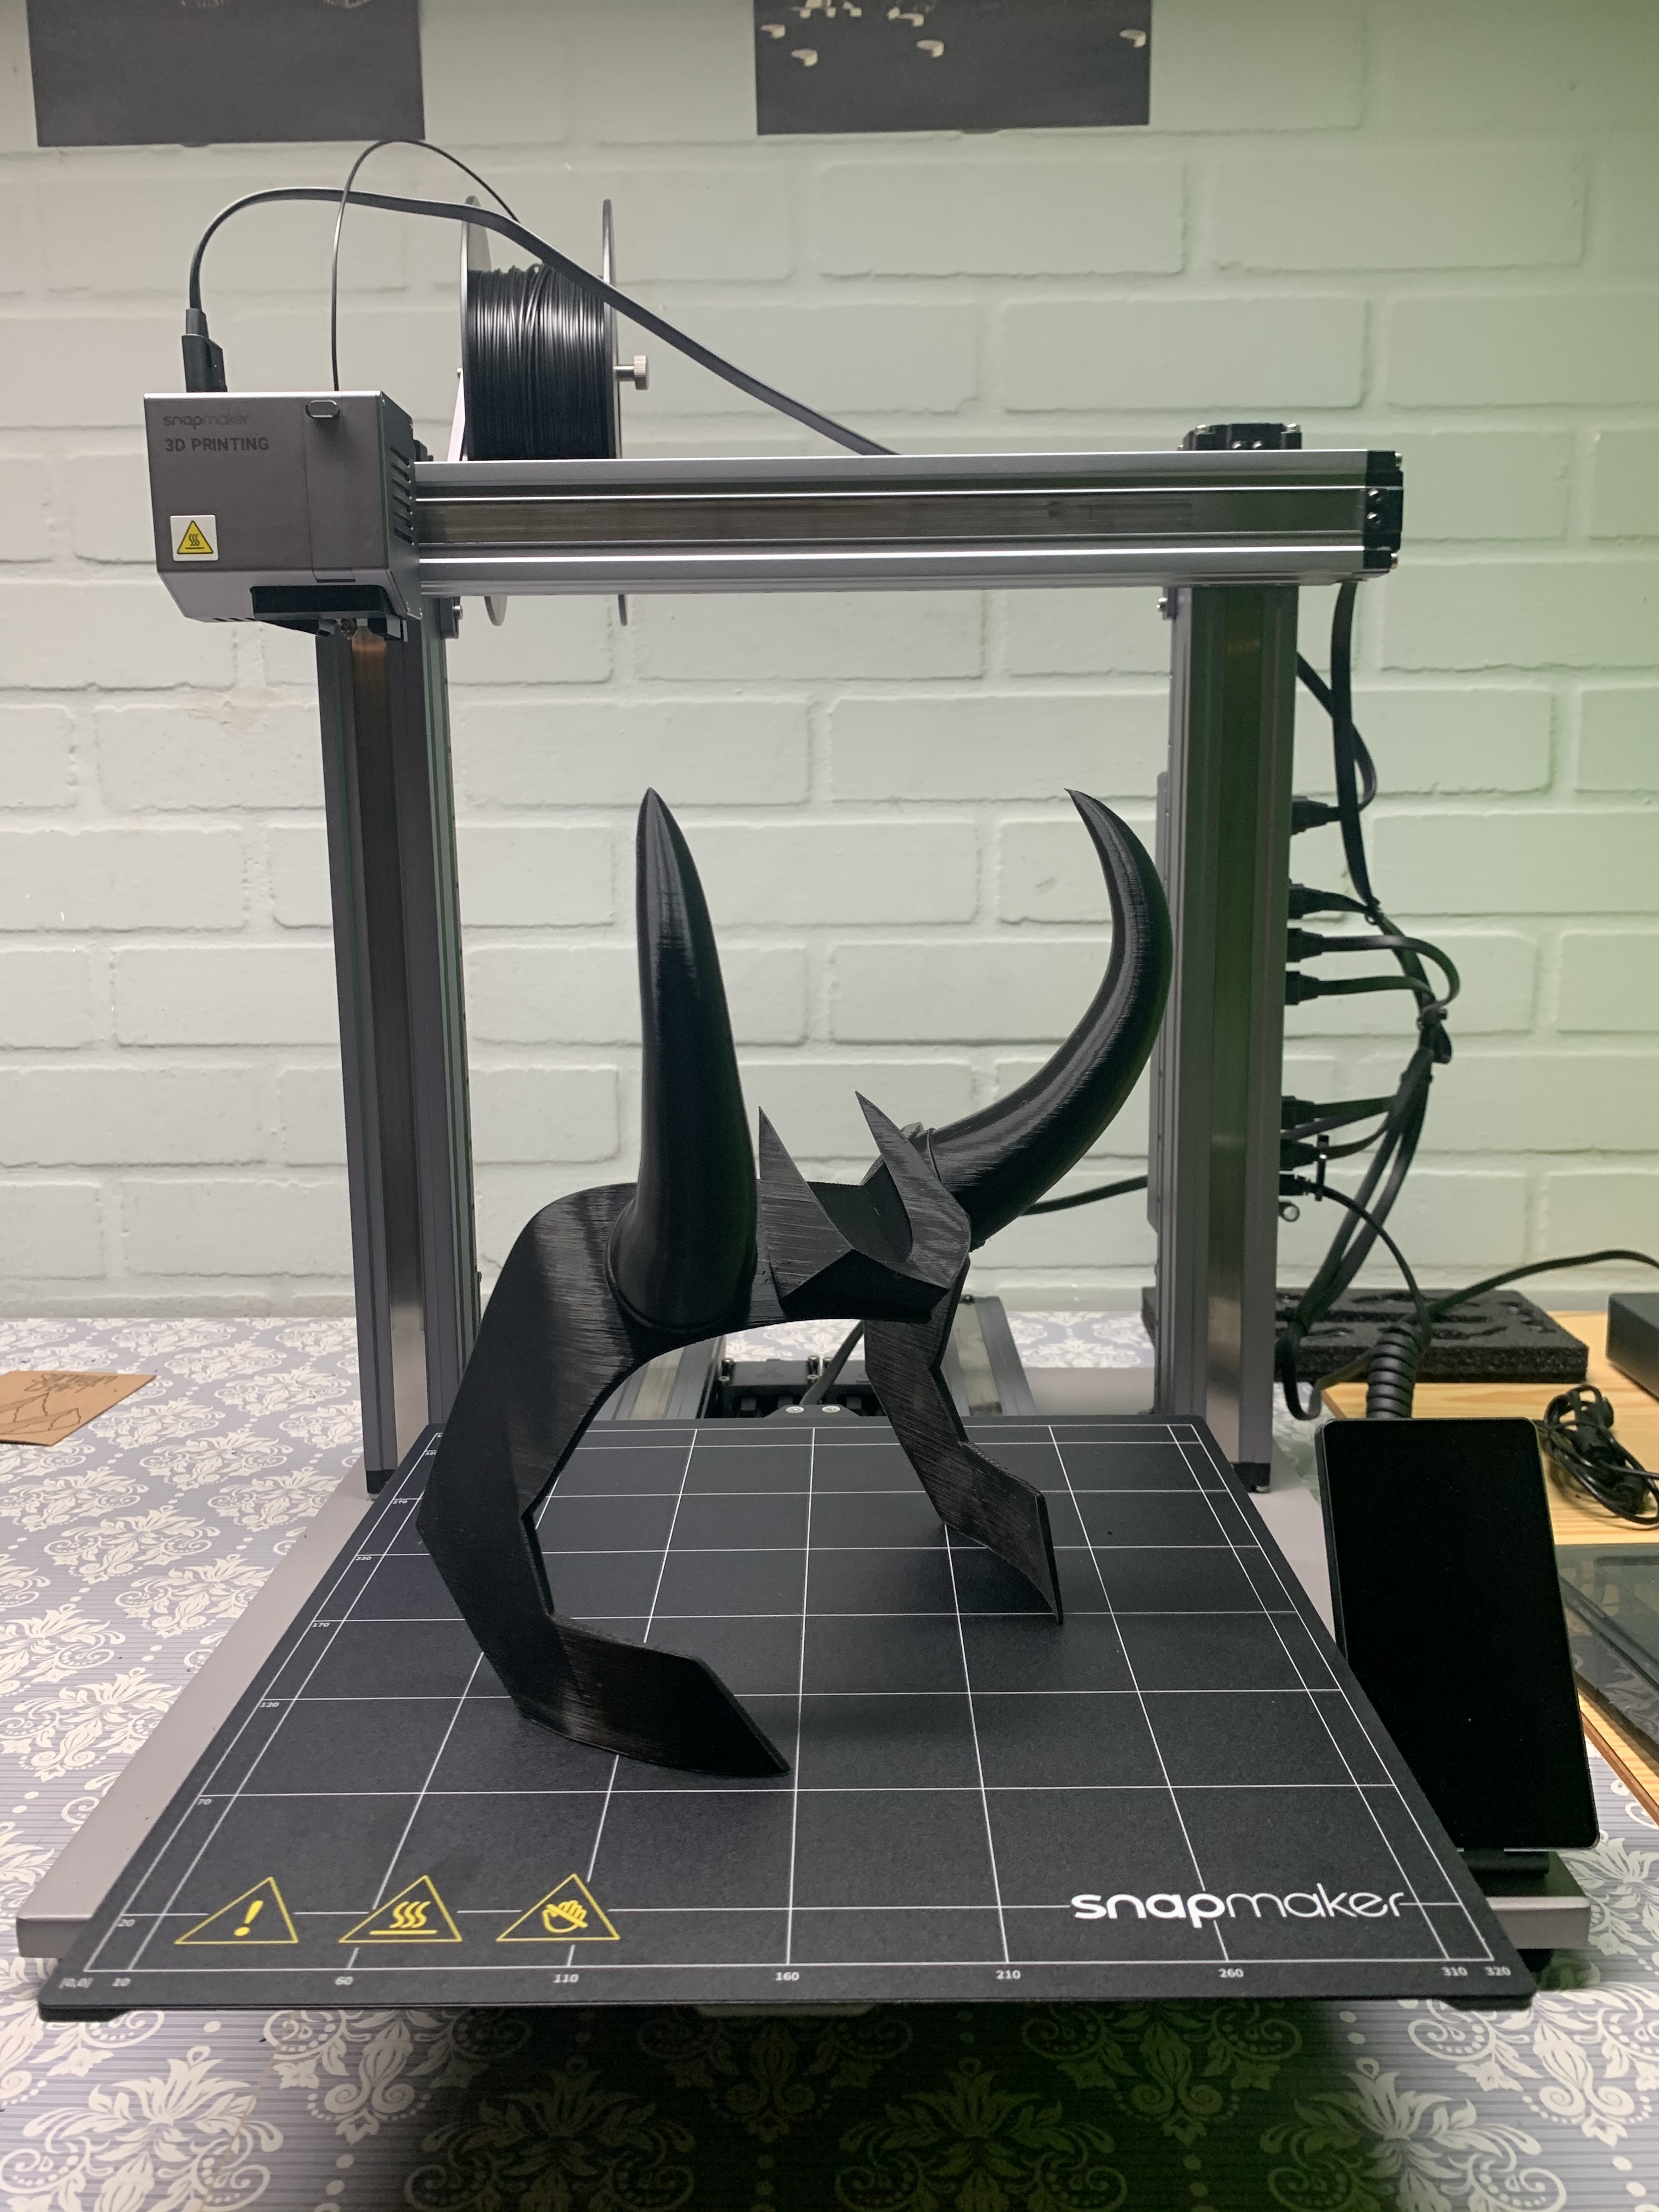
Hello community I wanted to make a Loki Crown from the upcoming Disney series so I made a file of it in blender and I thought it turned out great but the first print failed so bad. when you look at the front the left cheek near the the eyebrow(the image ) and there where a big gap like one layer was not attached to the one below.
but the other side was great and had no problem the filament is good and dry also made other prints with the same spool and the print settings are also tested. Loki Krone.curaprofile.zip (1.4 KB)
also wanted to post the g-code but its too big
There may be a problem with the mesh that doesn’t show up in the on-screen display. Various mesh repair programs and plugins exist (I think Blender may also have some limited built-in functionality somewhere).
The thing to remember about Blender is that its primary use case is to create models for visual rendering on-screen, rather than for 3D printing, so there are times you have to go through extra steps to ensure a good result.
so Meshmixer no mesh errors in this area. since I´ve installed the new firmware to the printer almost every print fails in the first run even if I use a g-code that already printed successfully.
then I clicked on the button repair mesh just for safety and exported the file but now I can’t slice it in cura.
Yeah i know im using the snapmaker filament in know its not good but i printed a lot and the first layer allways was fine i wiped it with a microfiber towel and i have a silicone remover.
What infos do you need. The bed was also leveld right befor the start
Somnium, I’ve gone through my own learning curve with Blender recently I’m still not very good/ I am very slow but I do know one thing that helps tremendously with finding mesh problems in Blender: Edit Mode → Select → Select all by trait → Non-manifold. Some googling of nonmanifold really helped me understand why even though it looks fine in the STL, when I slice it there’s some obvious problems. Generally the problem is extra vertices, things not being connected even if it looks like they are, etc.
For first layer I have success anywhere from 50-70C bed temp. Also in your picture it doesn’t seem like you’re printing with a skirt. Although not required, I find I have better luck when I print with a skirt, essentially priming the extruder. I would also double check your z-offset with the calibration card.
Yeah i have also installed the 3D printing plug in vor blender but when i run the check and it solve itself blender destroys the mesh but meshlab didi a great job to repair those problems without deforming my modell
I calibrated the bed and the z offset as i allways do thats why im so confused that the first layer sticks so bad
Yes thats a brim for better Adhesion bc its a pretty big modell
Snapmaker’s bed is not very user friendly I must say.
When you do your calibration using paper, that’s not low enough!
I use paper as a gauge as told, then I take it down a few notches.
I use the term notches because I can’t tell you the exact distance, just get it down until it works. It may take several trial and error attempts.
Tips:
Bring it down as low as possible without letting the nozzle hit the bed otherwise you’d risk scarring the bed.
Mind you, the bed may not be trully leveled on all corners. Chances are the far out corners are drooping lower by sub-millimeters – due to the cantilever design of the X-axis. Mine is off by 0.6mm. With that in mind I suggest start calibrating the far out corners first (I don’t remember the designated numbers for corners).

 I will check if i find something
 thank you
  but i would recommend you to watch some youtube tutorials for tips and tricks
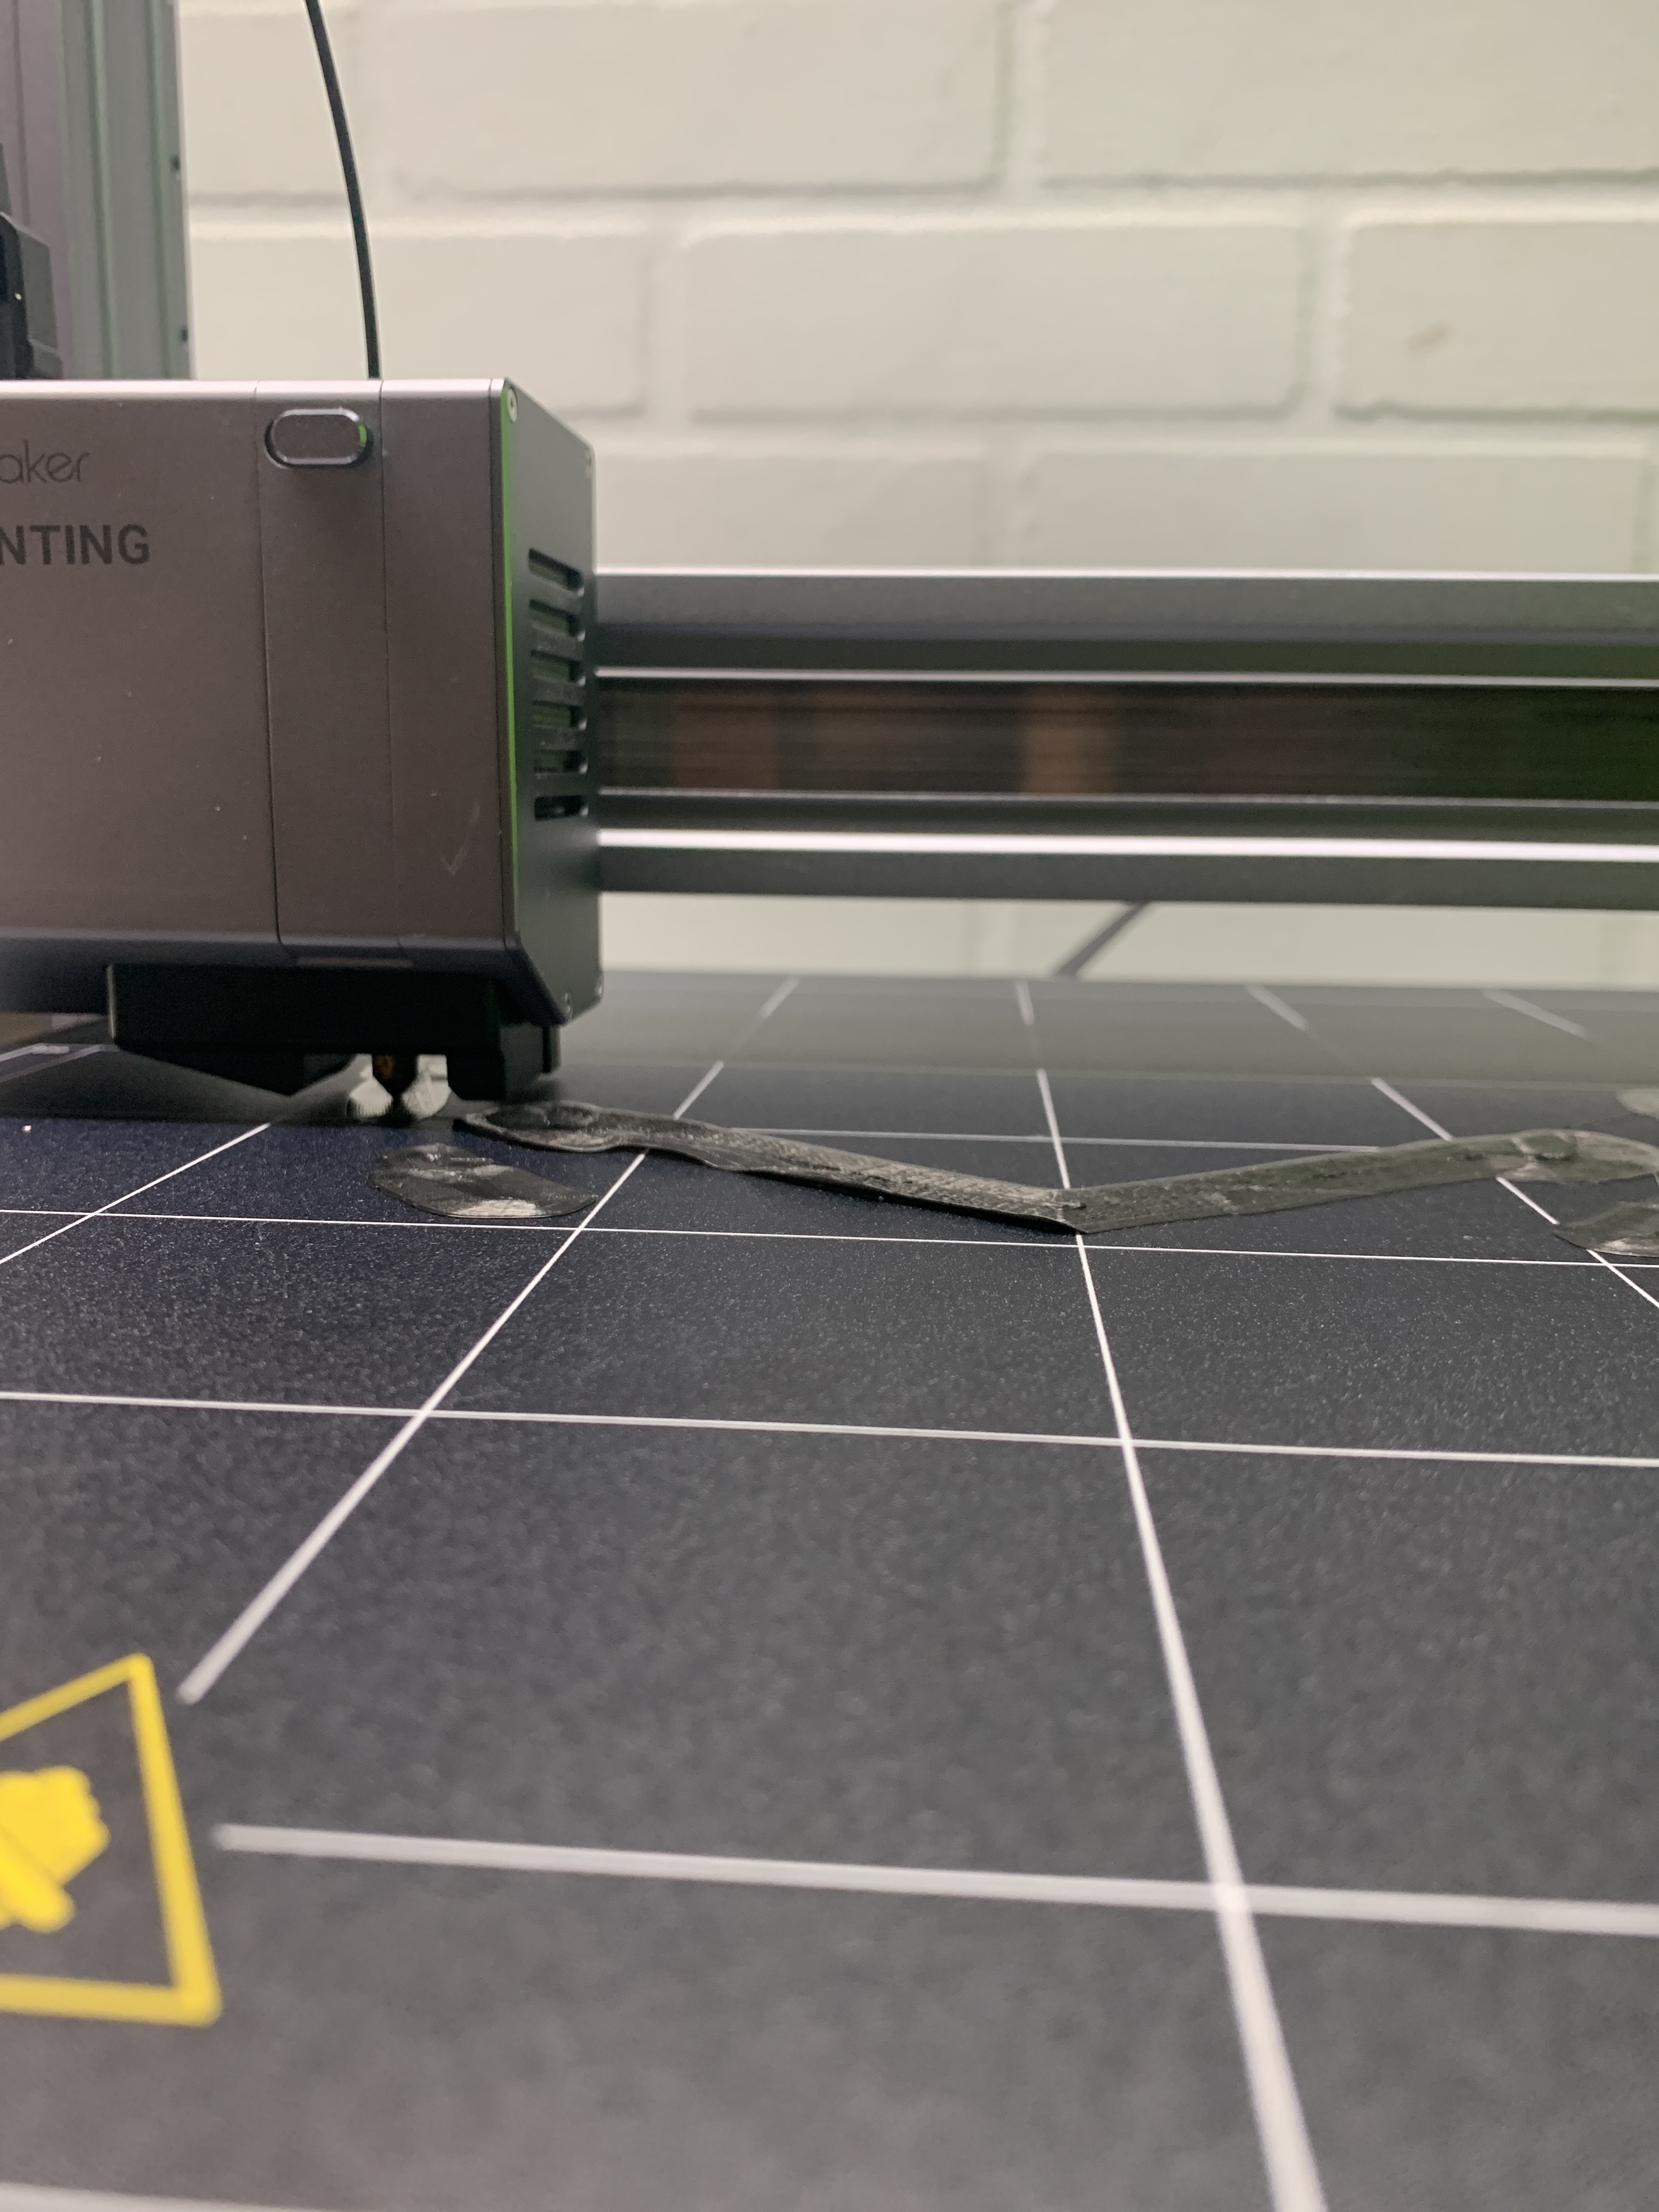
 I’m still not very good/ I am very slow but I do know one thing that helps tremendously with finding mesh problems in Blender: Edit Mode → Select → Select all by trait → Non-manifold. Some googling of nonmanifold really helped me understand why even though it looks fine in the STL, when I slice it there’s some obvious problems. Generally the problem is extra vertices, things not being connected even if it looks like they are, etc.