Multi-Pass Rotary Guide

Haven’t found a good guide, so after some extensive testing and finally managing some good results, I figured I’d make a guide on how to do multiple passes using Luban. Please read the entire guide before starting, it seems daunting, but once you get through it once or twice, it’s quite simple.

Disclaimer: I am in no way responsible for any possible damage to your machine or materials, although risk is very minimal if you follow along exactly as I am going to include images of my settings, setup, and results as I’ll be carving this. Also keep in mind, Luban is VERY limited compared to say, Fusion360, Microvellum, or other CAD/CAM. If you’re familiar with getting materials loaded, origin set, models loaded, etc. you can skip to section III for the roughing pass setup.

Materials and Machinery in this tutorial:
Snapmaker A350 + Rotary Module + Enclosure
Tools: 1/8"|3.175mm double-flute down-spiral for roughing; Snapmaker Straight Groove V-Bit for finishing.
Material: Solid Cherry Wood - L:90mm, D:45mm
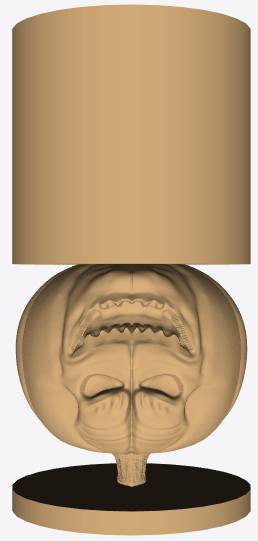
Model to be machined: Scary Pumpkin Head by ideaform3d found here: Scary Pumpkin Head by ideaform3d - Thingiverse
Software: Luban v4.0.4 (latest beta on github as of writing this)

I: Preparation

1: Measure stock and write down the length/diameter to put into Luban later.
2: Choose an appropriate roughing bit, usually an 1/8" flat mill, though a bullnose should give less cusps and a better end result.
3: Follow Snapmaker’s quick-start guide to get the bit put in, stock loaded into the rotary module, and use Origin Assist to get your start origin setup. (I suggest at this point to try making one of the jaws straight up for identification)
4: Download the model from above and Luban 4+ and install it.

II: Loading and Centering the Model

1: Load the 4-axis CNC workspace in Luban and input the length/diameter you wrote down earlier.
2: Either click the folder icon, or drag-and-drop the STL into the workspace to have Luban map it.
3: Position and size the model properly.
3a: Always keep X at 0 to keep it centered in the stock.
3b: To use maximum of the stock, for “W” multiply your diameter by 3.14 (I suggest downsizing by about 0.5mm to ensure you carve the entire circumference)
3c: Set Y at half the model height (H size directly under it) to put it directly at the end of the stock, or if you plan to use the tailstock, add about 3mm for a safety buffer.
4: Double check the small preview window to verify if that’s how you want the model.

III: Generating Roughing Gcode

1: After clicking next to process the model, click on the model, then create toolpath.
2: Fill out the roughing settings. I’ve provided an image of the settings I used, one of the most important settings is “Allowance” as it should leave material to be cleared away with the finish pass.
3: Modify the settings to match your needs. The wood I’m using is fairly soft, so I can do quick cutting moves, and a good stepdown/stepover.
3a: Stepdown is how deep the bit takes with each pass (0.5-1mm is good here).
3b: Stepover is how wide the bit cuts as it moves across the surface (a good number is 30-40% of the bit diameter)
3c: While I’m using 800mm work speed in my example, for woods like oak or maple, 400-600 would be better. Woods like poplar can be run faster.
4: Check the preview, the lines will be spread out and the simulation will look a bit blurry and rough.
5: Generate and export to file, not to workspace, we have optional modifications to do.

Luban3

IV: Generating Finishing Gcode

1: Close the preview window, and click delete on the toolpath we just made.
2: Click create toolpath and select the straight groove v-bit for epoxy tooling. Leave the settings at the default as seen in the image.
3: Check the preview, it should look like a single pass along the surface, and the simulation will be clean.
4: Generate and export to file as before.

Luban6

V: GCode Optimization (Optional, but recommended)

1: Download a text editor that’s more powerful than notepad (I use Notepad++, and will be referencing it and its functions in this section. Also note in editing sections I will be using _ as a SPACE, THIS IS NOT AN UNDERSCORE)
2: Open the roughing gcode file in N++ and stare at the Gcode-ness and take in the glory of what you’re doing.
2a: Specifically what this section is for, is making the carve quieter and higher quality.
2b: In most CNC milling, a climb cut produces less noise, chatter, heat, and tool wear with giving a better surface finish. However, Luban defaults to traditional milling, so we’re going to reverse the rotation direction.
3: In the header section, look for “max_b” and “min_b”, reverse these two, making max<>min and vice versa, then remove the - and add it to other number.
3a: This shouldn’t be necessary and only for the run boundary, but it’s worth mentioning.
4: Time for mass change of the B direction, remember _ is a space here. Using the Ctrl-H shortcut to bring up the replace popup.
4a: In the find box start with “_-B” and in the replace with box “_-C” this is a placeholder for now. Click “replace all”
4b: Find box “_B” Replace box “_-B” Replace all.
4c: Find box “_-C” Replace box “_B” Replace all.
4d: This changes the B rotations with B- rotations, since the snapmaker actually reverses these on the rotary module. In the GCode, B makes the rotary spin clockwise, however in the snapmaker, clockwise is B- direction. Annoying to any CNC machinist.
5: Save the file, then open workspace in Luban, connect to your snapmaker, and send the file via wifi.
6: Repeat the above steps for the finishing gcode, do note it will take SIGNIFICANTLY longer and may appear to freeze. Leave it alone, it’s replacing thousands of lines. Go to the restroom, get a drink, etc.

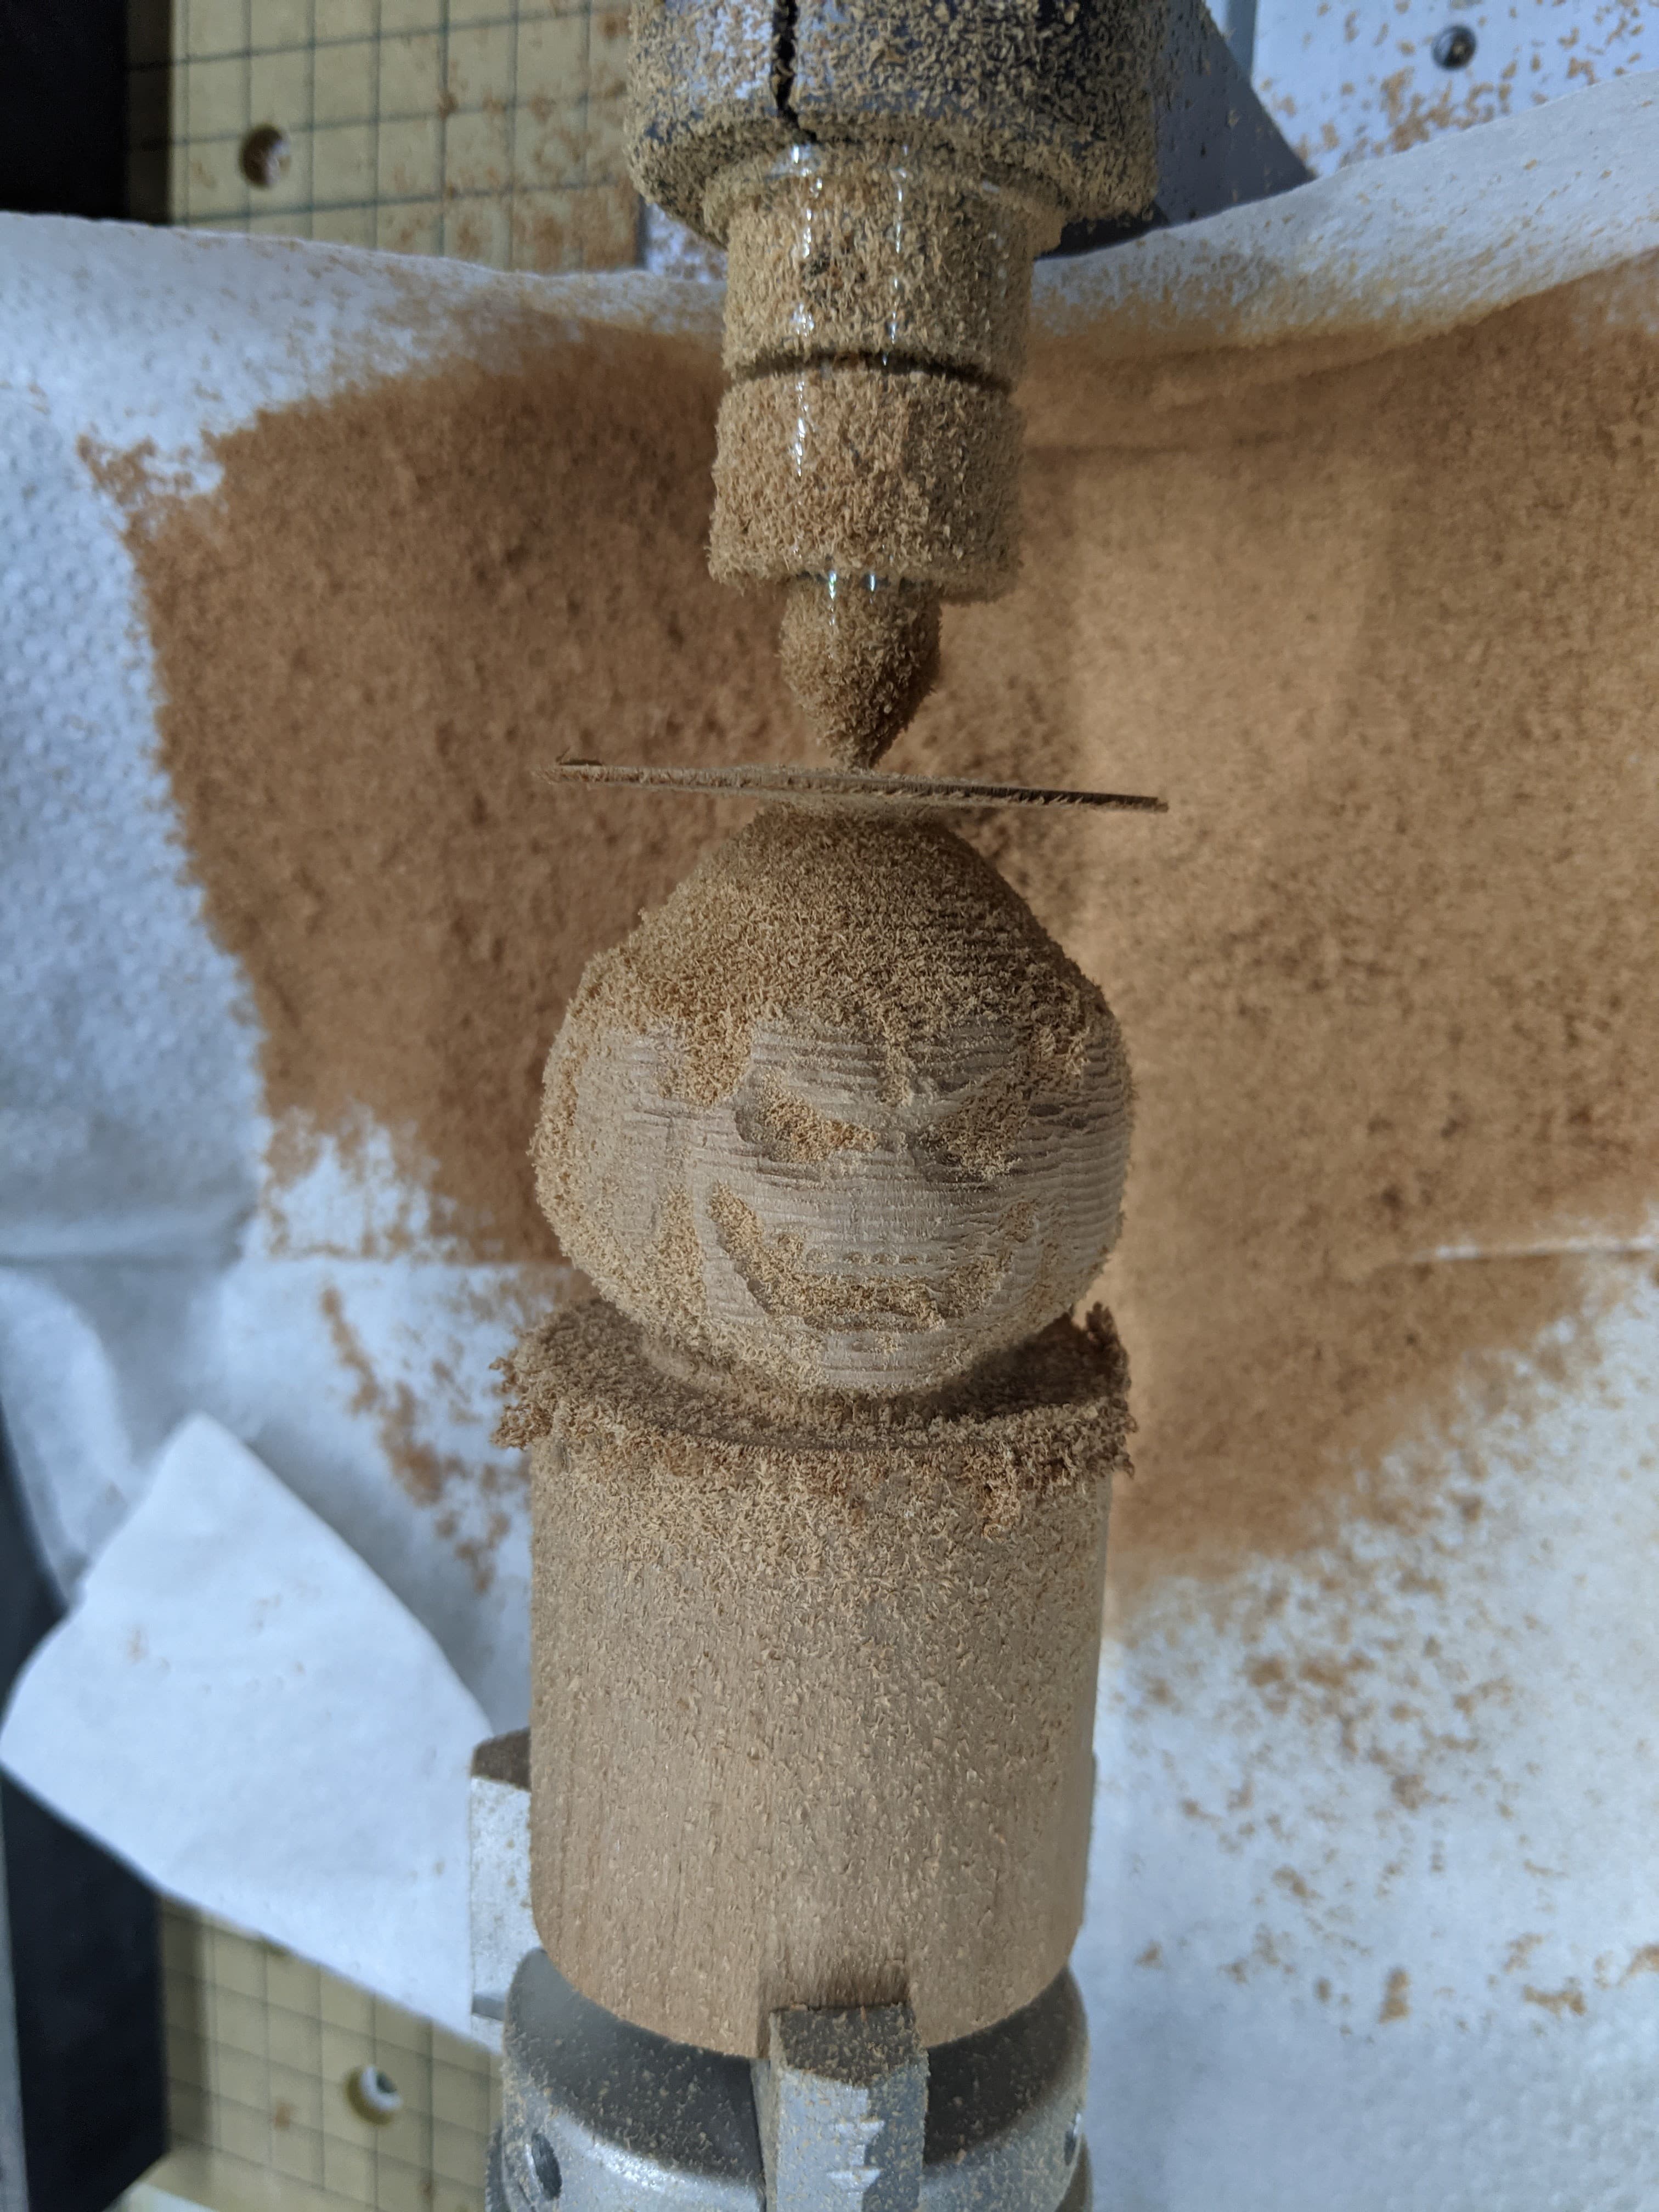
VI: Begin Carving/Rough Pass

1: Since we’ve already loaded the roughing bit, loaded the material, and set the origin, just select the roughing file and hit start.
1a: You can install the tailstock before starting if you wish to help reduce vibration, run boundary, etc.
1b: Note the napkin underneath, I just use this to catch dust, so I can reverse-parachute it into the trash instead of vacuuming it up.
2: WATCH THE FIRST ROW. Just like any machining or 3D Printing, watch the first pass to ensure it goes smooth.
3: Go entertain yourself while it’s running, although roughing passes do not take too long. Mine took a total of 55 minutes.
4: After it’s complete and you click finish go into the Control section on the touchscreen. Note the B axis, it should be around B90. (This is important and VERY annoying about the snapmaker, keep this number in mind)


VII: Finish Carving/Finish Pass

1: On the touchscreen, click on the Bit Assist that’s bundled next to the Origin Assist. Follow the prompts to get the bit changed to the v-bit.
1a: Do NOT move X, since these are generated in Rotation mode, there’s no X movement in the GCode and it will simply start wherever you leave X.
2: Go back to the control on the touchscreen… Notice for SOME REASON snapmaker has gone thousands of degrees out. Why? I don’t know yet. However it’s easy enough to get back to, and set the B origin.
2a: While it’s not strictly NECESSARY to do the following steps, it saves a ton of time. It WILL rotate back to the origin before it actually carves, but my last test took over an hour to spin back to B0 uselessly.
3: Set the B origin back to 0.
3a: For this, take the number on the control screen for B (Mine was B70249.00)
3b: Divide it by 360 (Mine was 195.4138).
3c: Remove the decimals and multiply the whole number by 360. (195x360=70,200)
3d: Use the touchscreen controls to rotate to what you got in the equation (Mine: B70200.00) It should be back on the exact B origin you set (if you set a jaw clamp straight up, it should be straight up again, your model should also be pointing directly up)
3e: Tap the set origin tab, set B origin. Do not tap on any other axis.

4: Run your finish pass gcode.
4a: If you’re unsure if you moved any other axis during the setup above, unless you tapped set origin, MAKE SURE X = 0. Remember, it will carve at whatever X it’s currently at, as rotation mode has no X moves.
5: ???
6: Profit! Your model should run through the finishing pass and total time is but a fraction of just doing the entire thing with the v-bit. Example; Using the default for the straight groove v-bit default material, Luban estimates 57 Hours, and 45 minutes. Using the roughing pass, Luban estimates 1 hour, 8 minutes for the rough, and 4 hours, 24 minutes for the finish pass. Do keep in mind these ETAs are usually not accurate, and the time will actually be a bit less. You can use this guide to make multiple passes, just remember to set your allowance appropriately as you move down in bit size.

Any other questions, feel free to ask.

13 Likes

Results!


…Not great, too many steep curves. This is where Luban falls short, their simulations are bad and doesn’t actually show an accurate cusp. So let’s try again!

New try is the exact same as above, except roughing is done with a 2mm ball nose, 600 work speed, 1mm stepover, 1mm stepdown, 1mm allowance.


Much better! It may take some experimentation to find a suitable allowance and step over, but it can do nice things. For things with very tiny details, maybe do 3 passes with gradually reducing bits and allowances.

5 Likes

Really nice work, thanks a lot for your detailed reporting back on this!

Figured an update, though not related to the subject matter, would be good. The wood with a finish changes dramatically, this is a quick clearcoat, no stain. I didn’t get a picture of completely finished, but this was close.

3 Likes

Thanks for doing this for all of us.

No problem, if there’s anything else I might know that could help others, I’ll try to make a guide on that too. I’m thinking about a mini-guide right now on making laser projects easier, repeatable, and more precise with the method I use.

1 Like

Thanks for the info, this really helped me get started. I am working on a Mac so Notepad ++ was not an option, and I found the global changes using the text editor I have did not work (the machine was unable to parse the file to run it), but it worked well without the rotation changes. Well, except for where I need to work on allowances and such now.
Has anyone been able to get linkage (vs. rotary) to work for anything other than the example lion? The example lion printed perfect in epoxy but does not seem to work if any parameter is changed to support wood for example. I’m not sure I understand all of the subtlety but I think rotary does not move in x while linkage allows that (correct?) and it seems like finer detail might be better using linkage if it worked right (correct?).

I’ve heard CotEditor is a good Notepad++ replacement on Mac, maybe give it a spin? It’s open source as well.

I got linkage working and was going to carve a ring, however, all versions of Luban 4+ made a pass THROUGH the object during my roughing cycle, but not during the finish cycle. Luban 3 made a proper path for roughing, but L3 does not take bit diameter or allowance into account, so it’s rather useless. I wish I had looked at the path preview a little harder rather than assuming Luban could do something competent. You can see a small handful of swoops that go right through the model.

I decided to run the finish pass and it looked rather decent if it hadn’t eaten through the ring on the roughing pass. Notice the path doesn’t exhibit the same swoops the roughing pass does. Basically ran half the finish pass just to confirm it just air cut where the wood should have been.
Screenshot 2022-01-08 123235

X does move in linkage mode, it does not in rotation mode. Linkage mode would provide better detail, and is required for cutting through objects, like the center of the ring. A good example is my roughing pass was done in rotation, finish in linkage.

TextEdit works fine for me for altering gcode on a Mac.

-S

That’s what I used. I assumed it added something when it saved. Did you do anything special to save?

Thank you. Great information. I’ve been communicating with Snapmaker support about the linkage issues. My first lion in wood came out with a few oddities (one place where the whole model increased any about a mm, one place where it suddenly rotated the model by about 10 degs and one place where it dug in the haunch instead of having it come out). Simulation looked fine. I saw others have had issues with the sudden rotation.
Anyone know about other CNC 4-axis software? I know the pro version of Fusion 360 is supposed to have it, but that’s pricey for a hobbyist!

Thanks. Confirms what I thought!

On mine, I have a B=-176,000 (and change). Previous was -146,000 (and change). Even moving by 5 deg at a time, this is a long time for me to reset to zero. Is there a way to enter a number manually, or move the number of degrees of rotation to a really high number? Otherwise, it might be better to let the machine rotate for an hour vs. having me push buttons for an hour?

Did you follow the sub-instructions of section 3?

3a: For this, take the number on the control screen for B (Mine was B70249.00)
3b: Divide it by 360 (Mine was 195.4138).
3c: Remove the decimals and multiply the whole number by 360. (195x360=70,200)
3d: Use the touchscreen controls to rotate to what you got in the equation (Mine: B70200.00) It should be back on the exact B origin you set (if you set a jaw clamp straight up, it should be straight up again, your model should also be pointing directly up)
3e: Tap the set origin tab, set B origin. Do not tap on any other axis.

As an example, your first B=-176,000 (although you said and change, so I can only go with what I’m given) divide by 360 would be -488.888~inf drop the decimals, -488, multiply by 360, -175,680. So your destination B is B-175,680. This should be the exact same position as your B origin, so you can then tap set B origin without the wait.

Yes, followed the instructions, but I only saw the clockwise and counter-clockwise arrows with 3 options (0.2 deg, 1 deg, and 5 deg). Is there a way to type in the number instead? 175,680 divided by 5 degrees would be 35,136 times the button must be pushed to rotate B.

That’s correct, that’s all you need.

I don’t think you’ve caught what I meant. :stuck_out_tongue: Rotate it until it says B-175680, then click the set work origin tab on the bottom (the little target) then tap set B origin. This sets the new location as 0, which the math above was to figure out where the last exact turn was to make sure it lined up.

I must be missing something. When I tap the rotate button it only moves 5 degrees maximum. If I hold it, it only moves 5 degrees once. How do I force the rotation of 176,000 degrees besides tapping the button?

You don’t, the entire section 3 is to find out where the B origin is physically. Basically making the rotary module face the exact same direction it was when the original origin was set.

Example; 360 is the exact same as 0. It’s a full circle, so if B = 360, then B = 0, just click “set B origin” again to turn the 360 into 0.
What the math does is say, with lower numbers, it stopped at B387, if you divide it by 360, you get 1.075, drop the decimals, so 1, multiply it by 360, you get 360. So you know the rotary module was off by 387-360 = 27 degrees. So if you simply go back to B360, you went back the 27 degrees. Set B origin, and it’s physically back to where it started.

A direct visualization of this would be to take a cylindrical object, such as your stock, a soda can, etc. Make a mark facing you, this is B0, your origin. Turn the can 3 times until the mark is facing you again, technically you’re at 3x360=1080, or B1080, however it’s exactly where it began. So you can set B1080 as origin, and make it B0 again.

The subsection of 3 is the math to figure out where this physical B0 is in the current rotation. In essence, when you divide by 360, then take the decimals off, that’s how many times it rotated fully.
The 488 I got a couple posts ago using your info means it did 488 full turns, which is 175,680 degrees.

176,000-175,680=320, so you were 320 degrees away from 0, either 320 degrees back, or 40 degrees forward, brings you back to the origin. So if you rotate B on the control screen to this ‘whole rotation’ number, you’re back at your origin, just 488 exact spins out. Since you don’t want to spin 488 times back the other way, and 175,680 == 0, just set B work origin to zero it out in the machine.

1 Like

Ok this makes more sense now. I think the part about subtracting the 2 numbers was missing in your guide. Or maybe the equation was missing? I didn’t see an equation, only directions to rotate to what you got in the equation but the last calculation was the whole number multiplied by 360 so back at 70,200 for your example.
BTW, you noted that after the rough cut we should not where B is (around 90), but I didn’t see where that was used later. Was that in the missing equation as well (seems like it should be used there).

It isn’t used, just noted. In the original roughing Gcode, it actually does the math and all and sets the B properly so it isn’t so far out. It’s just after doing the bit assist the machine, for some reason, sets thousands of degrees out. You can actually open the roughing file in any text editor, and at the very end, you’ll see a G92 line which resets B. So if you were to immediately run the same gcode, it would only do 1/4 turn and begin, instead of spinning for hours. (You can also use Luban to “go to origin” on B only, and it’ll just make a 1/4 turn and stop). The issue is the fact that it adds thousands of degrees after using bit assist, I don’t know WHY it does this. If it left the B origin alone after changing the bit, this entire section would be a non-issue.

Thanks for your patience and willingness to help!
One other question, When I did the find-replace all, I got no finds for “-B” and consequently no finds for “-C” (the latter is obvious). My questions is whether or not there should be no “-B”? (It did a lot of replacing for the “B” to “-B”!) It is running now, appears OK, not sure I can tell if it’s any quieter though.