I’m getting good results overall with the laser engraver, but so far I’ve been unable to get this working properly… after following the steps (accurately as far as I can tell) Snapmakerjs v2.5.2 Beta Testing
I generate the gcode and start engraving, but the result is pretty significantly off the mark.
I tried it as parallel as possible, and also at various angles just for testing purposes… seems to be more or less the same. Getting the corners very accurate is a bit difficult as the window is so small and cannot be resized.
I am also experiencing this issue with Luban 3.2 and the latest firmware (SM2_V1.6.1.0). I’m using the A150 to try and stitch together 3 separate images with the laser. Because I’m not getting a perfect background, my reference points for the next image are off.
Steps I’ve taken to resolve the issue:
Ran through the camera calibration. Adjusted the lines in the camera calibration on the paper box.
Updated Luban to 3.2. Ran through the camera calibration process.
Updated firmware to SM2_1.6.1.0. Ran through the camera calibration process.
Is there a step I’m missing? Anyone have any ideas? Has anyone else tried breaking a laser print into sections and was successful in stitching the images together?
Hi, could you send us a screenshot of how the stitched images look? Also there is a video tutorial on our website here about using the Camera Capture feature. The issue you are having could be due to laser not being focused.
Also, I found a potential bug in the Luhansk software that causes the z axis in the work area to a lower point than the material I was working on when I pause the job. When I resume, the laser mashes into the material. The first time this happened, it caused the laser to lose its focus. I tried doing an auto focus on the laser, but the laser was so out of focus that it wouldn’t even print a line on the material. I was able to get it to work with a manual focus and then running the auto focus. Anyway, I just thought I would put this out there in case anyone had any ideas what might be happening.
Just in case anyone is following this, I believe I may have fixed my issue. I haven’t been able to confirm yet because I’m in the middle of a print. Anyway, when I removed the laser module to go back to 3D printing, I noticed the camera was not perfectly level. I loosened the two screws holding the camera in place and reseated the camera.
With respect to the laser module, which made it unlevel with respect to the build plate. So, when I tried using the camera the images didn’t stitch together accurately.
I’m experiencing a similar issue, except I don’t get an image at all, just nine colored squares. The colors don’t even correlate to what I’m trying to cut (I just have wood on the platform, and the squares are green, blue, and black).
Edit:
didn’t realize there was yet another calibration that I needed to do around the cut square (this is poorly explained in the manual). That seems to have fixed the issue for me, though the exposures are still wildly different.
I tried starting this as a topic, but got no response so I’ll add it here since it appears that @JKC20 is following it. (Need to ask support but haven’t gotten around to it)
It works fine for me when I run the camera calibration with a piece of paper directly on the bed. But when I try to use it on a piece of stock that’s 23mm thick I can’t get it to line up at all.
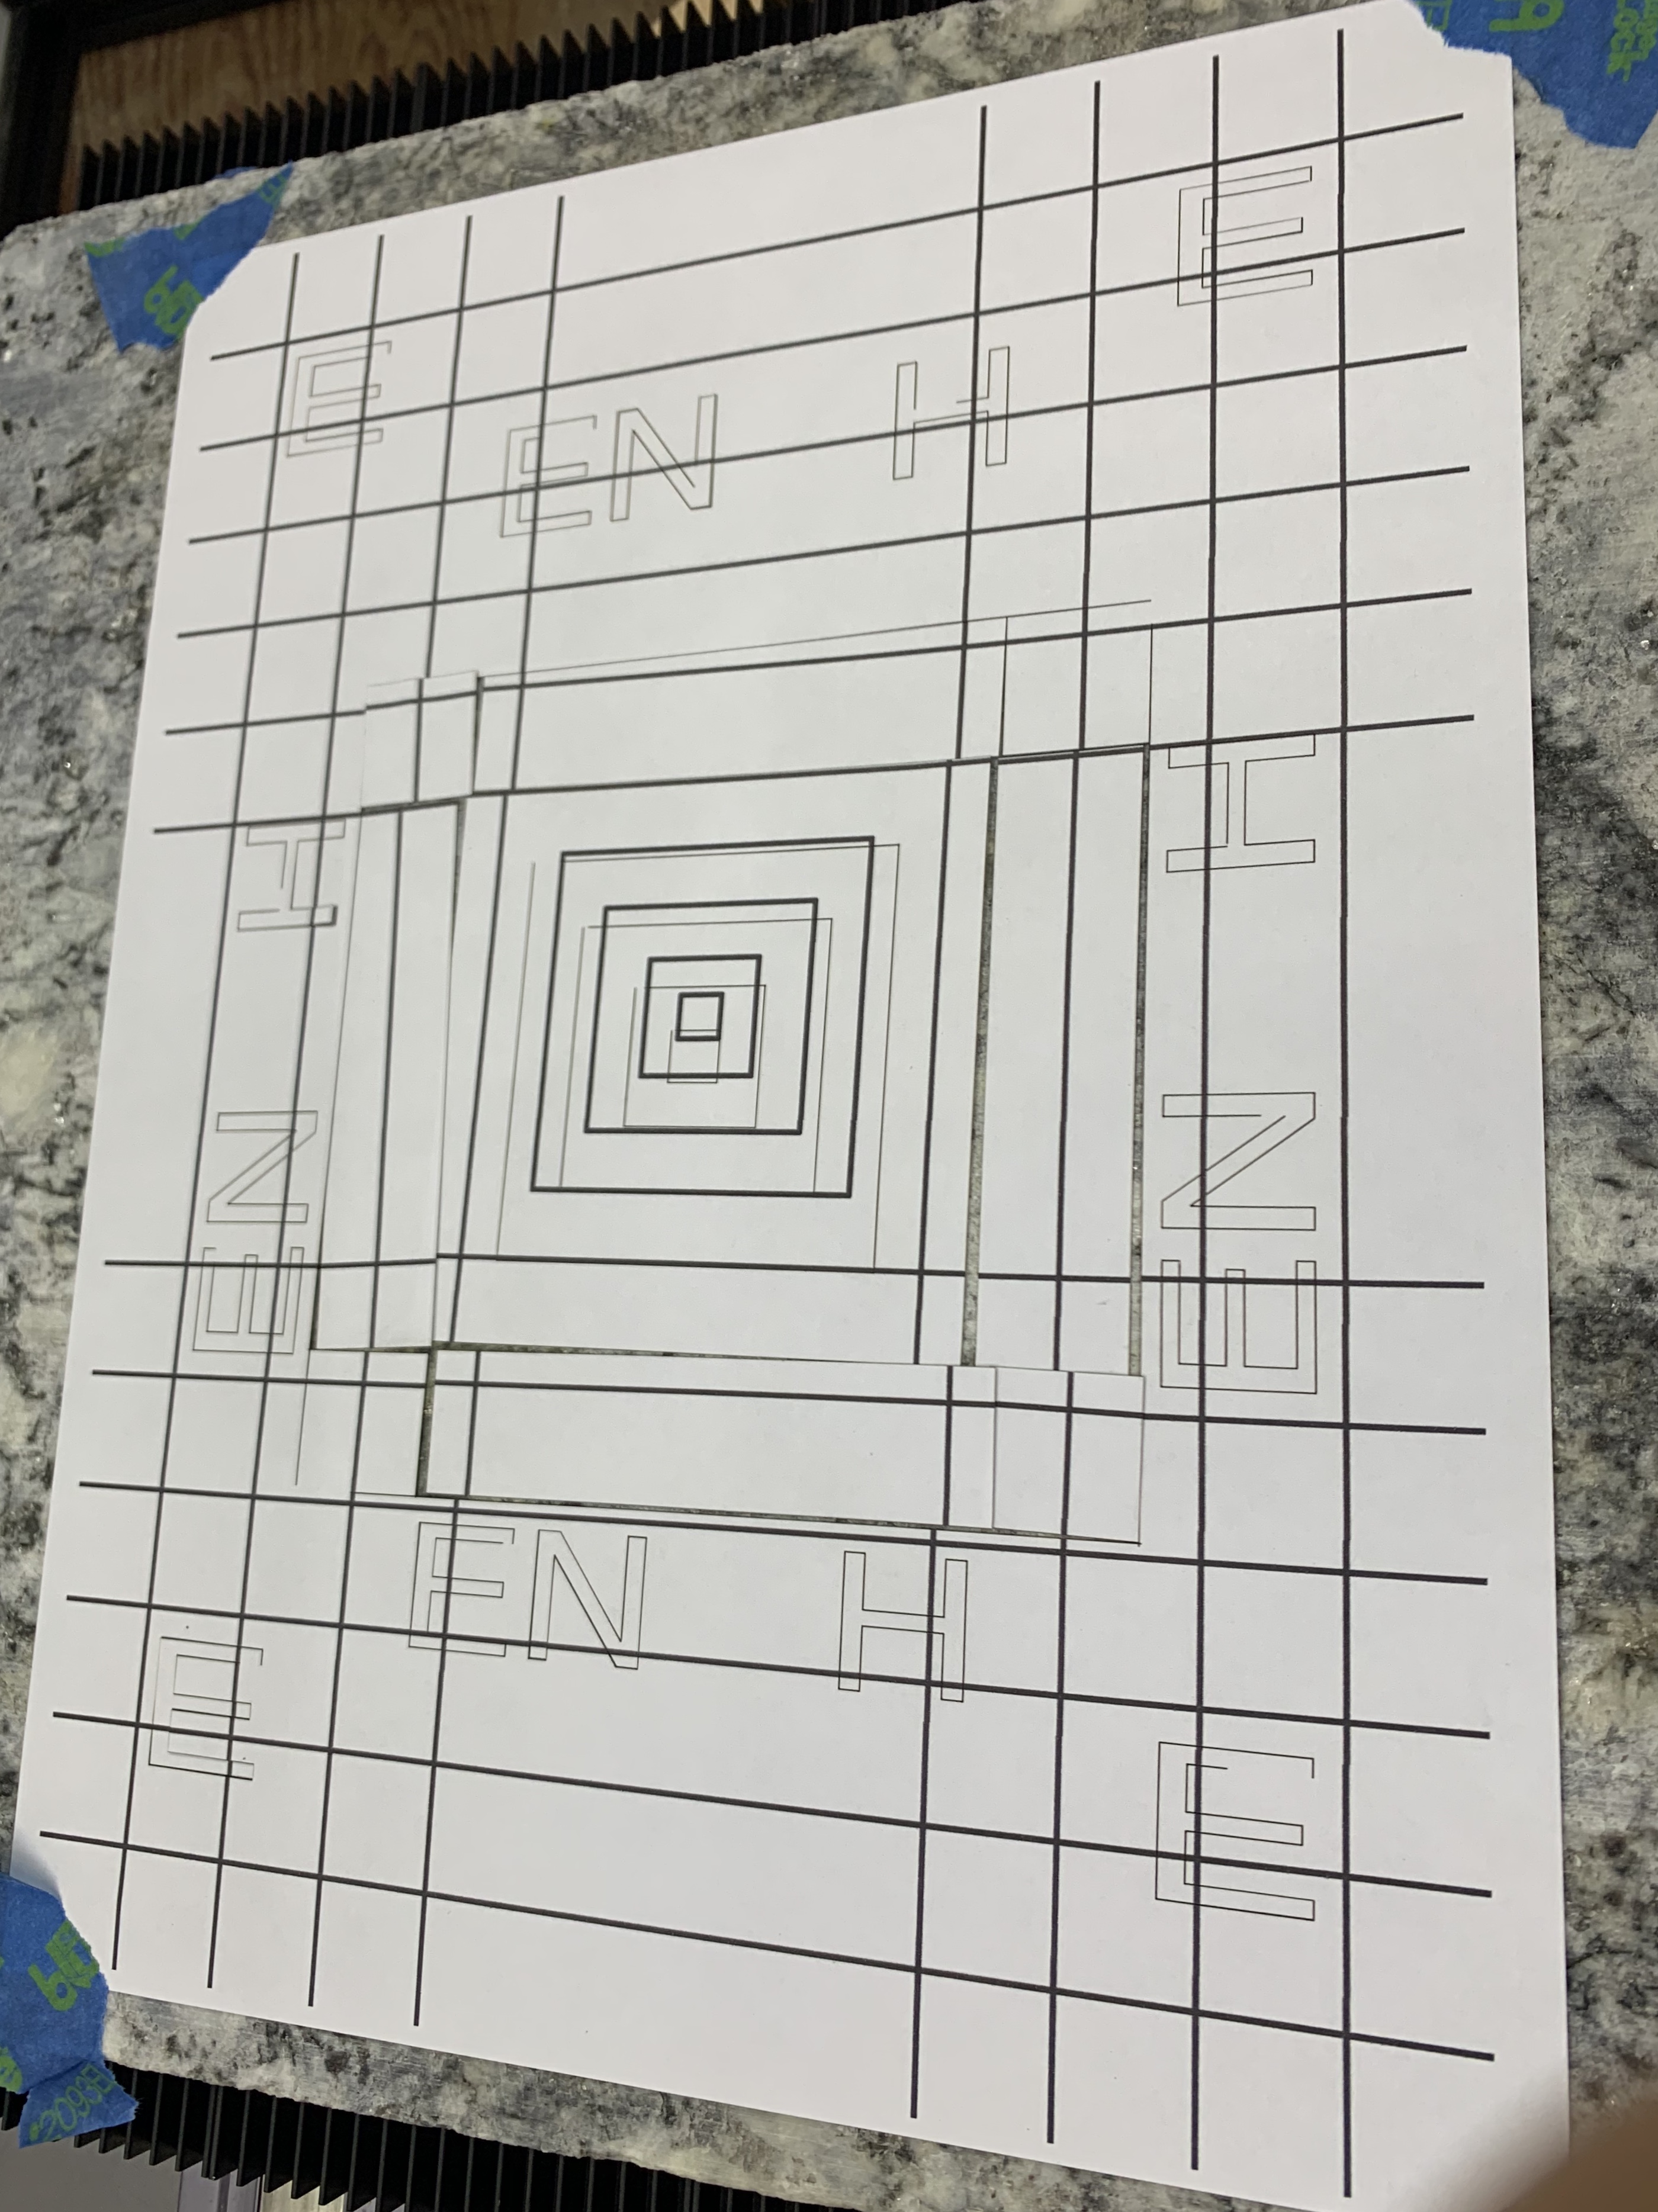
So I did some tests and printed out a grid to figure out what was happening. Ran capture and grid lines up fine. Some variations in exposure which I don’t understand:
Then I tried a camera capture of the grid 24mm off the bed. The grid starts to show some problems with alignment: center squares aligned, but outer squares are off, had to change size/shape and position of letters to fill boxes again:
Am I missing some adjustment or way to compensate or calibrate for a thicker piece? Something wrong with my camera? I tried to see if I could do the calibration on top of the raised piece but there was no way to adjust the z and had to power off before the toolhead would run into the piece.
I had a similar looking combination of pictures. I was able to fix a lot of it by clicking the calibration button in Luban (left bellow the images). It is a bit surprising that the auto calibration was so far off. Just move the four white dots to the four corners of the calibration square. The more exact you can do this the more sense will make this background image (by the way you can zoom in there).
However. even after I see that all the parts of the background image have alligned lines. I still see some big inaccuracies. The right side of this image looks stretched and the dimensions on this side are far off – only at the three images on the right side. I did not even notice this at first until I made a test:
After I lasered the cute present box from the library I used the left over sheet with the cut-outs in it as background picture and I tried to make it fit to the file in the library – which worked for the left and the middle section. The right side is duplicating two of the screws that are already visible in the middle section.