Improvements from beta testing: For people who are picky like me, the U1 now has a very nice on-screen wizard to assist in manual bed leveling by beta tester request.
(For the curious, I might see an additional ~0.2 mm change in the bed tilt after the first heat soaking of the chamber to 50 C for ASA printing. And ASA is evil, so I prefer leaving nothing to chance.)
You likely don’t really need to do this. @nweolu showed the bed mesh compensation can compensate for a lot! If you like clean living though, I think this is really nice.
Thank you, Snapmaker! Not every printer lets you see the bed mesh, let alone help you address any observed bed tilt.
Wow i am impressed, after manual leveling i went from 0.94 to 0.54 variance which is, horrible ! Even the cheapest china bed for a voron reaches better variance …
I am disappointed
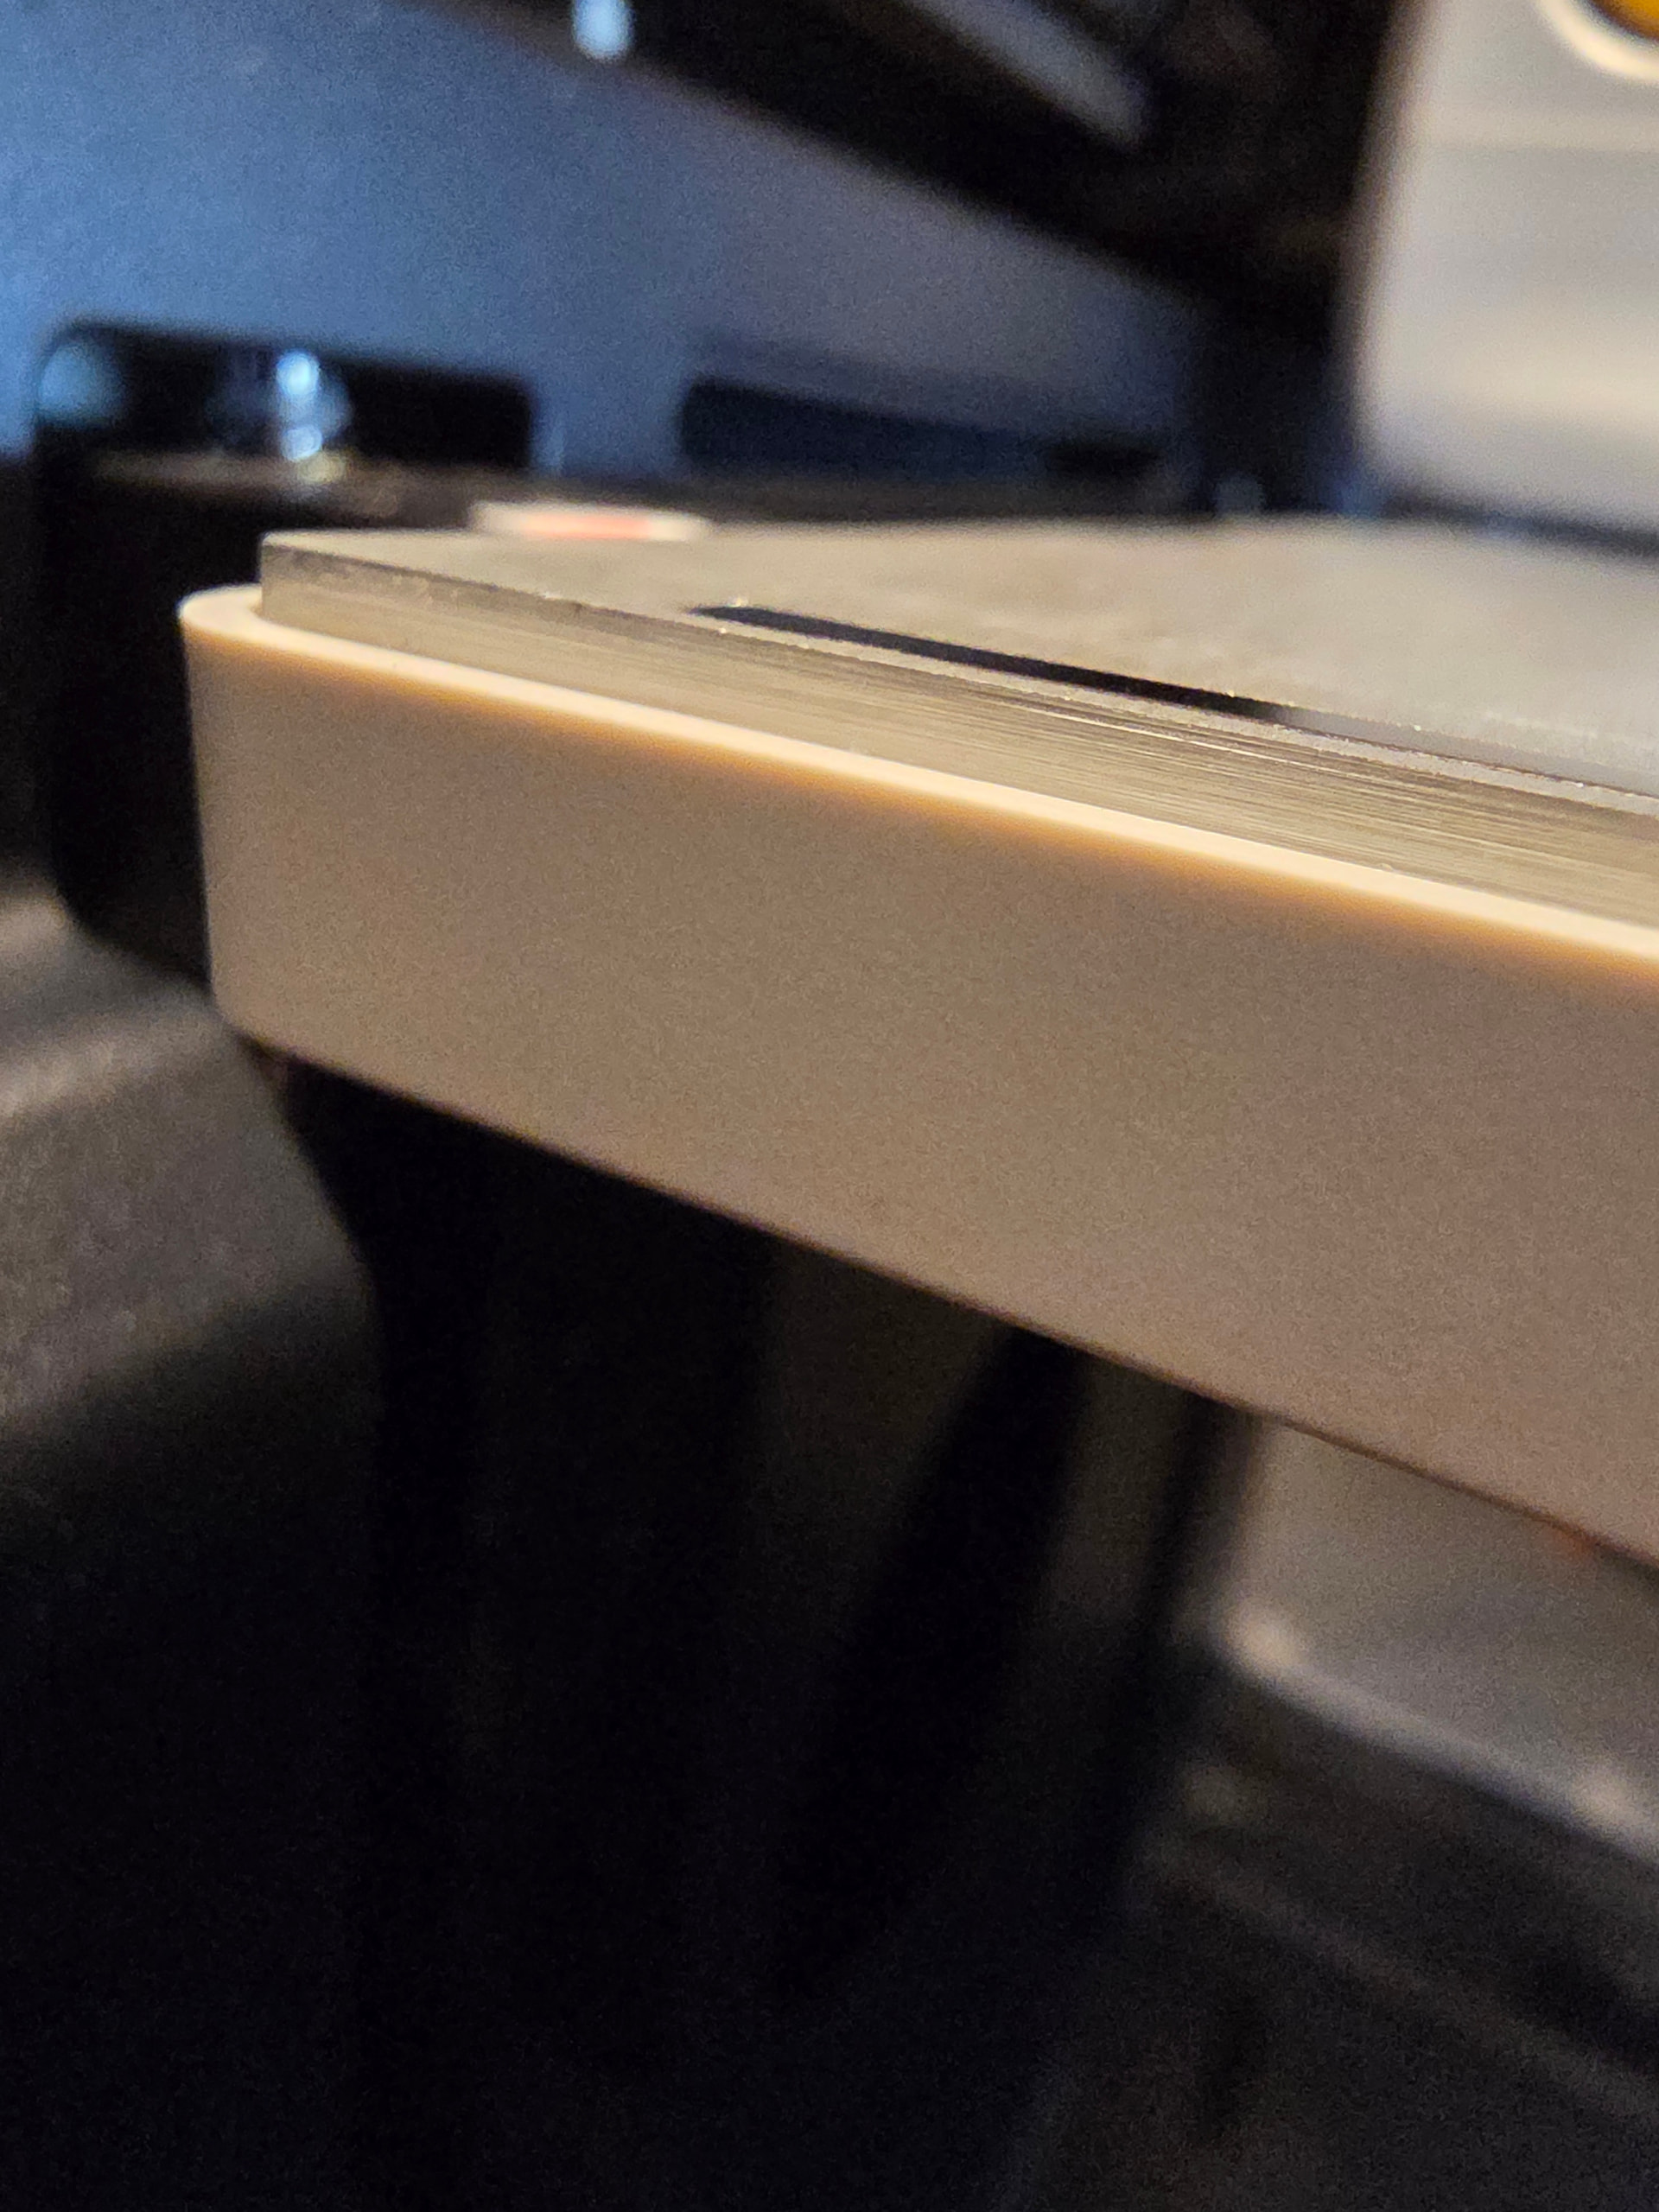
If the bed is clean (it will absolutely detect small particles under the bed), it can help to double check the overall height of the 4 screws.
This is simply using the klipper screw adjust macro, which gets the 4 corners level. If they are out of plane with the center it may still have bowing.
I’ve learned elsewhere you can raise or lower all the screws then skip along in the procedure to the probing step. If the center is above or below the center.
Maybe the routine could be improved to measure the center point as well. I find it a little tricky to judge the step where the nuts are flush with the screw caps.
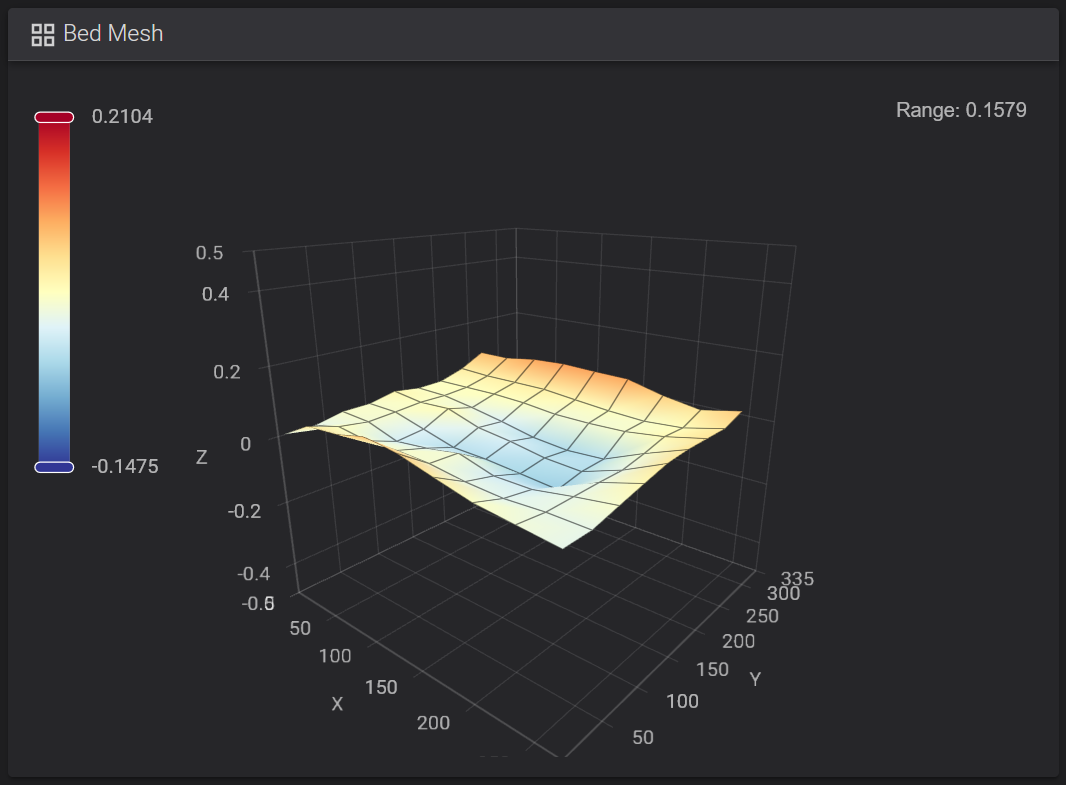
But mine has always been <0.2mm out of the box.
Your mileage may vary.
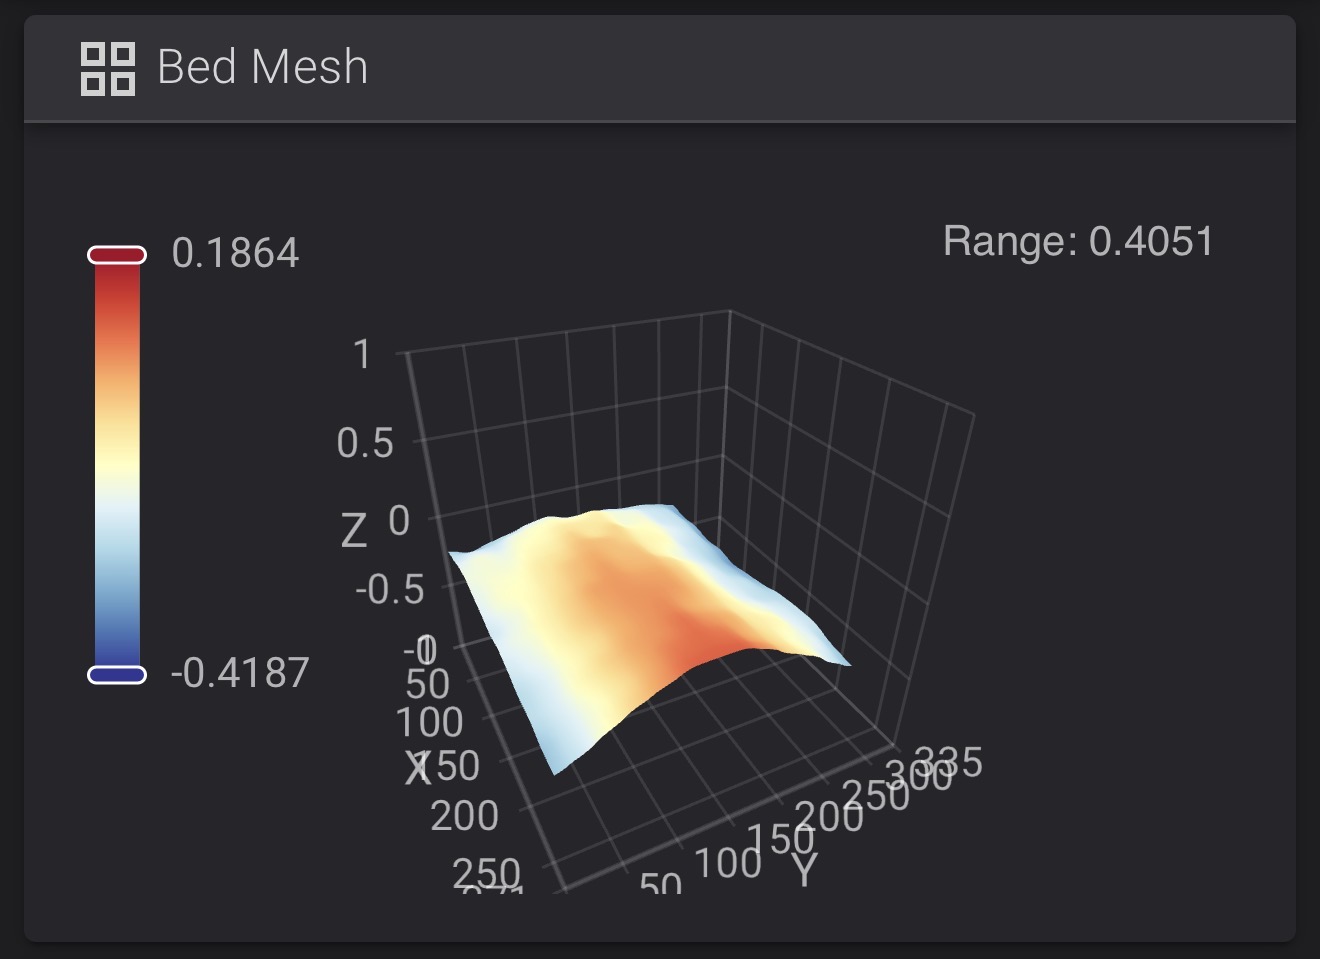
I spent hours, manual leveling, running mesh again and again. I tried loosening the screws in hopes to get rid of middle bump, did not work:
Best I could do was :
I ran the manual leveling process. This has made a huge difference. Plate was horrible. Also added elephant foot. Changed retraction settings for prime tower. Also stopped using snapmaker orca. Vanilla orca is working flawlessly in lan mode.
Thank you for all your help. Have a great weekend.
No after manual calibration I also ran the heated bed calibration. I also did it on vanilla orca. And set the tune there. Using flat plane and wire matrix. With massive difference from factory.
Thank you for the help. I’m having much better luck. Also changed build plate glue.
Just had to do my first manual level… I didn’t think to check the bottom of the plate to see if anything was under there. I hope it doesn’t need adjusted again after I remove the plate once this test print is done. Not difficult but I do wish I had printed the adjustment knob!
The max deviation across the plate is only 0.29mm so it’s not that bumpy. It’s an exaggeration of the height difference.
You should be able to get an even flatter result after manually adjusting the knobs with the wizard. (I personally feel the wizard is pretty good btw).