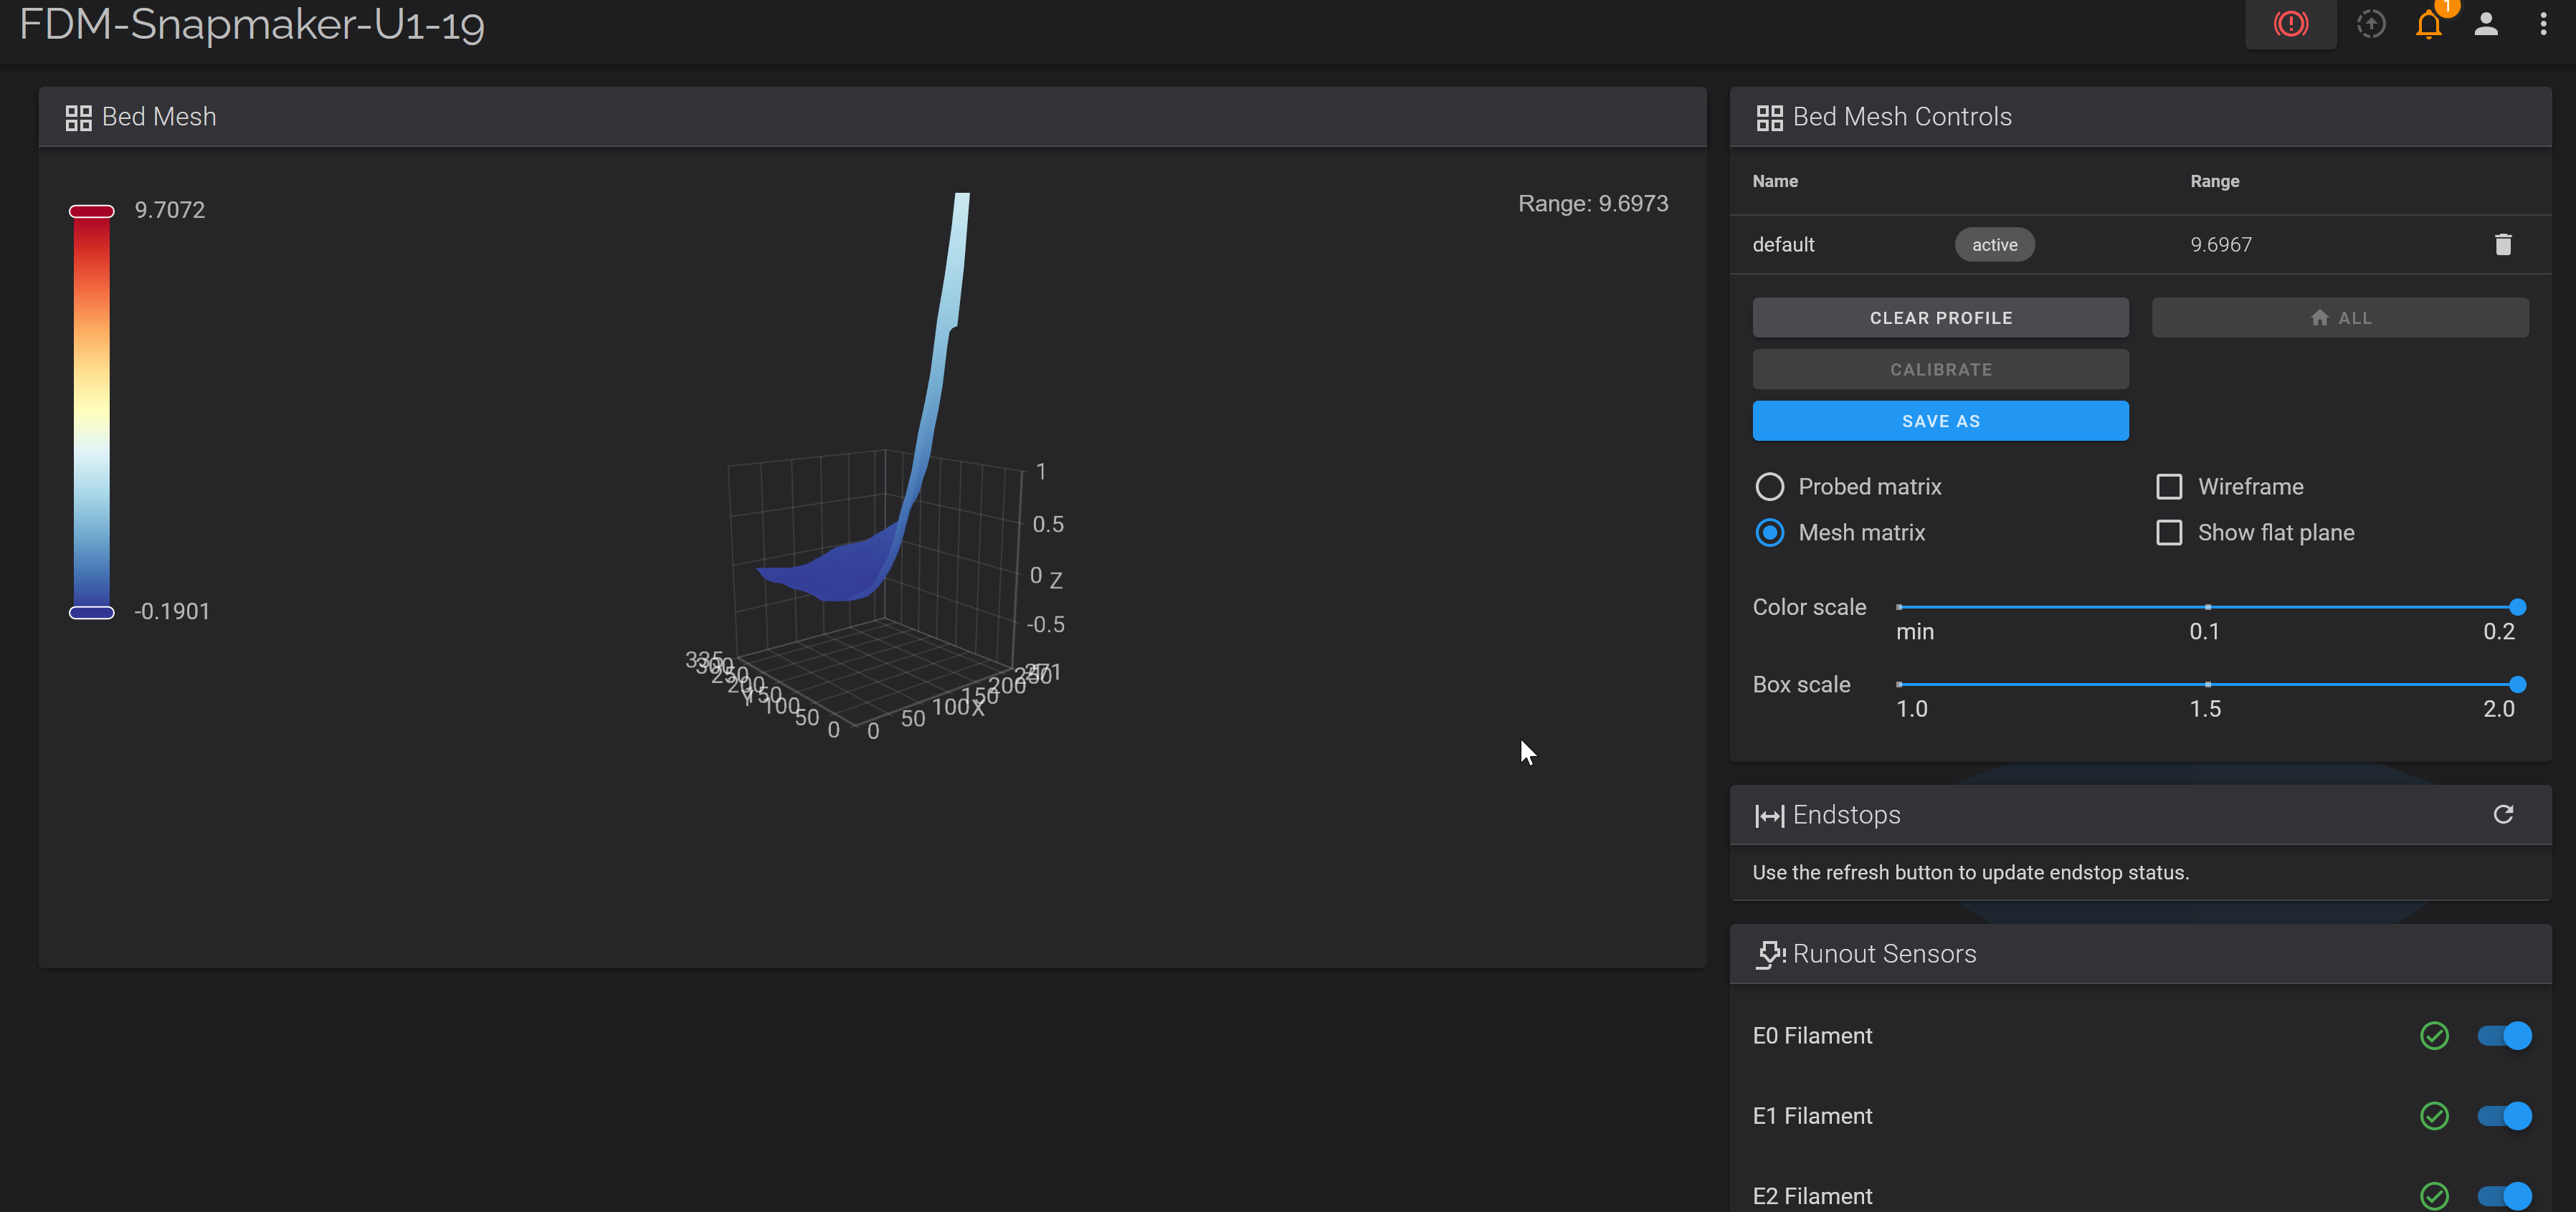
This is my bed mesh for the example. I put a random object under one corner of the PEI sheet and leveled the bed.
Now to the print - short video showing full leveling/printing process.
It handled it pretty well, given that this is an extreme example and won’t happen in real life. I’ve seen quite a few people asking for these bed meshes so they can compare them to some other bed meshes. After this experiment, I have no idea why someone would waste their energy on this.
Curious to see multiple layers. I do believe I’ve seen a demo like this where mesh correction is so thorough, printing in that corner would pile up the layers causing one heck of a part distortion.
It’s a great demo though. In any case, if the distortion isn’t the width of a carabiner over the whole bed, you’re not likely to notice it.
And for the concerned, I will put out there my mesh is 0.16 mm range over the full bed after a one time adjustment of bed skew using the klipper macro already there, and not close 9 mm before, ha. Also mentioned elsewhere, I was printing cleanly “out of the box” before even inspecting the mesh.