When i get to bed leveling the bed just goes to the front makes a lot of noise for a bit then it wants me to set middle when it is in the corner. I am missing something i know but i can’t see it
Can you show pictures of the assembly? There might be something not assembled correctly.
Did you also double check the pitch of the lead screws? (its noted on the side of the axis) not all of them are the same (on recent machines) and they need to be paired correctly.
1 Like
@Caveman First, welcome aboard! ![]() To help you out, we will need to know which model of the machine you have (F250, A350T, etc.), and which of the machine functions you are trying to use, though from reading your post closer, I can tell you are trying to use the 3D printer function, correct? If you are able, as often as possible, uploading photos or videos is a huge help with troubleshooting too.
To help you out, we will need to know which model of the machine you have (F250, A350T, etc.), and which of the machine functions you are trying to use, though from reading your post closer, I can tell you are trying to use the 3D printer function, correct? If you are able, as often as possible, uploading photos or videos is a huge help with troubleshooting too.

That looks like an Original or an A150.
If it’s a Snapmaker Original, you should be posting in its dedicated forum, and the information on linear module pitches does not apply to you (the Original’s modules are all the same pitch as far as I know).
If it’s an A150 with the newer linear modules, the pitch information is included in the labels. There’s a good photo in Skreelink’s post here: Fitting new linear modules - #2 by Skreelink —see the bit where it says “Lead 20mm”? One module will say “Lead 08mm” (I think) instead. That one is supposed to be the Z-axis module.
Sorry yes its an A150 but it has not got the marks that r in skreelink’s post
@Caveman Yeah, the A150 does not have the pitch identifiers, those are specific to the “T” suffix models, so you don’t need to worry about it. I don’t have any experience specific to the A150, so I may not be of much further help.
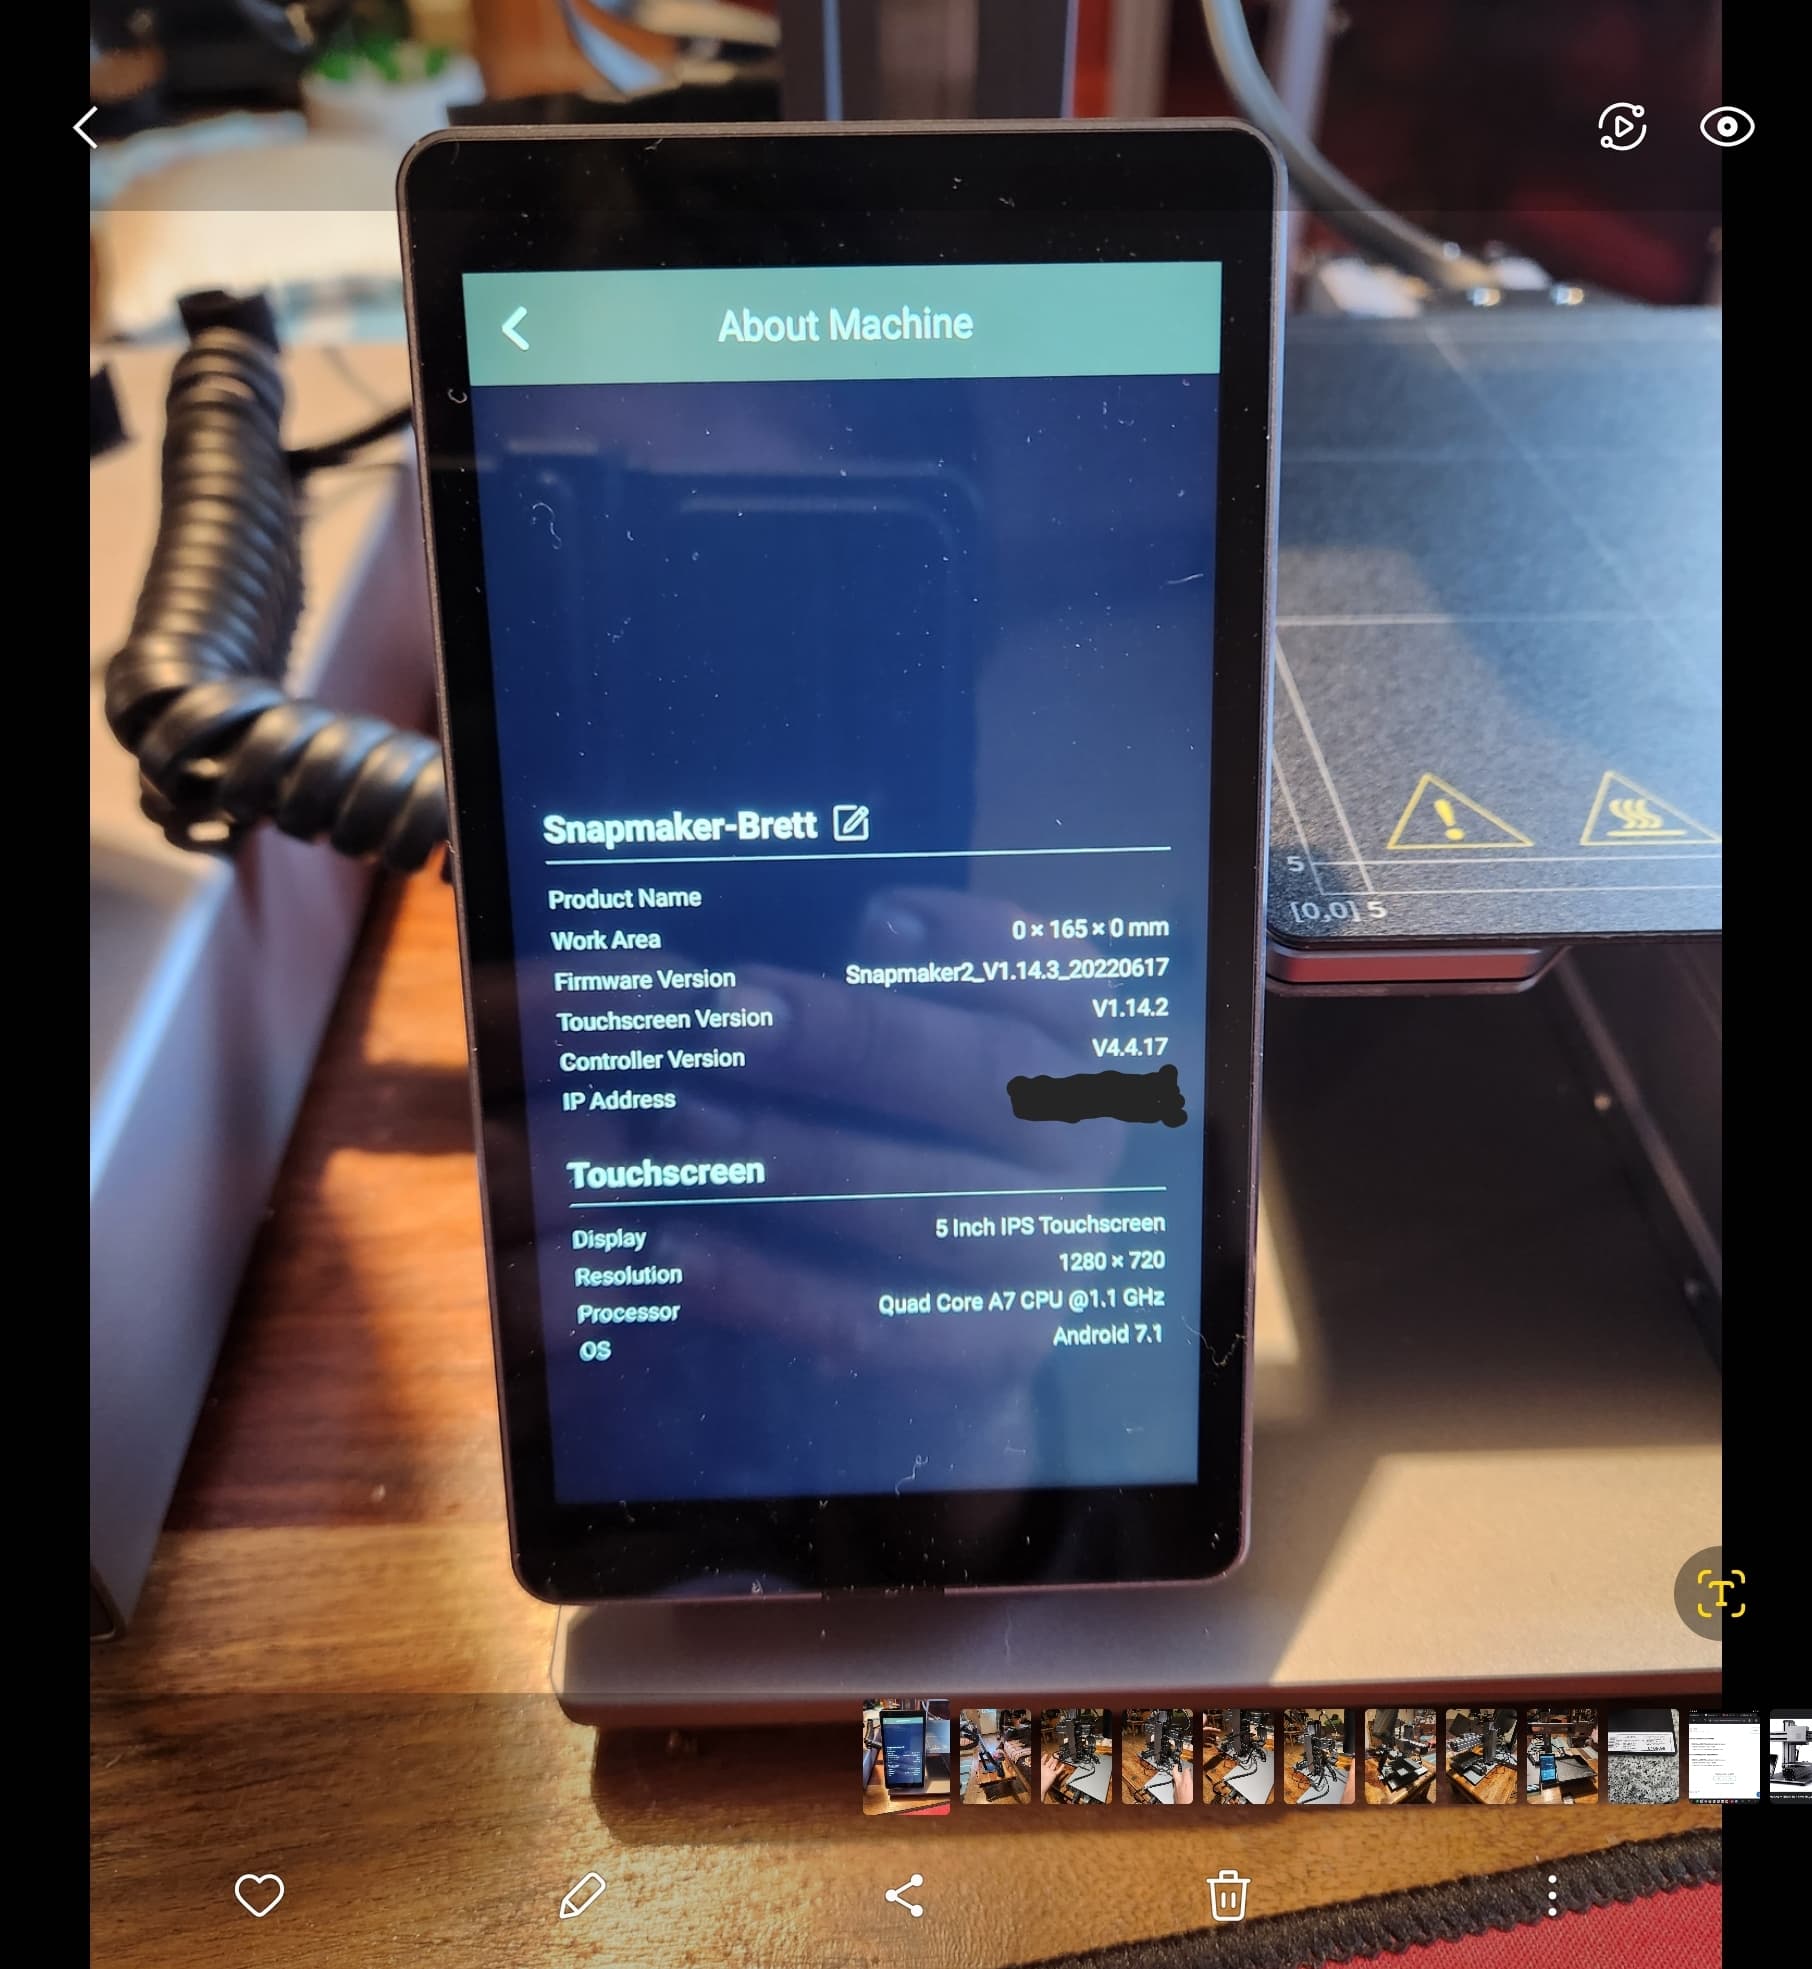
Try unplugging everything, leaving power off for at least 30 seconds, and plugging it all back in. The touchscreen is showing your work area as being 0x165x0 (that’s definitely not right) and is not showing the product name (Snapmaker A150) or an image of a Snapmaker machine like it should be. Seems like it may not be sensing/recognizing your machine properly.
Just tried unplug and shutdown for 2 mins and still the same ![]()
Can you move all axis by hand? With power off that is. If power is turned on the motors will prevent that.
It could be there is an issue with one of the limit switches. If you move them all to somewhere in the center and then you try to home, they should all move. And if then they “hit” the end without really stopping in a nice way, that might be the issue.
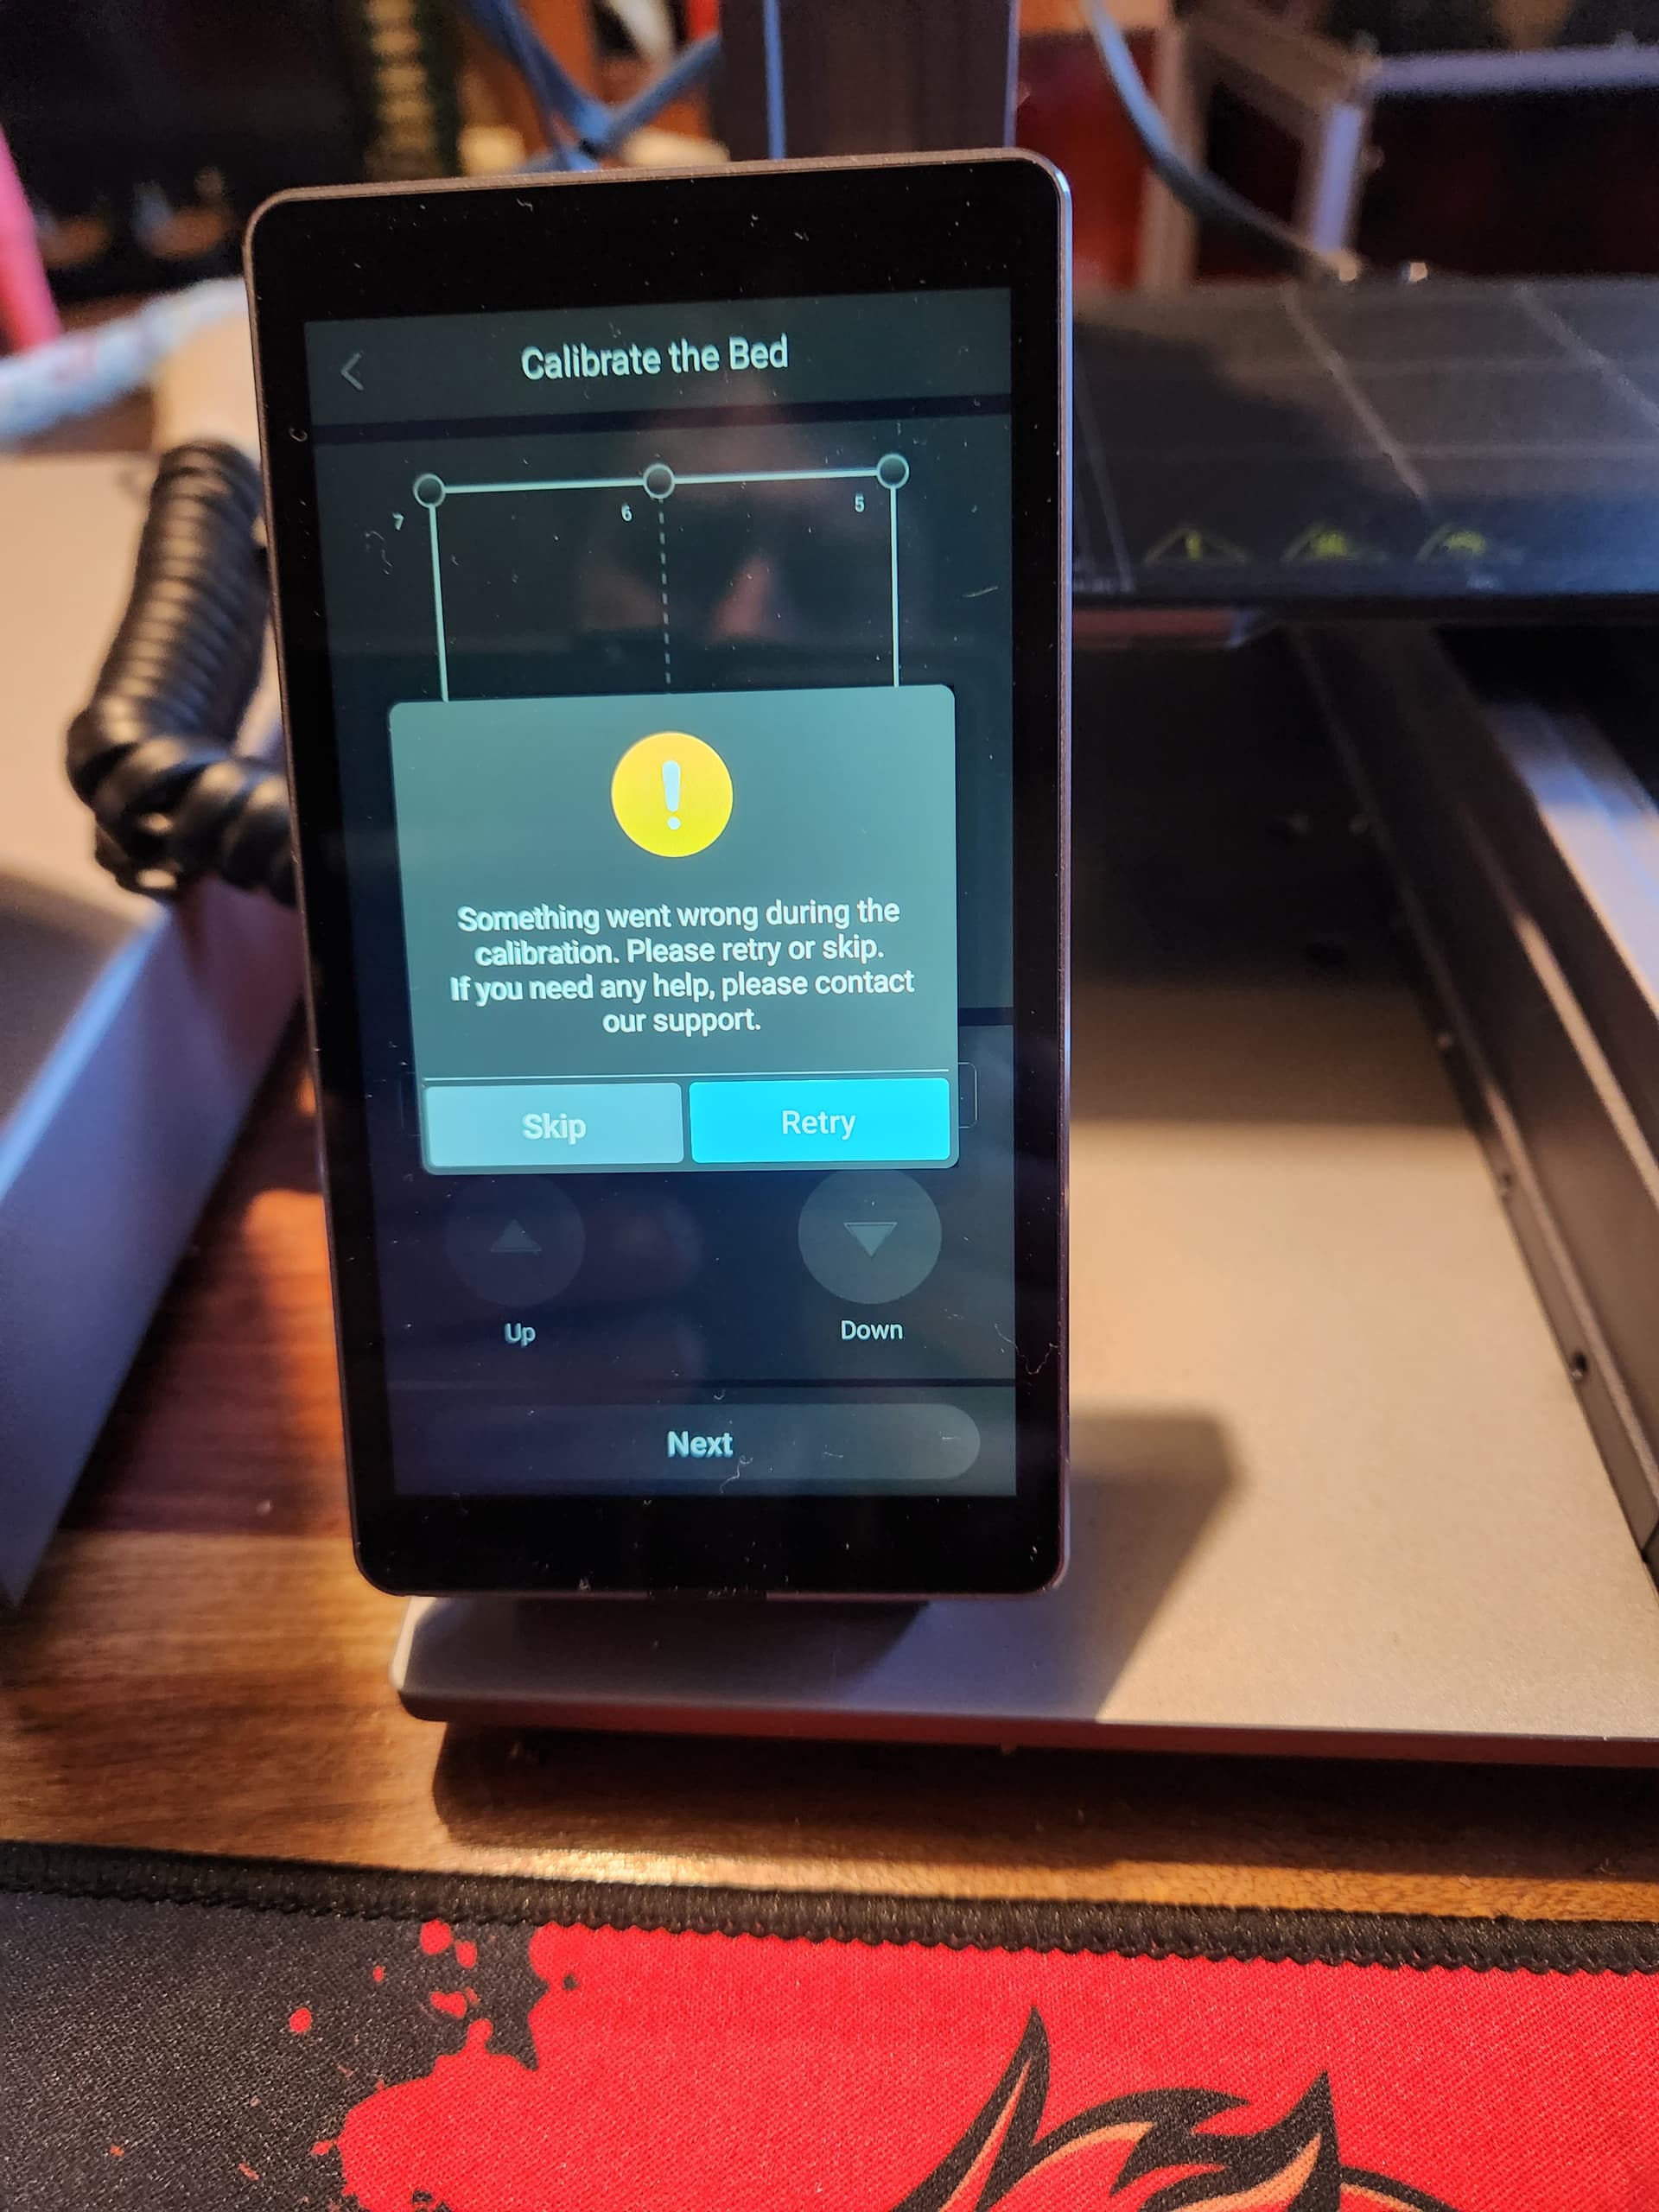
I have moved them to middle and tried again it still wont move but in about machine the work area has changed lol

I have what looks like a boot log if some 1 knows what it means
Oh geeze, haha. That’s really rather comical despite the situation.
Besides that, I personally am nearly at a loss. The only other 2 things I can think to try is to push all the rails to their endstops as far as they will go (to the end away from/opposite the wired side), and to force re-install the firmware via the USB drive. I have had it happen on desktop computer motherboards where the firmware just doesn’t apply all the way the first time, and it has to be redone. It’s kind of like re-programming your brain to forget one habit and replace it with another: doesn’t always work the first time we try.
thank you by the way im brand new 2 the snapmaker and 3d printing so thank you all 4 the help so far
@ElloryJaye , for future reference, the Original has different cables (curly, with an RJ45 head), a smaller controller (higher off the build plate), no grid on the build sticker, and doesn’t have the strain relief on the bed’s cable.
It did take me a couple seconds to notice the differences though. They are very similar looking.
@clewis @ElloryJaye It also does not have the metal dust cover strips on the linear rails.
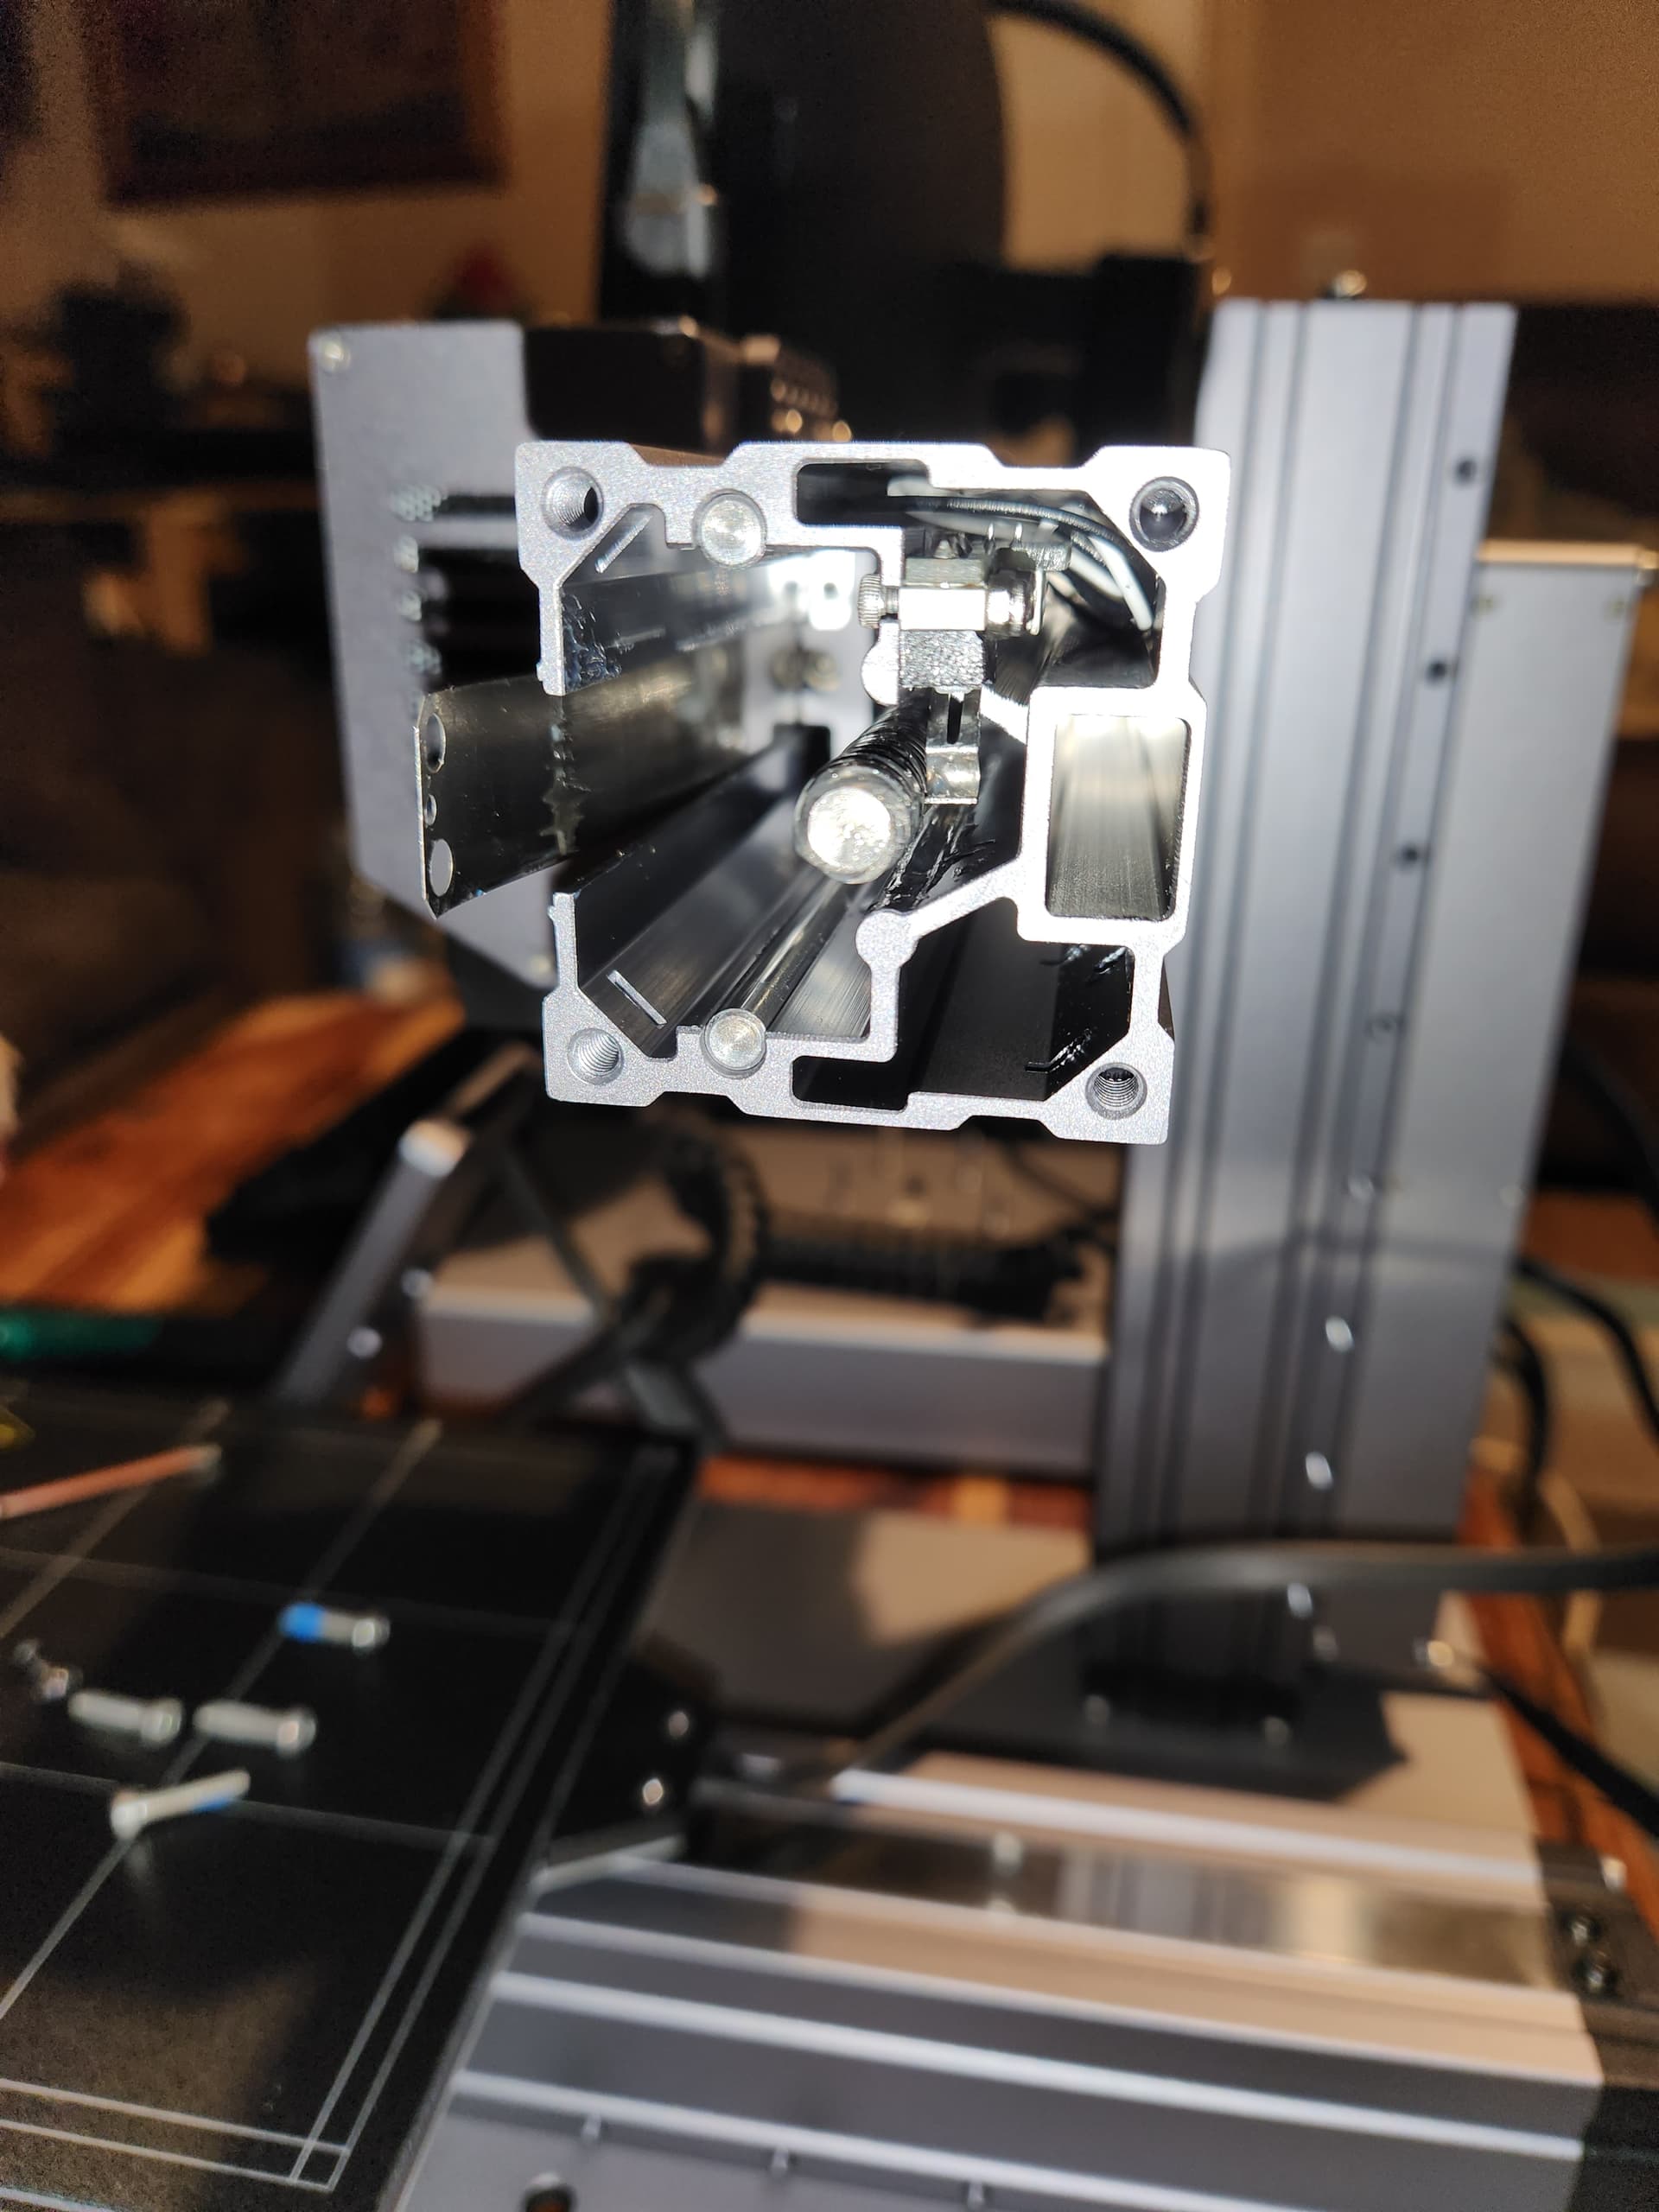
So i have found a fault i got a hunch it was the x axis so i put on my big boy pants and opened it up and the micro switch was broken what i dont know is if that is enough to stop it all working
@Caveman Yes, it will stop it from working. That microswitch is the endstop that the machine uses to know exactly where the carriage is located. Without it, the machine doesn’t know where it’s at, and so cannot perform any functions. If your machine is still under warranty, contact support and let them know; should get a free replacement. If it is not under warranty, you can still contact them to purchase a replacement rail or even just the microswitch. Another option would be that you can find the microswitches online for a lot cheaper, BUT depending on how it is broken (got a picture by chance?), it may require de-soldering the circuit board to remove to old switch and soldering the new one back into place, or you may only need to swap out the metal clip on the switch (a part that is very easily and commonly damaged by owners who venture into rail disassembly, as was the case for me).
Either way, don’t be discouraged. It may seem daunting, but this is really a rather minor setback, and once you get the machine working it is quite a lot of fun.