Hi folks,
coming from 3D printing, I had a lot to learn for CNC milling! So I picked some piece of leftover wood from my cellar (douglas fir actually) and decided to create a bas relief from it. Understanding that Luban can do this “out of the box” from a grayscale encoded height-map image I thought this would be an easy project - turns out it’s not Hope my short description here helps others!
I picked this dragon more or less randomly from the Google picture search. Grayscale encoding means: The whiter, the higher. If you put this into Luban, you can generate a relief toolpath. However, as soon as you change settings, at least for me the program either crashed or just said “Cannot generate toolpath”. Also, multiple passes were just not possible.
So I switched to Fusion 360 and guess I condemned my self to hell by the amout of bad curses it uttered while trying to figure things out on myself. Fusion 360 is the exact opposite for me to what I would call “intuitive GUI software”. I don’t mean the desgining of things - it’s clear that learning is involved here. I mean simple things like: Mouse scroll wheel works exactly opposite as compared to every other application on the globe! Clicking on an Object sometimes locks operations for no obvious reasons. In order to edit a mesh you first need to activate a feature in some deeply buried option dialogs… OMG! Still, with the help of these resources I finally get things ready:
Tutorial on getting a grayscale image as relief into Fusion 360
Tutorial on creating a bas relief in Fusion 360 with Snapmaker 2 - you need to replace the part where this guy loads an STL relief by the tutorial before.
Still, none of the above does multi pass. But it is not that difficult. I did the following:
First, do adaptive clearing like in the tutorial with the largest flat end mill at hand (I only had the Snapmaker bits, i.e. a 3.175 mm 2 flute flat end mill was the largest)
Then right-click on the result in the operation tree and choose “Create derived operation” and pick another adaptive clearing. The result is a new operation that has basically the same parameters than the one before. Now pick a ball end mill. I only had the Snapmaker 3.175 mm ball end mill, and this already gave awsome results, only that smaller details could not be carved since the mill was that big. If you have, pick a small one. Maybe you’re already done then. Important: In this (and any potentially following tool paths) in the Geometry tab select Rest machining and choose “From previous operations”. This makes sure you are only milling in remaining material and not in thin air.
I had a 1.5 mm single flute flat end mill, also Snapmaker brand. With this I did a scallop, and two parallel passes in X and in Y. This worked out the details, but left many artifacts. I guess with a ball end mill it would have looked much nicer! I stopped here - It was for learning, not for carving the perfect dragon. If I wanted that, I first would need to shop for more bits.
From each toolpath generate the CNC file via post process (like in the tutorial)
Send it to Snapmaker one after the other and change tools inbetween. Make sure to note down your X and Y work origin! Snapmaker forgets it on power down! Z origin needs to be re-set for each tool anyhow. If you look closely you’ll find that the touchscreen allows you to set Z origin individually - you need to swipe for that. All tutorials suggest to set the work origin in the center of the workpiece - I would not do in the future. The center of the workpiece will most likely get milled away, so better choose a part that stays for relibale Z origin setting for each tool.
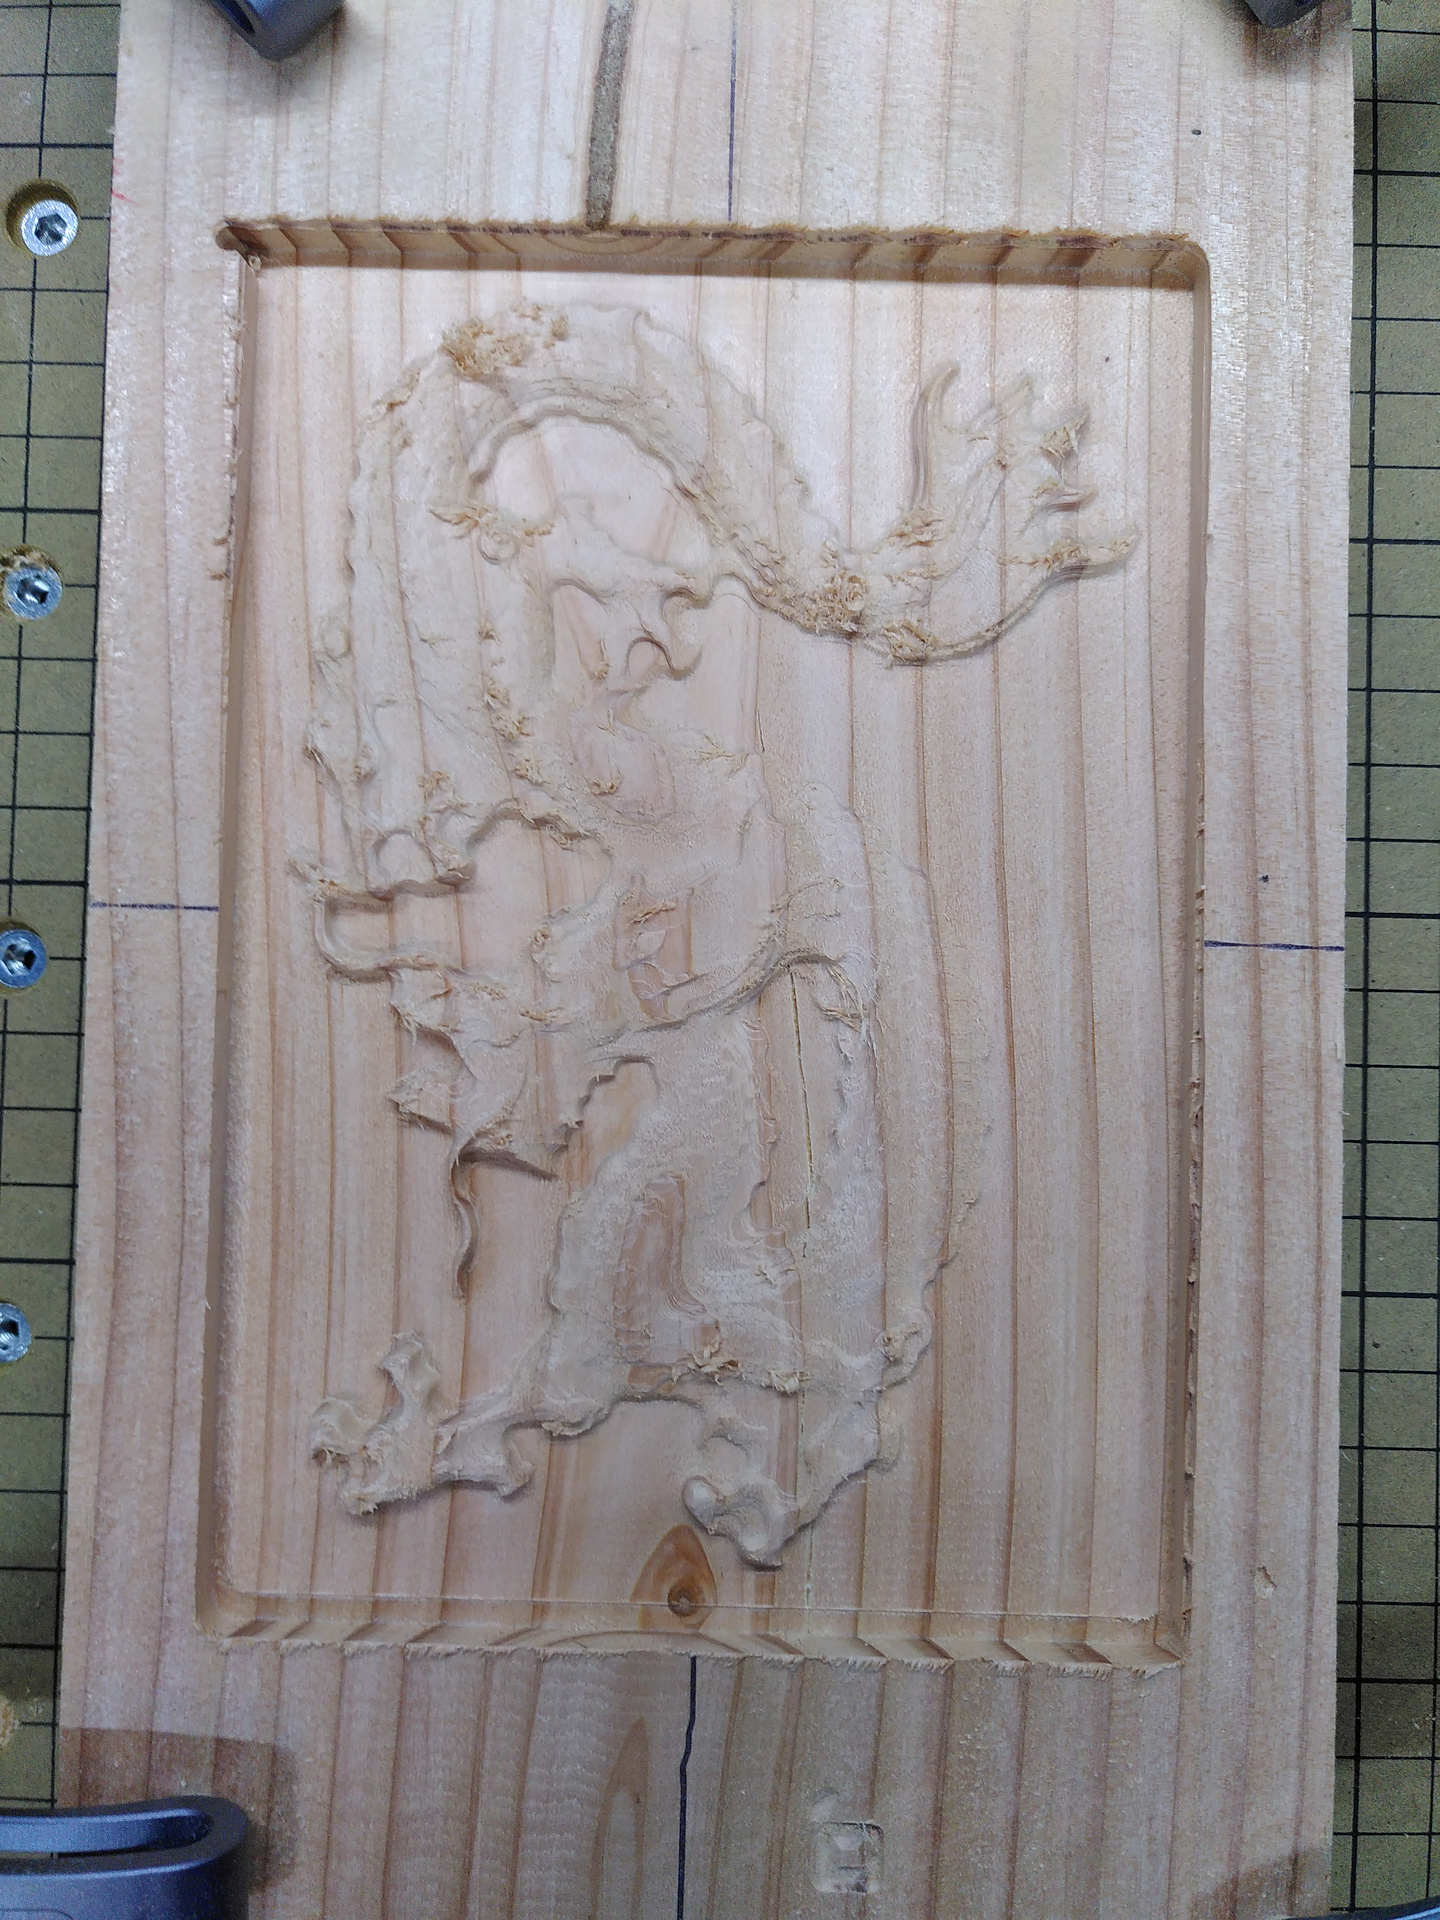
And here is what it looks like…
…after the first roughing pass with the flat end mill
… after the 1.5 mm flat end scallop and one parallel pass, already much more detail - if you zoom in you can see artifacts/imperfections from the flat end mill:
…and the point where I stopped since I had no better bits available. I find this already remarkable and it shows where you can get if you have the right tools!
Set the work origin not to a place that gets milled away
note down your work origin to have it after a power cycle
Don’t use a ball end mill for the roughing pass - it’s the wrong tool for it and I could see how much load it put on the Snapmaker toolhead! It was visibly lifting on tree rings, and douglas fir is not even hard wood!
Fusion 360 and me will never fall in love I suppose… I think I’ll try out other software at some point… Still, I can see how powerful Fusion 360 is! It’s UI is just so… strange! And cloud, cloud, cloud… don’t like it…
Snapmaker is a cool thing!
For serious wood work the stronger spindle announced will be very welcome!
Great article - thanks. I only have the Snapmaker original and have struggled to do any decent cnc. You have inspired me to give it another try. Funnily enough one of my first efforts was a dragon too. I agree with your observations particularly about the beast that is Fusion 360 - amazing program but a real beast. I hope it is easy to purchase add cutters to the library to be able to improve detail. Unfortunately my email to Snapmaker support re problems and issues with cnc has had no reply - yes, I am sure they are busy but even an automated reply saying “Please be patient, we will get back to you soon” would be appreciated.
Thank you so much for this. I’ve been scratching my head trying to understand the process for cnc having never done anything like that before, and fusion 360 is a nightmare! Just having a basic work flow to learn from is brilliant.
Great work. I also made a test run with my SM A350 CNC and after reading some comments in the forum I decided to search for a intuitive program which would possibly work with Luban. Based on some promising statements in the forum I have checked the Vcarve Desktop by Vectric. It’s a very nice software and really fun to use, but it’s not completely compatible with Luban - you have to change the file format to *.CNC before importing it into Luban. The generated GCode doesn’t work with SM yet so there is a risk of mega failure. For instance, you have to turn on the mill manually and I faced multiple times the error 409 messages ( don’t know what this means ) before I managed to get it to run.
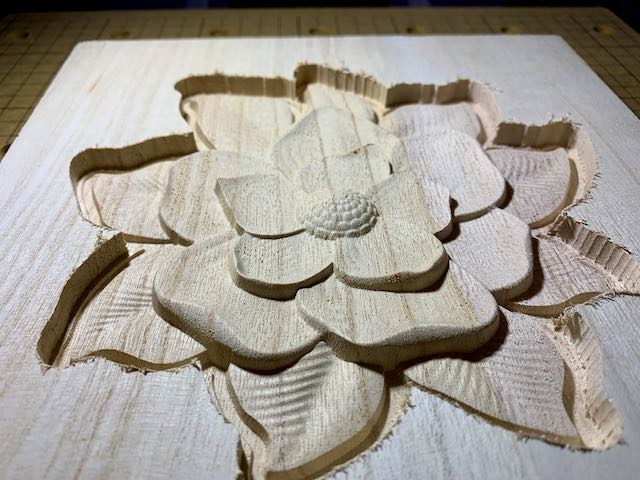
The Vectric based software allows you to design the work with multiple passes and the flower SM ( picture ) made is done with 2 passes - one rough and one finishing pass. For the rough pass I used the 3.175 double flue Flat End Mill bit and fo finishing the V-Bit. I didn’t know what I was getting into so expectations weren’t that high - I just wanted to test if it’s even possible to get anything engraved.
I made two separate files : one for the rough and one for the finish and it turned our surprisingly well … after a total of 26 hours. I really cannot blame SM nor Carve Desktop for the slow work. I didn’t know better how to adjust the working speed, but now I’m getting the hands on it. It takes a lot of practice, trial and error before succeeding, but who would do this if it was easy
The piece of wood I used is Paulownia - a very light and easy-to-work-with and suites well for CNC.
That looks really nice! Still being a novice myself, I would think that a v-bit is perhaps not the right tool for the finish - it explaines at least why it took so long. I seem to understand that a small diameter ball end mill should be best for that. But I happily stand to be corrected!
What I have read, the V-bit brings out the smallest details on the plane. For this work I adjusted the tip of the V-bit depth to only 0.6 mm according to the suggestion made by VCarve Desktop.I’m sure with small adjustments the processing time can be reduced without loosing the quality. I checked the other bits from SM I have and the only other option I can think of is the flat end mill, single flute which diameter is only 1.5mm. I have no idea how well this would work, but I’ll definitely try this too.
Have fun and stay safe !
The fifth content
Locate the Image2Surface.js file in the folder you copied, select it, and click Open. The script should now be installed and ready to be run.
The script should now be installed and ready to be run. image2surface.Js could not be specified.
Javascript. Some sources say that Js is no longer supported?
Hmm - this is strange. The page you linked in is from 2018, and I started working with Fusion 360 only last year… And I followed that tutorial… Sorry, I am a bit at a loss…
It’s been quite a while, but I was able to add-in Python afterwards.
It’s useful to be able to create toolpaths for CNC carving from images, but with my CPU specs, the process takes a lot of time and I haven’t been able to create the model yet.
It may be a bad setting, but I think the processing time would be shorter if it was a simple vector image, so I will try some more.
Some good advice in there. A couple of possibly useful extra tips from recently going through a very similar learning curve;
Buy some really fine ballnose bits for detail work
Vectric software makes some of this easier and they now have a Snapmaker postprocessor so it spits out a .cnc file you can use right away without going through Luban
 Hope my short description here helps others!