May you share your M503 or M420V with us?
I guess your level is not as bad as you guys write here, because you have a steel plate and or a Glas bed already.
Please share also the model and the gcode that you print in the first post.
I couldn’t get the plugin to graph the data, but it did store is so I’ve used excel.
MetalOnly 21C
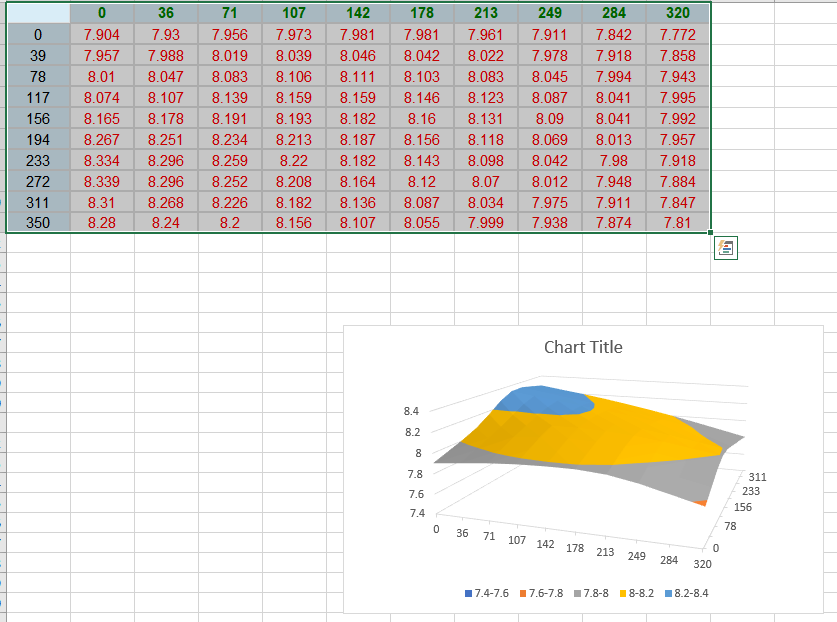
MetalOnly 65C (30minutes)

GlassMental 65C (30 minutes)
I held the glass down with two binder clip. You can see that it is obviously deflecting around the peak and flattening it a bit, but the clips are causing it to flex.
I’m regenerating the GlassMetal 65C as I don’t believe the data. It should have been a larger offset when I put the 1/8" glass on there.
GlassMetal 65C

GlassMetal 21C

Out of curiosity what commands do you use for the bed leveling plugin? I’m using:
M420 V ;get data
G1029 A ;leveling
G1029 S ;save data
G1029 D0 ;end leveling
M420 V ;get recent data
G28
the data gets stored, but doesn’t get plotted.
I think I need to add shims under the heater to level it out as much as possible. I could also use more sheets of glass. I have 4 on hand, but think getting the basic bed as flat as possible is where I need to start.
after shimming between the cradle and the heater board, then with the glass on top with the metal plate this is what I’ve achieved. All at 25C

I only use the “M420 V” command for the bed visualizer plugin. (I just use it to visualize the bed, not to level it.
You’ll might need to use the release candidate of the plugin as with the glass in between you’re above 10mm of the zero point and it didn’t support double digit numbers until recently. (See For all who want level on glass - #31 by stefix and [BUG]: mesh data with points with more than single digits doesn't collect data. · Issue #352 · jneilliii/OctoPrint-BedLevelVisualizer · GitHub)
Your bed actually looks quite good. Even before the shimming. it was a fairly straight slope.
Did you tram your snapmaker? That might also help to get things more level. But right now I thinkg that looks pretty good. What’s the max deviation after the shimming?
Level looks great and bed levelling should easily sort that.
I am with @xchrisd what’s going with that boundary layer?!?!
Did 3D PrintedLandscape give you an STL or GCODE? It just looks all wrong.
Do you have the same problem printing something big but basic, say a bunch of 20x20mm blocks over a large part of the bed? What slicer if relevant. This looks like a model/slicer problem, not a printer problem.
By the way to get OctoPrint Bed Visualiser to show a level you need to tick “Use Relative Z Offset” and it with offset all values to 0 or put your lowest whole number and highest whole number Z value in the Graph Z-Limits.

I did finally find the “Use Relative Z Offset” switch and it started working.
I think the issue with the print is that it was a 0.3mm initial layer, but since the bed wasn’t level it squirted up around the nozzle, creating those odd lines. There were parts of the print that were fine as well.
After I get the bed flattened a bit more with paper shims (I hope they don’t change too much over time). I’ll try a print again.
My final attempt at 25C. No shims at the highest spot, shims pretty much very where else.

Now to preheat to 65C and see how it changes

May we get your model and gcode now?
Your bed level is better like the most kickstarter pledges, no worry about, now even less - great work with the paper 
The model is an STL from a kick starter. I can’t share it.
I did try to print it again today and it was improved, but still not enough. I’m going to check my esteps with the new hatchbox filament. I’ve not checked it with this filament, only the original snapmaker.
The perimeter looked good, but when the infill/base started it wrinkled up again.
I changed my slicing parameters to the Luban PLA Fast setting. I’ve used this before and it worked OK, but this is my first time with the hatchbox brand.
Thats a fantastically level bed, never seen one that good, mine looks like this and I print fine.

Have you checked the actual temperature of your print surface? with sheet metal and glass between it and the heated bed it could be quite cool, dont know how it will heat.
If you have an STL that takes out rubbish GCODE though it could still be a problem with the model. When sliced in Cura do the initial layers look OK in Preview? Is the model actually flat on the bottom and at Z0? Do they show all that weird edge stuff?
Are you coating the glass with anything to help adhesion or at least cleaning it down with IPA before the print? I like Magigoo on glass but thats mainly because models pop off when cool.
Best of luck getting it sorted, its a strange one.
If you change the scale of your graph to have a max and minimum of +2 to -2 mm deviation yours will look a lot flatter too ![]()
Here are the two bottom layers of the gcode. Maybe someone can see something.
Bottom2Layers_Part2_CommonersHouse - Copy.gcode (1.4 MB)
Here is a picture of the print I tried last night after the leveling.
Top View:

Bottom View
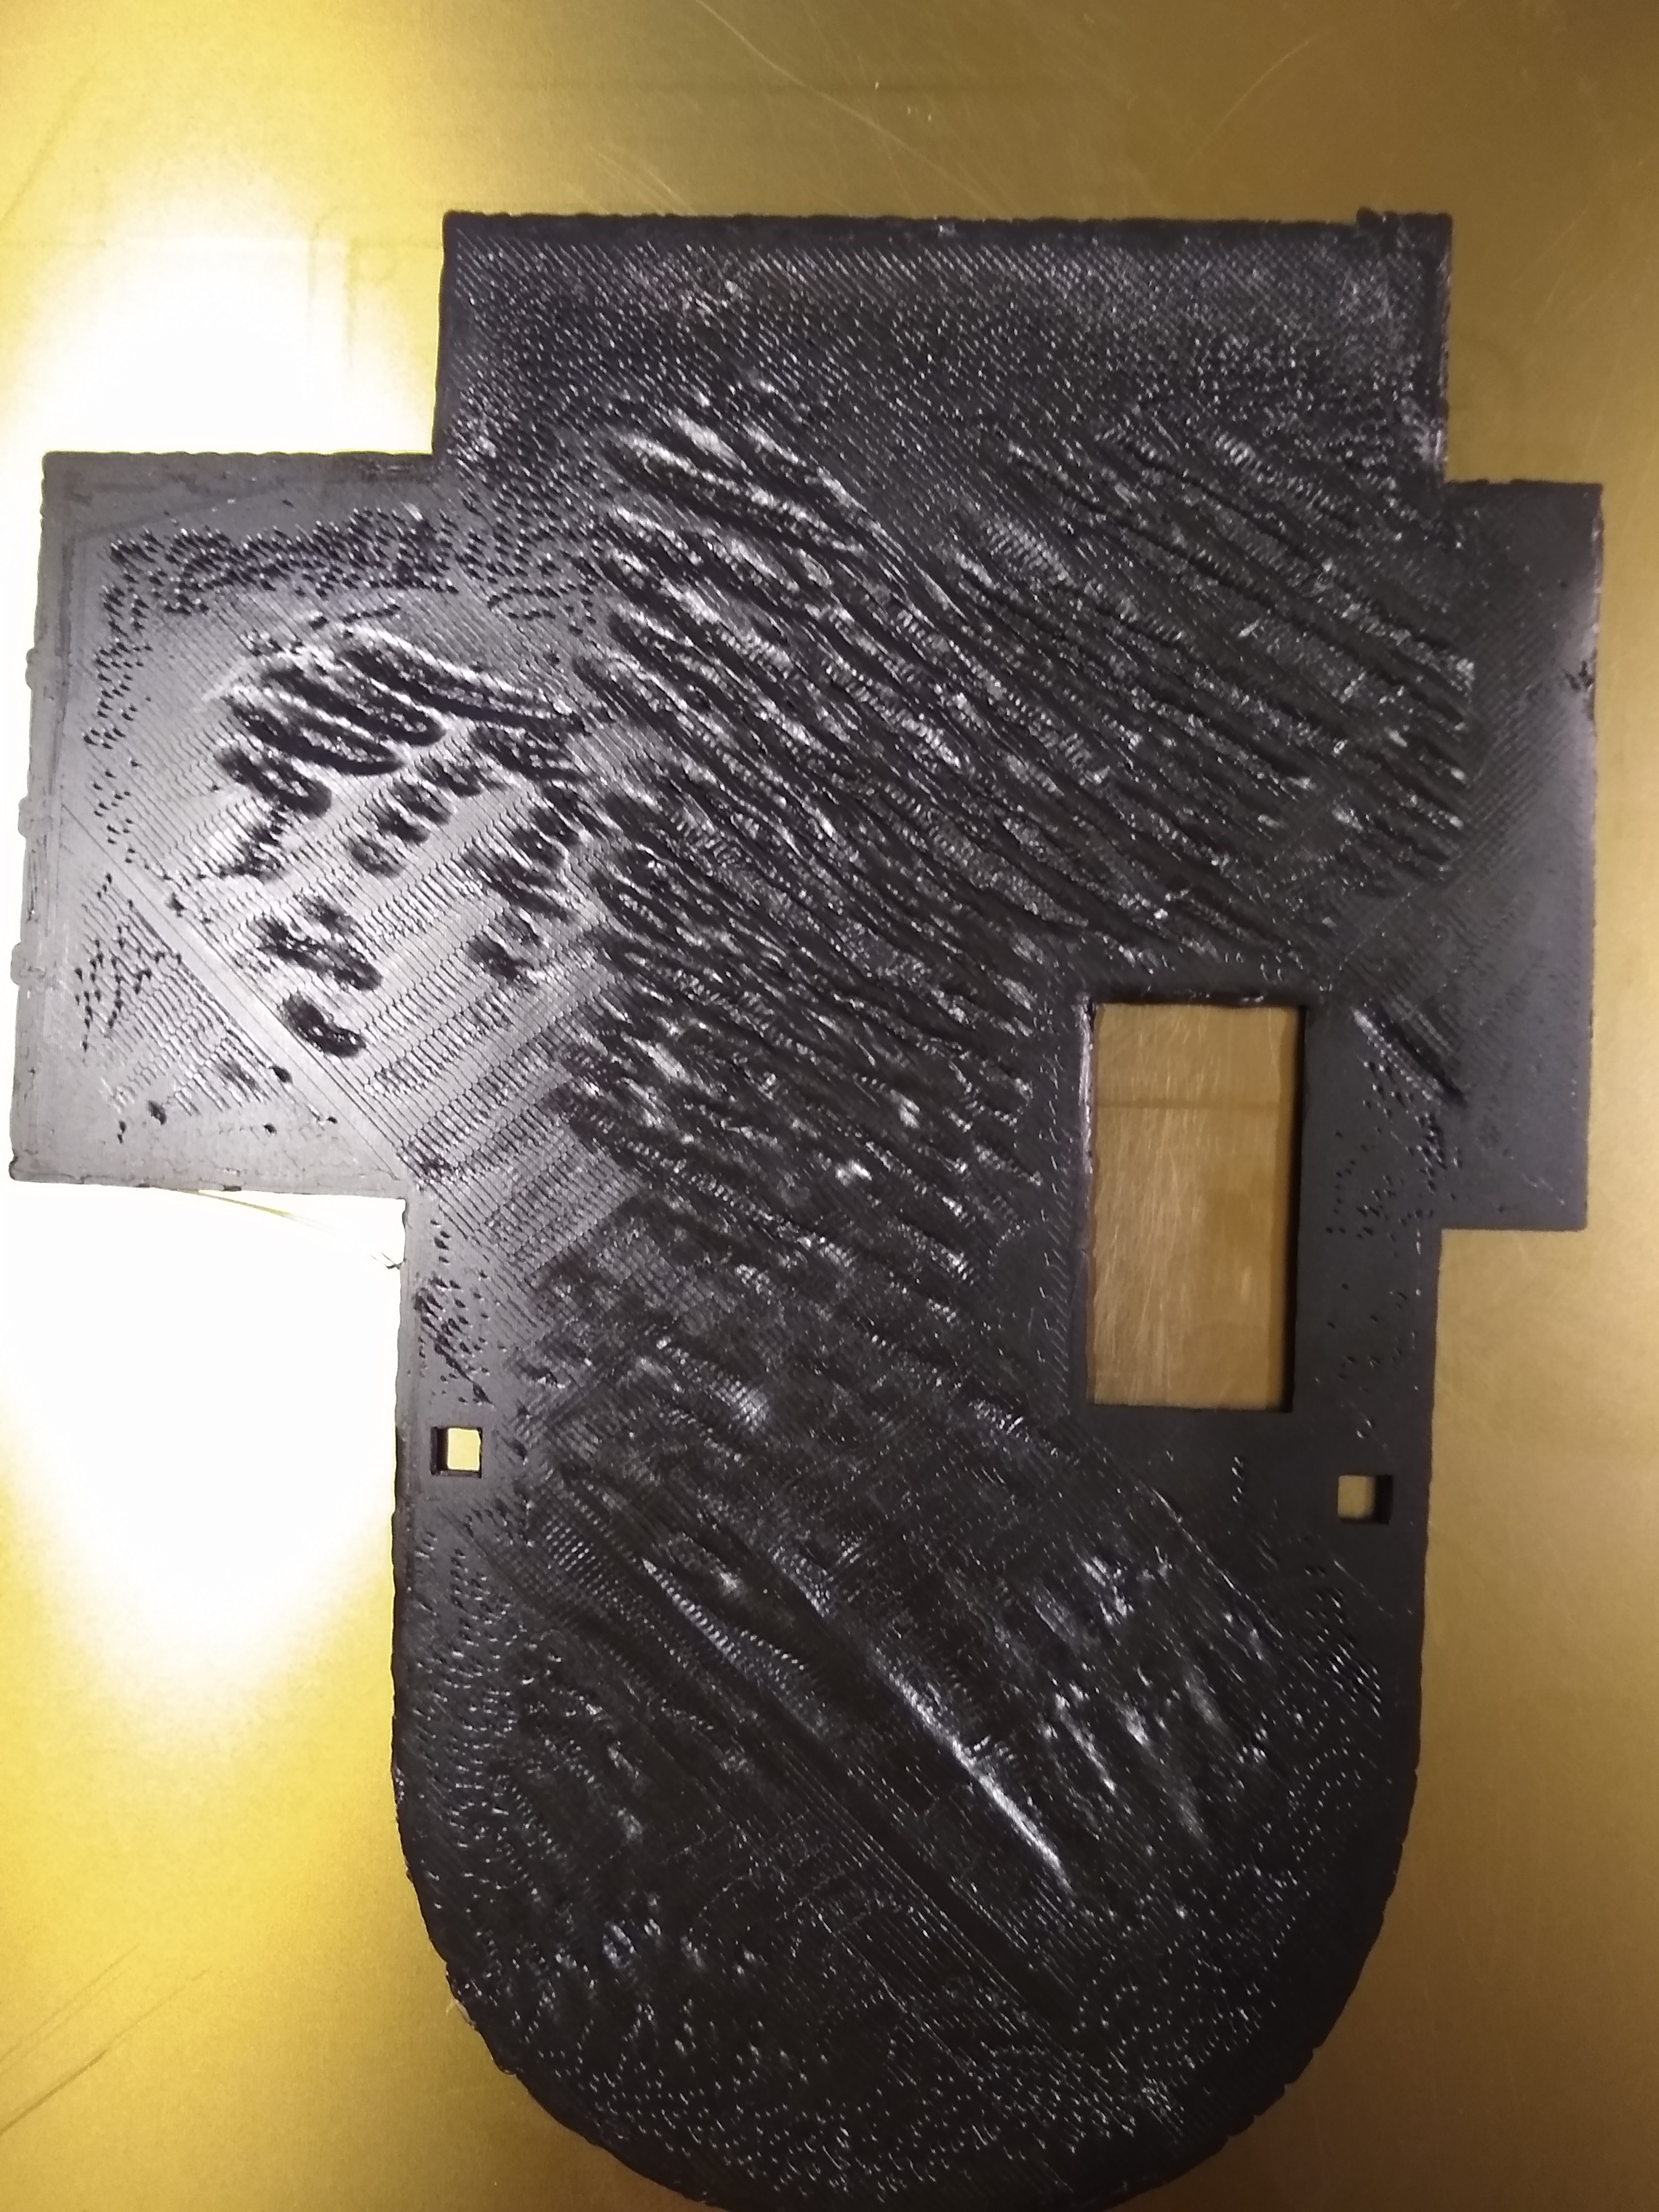
It still wrinkled. I’ve never seen this before. Even the “good” areas have bubble holes. It does make se wonder if the hatchbox PLA was wet, but it came from a brand new sealed package.
Here are pictures of the bed heated to 65F for 30 minutes.

And I put the failed print on the bed where it was printed.

I think the filament is indeed the most logical thing to look at. Do you have the same problem with other filament? Have you printed something else successfully with this roll?
Also, try a temp-tower to validate 200 is the best temperature.
I added this roll part-way through a previous print. That print finished fine. I have not printed anything from start with this roll. I’m starting a different print with this roll right now to see how it works.
I’ll look to drying out this roll if it still acts up.
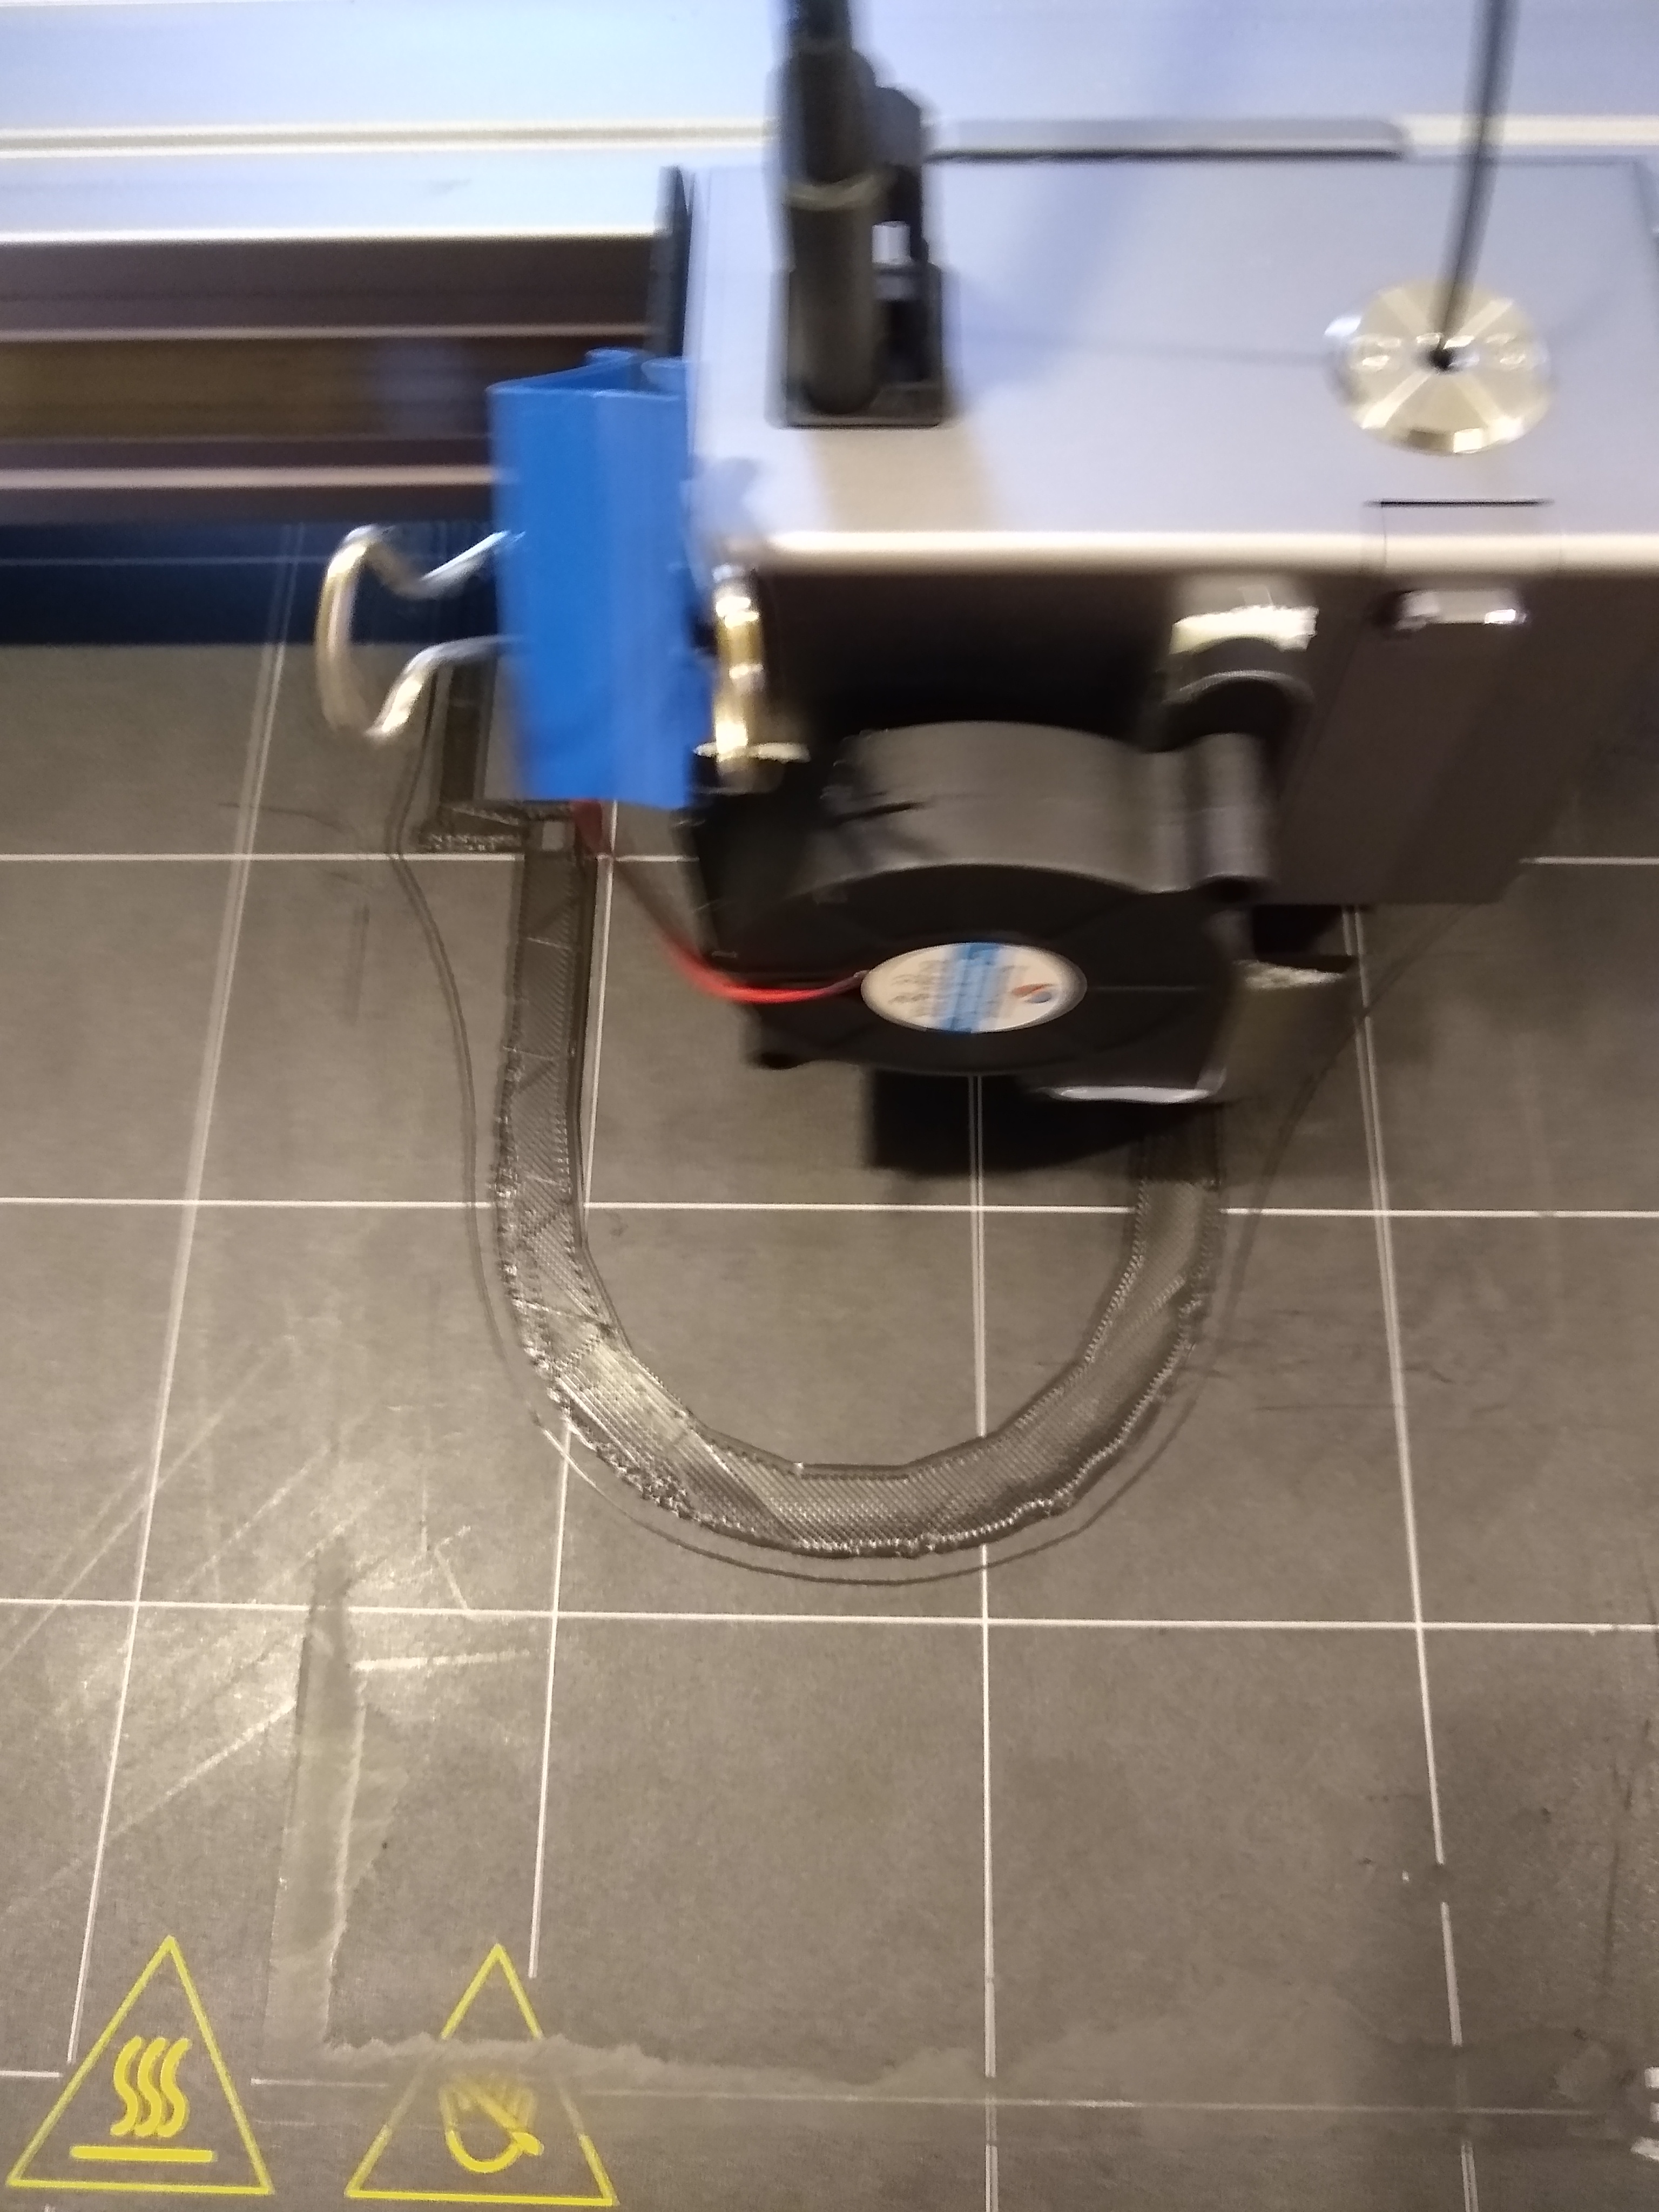
Last post for a while as the current print is 26hours.
This is the roof portion of the house, and only touches the bed around the edges. I also threw the Snapmaker pad on there. The leveling didn’t change so I went with it for grins and giggles.
There is a bit of “rolling” on the edge after the fill. you can see it on the outside of the curve along the bottom. Not sure what this is.
these things still just look like wet filament/partial clog issues to me.
i would say the majority of fresh brand new rolls i unseal still could use some dehydration. even the real good shit like matterhackers can be a bit damp on opening sometimes.
bake your spool, swap your nozzle and try it.
also, treat yourself to some matterhackers build series pla, it prints like a dream. like you dont even know what you are missing.
hatchbox may be an acceptable filament, but some of these filaments on amazon seem like they are decent until you realize that they are screwing your nozzle up. the nozzle thing is so complicated and can do so many goofy things.
i realize that i ruined my good microswiss nozzle when i ran thru some junk filament on it, and even with it acting goofy i was still getting decent prints with the matterhacker pla but once i tried petg the crap in there really showed its colors.
I don’t see a build series PLA filament, they do have resin. Their resin prices are pretty good. May have to try some of that instead of the Siraya I’m using today.
Is it the Pro series filament?
EDIT: nevermind I found it, they just didn’t have a shortcut to it. The pricing is cheaper than hatchbox. I’ll get a couple spools