Here is the download link for enclosure: https://s3-us-west-2.amazonaws.com/snapmaker.com/download/manual/enclosure-installation-guide-webview-V1.2.3.pdf
Hi Doug,
Do you remember several months ago we said we will plan to add light and fan to enclosure? Now we are working on it  , here are some pics for preview:
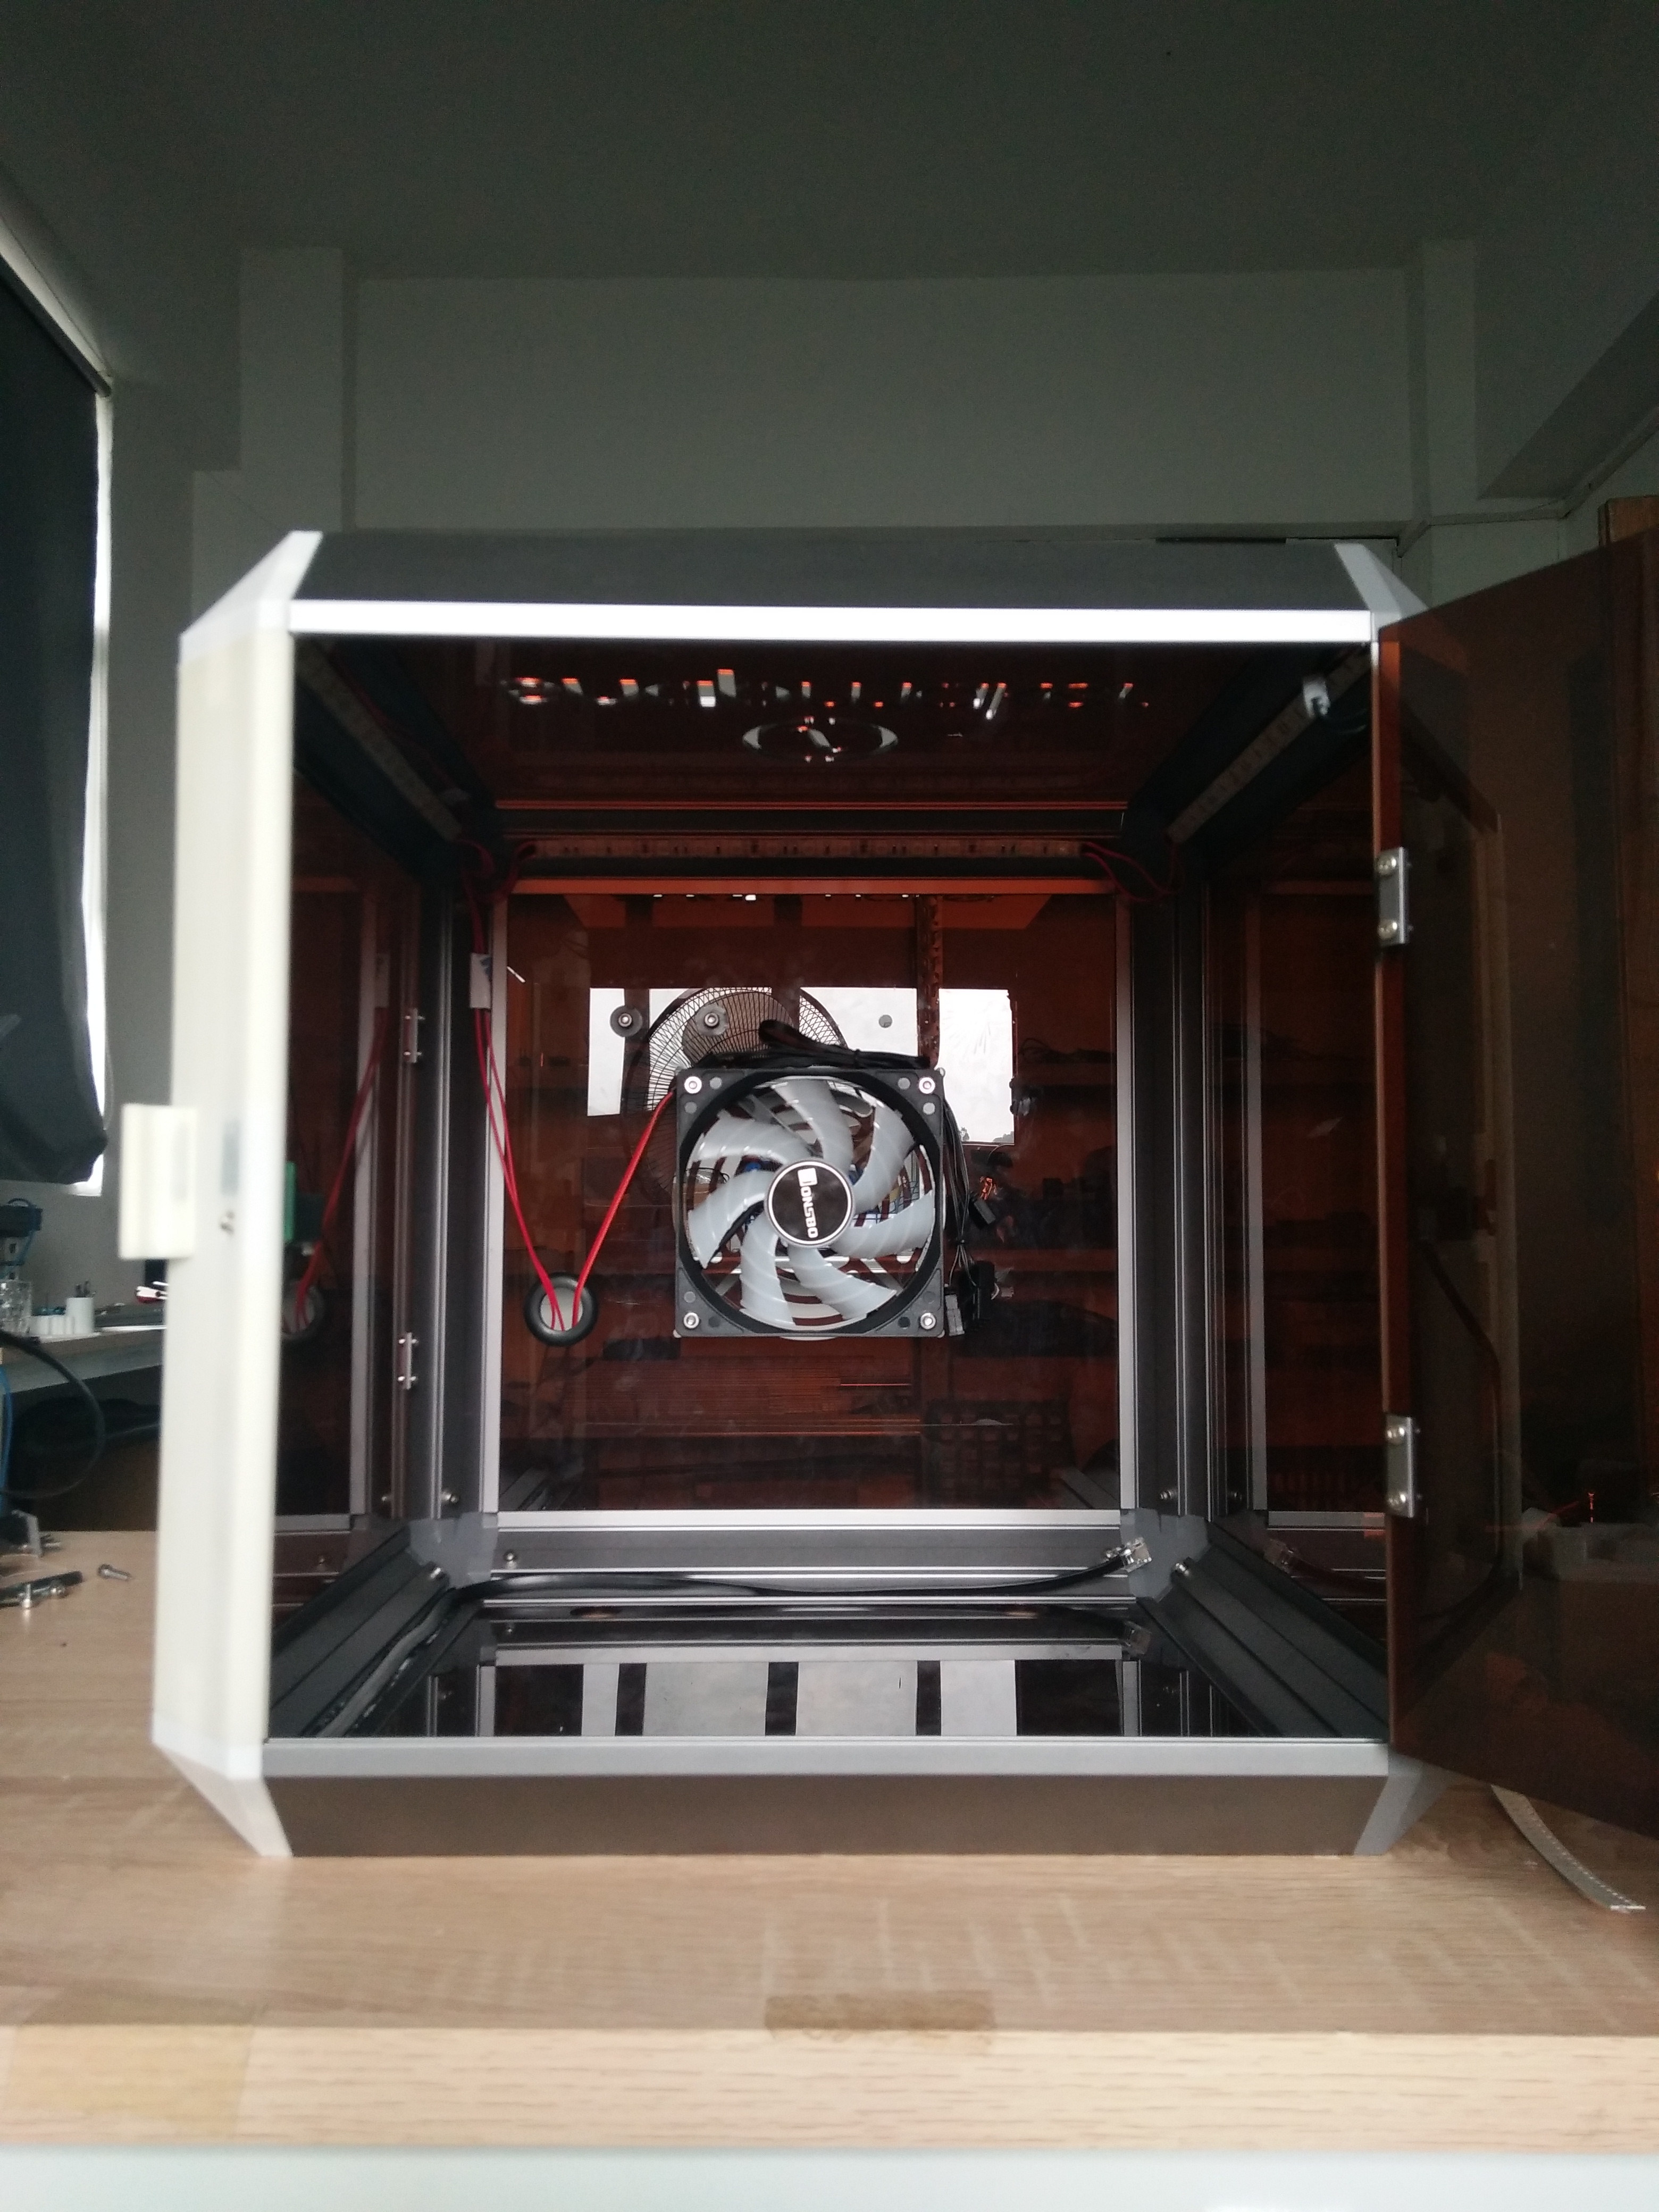

Since the first generation of enclosure has quality issue – Corner bracket may be broken off easily. We are now developing the second generation, which will optimize the material and procedure. It may take at least three months to make it available. However, I think it’s worth to do so. 
3 Likes
@Noah and team
Absolutely fantastic. I knew it would happen one day. Don’t rush it, make sure it works well, the only requirement is a switch to turn the lights on and off. There maybe some users who have the Snapmaker in their bedroom and need to sleep hahahahaha.
Have you considered a dimmer switch on the LED’s; bright lights may be too strong for some users.
Have a great day and well done!
Doug
Yeah, we are now thinking on it and find It’s difficult to add switch for light. We have added a auto switch to detect door’s opening because some countries require this feature for safety when using laser. The laser module would stop working when the door is opened during engraving and remain to work when the door is closed.
The main problem is about controller, we have only one port left for controlling, but we have two switches need to control. If we design a new controller, users need to buy the upgraded controller again. It’s not the best way. We are trying to solve this problem.
Well, we’re now getting used to facing problems one after another. 
1 Like
Hi @Noah
You are evolving and that is great. I think many of us are still at the crawling stage.
You will come up with a solution. Get the team together around a table with some good Australian wines or single malt whisky and you will solve all problems hahahahaha

Doug
1 Like
That’s great! Hahaha
PS: I like single malt whisky 
1 Like
Hi Guys
Any idea what is current state of enclosure we get V1.1 ,does it have fan ,lights etc ,if not when is new version planned?
Regards,
Neeraj
No lights, no installed fan (but is ready for a very wide range of different sized fans)
1 Like
Jan’19 Think I was just delivered the other prototype 4-5 hrs to assemble and re-engineer. Had to Deburr and widen all holes as they did not align with corner piece threads. These had been tapped at an angle and full of blasting grit. Slots in extrusions too tight for screens so 1 corner snapped off under light pressure. At least we now know why it’s called Snapmaker.
The machine was a dream to assemble but would recommend slightly longer screws with antishake washers all around like a real machine vibration is a killer. Maybe include a few more extra screws
Well I received my enclosure and was very impressed by how well and easy it went together. Not a single issue.
One thing I might point out however, is the mechanics of the door hinges - the hinge bolts are machine screws and tend to be a bit problematic. They need to be rather loose otherwise the doors buckle or bend a little when shut when too tight or they can’t be opened very wide if still not loose enough. As such, the door must be lifted a little in order to properly shut it that the switches engage. That’s not so bad, but the real problem I see is that being so loose, the screws are constantly working themselves further loose or tight. Perhaps a drop of loctite will fix this.
Regarding noise reduction, I don’t perceive very much attenuation at all. I have in mind to cut a square of rubber matting (the 10-15 mm kind used for putting under washing machines and such, made from recycled car tires) underneath so we’ll see how that goes.
2 Likes
Further tests do in fact show an attenuation of the transport noise (singing?) but not so much by the fan noise.
Another point that concerns me a bit is the spool holder being affixed to the rear panel. With a 1 Kg spool mounted, there is a noticeable droop of the spool i.e. slight bending of the rear panel. I’m wondering what long term affect this might have in conjunction with the warm environment in the enclosure. Perhaps the addition of a metal plate would help circumvent of any stress related fatigue.
Another update, regarding the hinges. During assembly I used the usual logic of screw - hole - nut, but after thinking about it I figured the reverse would make more sense in this case. So I checked the assembly instructions and sure enough, I had put them in wrong - my bad.
1 Like
well done, at least you have the answer; thanks for the honest update
I was once told many years ago by an old man that is why god put an eraser on the end of pencils…because we make mistakes.
Keep having fun
Doug
2 Likes
Hi, Last week I received my pre-ordered A250 case. Assembly was quite easy and well documented. The case parts themself are professionally designed and manufactured.
Anyway I have to change both the positions of the spool and the fan to save space at the left and back side - not everybody owns a free square meter of workbench space.
I decided to place the fan opening, the spool intake and the supply inlet on top of the case. The spool holder moves to the right edge and is aligned with the backside with a slight disadvantage to have to remove the spool in advance to open the side panel
Additionally I spent the whole thing a bottom plate to be able to move the complete assembly.
A question: is there any functional problem to having the fan outlet on top instead of the case bottom.

As you can see, the case now needs no more place on the left and the back side. The position of the spool holder is in the area you need anyway to open the side panel and allows complete opening after removing the spool.
Best regards
Peter
1 Like
Nicly done!
Why don’t you attach a filament holder to the wooden back plate?
I suggest buying a PTFE bowden tube to guide the filament.
Thanks for your kind comment 
The wooden backplate is just a weak sheet of wood, just to prevent things from rolling to unavailable areas …
Good idea to guide the filament using a flexible tube!
Best
Peter
Hey look, it has a bottom unlike the 2.0 enclosure…