Door_Pocket-Alt_Custom_cooling_mod_regular_2021-01-06_20_12.gcode.zip (1.5 MB) For the brave - this is the gcode (walls only)
Wat

The corners on the inside are all G0 moves with no extrusion. Is the nozzle just travelling somewhere else but refusing to leave the perimeter for ooze reasons? In the preview does it show the inside of the corners and walls hollow? How’s it printing?
ncviewer is kind of hard to view for still like this, and I don’t have S3D in front of me at the moment.
Prints unfortunately with lines. 

Here is a video and pictures.
I think i know why the g0 moves happen. I’ll try to explain it tomorrow.
Thanks for the video - I think that explains the g0 just fine. Just travelling to a new location to start infill.
There’s no tension on the filament is there - I couldn’t really see where it was feeding from and it seemed loose enough, but couldn’t really see. If it’s binding that could be bad.
I’m wondering if this is a combination of slight over/underextrusion combined with the infill, combined with a slicer/model specific quirk. I wonder what would happen if the infill pattern did not alternate by 90 degrees each layer - I am suspecting due to the geometry the infill is variable from each layer to layer, causing alternating lines.
In Cura the infill angles can be set, would be interesting to use the same infill angle for every layer and see if the lines go away.
Good morning,
indeed it looks like a travel move.
But there is no infill. There are only inner walls. so i cannot set the angle.
Looks like there are two inner walls laying on each other on one layer.
Look at this:
Start:

Inner wall first line 40 mm/s:


Inner wall second line 40 mm/s:


Start outer wall 20 mm/s:

End of layer:

This is the model: Kitchen Door Pocket by knoopx - Thingiverse

I created fast printing wall test models to reproduce this problem.

@Linui maybe you could try this too?
At the moment I’m printing the complete one and two thin walls, squished a bit to create overlapping inner perimeters.
1_50.stl (684 Bytes) 2_50.stl (684 Bytes) 3_50.stl (684 Bytes) 5_50.stl (684 Bytes) 10_50.stl (684 Bytes) Test Walls v1.stl (3.0 KB)
First picture mid print:

Looks like lines get worse each layer…
M900 K0.07 ; set K-factor of linear advance
;M425 X0.02 Y0.02 Z0.02 F1 S0 ; compensate backlash to mashine specifications
M204 P250.00 ; acceleration to 250
M205 J0.01 ; junction deviation to 0.01
Outer walls 20 mm/s
Inner walls 40 mm/s
Hey, i follow your problem, may you print this in just outer line? ( maybe we could see if the lines on your photos follows)
Its part of this tutorial:

I have set up to M204 P750.00 and M205 J0.06.
I get sharp edges and a little ringing at 67mm/s printspeed with this model.
I’ll try tomorrow  thanks for the hint
I created the test walls with this settings:
The results are the following:
Vertikal, no infill, just inner and outer wall:

Verikal with infill:

Horizontal, no infill:

At the moment I’m doing the accelleration and junction test.
Interesting to tell that i never used junction deviation before, but my acceleration is set to 750 mm/s while printing the boxes where I realised this problem.
Alright - I got some interesting results.
At first - did not use se settings recommended in this video.
I set cura to print only the surface, so it only prints the outer wall with 20 mm/s.
I made three prints
First print was with acceleration set to 250, and junction deviation set to 0.01.
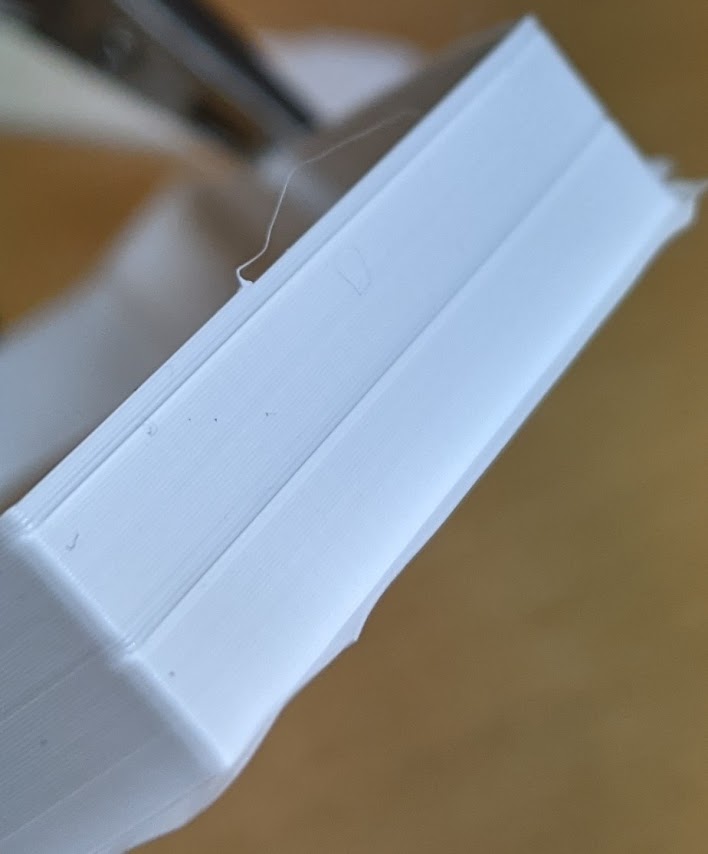
The first picture shows a vertical wall:

The first two segments seem okay, no visible line. The third segment has a line which I created by upping the speed to 200%.
The second picture shows the same wall with acceleration at 750 (my default) and junction deviation set to 0.06:
There also are no strong lines.
The third picture shows this wall again, third print - mostly the same parameters, but I changed a small detail that I’ll come to later.

It it seems to be more smooth.
No we come to the horizontal y wall:

Here we have some lines, at the center of the Y.
Now the second print, (acceleration 750, JD 0.06)

The Y looks much better, and the soft lines starting at the center of the Y are visible, too.
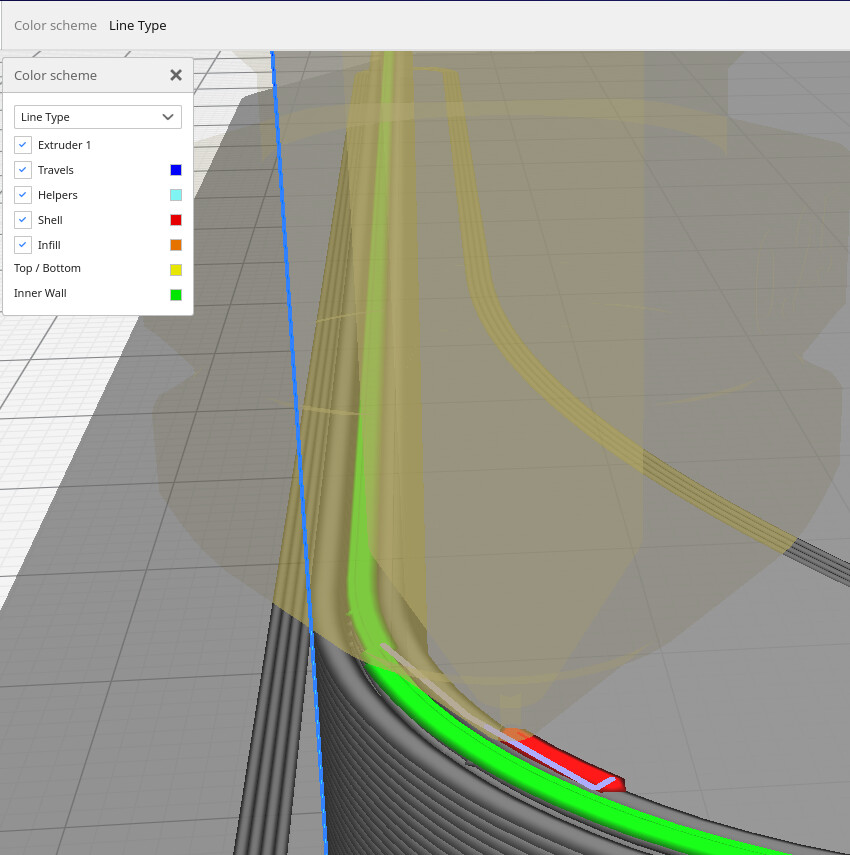
I took a look at the gcode preview:

The Z seams are lokated exatly there. So theres a layer change. The cura config corresponding to this says: Locate Z seam on the sharpest corner of the level.
So lets come to the third print again. I set the Z seam manually to 0/0 of the object:

The Y looks a lot better, and the soft lines are gone.
So now I need some help to interpretate this results. These are my suggestions:
This is more of a slicing than a machine problem
There should be no retraction at layer change, so it has to do with nozzle pressure. (I need to figure out how to validate that)
I’ll think I print the test walls again, but I’ll slice with s3d.
And at last:
Here I linked a video of the X wall. Do I have a problem with ringing/ghosting on 20 mm/s? It looks like the X is mirrored on the side. Or is this okay?
Thats it for today. Thank you!
Just a few more thoughts:
It also can have to do with speed changes in combination with flow - Maybe theres a setting to compensate for that.
Linear advance is the name of that setting
But I already did that twice - with same results. Value is set to 0.07
There is no other setting that relates changes in speed (acceleration) with flow.
I think you’re getting at the root. Just my opinion: Near the end of your long post you propose the issue may be slicer related rather than hardware. I’m not sure I share that conclusion based on this: if the starting point of the layer controls the issue, that sounds like it’s something tied to motion, which would be configured in the firmware. The start and end point may have a small ‘zit’ from a bit of ooze after a travel, but otherwise should not affect the thickness of an extrusion. Additionally, the Cura ‘sharpest corner’ detector is often wrong, does not work at all when there’s multiple sharp corners, and above all implies print quality is model orientation specific which is undesirable - the machine should be slicer independent as much as possible.
I do not see any ringing or ghosting, I don’t think your acceleration is too high. I also found JD to be invariant - .01, .10, all the same to my eyes.
I don’t think your linear advance looks wrong - the walls looks to be of consistent thickness, although a caliper on the far long uninterrupted wall would be a good check. If it’s different thickness in the middle vs each end lin adv could be very slightly off, likely less than +/-.01. 0.07 is also what mine is set to, I never went down into the thousandths, but perhaps 0.065 or 0.075 could be better. I believe I also have small lines like you have where the nozzle starts and stops in different locations, but the effect is small.
It may not be possible to fully eliminate for every print. Manually configuration a start location to be one corner has a positive effect on appearance for the rest of the print, but could have structural effects since there are no continuous extrusions around the corner.
Yeah - I think the problem is solved.
Yesterday I did a print with s3d and most of @brent113 's default settings (sorry, no picture) and the lines were still there, but not as strong as with cura, and there is no JD configured.
Today I did a little more research and made two more test prints with cura.
Number one shows my test wall with JD configured. It looks better than the prints a few posts before!

In the next print I disabled compensate wall overlaps - and tadaaaa…
If I am not wrong soft lines like this are within specification and not weird anymore. Isn’t it? I’m starting to develop printing insecuritys 

I’d agree with that. Looks good to me.
Than this issue is solved.
@Linui this could be interesting for you, too.
Recap:
Linear advance, Junction deviation, accelleration, flow and speed really made visible differences. But the real problem was created by the cura feature compensate wall overlaps.
I found a few articles that such problems can be caused by this feature - our printer is no ultimaker, so features for this printer doesn’t necessarily have to be suitable for the snapmaker.
It’s enabled by default, so deactivating it might be a good idea.
On the other side, if the compensation algorithm is good for snapmaker, too, it could be possible that I still have a flow issue. But this is influenced by material, nozzle, line width, e-steps and so on 
So, the possibilitys are endless.
Just keep in mind that a feature like this exists in the cura configuration.
Thanks at all!
