I am new to 3d printing and I spent the past month printing with my A350 and twicking the settings, trying to learn how everything works.
I calibrated the E-steps, changed the K-factor (I hope correctly both of them) and many more, but I’m still getting the issue you can see in the picture.
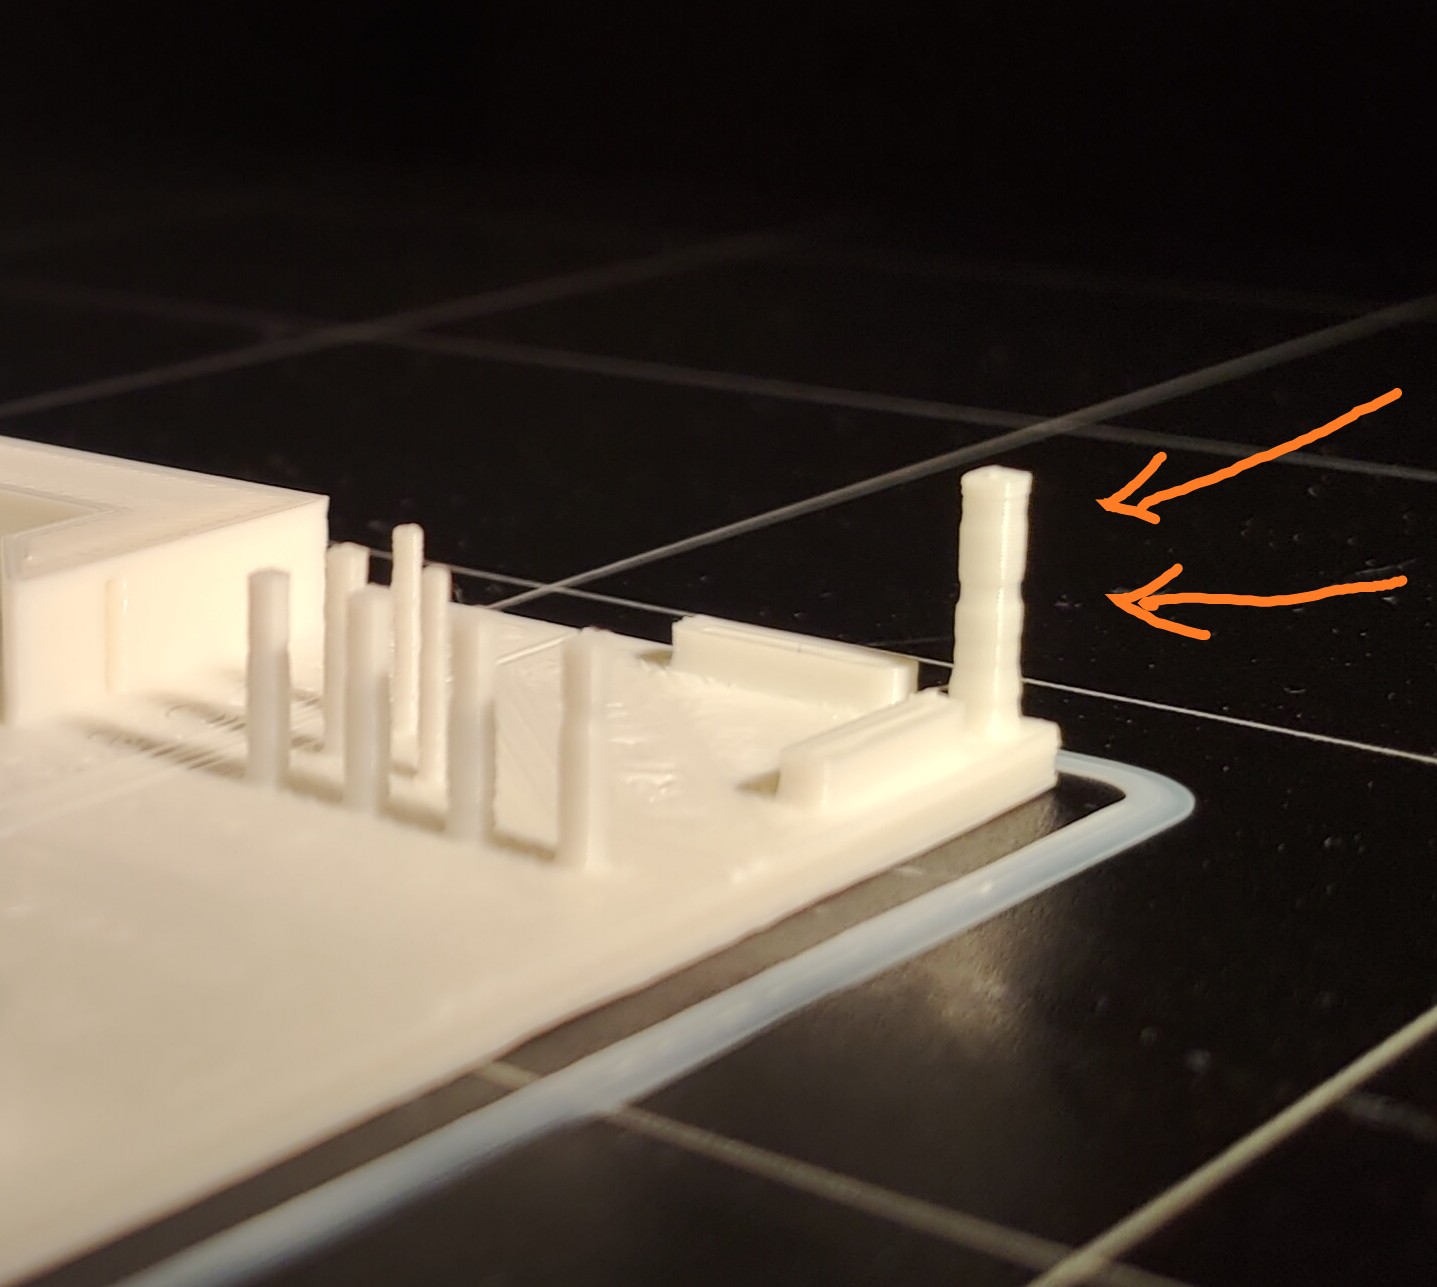
Lines… Lines on different layers. They seem to be created depending on the amount of things printed in each layer. If the layer is somehow “full”, meaning more things were printed on that layer, the lines are bulging. If from a fuller layer it changes to a layer with fewer things to print, it creates an indentation.
Potentially using filament with inconsistent diameter? Potentially the filament is a bit wet?
kfactor - did you actually preform tests to decide the kfactor or did you assign a value you read on the forum?
theres a test where it prints out lines and numbers next to it, and then you choose the best one, then choose up and down some the next decimal point over, until you are at a relateively precise number
also does your Z axis seem smoothe? if it doesnt move smoothly maybe its smooshing a bit which could be an installation issue or an issue with your linear modules perhaps
try to measure your filament diameter in several places, meters apart, to see if its close or very different
there is some garbage filament out there, including some of the crap that came with the machines.
it could even possibly be a partially clogged nozzle perhaps.
I did tests before changing the values, but this issue was both before and after the changes.
Z axis looks smooth to me, as no weird movement or sounds are existing.
Also when I print something that one layer to next has small difference, I do not seem to get these lines.
I will try to dry the filament for now and clean the nozzle, and if I still see the lines I will try to re-measure and recalculate everything, in case I missed something there!
Made some cold pulls and then tried printing with a different filament and it seems that the lines are much smoother. Not completely gone, but this filament was also opened, but newer and different brand.
I cannot try to dry any filament for now as my oven cannot go low enough, but at least I know that the cause was not my settings
I swear every filament I open has a little mositure in it. it causes any number of weird things to happen such as rough texture, bad adhesion, stringing, inconsistent extrusion
I purchased a food dehydrator from amazon and 3d printed an extension ring to put my filaments into.
If youd like more information I can share the links. Probably cost you about 30 bucks and a 6-8 hour print.
Also consider investing in an air tight container and one of those plug in rechargble dessicants
I can share links on what I use there as well.
I’ve also found that having spare mk8 nozzles on hand is just mandatory, some filaments are junk and clog up your nozzle, and many of the above symptoms can also apply to that very problem too.
I’m starting to just buy good brand filaments, but even they are damp and inconsistent in diameter sometimes too!
I have not successfuly done a cold pull before, tried it with some petg and pla i had and failed both times, then i ordered nylon just to do that, and wouldnt you know it the nylon was wet and brittle too.
@MooseJuice I start to realize the same thing about the moisture.
If you could share the links you mentioned or just some extra details of the things you used, they are welcome, as I can see that more people could benefit from it!
As for the cold pull… Yes I have only PLAs for now… I broke the filament twice while pulling, but managed to pull it 2-3 more times kinda successfully I hope. But as you said, it doesn’t hurt to have some nozzles handy.
If you dont have a model that will fit an object that big, no worries, search around on thingiverse, there are some variants with multiple pieces
Note: it would seem that the dehydrator has gone up in price, they likely cought on that it is useful in the 3d printing world. even still 50 dollars to fix unlimited spools for very little energy consumption is worth it.
I changed nozzle, filament, recalculated my E steps and the K factor, but I still get the same effect when the amount of things printed per layer changes. Check following pic:
In this pic it is more clear, as the part is going from thinner, to larger and then thin again, depending if there is something to print on the left side or not. In between of the changes, the layer is smooth.
I know you said you calibrated it earlier but it sounds like filament has changed and some other things have changed it wouldn’t hurt to do a verification.
I noticed sensitivity down to the hundredths for the k factor, requiring about six test prints to really zoom in on and confirm. Don’t just try 0.1, 0.2, 0.3 etc. Eventually you need to be doing 0.07, 0.08, 0.09 etc
^ in my experience. Several other people have noted their machines do not have such sensitivity to linear advance so your mileage may vary
The reason why I mention it is the line is at a transition between a long feature and a short feature and speed differences in such cases can contribute issues as the tool accelerates and decelerates. Linear advance miscalibration will show up in such cases. That does not mean that’s the only possible cause, however.
I had some things to deal with earlier today, but now I am working on this…
E-step value was really close to my previous calculation (242.52 is the current value), but for some reason, even though last time I calculated this, I stored the value and restarted the machine and checked that the value was properly stored, it was now back to the original value.
Now I am checking the k-factor again.
After this, I will print the same piece I uploaded yesterday, with same gcode, to see the difference! I hope this will be it!!
i would like to see the settings your using, it could be something in your wall or infill settings. are you using cura or S3D? i know everyone is looking at K factor but in my mind at least if it was K factor i would expect the inconsistencies to happen based on start and stop points or turn degree more than how much you are printing on the layer. seems more likely that it is something like the number of walls, or density of infill causing your outer layers to have no where to go but out. it could also be a temp issue, does it seem like your hot end is holding a steady temp, or do you get several degree swings?
I agree with that, my thought process was just quickly verify the machine parameters are acceptable before moving on to slicer tweaks. I don’t think linear advance alone explains all of this, especially some of the lines higher up. But the ones high up seems smaller than lower maybe?