Hi, fairly new to the 3D printing side of the Artisan but this is the 1st fail after using without issues.
I chose default settings of precise and strong as it will be a bracket used often.
Any advise appreciated.

Hi, wish you start enjoying it soon.
Could be various issues.
Bed adhesion primary suspect. Did the print get loose in the middle of the print? You might not know post mortem but you can double check bed levelling and perhaps decrease z height a bit and increase bed temp to 70 if you’re printing with PLA. 95 if ABS.
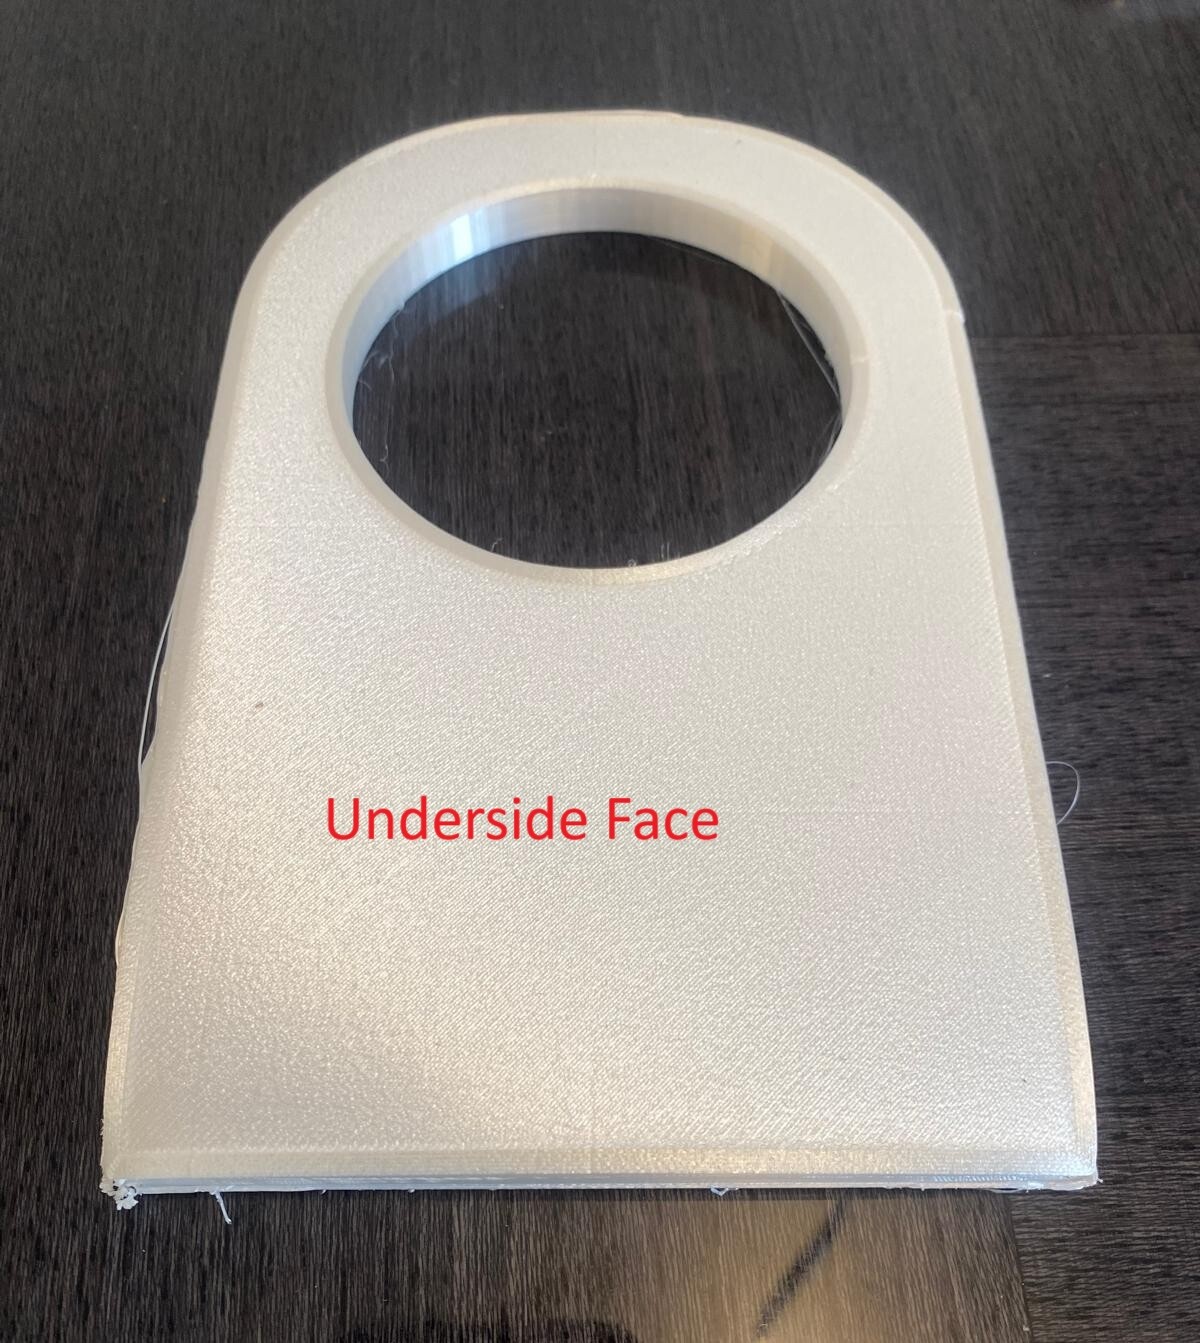
Post a photo of the underside of the print plz
Looks like the stl needs to be repaired? (Exclamation mark in front of model)
Thank you ! Now repaired and will try again


Warping. Increase the bed temp or add a brim.
Also good to heat up the interior in enclosure. And keep door closed.
It’s now clear for me, was the model loose on the build plate?
Exactly.
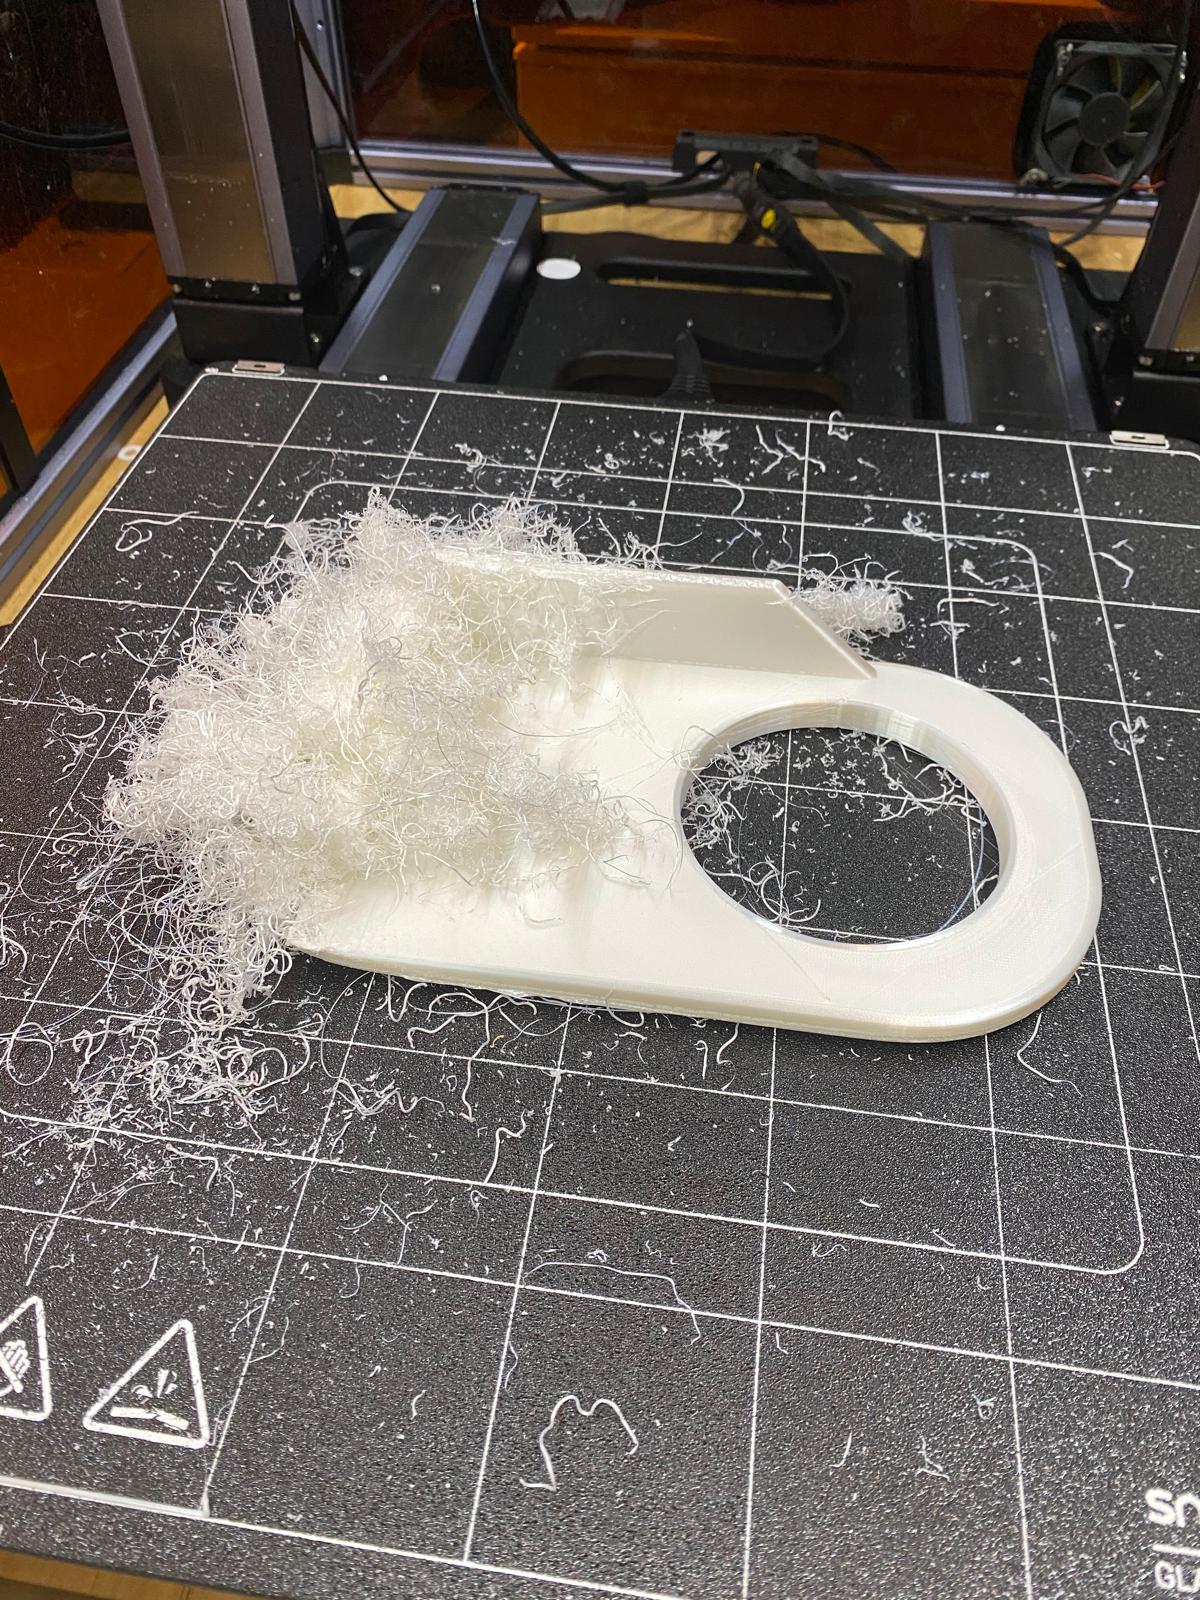
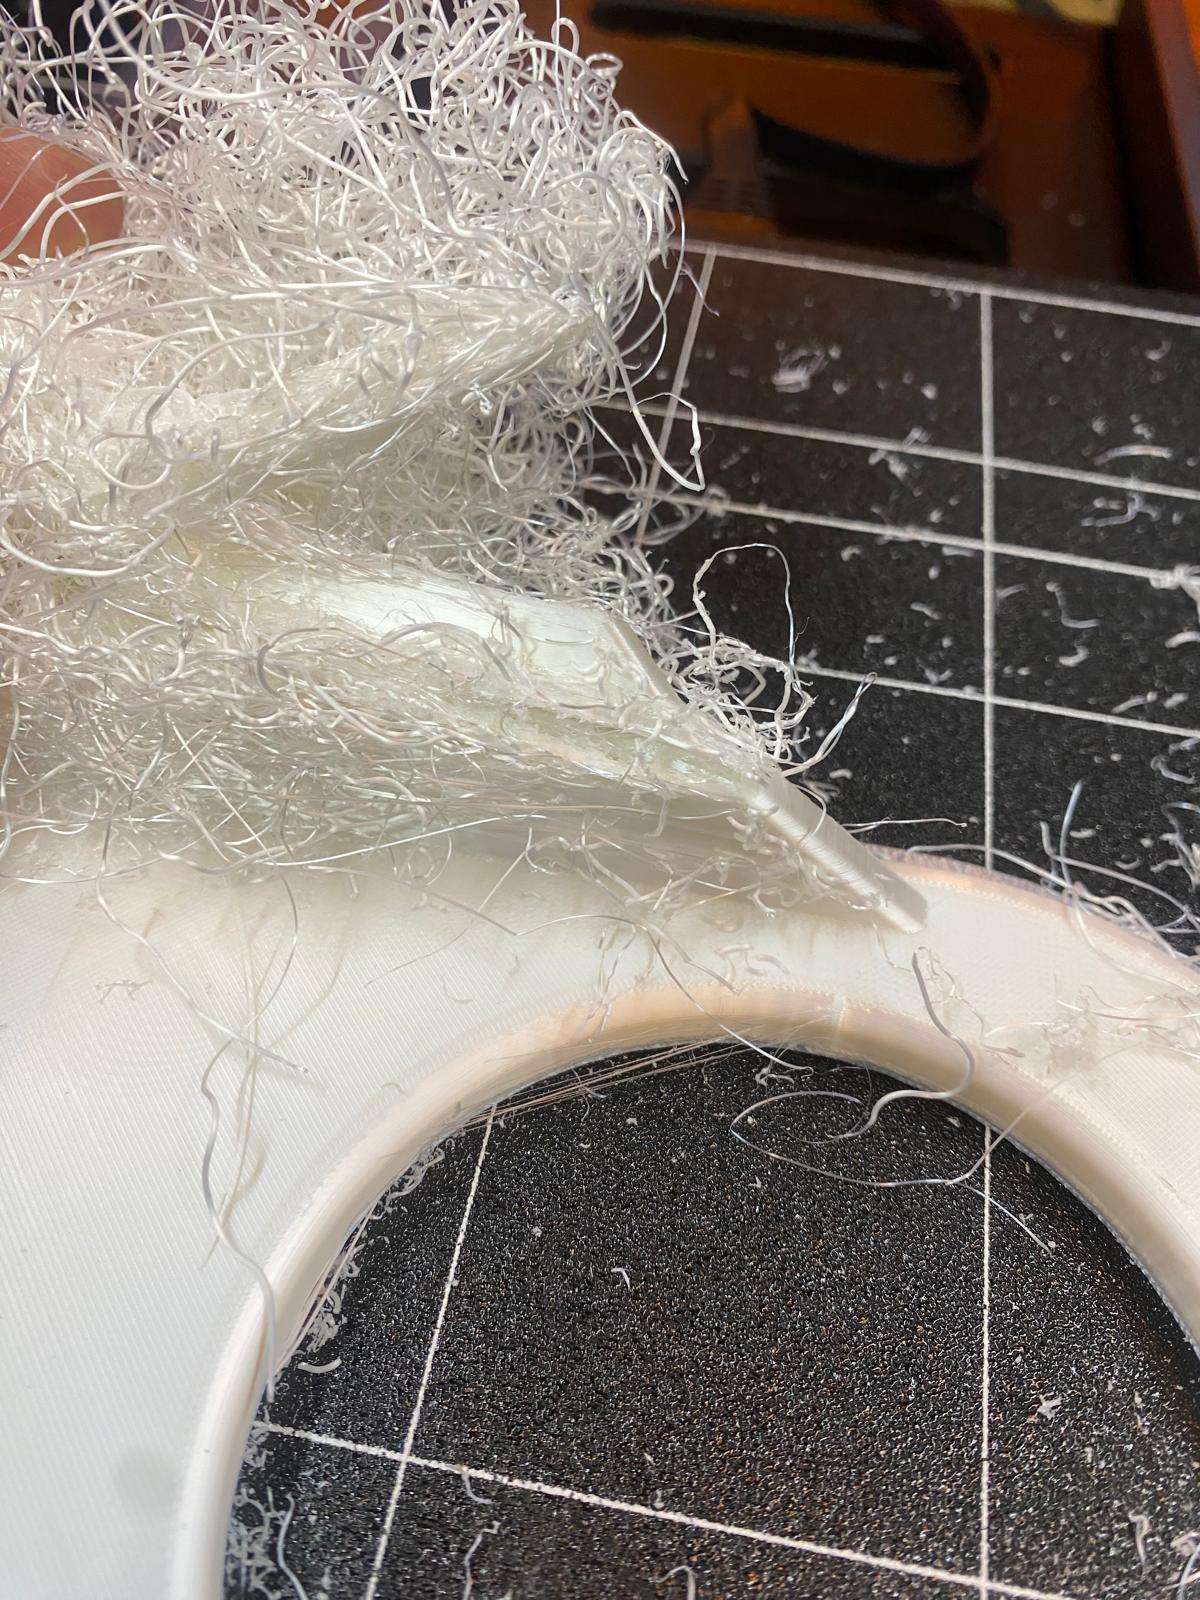
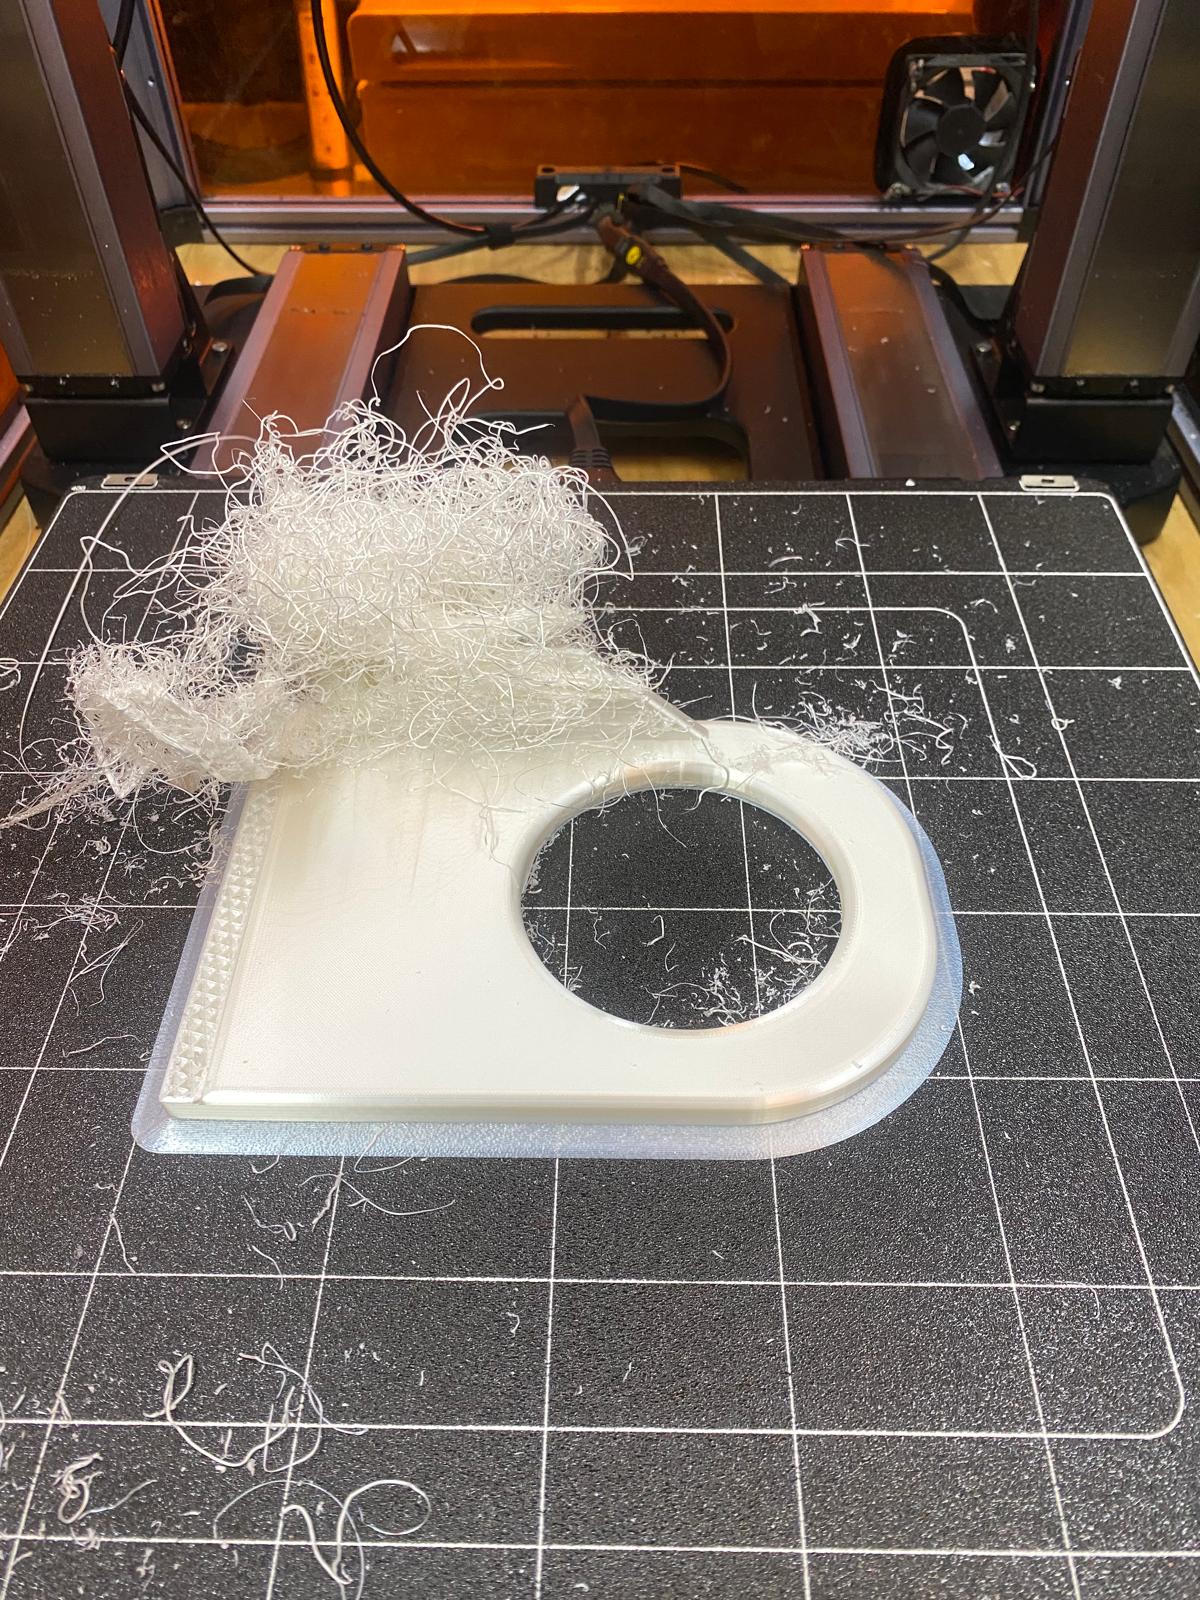
The print didn’t stick to the print bed and got dislodged then the print head started printing in the air producing the spaghetti of filament in the picture.
Look up (print bed adhesion) and (how to prevent print warping). Multiple solutions. Most importantly to calibrate z offset of the nozzle, clean print bed well, increase its temperature at least to the required for the material you’re printing with or 5 degrees above it, slow the first layer and appropriate first layer height such as 0.2mm for a 0.4 mm nozzle.
Additional things include adding glue to the print bed, adding breakable “feet” to the underside of the object that can be done automatically by some slicers or adding a thick brim as adhesion method.
Good luck
The model was not loose on the build plate, I did have to prise it away with my scraper tool
Still, warping is clearly there - the advice of the others is sound here - use a brim and raise temp’s. Btw.: What kind of Filament are you using? From the optics I’d guess on ABS, but that may be misleading. ABS is very prone to warping and needs special attention also to print cooling (no first hand experience, just reading what others say).
Even if the model didn’t become loose, warping changes the print dimensions and its location so when the nozzle looks for the previous layer to print over it it doesn’t find it so it prints on air.
What’s the material you printed with?
Filament used was PLA
Ok then the tips below should work.
Best of luck. Keep us posted.
Will do, thanks so much for all the advice.
I had the same problem. I smeared the table with the glue that was in the kit and the problem disappeared. This glue is also available in the Snapmaker store, and I had it in the kit with the printer. It is liquid and better than glue sticks for paper.
Thanks for that, I was never aware of using glue to help (my Snapmaker did not include any) . Does it affect the final appearance of the printed model in any way?
Unfortunately yes it does.
You can look for adhesive disposable print bed stickers. Used to be available

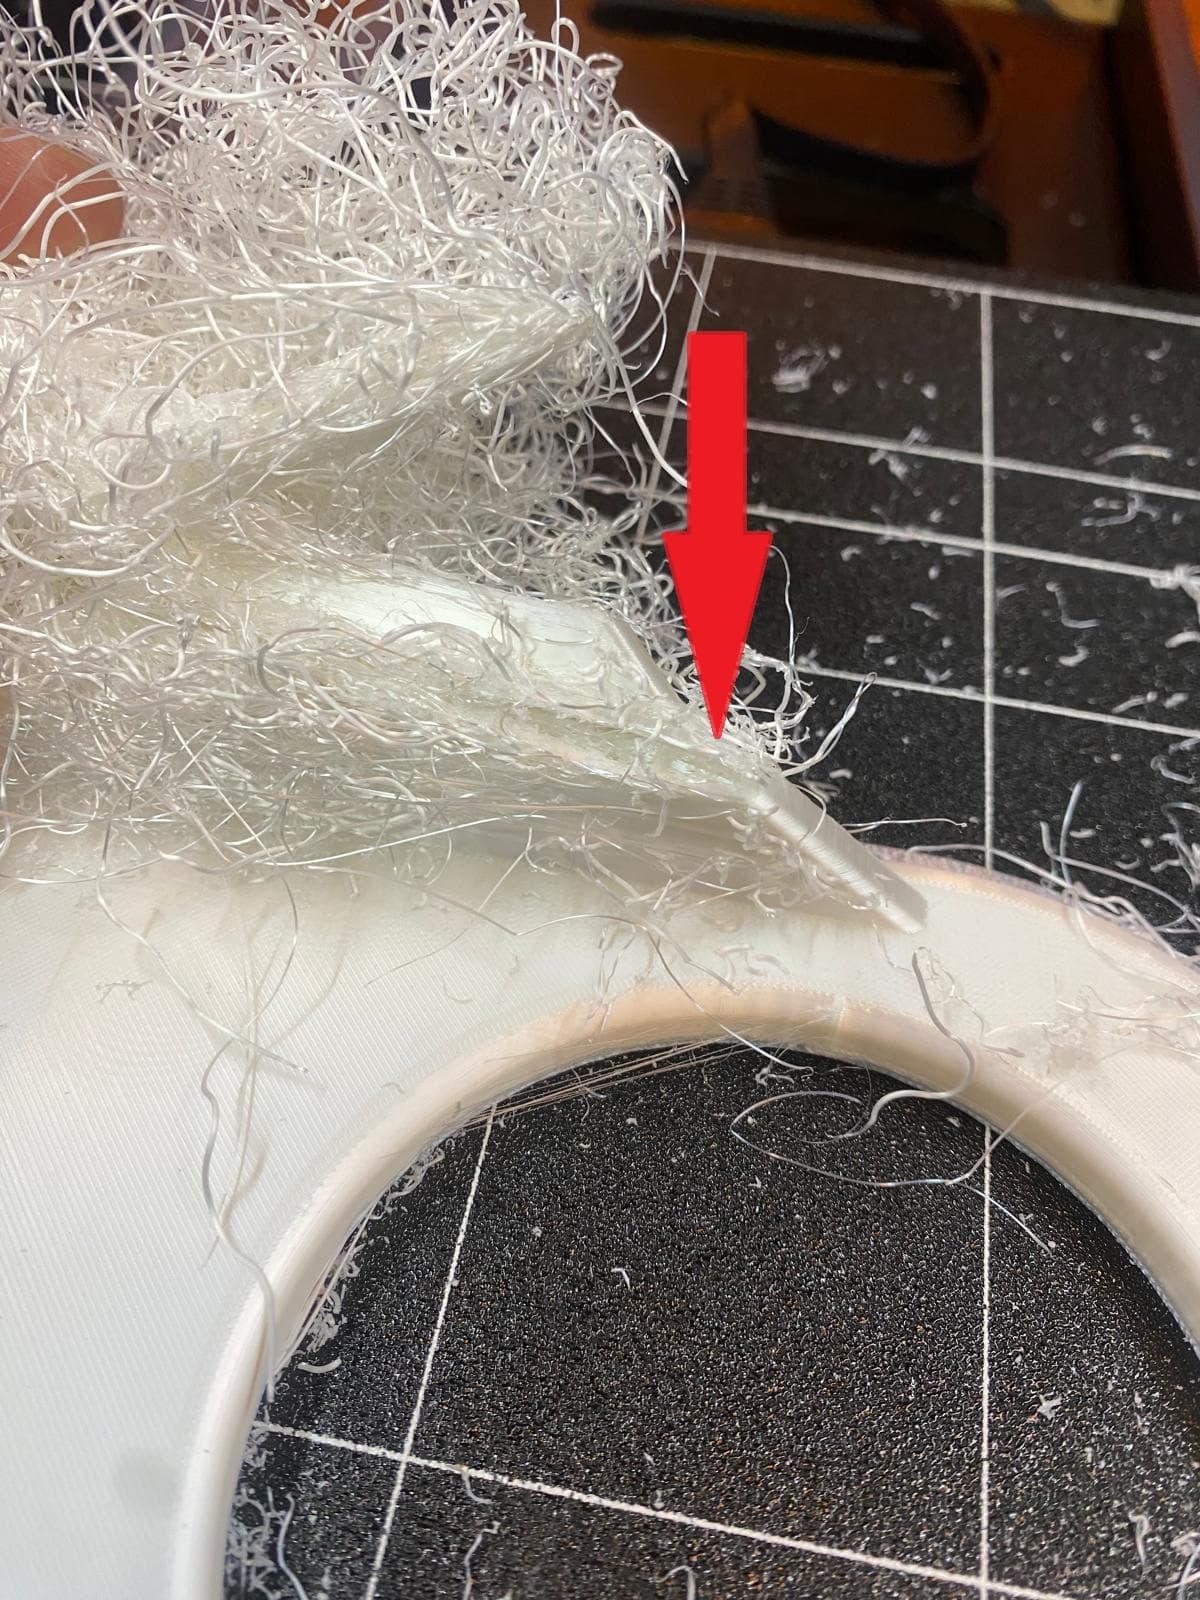
What happened to the diagonal wall at the front? On your sketch there should be a wall at the front and back. On the print I can only see a smooth top layer.
How well does the rear wall adhere to the base plate? Is it easy to tear off?
I stopped the print mid way after seeing this. There was no rear wall built at all. The diagonal back wall snapped quite easily at the red arrow. I think i’m jumping the gun and not compiling the model properly in Fusion (the STEP file attached is made of individual bodies) and then imported into Luban as a STL file
Bracket .. 2 v1.step (129.5 KB)