I was just going to say the same as @sdj544. The photo of the top layer looks like the filament is MUCH too hot, causing it to collapse and ooze a lot. Most PLA is in the 190-200c range. I would first start by dehydrating the filament just to be sure there is no moisture in it. You can put it in your household oven at 135F for about 1hr and that should do it. Then I would try a print using all default settings and see how that comes out.
Can you share what your other slicer settings are? Specifically…
Layer Height
Print Speed
Bed Temp
And yes, more photos of the rest of the failed print for comparison would be helpful.
I don’t think your first layer is good either. There are some spots on the right that I can see through.
Too me, it looks both too hot and under extruded. And it looks consistently under extruded. In the upper left and lower right you can see through the top layer to lower layers, and the line width is fairly consistent in both layers.
At 6% it might be too early to tell, but I am suspecting it’s still doing this thing where it just adds a random blob of PLA instead of printing in a continuous pattern…
Could be some underextrusion going on because of a partially blocked nozzle…
Or maybe not…
You could try:
Clearing the nozzle with an acupuncture needle.
Try a few cold pulls.
Investigate blockage in the feeder mechanism…
Change the nozzle completely.
Is the material sticking to the buildplate ok? Maybe you need to lower the layer height…
Make sure that its not a bad buildplate by using masking tape on it and see if quality increases…
If you have another roll of material, try changing if you haven’t done hat already…
Happy 3dprinting!
I would say that looks terrible. It’s definitely not right. I wouldn’t waste 4 days on a big print when that is what you are already getting.
Yes, it is possible to reset both the machine and Luban. (And you can actually attach multiple photos to a post…)
In Luban Workspace, connect to your machine, go to Macros on the right side, and hit the play button on this “M502&M500” command. That will reset the machine’s firmware. It will also erase your bed level calibration, so you will need to do that again.
To reset print and material settings in Luban, go to the 3D Print slicing page, mouse over the setting you want to reset and a “3-dot” bubble will appear, click on it and it should show “Reset.” The reset option will only appear if the settings have actually been changed from default. It is the same process for resetting the material settings
I’ll give this a try and see what happens afterwards, of course I understand I have to do all the calibrations again (that’s to be expected when you reset everything).
Sadly I lost a whole days of work yesterday trying to figure this thing out, so I am a bit behind today, so I won’t have time to look at it today, but I will have another go at it either this weekend or monday.
So after searching around like an idiot over the weekend, I found that a common problem on a lot of 3D printers (not just Snapmaker) is that the extruder and linear advance often are completely FUBAR in their calibrated parameters from the factory.
One of you did suggest recalibrating the extruder (so credit where credit is due for that)
However I didn’t really find any clear guides as in “how to” recalibrate the parameters for these.
So I will include the links to the guides I found helpful:
Here’s a link to write up guides that are straightforward and clearly written:
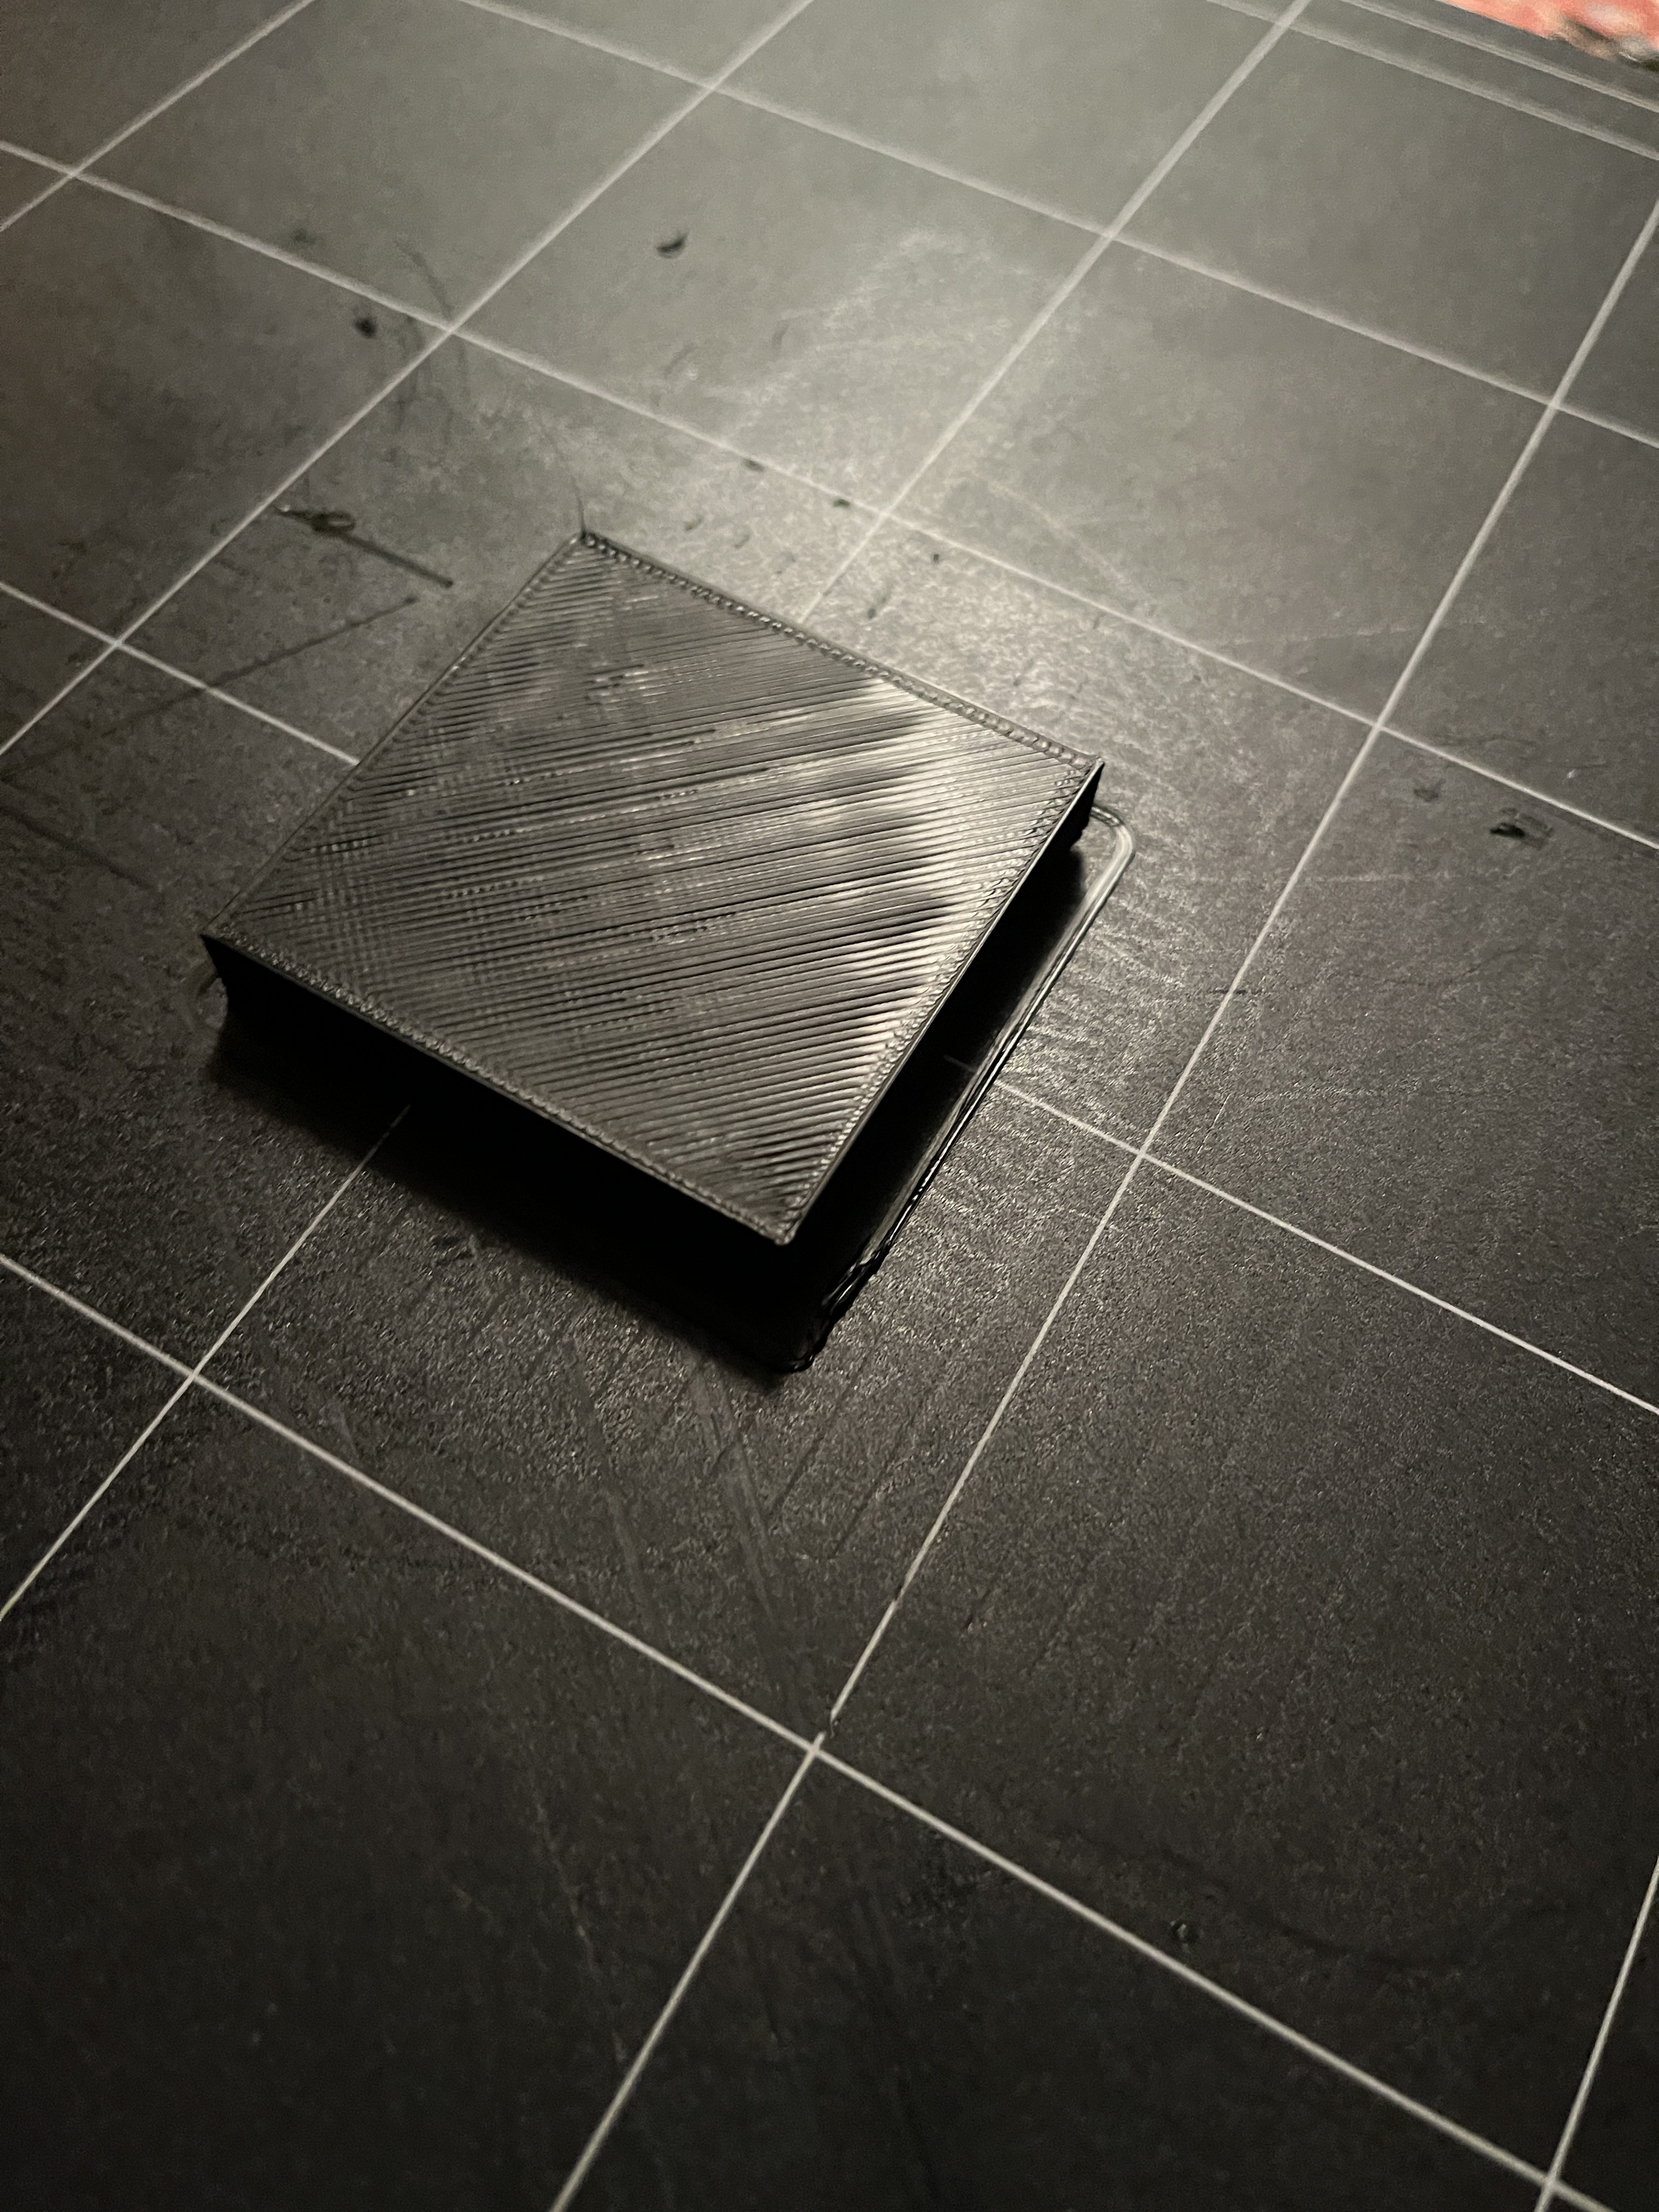
Lastly I will include a picture of a 5x5 cm test print I did, so you can see the results after the calibration, note this was printed of the “fast print” setting in Lurban: