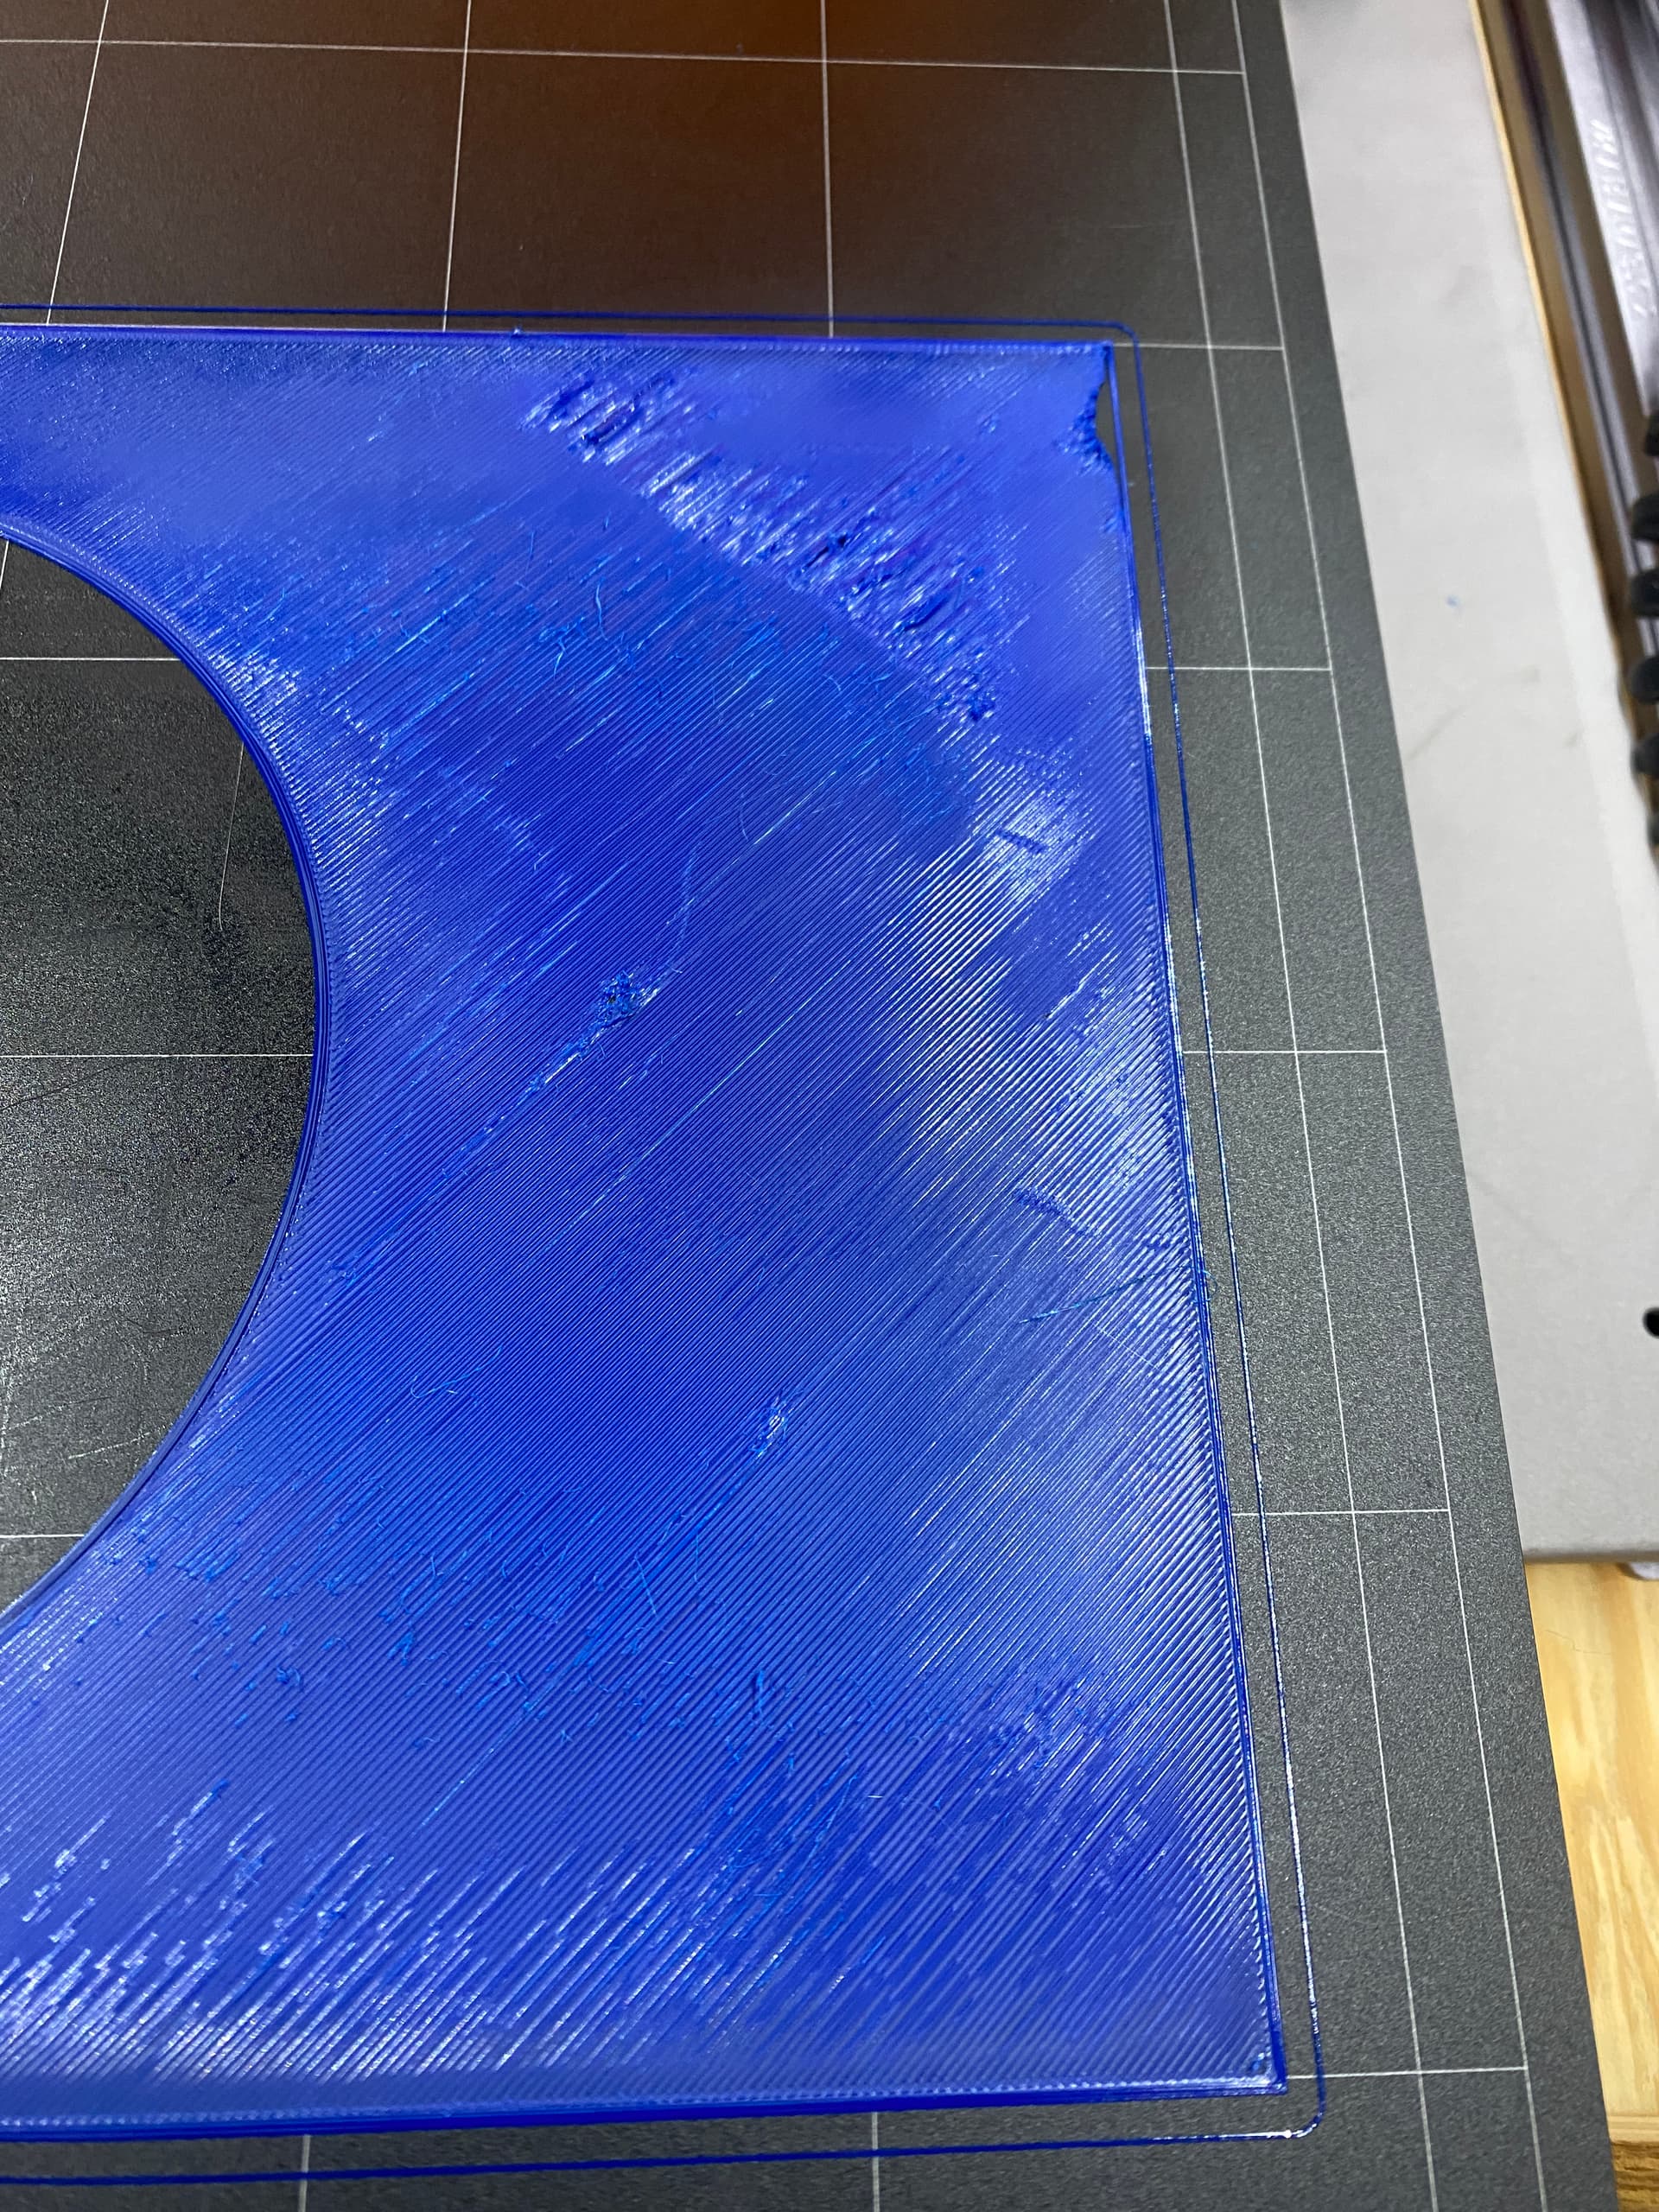
I have been trying to print with PETG on my A350. I have a print that is large in surface area, ~ 200 x 290 mm. Initially the failures were spaghetti balls, starting in first or second layer. I re-leveled and re-calibrated z height, and this last time it was going well until .. it wasn’t. See picture - the nozzle actually pushed the build plate (I’m using standard OEM Snapmaker build plate). I really thought it was going well until I took a closer look and realized what was happening. Maybe of note: Everything I’ve read says PETG wants to stick to the bed. My failed prints have all come up easily. FWIW - I have printed prints of similar xy dimension in both PLA and TPU with no issue. Given the way the layers are misalligned (see photo), to me it seems the bed is getting a one-time push at the end or start of the layer (i.e., edges of the misaligned layers and support structure features are straight).
Some details on my print and tool:
Snampaker A350.
I have the Snapmaker enclosure, and ran with enclosure fan off.
Bed temperature 70C
Fan speed 30%
Printing temperature 235C
Print speed 50mm/s
Layer height 0.16 mm
Help/suggestions appreciated, both on the build plate being pushed, and PETG in general.
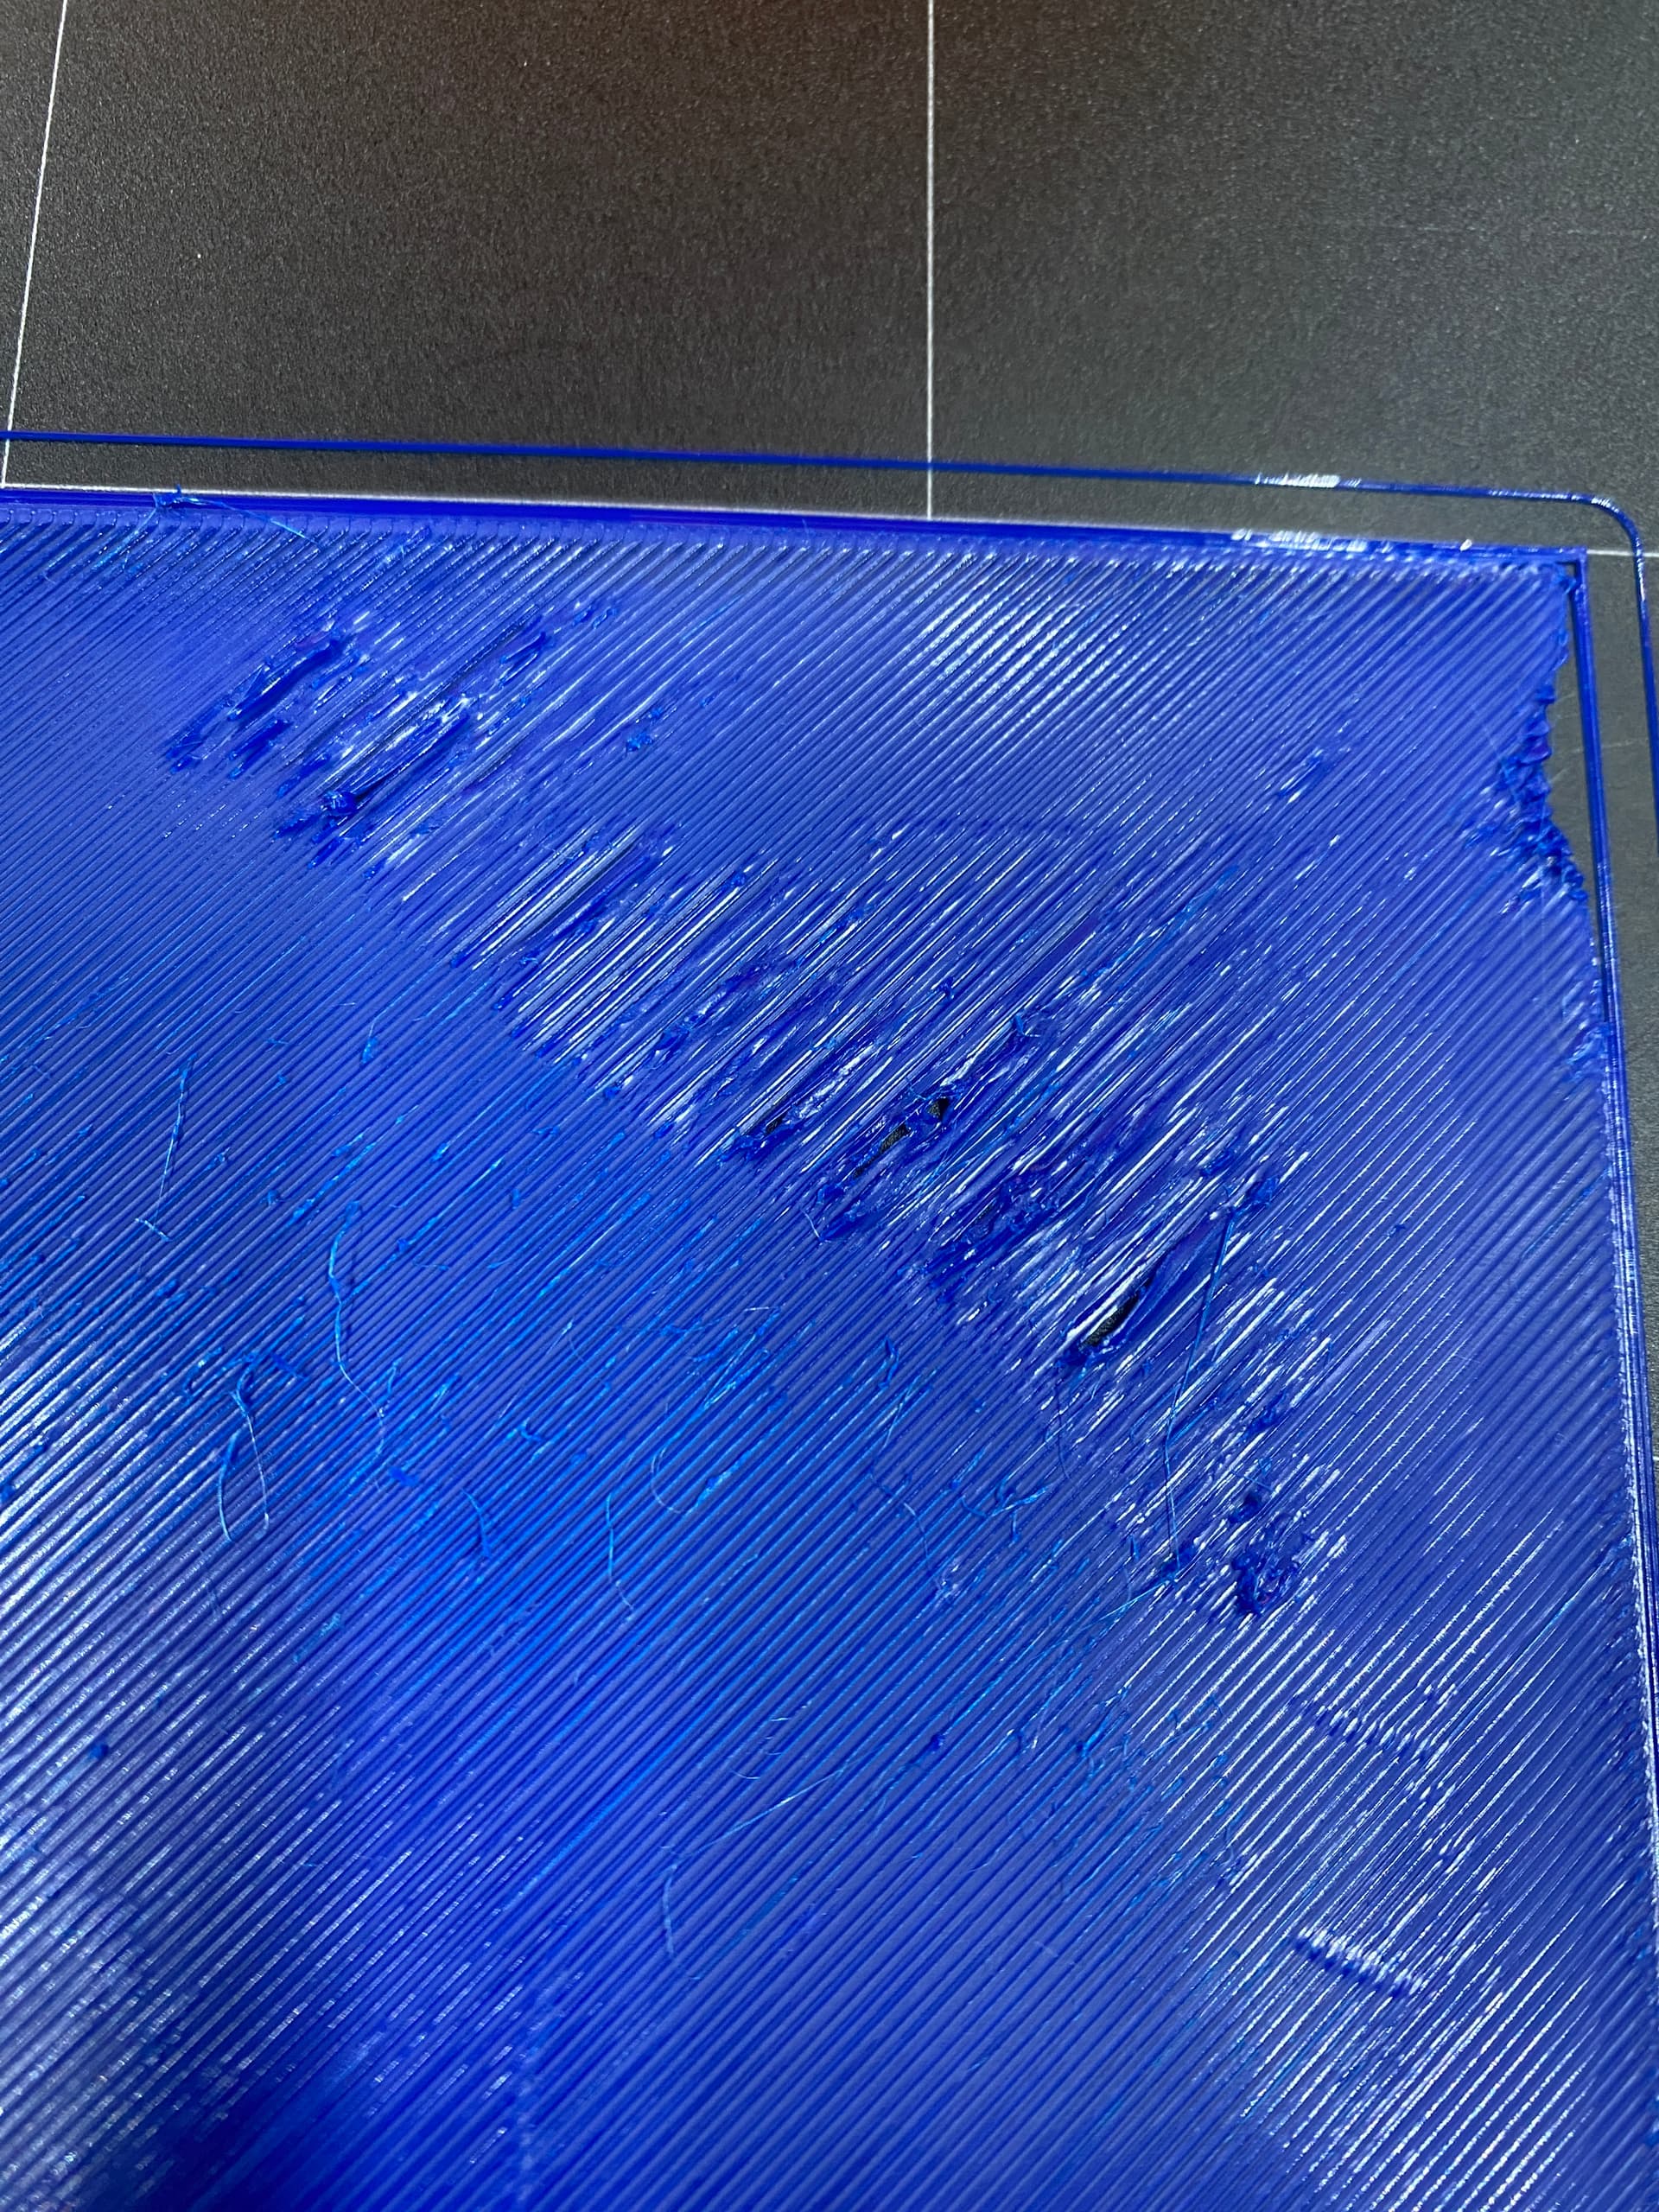
Update: I decided maybe I had the z-height calibration to aggressive (low), so I re-did that, and started the print again. Part way through the first layer it is failing (see picture). It is ok over most of the print, but then in this one area is .. ugly.
I thought maybe it could be bed leveling so I did a manual G1029 bed level with the build plate and nozzle at temperature, and did a 5x5 grid. Re-running the print now but not to hopeful.
You see two issues here I suppose: A) an uneven print bed (many suffer from that) - solution: Pick the tightest bed leveling pattern you can or even go to 11x11 via GCode. More on that here: Bed Leveling - Revisited & Detailed
B) PETG has a tendency to warp, and that may cause the nozzle to catch a warped part of the print and dislodge the print sheet. My solution was this: Magnetic print sheet fixation - #10 by Hauke
Thanks, I’ll go to the 11x11, and maybe do some manual checking w/ a dial indicator to see just how bad the bed level is. And thanks for that thread on bed leveling.
But when doing the manual bed leveling, I am confused on what to do after the bed leveling grid measurement completes. Below was the sequence I used, I put my question in sequence as a comment.
M140 S70 ; heat bed to 70 °C
M104 S240 ; heat nozzle to 240 °C
M190 S75 ; wait for bed
M109 S240 ; wait for nozzle
G1029 P5 ; 5x5 grid for bed leveling (I will increase to 11x11)
G1029 A ; run 5x5 calibration
; After the calibration is complete, the print head is returned to the center waiting (I presume)
; for a z-height calibration. I don’t know how to proceed at this point - how do you complete
; this step using gcode or the Luban workspace console?
; I just decided that the previous z-height calibraiton done using the hand remote was good,
; so I just entered
G1029 S ; Save the calibration data to ROM, which includes the old z-height position.
When the nozzle is waiting centered, you just use the Jog screen on the tochscreen controller and lower the nozzle to touch the calibration card. The save - done!
But I’m running the calibration from the console, using gcode. Can I still access the touchscreen while I’m connected to my computer and Luban? I didn’t think so. I’ll check.
Update and OMG. I fabed a bracket to attach a dial indicator to measure bed leveling, and it is BAD. I have about 1.5mm runout, front to back at center of the bed. Side to side is approaching 1mm. I am digging into it, but that would seem to be a smoking gun.