I backed the original 2.0 A350 kickstarter, and have had many successful prints. Fully an amateur as outside of calibration and very minor tweaking, I’m mostly just download & print. One of the Y-axis pillars broke in the beginning of the year, so got a replacement, and ordered the dual extrusion module in Apr of this year. Life got in the way, and I finally re-assembled new Y-axis pillar along with dual extruder & quick-snap kit two weeks ago.
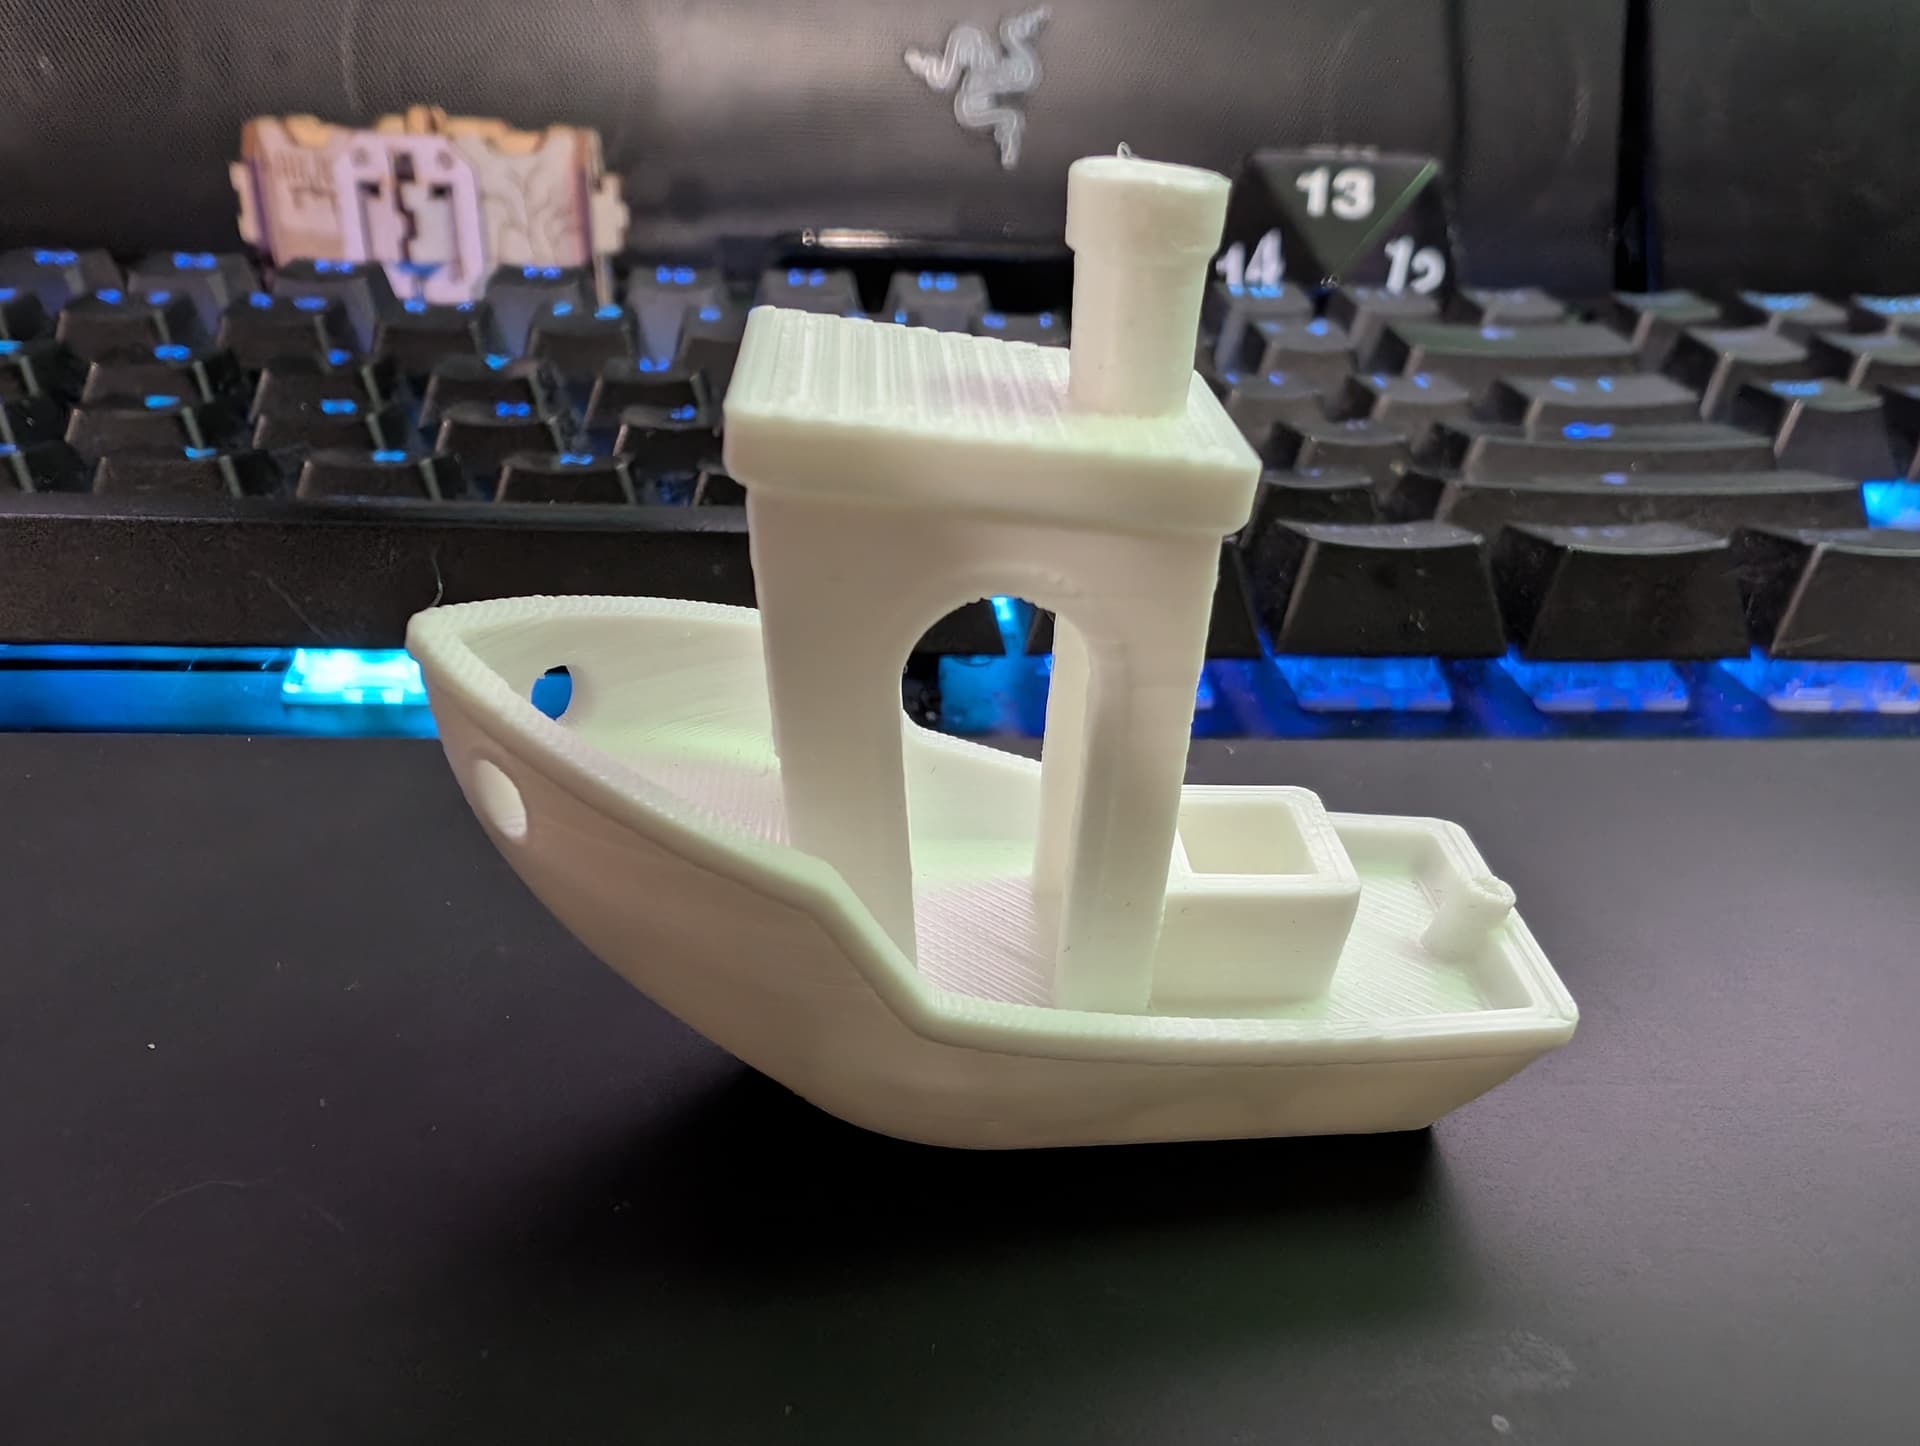
I’ve gone through calibration of both nozzles, and individually, they both print fine. Benchy comes out fine when printed from either left or right nozzle.
however when trying to print dual version of Benchy, I get the following. First is sliced with Snapmaker Luban, second was with Snapmaker Orca to see if that would make a difference.
I stopped the second as it was obviously not gonna come out right.
What’s my next direction in order to get dual-extrusion working correctly?
*note - all of the pictures were printed using Polymaker PLA Pro, kept in a drying enclosure.
Hmmm - difficult to say if you have stringing or oozing. It looks more like oozing, so here’s what to check if I’m right:
Do you use a prime tower? If not: Do!
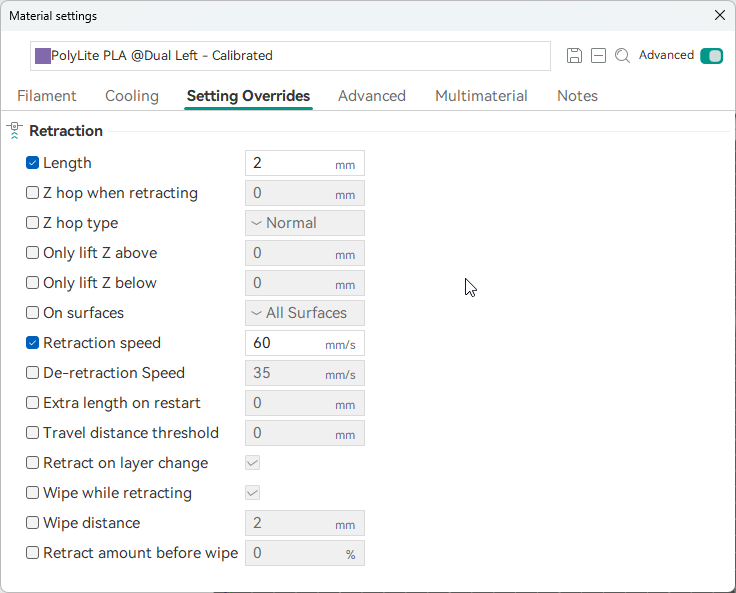
What are your retraction settings? Try to increase retraction on nozzle change, unless you already have double-digit values.
Lower the standby temperature for the inactive nozzle.
Oozing means that while Nozzle A is printing, a bit of material creeps out of the inactive nozzle B, which then is deposited on the print at the next color change position. When you observe the print process, you should see that. Retracting more and/or lowering standby temperature can reduce or eliminate this oozing. The prime tower will also help, as it is the position for the color change, so the oozed material will be deposited there. Also, the prime tower ensures that the nozzle pressure is good, avoiding underextrusion due to the lost material.
yes, prime tower was used as part of the print (added automatically)
Retraction settings below (both Luban & Orca)
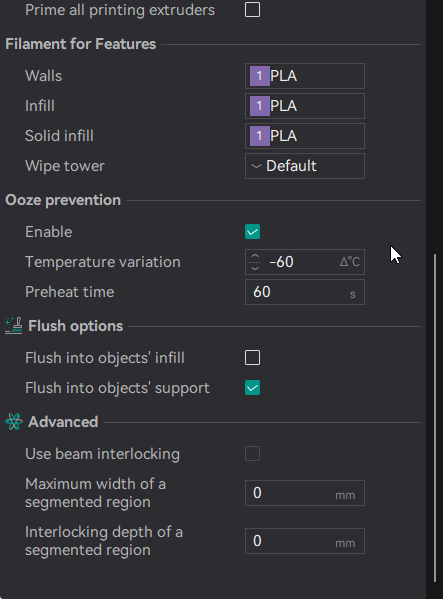
screenshot added of Multimaterial Ooze prevention in Orca. I think this means that the other nozzle will be 60 degrees lower than active nozzle? in which case, I would think that’s okay to prevent oozing? but by all means tell me if I’m wrong.
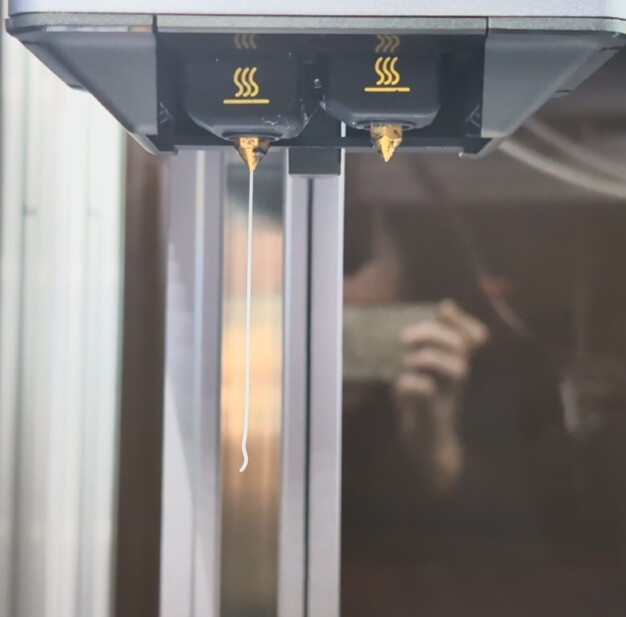
another thing I’ve noticed which may be related is that the left nozzle when heating oozes quite a lot when it’s not doing anything, even when doing a print that only uses left nozzle, as in a full 8-10” of material just dangling. I noticed that the extruder does do an “initiall pass” on the front of the bed to seemingly account for this, but the previous single extruder didn’t have any type of oozing issues. Could this be a contributing factor?
so I just tried heating up the left nozzle up to 190, and within a few seconds, it started oozing out. See pic after about a minute. I just googled Ooze Shield, is this a feature of a particular slicer that can add it to a print? I will test the different toolchange-retraction-speeds tomorrow.
So I have two spools of Polymaker PLA Pro, only difference is color (white/black), but for the sake of diagnostics, I will swap them tomorrow to see if it makes a difference with the oozing.
One thing I just ran into is that when setting the Right Nozzle Temp with Luban, it applies the temperature to the Left Nozzle Temp. There doesn’t appear to be a way to manually set the right nozzle temp through the app. Is this a known bug?
The oozing out after one minute does not look unusual to me with 190°C temperature.
2 mm retraction length is not much, as others said: Increase, up to a max of ~15 mm - beyond that you risk clogs due to molten filament getting back into the cold zone. Perhaps start with 6-8 mm or so. The Luban setting is already 16mm, which is a lot. You had the oozing with this setting also?
Standby-Temp: I only see the Luban setting with 150°C - perhaps go for 130°C or so.
Would support what others said: See if the same filament oozes differently from the other nozzle. It may indicate nozzle wear - did you ever print abrasive filaments like glow-in-the-dark or carbon-filled? If you look at the nozzles from both hotends: Does their aperture look visibly different?
sorry, I meant disassemble the feed tubes and do just that. cut two lengths of same material.
In this case, did just that, loaded into both with temp at 190, setting on the A350 directly. After loading, let it sit at 190 for 15 minutes, no oozing. Stepped it up in 1 degree increments w/ 5 minute intervals up to 200, still no oozing. I’m at a loss.
setting retraction within Orca to 3mm did make a difference. Not as clean as I’d like, but definitely better. I will try with a higher retraction settings after this weekend.
following up on this because I appreciate all the help. Been trying multiple things but so far nothing is working and it seems like I’m making things work, so I want to get back to basics first.
I’ve done all calibrations on the A350 itself via touchscreen.
I’ve done the Extruder Calibration (difference was only 3mm)
This is a simple single filament print I tried, canceling after the first layer. Even the first layer shows inconsistent extrusion, some partial, some sort of partial, and others that look like it wasn’t even flattening at all. What should my next diagnostics step be to get consistency?
I let it sit for 10m. I will try again but wait 30m per your suggestion. Support is actually sending me a replacement proximity) proximity switch, so it may be hardware related.
Can you expand on “lowering the live z offset”? Be glad to try that and see what happens.
Tonight I’m going to swap it for the original single extruder and see if there’s any difference. Some online research shows that I can run the 11x11 grid with the single extruder, so I’ll try the built in 6x6 first, do the same simple pass, then try an 11x11 and do another pass. See if it’s just my bed that’s the problem. I did verify all screws are secure, and my level says it’s level (within visual tolerance that is).