I am owner of a A350T and was early to preorder Dual Extruder, i suppose i got one of the first batch.
In general, it worked until a few days ago. Now however, I cannot get auto leveling to work at all. The problem manifests as follows:
I swap tool head to Dual Extruder (of course, using correct screw holes), Heated bed.
Turn on Snapmaker
I start Auto Leveling, Snapmaker moves to home position
The toolhead moves to Front left position and descends fast until like ~1cm above the bed.
Then (as it should) it descends more slowly
However, it will not stop descending, and crashes the left nozzle into the bed (and beyond, it actually pushes down the bed significantly - i use my emergency stop button to avoid more damage)
Here is what i tried so far:
Firmware update (on 3rd Nov if I am not mistaken)
Auto leveling with / without heated bed, 4x4, 5x5, 6x6 (all failing like above)
Z-Offset calibration (also works, and does NOT crash into the bed)
Manual bed leveling (works, but its a lot of effort)
I am not sure how to proceed to get auto leveling to work again, kindly advise.
i cannot find any indication of a LED and also don’t (yet) dare to open my Dual Extruder, but i did notice that the proximity sensor is not in good shape. While it looks reasonable, it is possible to bend it back by ~30 degrees. I can bend it back and it ll stay straight, but its not fixed in position, and with only very little force, it bends back again. It feels like its broken. I think it may have happened during a failed print where some goo got in the way. Pictures of it are found here (as i seem to be unable to upload them on this forum for some reason) Emanuel Schleussinger 💾: "meh, the proximity sensor of my Snapmaker Dual ex…" - Mastodon @ schleuss.online
It would be interesting if anyone had similar problems, or if a kind soul from SM can let me know how i could tackle a repair. I really want auto leveling to work again, especially now that i have a quick swap kit, i need it even more often.
I had the broken sensor issue a while back and contacted support. They asked for a picture of the sensor. After that they sent me a new sensor and everything has been working since I replaced the sensor.
Looking at the pictures you posted, I’m 99% sure it is broken - on the images you can see the PCB inside the sensor - that should not be possible, it is a fully closed housing.
It seems that the proximity sensor is the same as for the SX 3DP head, and if I’m right about that, you can get it here: Air passage and proximity sensor kit for Snapmaker 2.0 3D Printing Mod – Snapmaker EU - however, that is definitely officially only for the old 3DP head, so better connect with Snapmaker support if that’s the right part.
Snapmaker support came back to me quickly, and will post me a new proximity sensor in the next days. Also, they have a (docx) Dual Extruder proximity sensor replacement guide available. All in all, really solid service so far.
Once the item arrives, I will take a few screen shots of the procedure and report back.
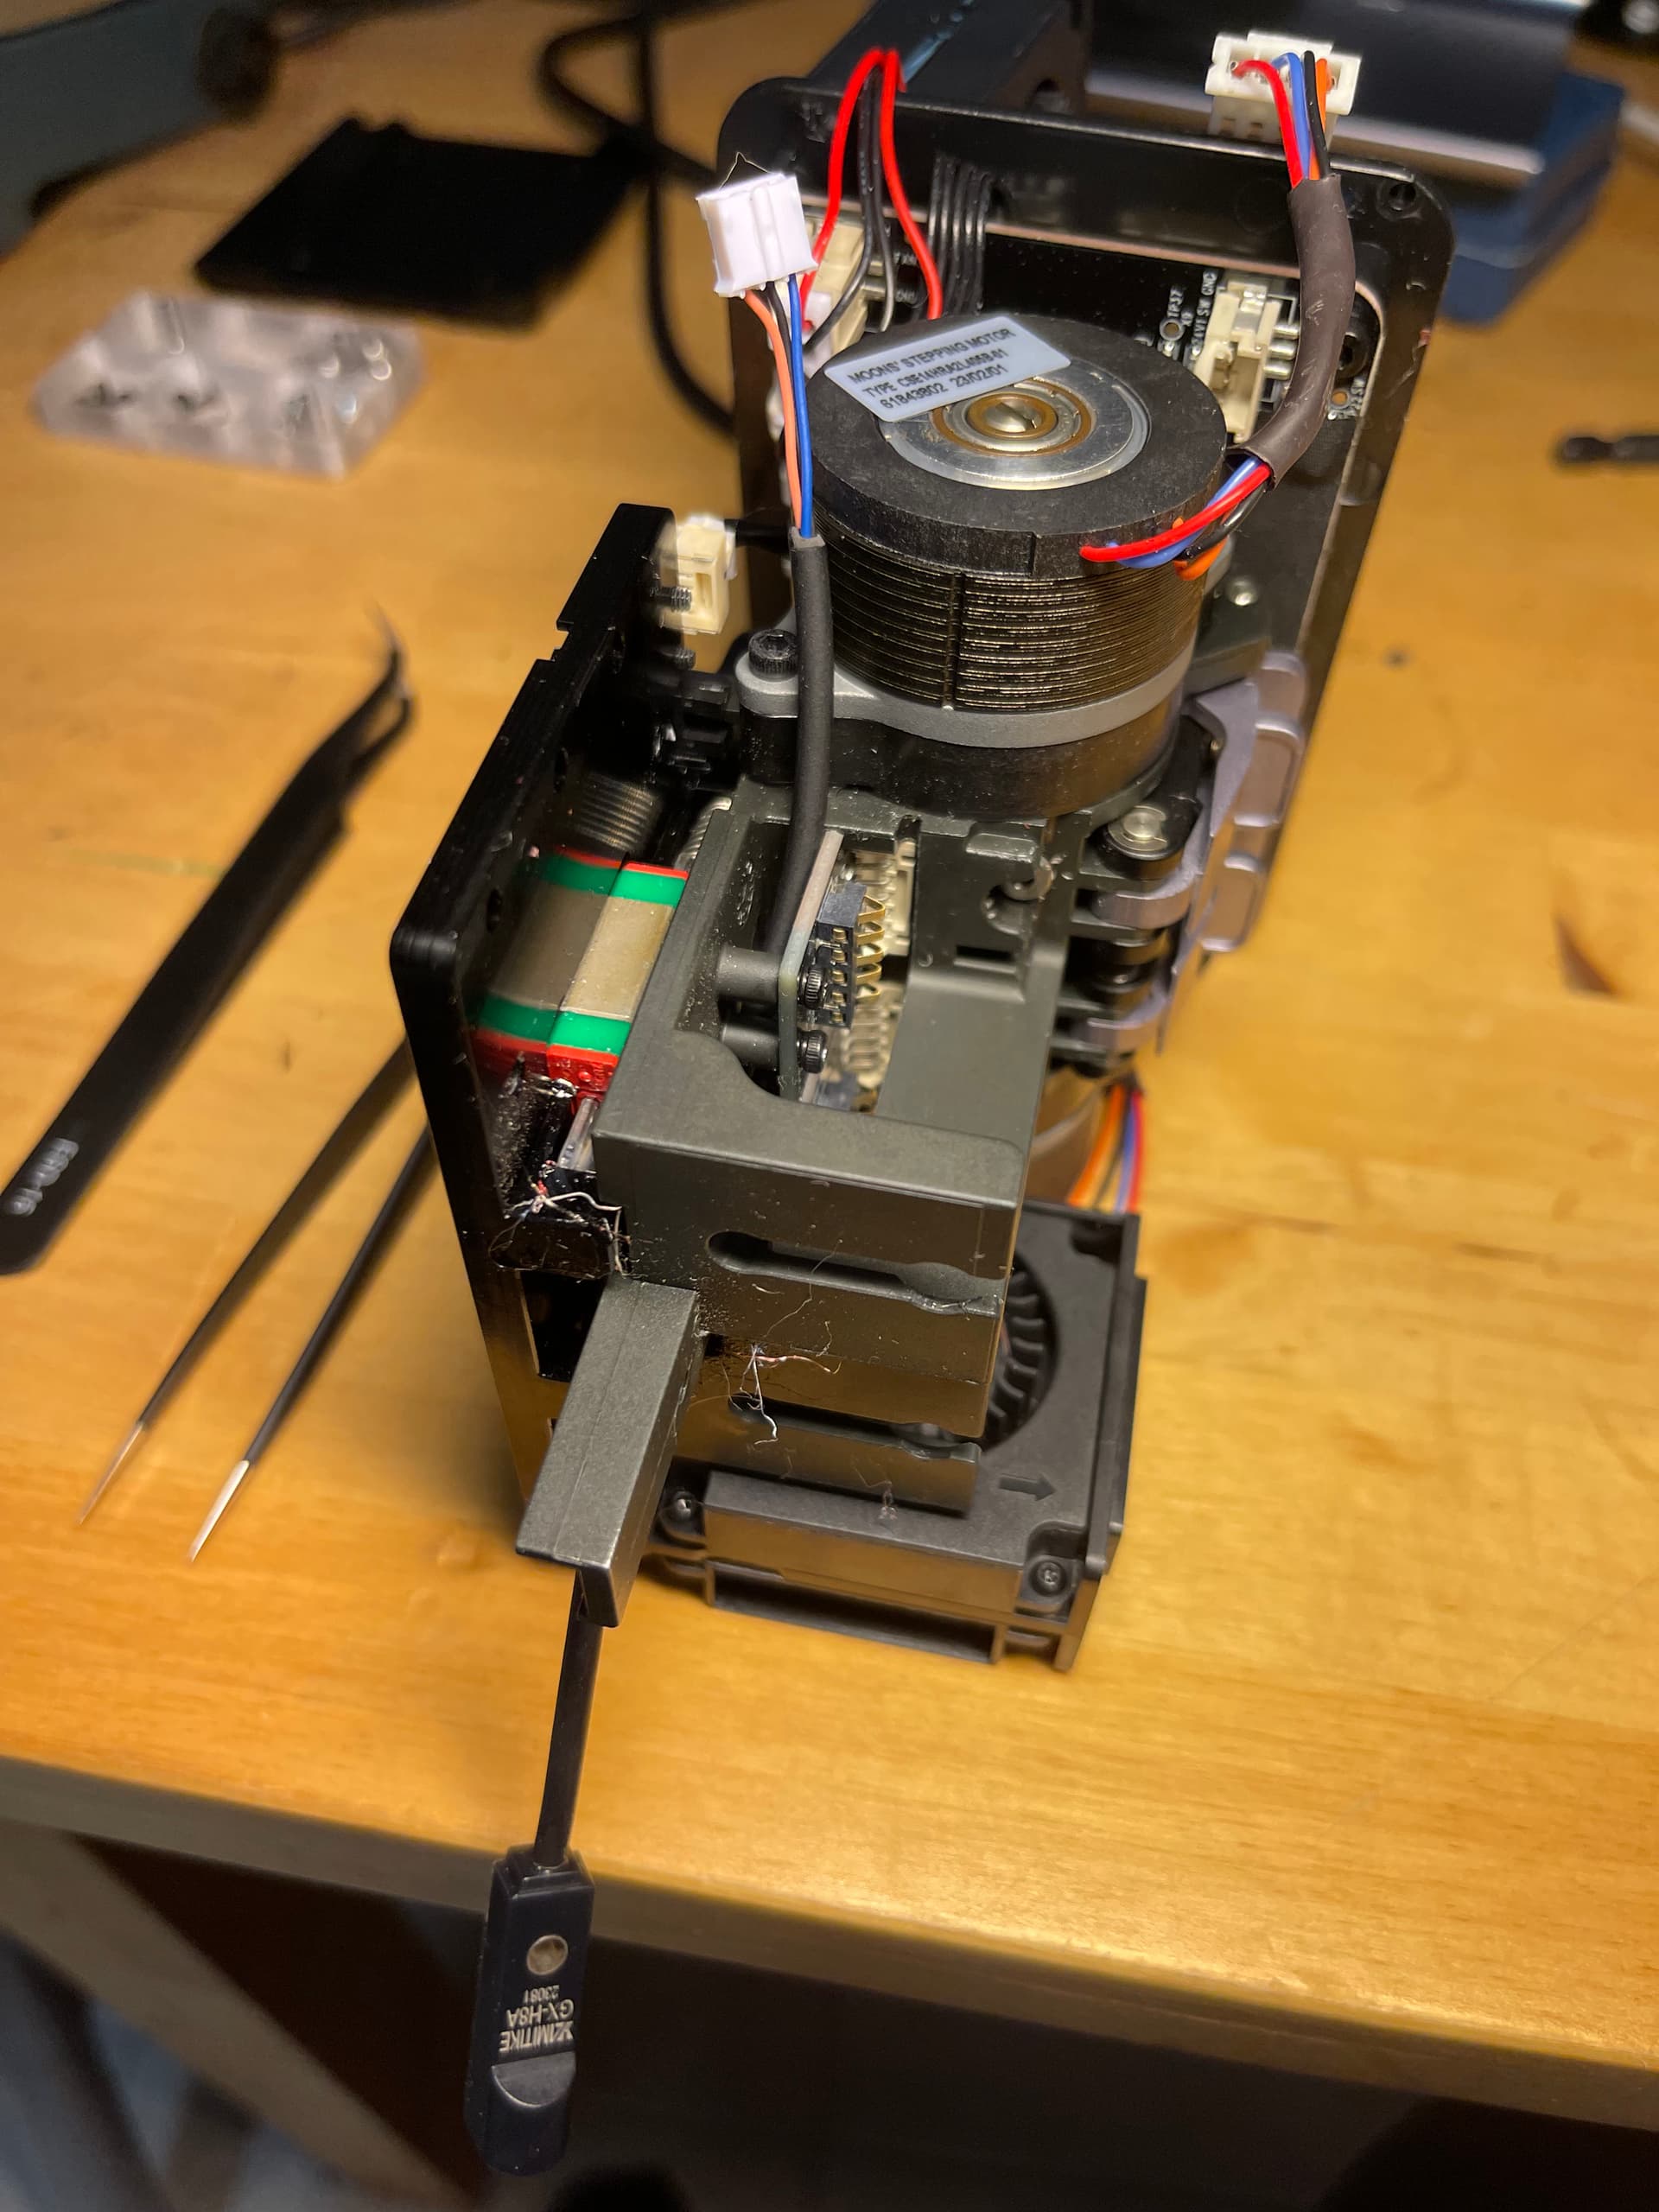
I took my Dual Extruder apart following the guide sent. It’s not too difficult to get the proximity sensor out. It was badly smashed as you can see, I think it must have happened during a failed print where the sensor rattled against a part of hard goo that stuck out on top of a print. I am now waiting for the replacement and will report back.
and, yes, the blue cable is snapped off the proximity sensor, and I tried to solder / fix that, but it still did not work, its probably broken for good.
With great support from Snapmaker (they sent me a proximity sensor and manual how to replace, for free!), I am happy to announce that my problem was fixed. And yes, the Dual Extruder sensor also has the red proximity indicator light ( on the bottom of the actual sensor) once you have a working one). Attached a few shots of the fitting procedure and cable routing. Note that the cable of the old proximity sensor was fitted different from the guidance I received, and it was not possible to remove the cable without cutting off the connector. The way it is fitted now (behind the left hot end PCB) is better for future repairs.
Thanks again to all of you too, I am very happy to have it repaired and working again!