Before getting my dual extruder I was looking into getting a glass bed for my A350T, and fitting the 3DP module with an optical sensor. Then I got my dual extruder and got so occupied with it that it went completely to the back of my mind.
However I couldn’t help but wonder: the dual extruder is perfectly capable of auto-determining the nozzle offset (“Z offset”) by probing the bed using the actual nozzle, no longer requiring offset it with the supplied calibration card. Why stop there; why not probe the entire bed that way?
Tonight I did just that. I expected the firmware to require a lot of modifications, but instead it was a small, easy change. In essence, all you have to do is change the type of probe sensor in bed_level.cpp. Given the usual code quality of the firmware, this was a pleasant surprise.
I also commented out the probe offset as there should not be an offset from the left nozzle. However there’s probably a more accurate calculation for this.
I compiled the firmware and let it calibrate the bed (with my finger ready on the emergency stop). To my surprise; no issues at all!
After this I performed the calibration again on default firmware with the proximity sensor. Using M420 V I retrieved the raw bed levelling data (without Catmull-Rom) from both runs and put them in Excel to check the delta.
I’m wondering what you guys think of these initial results. There’s a part of me that feels like this isn’t good for the mechanism or simply not accurate (although I would say the deltas are pretty good), as Snapmaker did not implement this themselves this way. Getting rid of the proximity sensor and all the required hardware would have probably cut their BOM by quite a bit…
Btw.: Is there some comprehensive guide how to compile your own firmware? I’ve not yet wrapped my brain around going down that rabbit hole, but having tinkered with my old printer’s firmware I understand the potential and might at some point start my own experiments. However, with the RTOS base, multiple modules etc. the Snapmaker is a bit more complex than my old, 8 bit Atmel board printer where I knew how to worst case use the ICP interface to flash the controller “the hard way”…
In short: clone the repository, set up VSCode, set up PlatformIO in VSCode and you should be good to go to follow the instructions on the Snapmaker2-Controller repo (compiling & installing). The compile & install workflow is set up by Snapmaker so I trust it will not brick anything .
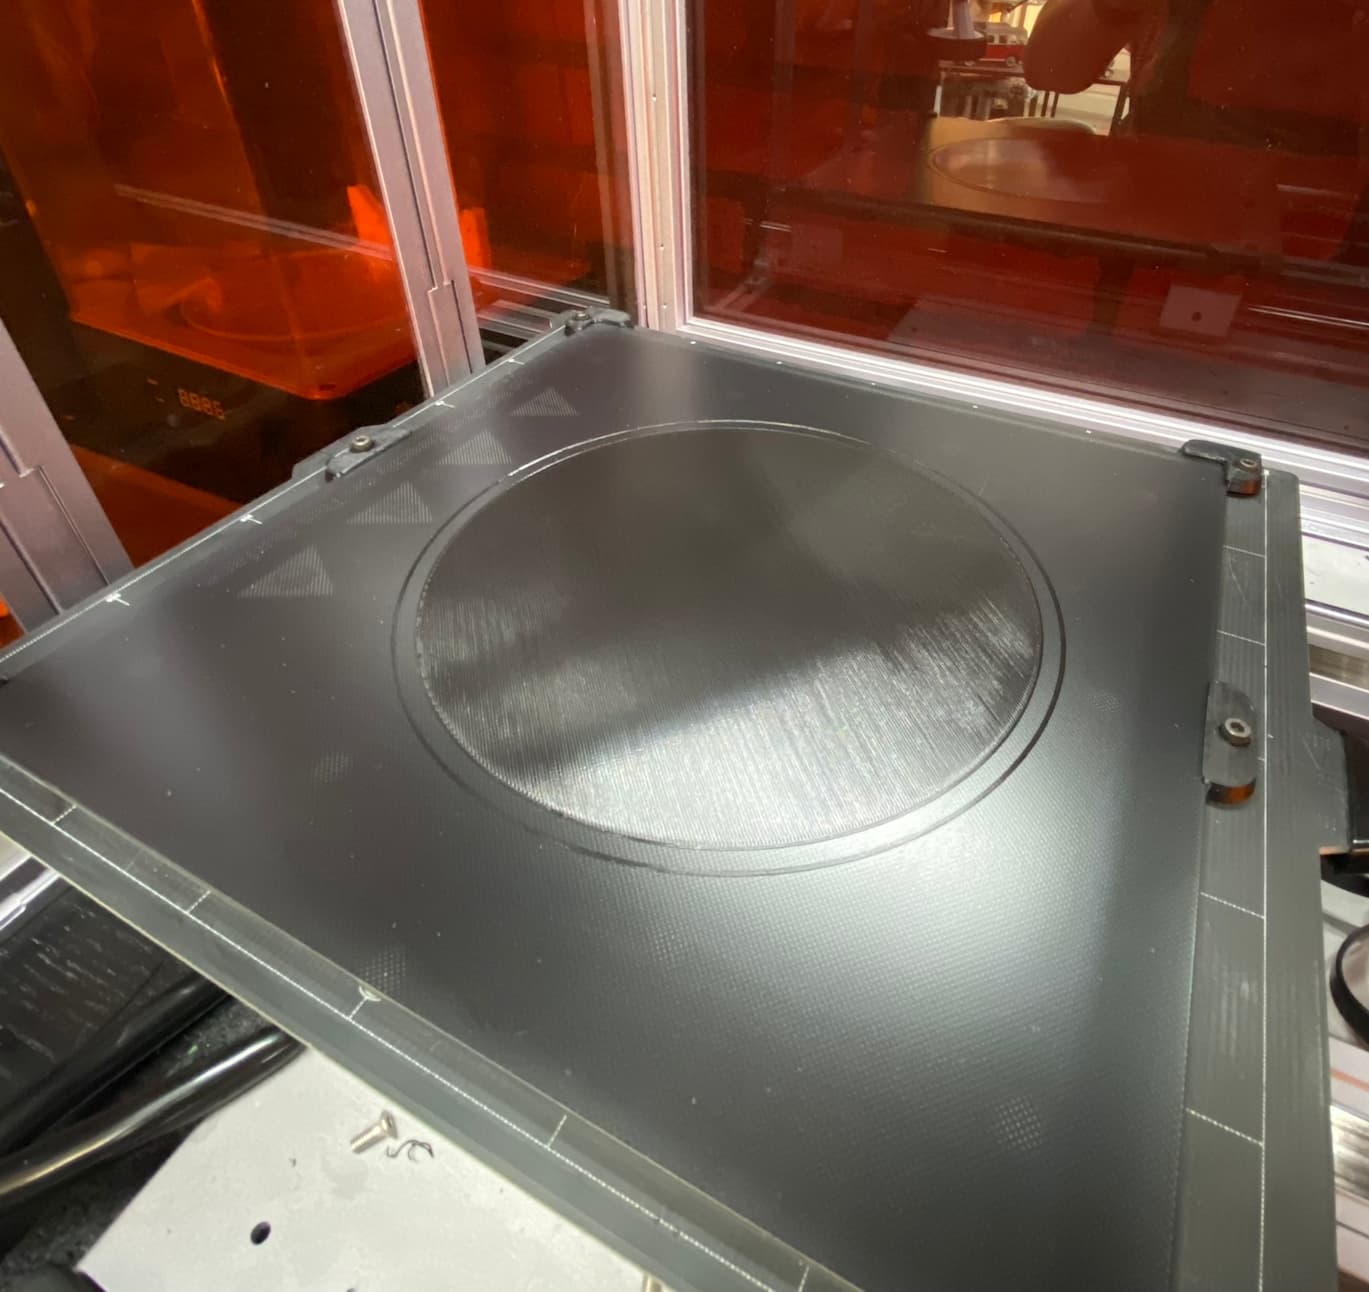
The results are in. I bought a 310x310 Ender bed because I could not easily get a glass plate matching the A350 dimensions. Some custom clips, firmware modifications, Slicer adjustments and modules crashing into beds, this is the result:
Probably a bit hard to see on the pictures, but it is not perfect yet. The “squish” on the filament is not completely even. Don’t know if I could have gotten it this flat by hand, though .
Having played around with it a bit now, I realize at least one reason why Snapmaker does not probe the bed this way by default: the sway on the (stock) bed.
The nozzle will put a bit of force on the bed where it’s probing. At the center of the bed this is fine (for auto z calibration) because the bed will only sway when pressure is put at the edges of the bed (on the Y axis). If you would probe it there, the nozzle would push the bed down a bit, ruining the leveling mesh.
I have the SBR16 linear rail mod, so my bed does not sway at all, which is why probing with the nozzle works. I suspect it will not level properly without the SBR16 mod.
Hmmm - good thought. However, not every bed seems to sway much. While having all kinds of issues with my bed, I must say that I at least (yet) have not the problem of a wobbling bed. But of course it’s not rock solid, and you still may be right that it gives enough to spoil reliable measurements…
@Slynold Thanks for sharing this info with me. The creator of this modification @Mayco has already provided a detailed analysis. There are two types of leveling sensors, the microsensor and proximity sensor, inside the Dual Extruder Module, which can meet the need of both leveling on the Snapmaker 2.0 printers and Snapmaker Artisan printers. The reason that we add an extra sensor is that it’s not recommended to use the microsensor for leveling on the Snapmaker 2.0 printers. The nozzle will put about 10N force on the edge of the bed at the probing point when using the microsensor for leveling. This will push the bed down a bit and cause the leveling to fail. If only printing at the center of the build plate, that will be fine. However, if printing at the edge of the build plate, such as a full bed size model printing, there is a risk of failing. Therefore, when using a glass build plate on 2.0 printers, it will require manual leveling, which will cause more time, but more reliable.
When you perform an automatic Z offset calibration, take a good look at the DX module and the X gantry from the side of the machine. You will see it exerts quite a bit of force and the gantry and the module will actually flex a bit. Honestly I would not be surprised if 10N is accurate. Without the SBR16 mod the edges of the bed will be pushed down a lot.
I wonder if asking support to enable this through G1029 g-code (or any other custom snapmaker command) for those of us with linear rails will have an effect.
Since the linear rails are not officially supported and no official glass bed is available for Snapmaker 2.0, I doubt they will add this into the regular release. Of course a custom fork could be created and maintained.
I will make my changes available on GitHub soon. If Snapmaker would open up the source for the HMI it could be integrated very nicely. But I have lost hope of that ever happening.
I am not providing pre-compiled firmware files as the firmware is experimental and I want users to understand the potential risks before flashing it on their printers.
Hey do you still use this auto bed leveling? I have a glass bed with linear rails and want to try this method out and maybe incorporate it with octoprint
I stopped using it because I joined the vibration compensation beta, and (back then) the source code was not available for the required modifications. Since then I rarely use my Snapmaker for printing anymore, just for CNC and laser.
The modification should still work as far as I’m aware. Are you running into issues?