Bed is not level

I have tried in all 3 aspects the machine offers. Cnc and 3d printing, I notice the bed is not level, its sags and bows in the middle. Even after multiple attempts at auto leveling. I am going to plane a board down and make a cnc bed thats level with machine. But I do not know how to fix the 3d printing bed having a sag and bow in the middle of it. See attached picture.

I even adjusted the z offset before starting the bad spot by 2mm just to get it to lay filament down. This is my 17th print, this spot on the bed always does this at spot on the bed.

Any help would be great.

Sorry to hear about that, I also have the same issue. There’s a couple solutions, none of which are great:

  • Up the number of calibrations points to have to 5x5, 7x7, 9x9, or 11x11. Above 5 calibration cannot be done from the touchscreen, only a computer via the terminal.
  • Don’t use the whole bed, print in the center
  • See if your platform or bed is out of tolerance and get support to replace it under warranty
  • Use a glass build surface, held on with binder clips or something
  • Use a raft under every print that uses that part of the bed

There’s probably some others I’m forgetting.

Thank you for the ideas, I am printing 8 different items just to show how bad the bed is. Normally i print one or 2 starting center out
 exact opposite corner does the same thing. Even has a spot in the middle too. I will try to up the calibration points soon as this 60 hour print is done. Its bad enough I can look down the bed and see its not level.

Do you know how much is out of tolerance for warranty?

You do have the bed frame installed correctly? The nuts should be facing down.

Also you’re using flat head screws to attach bed so that they’re flush?
-S

1 Like

Hi, thank you, yes all tampered flat screws and bolts are facing correctly and tight.

I’ll just pass along what Edwin told me. But the tolerance of the webbed carriage, not the build platform, is 0.15mm, see below for the full details.

Email 1
Thank you for reaching out to us.

On our end, the heated bed PCBA board is flexible and needs to be fixed on the platform. But it is tough to make the platform completely flat because it is not a consistent plate but a Gridded platform.

You can also try to loosen some screws on the heated bed, which may cause the uneven working area. If the issue cannot be solved by adjusting the screws, you may need a new platform instead of the heated bed.

We recommend you to loosen those screws at the edges of the heated bed, which may be lower than the central area.


You can turn off the auto levelling feature and calibrate the print sheet manually.

If you have any other questions, please feel free to contact us.

Email 2
You can put the platform on a desk or something flat and big enough, you can check if all the screws are close to the plate.

Here are some pictures for your reference.


Email 3
In order to exclude the linear modules’ impact, I would like to ask you to measure the platform separately when it is not on the Y axes sliders.
The machining tolerance of this part is less than 0.15mm

1 Like

Thank you for the info. In my second picture its hard to see but the corner looks pulled down a little further then the center. I will try loosing up the outside 4screws and probably 2 around the middle.

If this dont work I will remove the platform and see how bad it is.

I might even 3d print some small spacers ;).
Just thought about that haha.

Thank yall for all the help.

1 Like

Surely loosening those screws would result in a terrible rattle and vibration?

Who knows. We will find out right?

1 Like

I don’t think loosening a few or even several screws would create much of a problem
 the rest will hold it in place. And you are not removing screws
 but loosening so that it doesn’t pull the plate out of flat
 there should be some tension in each screw. Finally, if you do get a rattle, place one or more shim(s) (there are specific metal washer shims as thin as .2mm; search Amazon; also consider large quality/flat fender washers to spread the bottom pressure
 they are thick but you could put one under every screw and then shim from there) between the frame and the baseplate and you can go back and torque the bolts tight. Make sure you flatten across the baseplate in all directions
 getting/borrowing a “perfect” straight edge is highly recommended. Working off of a verified flat 1/4” (6 mm) plate glass (glass allows you to turn all upside down and see gaps between the frame and the glass, and feller gauges are easily used in this manner), larger than the frame/baseplate will help. Keep in mind, glass is not necessarily flat; you must use a verified straight edge with, or without the glass.

I’m noobie to computer controlled tools (3D printing, laser engraving/cutting, CNC) but bring 50 years of woodworking experience. Yet in reviewing comments combined with my limited experience, it appears the vast majority of the issues with SnapMaker and almost every other computer controlled precision machine revolves around 1) getting a flat bed; 2) correctly setting the z-height setting and understanding “flat” is not “level”; 3) and getting ideas in/out of software to the printer/engraver/cutter.

Numbers 1 & 2 seem closely related and I hope to, but haven’t found a comprehensive (no, make that COMPREHENSIVE) discussion, both generic-ly and SnapMaker specific to getting a flat (and level) bed (including dealing with different beds (e.g., glass, purchased flexible “rubber”, metal, etc.), and then finding the right z diff (most have or can get feeler usages
 need something more definitive than “a plastic card that pulls free but won’t push under?!?“ for different filaments, heat, etc., and then combine all that with filament and bed temperatures. I find lots and lots of bits and pieces, but I don’t find a “beginning-to-end” procedure/process (with the “why” you do something or why you care). Knowing why something innocuous is important and its many ramifications is key to getting users to not skip our skimp on it. Recommendations???

#3 is also an area I hope to find a comprehensive discussion that tells me what all those software settings mean/do; how to set them; how SnapMaker/most machines use that info (or which ones it can’t use), etc. this one is difficult as there are many different software packages and conventions out there but it would seem there can be a generic discussion with tables/appendices cross referencing the genetic discussion with a particular software and with a particular machine (especially those that are open source). I’m sure it must exist because those that work on open source software must know that “xxxx” means “yyyy” value on “zzzz” machine in “aaaa” software. But from my limited experience, it is not easy to find. Recommendations???

My frustration, in part, is these issues are quite complex yet generally dealt with superficially in forums like this with limited space and often not edited/re-edited pros. Example: my suggestion at the beginning of this discussion. A well organized presentation could allow one to skim the top yet dig down into the dirty detail where required.

It’s hard to have a comprehensive discussion about how to fix the issues when everyone is still trying to sort it out.

A lot of posts on this topic are people asking for help on bed leveling and many of them do not even realize that it is a common issue.

What you are asking for is a “master thread” guide on the topic, which is fine, but just isn’t what has been going on thus far.

Edit: I should add - alot of people are working on different solutions. Some people say lets use a glass bed but then lose autocalibration without additional modification, some people say lets machine a new build plate, some people say that heating the bed first helps a lot (which it does) but the machine doesn’t allow you to calibrate while the heater is on, some people say that the code that maps the bed needs some altering.

All of these different avenues are rather large conversations in their own right which spawn a lot of ideas and trial and error.

Sometimes these topics appear spontaneously on an un unrelated thread, and when that happens it isnt necessarily the OP’s responsibility to format their post to accommodate the information being talked about below.

In short, while i understand the benefits of what you are asking for - but it just hasnt been how things have evolved. you can certainly try to start this type of thread yourself though.

1 Like

I have also been doing wood working for 20 years, it aggravates me when a company can’t mass produce a product that works, I read and see so many issues with the machine. Sad part is my mounting frame for bed is way out of “flat” dips and raises up to 3 mm. I will probably turn to my own metal fab and build my own.

I have other cnc machines that are diy that don’t have as many issues as this machine. I have wasted more time and money dealing with my snapmaker in 2 weeks then I do in 6 months of my normal woodworking. I have very limited experience in 3d printing, thought I would give it a go with snapmaker. The factory black filament prints great, the blue I purchased just sucks so bad to be honest. I feel like the machine is going to be a money pit (not necessarily cash but time as well).

It is a tricky beast, to be sure, but alot of us are finding it to be a.) useful and b.) something to be upgraded with effort to get better results which ends up being c.) kind of fun to be honest.

surprised your black filament is good, most people say that stuff is garbage that comes with the machine. certainly all spools of filament are a bit different, some brands or blends better than others.

first thing id say if you have a spool that prints awful is its probably wet and needs baked out / dehydrated. i find more spools have this problem than not, even in vacuum sealed packaging and even on the good name brand stuff. but avoid most of the junk on amazon and buy something like matterhackers or prusament or maybe hatchbox.

although so far the priline brand for me has been good despite its lower cost, but as i get better and better im realizing that my parts were coming out okay due to my machine settings being a bit poor and just kinda forcing them through working around the poor material and tinkering with settings forever until something finally worked with it, and the better filament with better settings is like a whole new world of parts coming off the line. and amazon basics PLA is apparently one of the better rated brands, but i havent tried any myself. this is not the case for all plastics, pla only.

My blue spool leaves clumps of blue and strings everywhere, I have done lots of research on different types. I will be trying next brand soon. Dehydrating is not an issue where I live always hot and dry, but I do have a system and Dehydrated my blue and black before I even used them as I read so many bad comments on them.

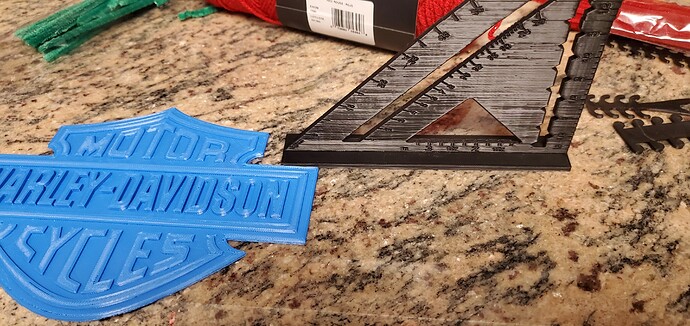
See the clips I knocked off the side.

Compared to black on fast print

Needless to say, I printed 5 speed squares in black 60 hour print. File saved to device. My home internet went down for 10 min and I ended up with 5 of these right at the end.

What is the blue spool exactly? brand and type?

The snapmaker one.

okay. this is opinion, and not intended to be condescending

i think that you just happen to be getting decent prints on the bad spool due to default settings (in the box spools are bad and snapmaker replaced suppliers) and may not even realize some of the issues it has, while the blue spool comes from their new supplier and is a little better in quality but the settings are not optimized.

there are some important tests and adjustments to be made in the firmware which we can get into, but real quickly i have one specific test that i think you can do without much effort as long as you have calipers - its regarding flow rate.

Are you using luban to slice with?

Yes I am using Luban, and I do have a caliper or 3 :wink:

okay.

luban doesnt support some of the adjustments that cura or prusaslicer or simplify3d has that would be of use, but i think if we were to print a flow rate test object it might answer some stuff.

i can give you gcode for one, what is the filaments recommended temperature range?

Temp is 190 to 210, I have set to 205. My current print has about 20 hours left. So can’t do anything till tomorrow :roll_eyes: