AI assistants that identify spaghetti and objects do not work in principle - they only identify the draft tower. It has never worked with obvious printing defects, at any sensitivity. When printing in pairs with several plastics, one head (mostly the 3rd) simply stops printing and pirouettes in the air for hours. I don’t understand if the problem is with the heads or the sensors. I’m not such a cool engineer, but if the plastic doesn’t work and the consumption is 0, I probably need to stop printing? This is the 3rd or 4th time such jokes have been made in 2 months of operation. We can talk about savings when printing with multi-head devices, but the amount of plastic that he has already ruined with his quirks already obviously exceeds all the savings.  The longer I print, the more disappointed I get with this device, just like with Chinese machines. Which has a lot of things stated, but few things work.
The settings of the branded slicer, when using PETG, are simply idiotic by default - it draws a border with an indentation of 0.1 mm from the model.. This helps to easily detach the edges of the model from the table. 10-15 layers and the corners are already hanging in the air. I’m just burning up with all this :-))

Please report to support:
https://snapmaker.formcrafts.com/u1-troubleshooting-request


8 attempts, 75 hours of continuous printing, 2kg of filaments.. The last attempt, with the replacement of the filament, was more or less successful, at least the head did not catch the wedge. I can assume that the problem is with the blue plastic, but I don’t really know what it is yet. This is Creality branded plastic, dried twice for 8 hours at 60-65 degrees in their proprietary 4-reel dryer. I will print the last part, the lid, and then I will try to print the middle part for the 9th time. I need to play with the temperature, the last time I freaked out and heated the table to 85 degrees, apparently the PLA floated and it turned out not very stable support. I’m also updating the 1.4.1 firmware just in case.


The technical support replied that the AI assistants really don’t work, but they are working on this issue. We were advised to upgrade to 1.4.1, and there finally appeared the option to detect “printing by air”. I set the average setting value.. Let’s see what happens in 9 hours… I sealed the lid of my box… It turned out with minor defects, as usual. After fitting, it became obvious that the very middle part of the box had not been printed successfully since 8 times. Cracks of 2 mm transparently hint that a dozen layers have been lost somewhere. I started reprinting the middle part again… Let’s see what happens, I hope it was some kind of firmware glitch 1.4.0…


With the new firmware, at least I stopped printing… After resuming printing, I missed a large piece again, almost 1.5 mm wide. What kind of buggy stuff is this.
The problem is that the filament stops flowing into the 3rd head. If you unload it and load it again, it continues to print for about 4.5 hours without any failures. Then everything repeats again. There is no clogging, the filament is not broken, just for some reason the feeder stops feeding the filament. Apparently, this is some kind of software error.

It feels like the parking temperature of the head set as (-150 degrees) is too low for PETG, which forms a molten edge at the outlet and the feeder, which freezes and when printing resumes, the filament feeder in the head cannot push it through.


It’s good that at least it stops printing now. However, the recovery mode after the emergency termination of the filament is obviously still not working well - it skips printing too much. We need to adjust this somehow, taking into account the speed of movement of the printhead until it stops - and rewind the G-code much further back.
The 14th attempt failed. He just stopped at night at the overlap of support from PLA.. When resuming printing, not only did I miss a large piece of the part and start printing from the wrong place where the error occurred, but also with large waves on the surface of the part that had cooled overnight.
I deleted the part as usual, and I’m starting the 15th attempt. If there was a problem with the filament or the nozzle, it would obviously be impossible to continue printing. However, he continues to type as if nothing had happened.
I also have an assumption that the slicer’s “Exact height Z” option is to blame for everything, I turned it off and raised the PETG temperature by 10 degrees to 255… Next result will be in 5 hours.


PS: Snapmaker’s technical support has not helped me in any way so far, except for silly tips like reducing the sensitivity of determining the end of the filament.
After upgrading to firmware 1.4.1, I lost remote (cloud) access to the printer, and I can’t watch video through LAN mode (the camera refused to output it, such an error). The mobile app also says that the printer is turned off. Everything is going just fine, I’m fuming.

What were your troubleshooting steps so far?
Is your filament spool spinning freely and is not tangled?
Ever tried a different roll of petg? Different sort or manufacturer?
Did you ever measure the filament diameter?
What brand is it and what settings do you use?
- The filament coil rotates freely and does not get tangled. Printing may stop arbitrarily with an error in the end of the filament.
After this error, in 50% of cases, the printer can simply continue printing the next “copy attempt” (I delete everything that was printed from the table and send it to print again), in 50% of cases it is necessary to reload the filament. It depends on when I find the error. If it takes 10-15 minutes, you can simply continue printing. However, after this error, when you resume printing, a significant part of the detail is lost within the layer, up to 5-7 mm wide. Thus, any filament error = re-printing.
- I tried printing with 6 different filaments, Creality Hyper PETG, Bambu PETG Basic, eSUN PETG, Snapmaker PLA, Bambu PLA Mate, Bambu PLA Basic. After many, many experiments, the Creality Hyper PETG pair is the best in adhesion (255 degrees first layer, 245 degrees next, the temperature of the table is 85 degrees first layer, 70 degrees remaining) + Bambu PLA Basic (maximum - 230 degree filament and 70 degree table).
The entire filament is of perfect quality (core diameter 1.75 mm (±0.02), dried for at least 20 hours at 55 degrees PLA and 65 degrees PETG. In the box (Creality dryer with independent temperature control in 2 chambers for 4 coils) where the coils used for printing are located, the humidity does not exceed 12%.
Next:
I reduced the printing speed of the outer walls to 80 mm/sec, and reduced all the others by 100 mm/sec.
For 5 hours, everything is printed perfectly, the rough tower is printed perfectly, without snot (the PETG temperature should not exceed 245 degrees, otherwise snot forms on the tower and the adhesion between PLA and PETG is catastrophically lost).
To get a perfectly smooth overlap surface on top of the PLA substrate, I enabled “align the bonding substrate layer” in the slicer settings. It also turns out perfectly. But.
As soon as it comes time to seal a large area of overlap on top of the PLA, suddenly at any subsequent stage, various failures occur within 3 layers. After updating the firmware to 1.4.1, the printer stops printing with a filament termination error.
Before the firmware update, the printer simply moved the nozzle in the air, at best. At worst, he wound spaghetti from the purge tower to the detail, suddenly stopped squeezing out the filament for a while, and then came to his senses and tried to continue printing as if nothing had happened.
As I already pointed out in paragraph 2, I found the perfect balance in terms of temperature and speed - however, at a table temperature of 70 degrees, the corners of the part detach from the table by 1-2 mm. At 85 degrees, everything is perfect with PETG - but the PLA is leaking and losing stability as a support.
The geometry of the part turns out to be disgusting and does not match the previous part. Now I continue to play with the temperature of the table and glue, as well as the glitches of this wonderful printer (after updating the firmware to 1.4.1, remote control and monitoring do not work for me, video does not work, even on the local network when connected to LAN, video is lost, because the proprietary slicer stupidly switches to the cloud - despite what I explicitly specified to work over LAN).
By the way, H2S printed this part the first time, with the default Bambu Studio settings. It’s called, feel the difference… I ordered a new printer for myself, and I’ll give this one to the children. I’m tired of glitches and unpredictable behavior.
PS: In the attachment project, table No. 4, I have already printed this part more than 15 times and never got a perfect result. I’m probably too stupid to use such an advanced printer.
bat.rar (2,1 МБ)
On the 17th attempt, I got the first satisfactory result. There were 3 errors of “finishing the filament”, just in case, I had to completely unload and load it again. Now it remains to figure out the settings of the slicer, which “increases” the gap from the table to the part by 0.2 mm, despite the value of the “vertical gap” of the connecting layer of PLA support from above and below = 0. At the temperature of the table, there is also a separation of the corners of the part from the surface of the table by 0.5-0.8 mm, which makes the coupling of the parts uneven. I ordered 8 more coils of filament :-))) I’ll make it print correctly… Nopassaran!
I also fixed remote access to the printer via the cloud, completely deleting all settings and re-linking the printer to the cloud + re-linked the printer in the slicer via a PIN code.
Is your printer enclosed? I know petg tends to warping, some glue or slow first layer could fix, but enclosure would be good anyway.
Glad you found a solution for your connectivity issues.
Did you ever turned the filament loss or grinding protection off to see if the weird behaviour come from this protection features?
I’m no U1 owner so, some more guessing, maybe print without the feeding motor on the side for troubleshooting?
I’m wondering, it seems there are not many people printing petg on the U1..
This similar setting was told you by support, right?
Of course, my case is closed, I additionally have an exhaust fan (120x120) connected to cool down when printing PLA. I even made an LED table light


The protection against filament loss in the new firmware 1.4.1 cannot be disabled - it can be set to minimum - Low. The “Print in the Air” detection option is also enabled. All other AI functions for “detecting” spaghetti and printing defects are not working yet, at all.
Yes. About the motor of the filament feeder, 4 holes on the sides of the printer. They often make a strange “crack” sound before the “filament termination” error appears. I thought I had come across a coil with a defective filament and even left the seller a negative review. I took a micrometer and measured the diameters on the segment of the “problematic” rod at 50+ points, each 5 mm.. And nowhere was there a deviation of the diameter of the filament more than ±0.02mm. Replacing the coils doesn’t change anything, I’ve already tried 10 of them… I already have 20 kg (PETG only) of Creality, Bambu, eSUN filament :-)) If you unload and load the filament again, the crack disappears. If it was constant and the error would be reproduced, I would think that I got a defective copy of the printer. But it perfectly prints single-component plastic parts with any “problematic” coil - phenomenally fast and accurate, without any defects. The problems start when printing parts from PETG with support from PLA, a large area where there is overlap (H-shaped parts).
Yes, I was prompted about that setup by Snapmaker technical support. Moreover, I was running 1.4.0 and there was no such option. I turned off and turned on the printer again and it appeared, then upgraded to 1.4.1.
I am currently printing a “huge box” (250х250) with a 90mm square in the center, 1.4mm high.. which is also produced by “extrusion” using PLA support. It turned out very badly at standard speeds.. I reduced all speeds by 100mm/sec again, and he has already printed more than 100 layers (out of 256) just amazing! I think on a large support area, especially when it is high from the table (more than 25-30mm), the plastic cools down and the adhesion between PLA and PETG completely disappears, which is why the main filament simply twists “into a tube”
UPD: Done. However, the key to success is to reduce the speed of printing. The “overlap” area was slightly less than the part I had printed 17 times. I will finish printing the second half of the box and run the problematic part again with the same printing parameters. I also slightly raised the average temperature of the table from 70 to 75 degrees. I don’t know how this affected the adhesion of PETG to PLA. But printing on top of the cooled PLA (smoothing the binding surface of the support lasted more than an hour) was successful.


Is your support distance set to zero?
I think it could help to print the interface from or to support with slower speeds so it has more time to bend together.
Yes, both gaps (top and bottom) from the binding layer of the support to the detail are 0. With the standard 0.20, nothing could be printed on top of the PLA even once.
The second half of the box with multiple PLA surfaces was printed amazingly. Only the walls remained. I can’t wait to repeat the experiment with my problematic part… So I checked the printing of 1,2 and 4 heads. I printed the problematic part with the 3rd head all the time. Maybe I have some kind of factory defect…
Or everything was solved by reducing the speed by 100 units and increasing temparature of the table by 5 degrees. It seems to me that I used to reduce only the first 2 speeds… The printing speed of the outer wall and the printing speed of the inner perimeter.. perhaps it was necessary to reduce all speeds, including the speed of continuous filling.

We’ll see..
The point of using PLA when printing PETG parts is not to combine them inside one part.. And just due to the almost zero adhesion between these materials, it is possible to print PLA supports for complex-shaped parts, which can then be easily removed without damaging the main part.
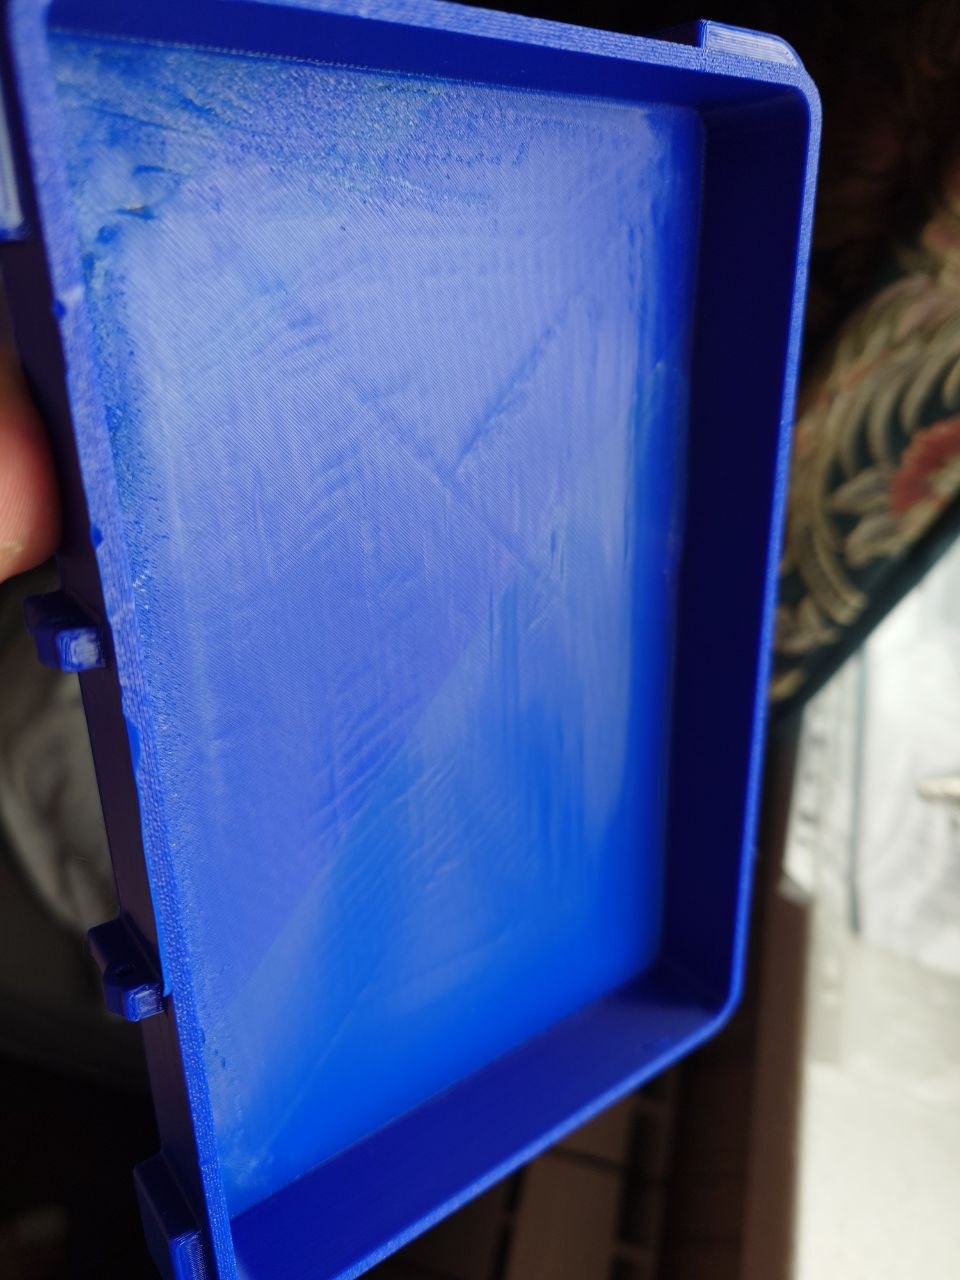
I have reprinted 2 complex boxes. The blue lid at the junction of the pad and the PLA support was poorly sealed, the plastic did not boil through. The joint was sealed with a bronze cylindrical sleeve using a soldering iron at 285 degrees. I’m out of green filament. I will try printing the problematic part again tomorrow. Overall, it looks like the problem has gone away.


While waiting for the green filament, I printed the “problematic” part in black PETG last night… It didn’t work out very well in terms of quality, but I was able to attach it to the rest of the parts and check the plane alignment.. Then I measured the resulting part from the drawing and it turned out that when printing from the side of the table, about 0.1-0.15 mm is lost somewhere. I measured 2 more “defective parts” printed earlier and found the same deviation of the about of 0.1-0.15mm.
After looking at the slicer carefully, I found an amazing bug… With the height of the first layer of 0.25 mm (0.2 mm) in the slicer settings, we get the first layer with an overhang at a height of 4.05 mm (in fact, after shrinkage, 3.80-3.85 mm). And if we set the height of the first layer to 0.2 mm (0.2 of the rest), we get the first layer with an overhang at a height of 4.20 mm.


Now, taking into account the difference in the thicknesses I indicated (0.25-0.2) = 0.05 mm.. We get a difference in the height of the first overhanging layer of (4.20-4.05) = 0.15mm… This is the gap I observe when mating the part.. The slicer prints the protrusions and grooves “from above” accurately, but “from below” not…
Thus, when printing a part with settings 0.25/0.20, we get the actual gap height of 3.80-3.85mm… And if you print with the settings 0.20/0.20, it should be exactly 4.00mm.
In the slicer, at 0.20/0.20, a 4.2mm gap is obtained from above, and at 0.25/0.20, a 4.00mm gap is obtained from above. The upper gap at 0.25/0.20 fits perfectly with the rest of the parts.. and a gap of 0.10-0.15 mm is obtained from below.
According to the drawing, the top clearance is 4.05mm. Bottom - 3.95mm. Now I’m running the 19th attempt to test this assumption :-)))