3D Printer Under extrudes or not at all

Hey all,

I received my Snapmaker 2.0 A350 and have been trying to get a successful print for almost a week now. I’m on firmware 1.10.0 and have the enclosure.

Every print I’ve done so far has had horrible separation (2), refuses to come off of the heated bed (4), or simply doesn’t print at all (8).

  1. I tell the filament to load and use the tweezers to clean the nozzle before every print
  2. I auto-calibrate the bed before every print
  3. I’ve tried loading via USB drive and Wifi through Luban
  4. I’ve followed the instructions in the manual for “what should I do when the first layer of print won’t stick” (layer thickness changes & choosing “raft”)
  5. I clean the bed with 99% alcohol and a microfiber cloth after every print

What am I doing wrong? Or is there something wrong with my machine?

1 Like

@MakariAeron,
Sorry your having so many problems. It took me almost 2 weeks to get a decent print out of my a350. Some pictures of the failed prints would be helpful in troubleshooting your device. As it sounds like you may have more then one problem. Also can you let us know what settings your using (print temp, retraction, print speed, etc.)

Hope to hear from you soon,
-Atom

2 Likes

Most people have had success right from set-up with some tweaks to make it better. So either you’re doing something wrong and not realizing it, have put it together wrong or there’s something wrong with your machine. Or the filament. A lot of people have had problems with the SM PLA that came with their machines. (Mine was fine)
As Atom said, need a few of the details and some pictures to help.

You’ve updated the firmware. Have you calibrated the extruder? ( Extruder Calibration a must )

Have you tried doing simple tests, benchy, calibration cube first? Need to start small and work your way up.

When you heat up the nozzle to load (make sure it’s 220 for PLA) and then press load does it come out steadily? You should only have to load when changing filament.

You shouldn’t have to auto-calibrate before every print. Only when changing between beds/toolheads. Calibrate once and then that’s your baseline and start adjusting from there. Most people find that raising the z-offset helps. I’ve found that if I do the final step of calibration to where it’s just showing resistance and then raise the Z-offset .05 it’s perfect for me for PLA (PETG I raise .2) Quite a few people who have been struggling find that’s their problem and have success raising it somewhere between .05 to .15.
If it’s too low it squishes the first layer into the bed and makes prints very hard to remove. Since I started doing PETG (which really sticks to the bed) I’ve become a big fan of using glue stick. and while it’s not necessary for PLA works really well too. First layer goes down great and things come off super easy.

Are you using a skirt when printing? I’ve found that setting the skirt to 2 helps to prime the head and gets thing flowing. It’s also a great starting indication of how things are working. If it doesn’t go down right I restart and if it still doesn’t then something’s off and I make adjustments.

I’ve found that my bed has seemed to have gotten ‘seasoned’ the more I’ve printed on it. Prints release better and stick better to start. (May just be my printing temps and adjustments are better)

I wipe down the nozzle with a microfiber cloth between prints when it’s warm. I use tweezers when something longer is hanging.
Can’t hurt to clean bed between every time. If I’m using gluestick I wipe it off with a wet paper towel and then redo gluestick every 5 prints or so.

Don’t give up. Everyone has had to figure out how to do this. PLA was super easy for me and thought I had it all down pat. Then I tried PETG and it gave me fits. Finally got it dialed in and now it works great. One thing that taught me is to be patient and not try to change too many things at once. Start with a setting that’s working for someone else and then do small tweaks. Z-offset, nozzle temp. and bed temp, in that order, are the first to try.
-Steve

3 Likes
  • Clamp the bed sheet to the frame/bed.

  • If you are using Luban, make all snapmaker profiles to custom profiles with less retraction, I would suggest from 5mm to 1mm @ 40mm/s.

  • Make sure your filament spool could spin free, ideally the spool is above the tool head.

  • I calibrate it not every print, I fine tune it from month to month or so, this means I just set a other offset.

Pictures would help!

2 Likes

Thanks for the replies!

Atom,
After reading these posts, I believe you’re correct. We only have 2 the prints that succeeded, but I’ll attach pictures of those.

sdj544,

  1. I have not calibrated the extruder. I just tried and it tells me “OK” (please note that we are over wifi because it’s in another room due to space)
  2. we were only doing 205, the default. I’ll try 220C
  3. I think you’re also right about it squishing the print. Wil adjust the offset as well (worst case, we’ll try glue sticks afterwards then we’ll also try painter’s tape when it arrives from Amazon)
  4. We used skirt at first, but hadn’t changed those settings. Will do this in tandem with the other two

xchrisd,

  1. bed clamping: I could try this, but the bed hasn’t moved
  2. will try that in trandem with sdj544’s suggestions
  3. I have the enclosure, so it’s a bit further away and comes in at a weird angle
  4. I’m just being anal because I have pets and I want to make sure it’s not a calibration issue that causes these problems!

Pictures
Luban M500 command
m500|350x350

Luban settings; basically default

1st print ever. And most successful print. There’s separation between layers. This was done prior to the enclosure arriving

*2nd most successful print, done with the enclosure. Same settings as the first print.

1 Like

i really like using painters tape (the blue stuff), it works great and can be used for multiple prints (important to me because i am lazy)

if your having issues with your print being very hard to remove from the build surface, i do not recommend using a skirt (as they will never come off) i would suggest a brim instead, has the same general advantages but is more likely to come off with the print.

also i found even the default 205 was to high for PLA (caused excessive stringing), i think the need for high temps is because of a poor thermister design, i would recomend using thermal paste to get better temp readings see here for more info on that: Whats wrong with this picture - printre hot ends - #20 by Hauke

also E step calibration has to be done using USB connection (console commands over wifi do not work) but this is pretty important. as most users (myself included) found the steps/mm was off by about 10%

1 Like

Those do look frustrating. Fair warning: Wall of text below. Just getting started myself so I’m in information overload mode. :laughing:

I’ve got the A250 not A350, do have the enclosure, and have prior experience with really ‘hacky’ machines (my first was a Solidoodle 2 Pro, heavily frankensteined to the point of some custom carriage replacement parts and all). So far I’m only printing with Luban, but did make some alterations to the PLA profile and speeds (205C layer 1 / 65C bed, 200C/60C thereafter). Someone else also already recommended only 1mm retraction vs. 5mm which might also be ‘starving’ your extrusion a bit…

Ye eld beaste of Yore:

I’ve gained pretty good prints right from the start with some caution, and am still in the mode of printing almost solely for printing, so to speak. Some of my hacks might not be necessary for you, as they’re somewhat related to my desk setup. But maybe some of them help at least with initial bed adhesion. I actually have barely made any attempt to clean the bed, just a paper towel to wipe off any obvious fingerprint/oil or dust, and adhesion has been fine.

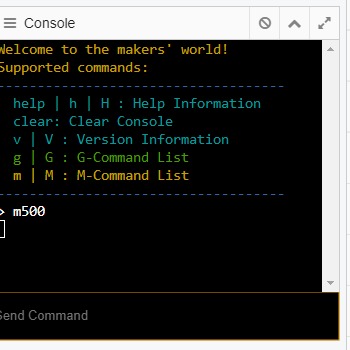
  • First suggestions I’d think in your case is extruder calibration, as others have mentioned, and also whether the thermistor is registering properly on the hot end. If you’re getting inconsistent heating, either too low or too high, it can cause really cruddy extrusion, and almost doesn’t matter what you set the Luban temps at if there’s a lot of noise in the measurement. (Too high can cause underextrusion same as too low - insufficient vicosity - because you’re burning crud up in the nozzle and breaking down the material, gunking up the flow path.) You mentioned you already calibrated - you can check again with the M503 command to get it to reply to see if it even applied. I calibrated while wired (USB), and did the M503 ‘check’ after the M500 ‘save’ command the first time, and it didn’t look like it had. Power off/on again and it still hadn’t. I had to make sure to program, THEN power cycle, THEN check to see for sure it was echoing back correctly as changed. As far as thermistor giving accurate readings, see the posts by others about taking it out and puckying a little thermal goo in with it when you push it back in. (I have NOT done this step myself - yet - as I seem to be getting reasonable prints so far, with only some loop dangling associated with undercooling on overhangs.) Related post:

https://forum.snapmaker.com/t/whats-wrong-with-this-picture-printre-hot-ends/7757/21

  • Next, and first print for me, is some sort of filament guide. I am NOT a fan of how the enclosure routes the filament, nor a simple bar for a holder. On my old machine re-routing the filament path and creating a better holder with far less ‘backpull’ was really critical for my success, and I’m working on how to do that here as well. (The old machine wouldn’t just get starved if it couldn’t draw the filament well enough, it would actually lose Y-steps because of tension and the print would gradually lean backward as it deposited layers.) In the meantime - I never print unattended. It’s boring to babysit just to nudge the reel or supply slack every now and again, but I think it matters, a lot, until you’re dialed in. Regarding the guides there’s a couple posted on Thingiverse already, I designed my own (may still redesign the loop a bit ‘longer’).


Regarding the spool itself, I had to install the holder ‘upside down’ because I have a shelf over the enclosure. I am working on a better clamp mechanism so I can mount additional reels to my shelf support (1.66in OD aluminum SCH40 pipe), but in the meantime I found two rollerblade bearings I had just barely slid over the existing rod. These help the spool roll a little easier, but I’m still watching it like a nanny until I can get the arrangement I really like, which is a spool that spins absolutely easily. (Yes, that can lead to too much popping off the spool if undampened, which is why the guide and grommet’s ‘friction’ are important as moderators. I’d rather have the spool almost free-running and add a wiper for friction if I had to than that it has to get ‘tugged’ all the time.) If I don’t nudge along right now, even with the skate bearings, I can see where the filament-in-waiting that’s drawn past the grommet is a little ‘bent’ by tension at times between my guide and the grommet itself. To me that’s risk I want to get out of my process.


  • Third tip: CALIBRATE THE BED WHILE HOT. I was used to this on my old Solidoodle with a borosilicate glass plate over a really skanky laser cut plywood bed that was warped as crap, and had NO bed autoleveling correction. I’d heat the bed to temp, then heat the nozzle to like 95C - not hot enough I was either leaking or ‘burning’ stuff since I was not extruding, but enough that at least some of the thermal expansion warping had kicked in. Then I’d turn my thumscrews with the paper shim test in a few places on the bed manually, get the best compromise I could for my planned print position, and be off with it. I am still paranoid enough I also auto-level the A250 before every print.

My sequence with the A250 so far has been:
–Manual control to home, then set bed to 65C and nozzle to 95C.
–Wait for both to hit temp then run the 4x4 calibration.
----(I use 2 layers of standard paper and go pretty ‘tight’ on my calf final step, good resistance on pull and immediate paper ruck-up on push.)
–Reset bed temp and set extruder temp to my desired 200C. Wait for heat, ‘load’ filament (basically drool some out to prime it well).
–Then wipe back to File, load gcode from USB, and intiate print. The machine homes and does do a ‘load’ priming before it starts the skirt outline.

Example of a print not intended for the printer, this is an 8020 extrusion ‘foot’ for my mockpit chair setup, printed on a slight remix of the ‘Fast’ settings so 0.24mm layers. I bumped the brightness because potato cellphone pic of black filament, but hopefully you can see it’s pretty clean. (The ‘hair’ on the first shot is truly hair…dang cat…)


3 Likes

Hey all,

So the print using sdj544 failed horribly. I didn’t take any pictures because I forgot, but it made a thin skin and did nothing else. Had to raise the bed temp to 90C to scrape it off.

I don’t have access to a laptop just yet (I will later today) to modify the extruder as the printer is in another room.

Atom,
Where is the hole to put the thermal paste in?

rtski,
Yeah, I’m not really happy with how the enclosure routes the filament either. Good call for calibrating the bed while hot, I’m going to try that before the next print.(settings below)

Atom & rtrski,
I am going to do another print pre-extruder fiddling with 1mm retraction 40mm/s speed, a brim with a line count of 20. Then raise the build temp to 60 and lower the initial temp to 65C.

I’m also increasing the initial layer height. So interesting to note, the original prints that worked (they’re paste tube squishers) I accidentally used the settings from the Snapmaker Original, before I realized I needed to change my model in Luban. So I am increasing my inital layer height to 0.8mm, which is the default for the Original for fast print. I’ve also dropped the temp back to 205.

1 Like

I think it was shown in a pic in the link I provided on the “what’s wrong with this picture”.

Did you get a single spare hot-end with the Kickstarter delivery? I did in the toolbox (and added a couple more, along with a spool of their PET-G and a backup spring magnetic bed). You can grab that and easily see, the higher-gauge wires (thin) are the ones that feed the thermister probe vs. the actual heater.

2 Likes

Gotcha, I understand now. By looking at the spare hotend. It’s just the little dangly thing that can easily pop out of the hole its in. I’ll find my thermalpaste and drop some in there once this print finished.

I’ve also added a hook at the top of the enclosure to help route the filament. It keeps getting caught on the left Z module.

YES. The line getting on the far size of that Z-rail during ‘homing’ is the first reason the guide is mandatory. It should’ve been part of the machine’s design as things stand now, IMO, for that reason.

Helping provide some additional filament control during print is just gravy.

Current print in work, about 8 pieces on the bed. I’ve been sitting here but NOT yanking the filament manually while it prints, taking a chance. So far so good: the skate bearings definitely help.

For context, this is a pipe clamp spool holder…I needed a one-side-mountable design since the enclosure is almost butted up against the pipes that are my vertical desk supports. CAD view below, the 2 holes to the front-left will take ‘barrel nut’ furniture type hardware. The one hole thru the middle height to the front-right will take a 1/4-20 threaded shaft that I can then mount a spool to (with skate bearings over the threaded shaft).

I hope that clamps strongly enough to support a filament spool. I can loop the blue parts around the pipe then press up (or down) into the cyan and red parts before I insert the furniture bolts. [Cyan and red will be pre-glued together using the yellow bits to reinforce the joint - one of the yellows is ‘reversed’ in the assembly image.] I might need to increase the size of the circular knob at the straight dark blue ends so they can’t be yanked thru. But the critical thing was I wanted only 5mm thick around the ‘backside’ because that’s where the enclosure wall is in my setup. (See one of my earlier pics…right now the light blue filament is just kind of hanging from a crap Amazon clamp purchase…)

1 Like

Sorry, my bad, I didn’t make it clear but I meant nozzle temp for loading to 220. Printing temp dependent on filament. For me it makes sure everything is flowing and anything old is cleaned out.

Definitely calibrate with bed at temp! - forgot that one.

Until you calibrate extruder, which you have to use usb cable for, everything else you’re trying is pointless. Need to eliminate the things that are easy to check first. This will also show you if the feed mechanism is consistently functioning. Run it several times and make sure it’s within a couple mm of 100mm every time.

I haven’t liked blue tape, but one of mine is really textured and the other kind I have peels off when bed heats up.

Haven’t had any problems getting skirt off even when I’ve had problems with model inside it. Sometimes takes a bit to get started with fingernail. Doing 2 or more makes it thicker and helps make it easier to remove. I could see where if someone was having trouble with sticking because printing too close it might be problematic. A razor blade laid almost flat and used carefully can help with scraping off crustys. Someone suggested a mr. clean eraser - haven’t tried that yet.

I just lowered my filament holder and it still fits inside my enclosure (think mine is same dimensions as SM) I still need to print a guide (designed one almost exactly like rtski) because sometimes it tries to wind around z-pillar.

When you increase the height of the first layer you have more room for error which also explains why more success with 0.8. Which also seems to indicate that z-height is a factor. Try starting with your z-height at .15 and then move closer.

Before you do anything else calibrate your extruder.

-S

2 Likes

Sdj544,

No problem! The 2nd print failed horribly, too without calibrating the extruder. I’ll try blue tape and glue stick for sure to see which one I like better.

All,
I’m sure everyone here will be completely surprised, my exturder was set to 212.2/ I changed it E249.65 as specified in the other thread. The other print failed, I’m not going to bother with a picture because it did nothing.

Also, I think my filament from SM is off, too. I have to unload and reload the filament before anything oozes out half the time. I have some white, silver, copper, and gold filament coming in from Amazon later today. So I’ll test out the white and see if I get better results, too.

So, when you remove the hotend to put some thermal pucky in the thermister hole, you might eyeball it good for clogs, too. I forget which size violin or guitar string made a good ‘cleaner’ for the typical 0.35-0.4mm nozzle…I have one lying around somewhere…looks like it’s color-coded dark blue at the loop end if that helps at all.

Also someone else posted about an insert not seated properly that was preventing filament making it into the nozzle, I think? I vaguely recall reading that a while back, while I was still awaiting my machine.

You remembered right, there where some hot ends where the ptfe tube inside broke or a loosened piece was inside.

So far it’s just printed the brim and nothing else. It’s like the filament clogs itself. I’m going to wait for the new filament to come in and try again later today or possibly tomorrow depending on when the shipment arrives. Thanks for the help so far everyone!

You should have an extra hot end. You can try swapping that out.

Looks like in your latest screen grabs your layer height is .2. Change your layer height to .4 or even .8 or .16. You’re not trying to get fine detail at this point. You’re just trying to get a semi-decent print.

Could just be the filament. Get the white working before you even think about trying any of the others. (White of same type/brand usually needs to print 5-10 deg. hotter than black of same) You mentioned metallics, if you’re talking the actual metal infused and not just colored, be aware that it will wear on your nozzle.

-S

You might open the little door and peek, make sure you see the filament going in and the extruder turning. I mean their filament can’t not melt so either you’re not getting the motor push, there’s too much holding the filament back that the motor can’t cope, or the thermistor is not resulting in the right temp to continue extruding. [EDIT I suppose you could also be calibrated so tight to the bed that the nozzle backpressure is preventing anything coming out…]

If you just set the nozzle to a good height above the bed, centered, heat it up, and hit the ‘load’ command several times does it keep extruding as long as you keep hitting the command, or is it dying out doing that too?

Did you remember to change the slicing profile and turn “Retraction” down to 1mm from the 5mm default, again? I saw you did show it before… (I haven’t figured out getting settings to ‘save’ right seems like I have to re-enter them every time myself…probably just as well for now, keeps me cautious.)

Post about the loose bit and a bunch of similar troubleshooting that might help you was in this thread, it was actually @xchrisd who mentioned it that I half-recollected the first time! Funny thing, memory.

This guy has posted a story that sounds kind of like he had a loose electrical connection either to the toolhead or controller matrix that might have been preventing the extruder commands from getting transmitted:

Don’t give up! Not to hijack your troubles but I just did my first ~6 hr print of my spoolholder design for my desk pipe support that I posted the CAD of earlier. Dry fit of pieces without the furniture bolts to hold it on yet is perfect, I think it will work very well. I’m honestly quite impressed with the dimensional accuracy I’m getting, and I’m not even trying for ‘pretty’ yet this is still on a variation of ‘Fast’ settings just higher infill and more side walls for some strength.

(You can see the poopy weak clamp I was using below my assembly on the same pipe.)

2 Likes

sdj544,

  1. Detail: I just did mostly default settings, I will keep this in mind for the future
  2. Thanks for the heads up, but I already started before I checked back in here @ 205C (whoops)
  3. metallic colored, I do have some wood filament now though. But good to know about wear for actual metalics.

rtrski,

  1. with the black filament from SM continues to extrude (at least for a while, then it clogs and stops)
  2. Yes, I am making sure retraction is 1mm
  3. I will check for the loose electrical after this print of white
  4. Oh no, I paid wayyyyy too much for this darn printer to give up.

All,
At this point, I’m almost positive my issue is with the black filament from SM in addition to the extruder calibration. The new white filament from Priline at 12%. It has more done than the black at 50%. The black would just stop and clog up the nozzle. I would have to unload it then reload it after clipping the weird brittle portion off of it. I never got that until after the two semi-successful prints.

A successful print! It got stuck at 99%, but using sdj544’s solution from A250 always freeze at 99% , powering it off and then back on finished the print.

Thank you all SO SO very much! It was definitely the extruder calibration and bad SM filament

1 Like