Dear Artisan community, I got my Artisan a month ago and it is a piece of art. The quality of the components are the very best…NOW I just need to learn how to PRINT.
Can you share what adjustment did you have to make to 3D Print right out of the box with the filament that Snapmaker shipped the unit with. I have not been very successful printing very basic components.
I have used the defaults setting for PLA
I am going to add some more setting parameters here:
Temp: I have tried between 210C to 215C
Heat Bed: from 60C to 70C
I also I adjusted the z-offset increases from 0.00 to .002
I have clean the surface on the build plate with regular rubbing Alcohol.
With all of that I can find a sweat spot to get consistency. If any I have inconsistent results.
G-Code Settings, Here the User Interface screen shot:
I added some more information to the original posting…
I am going to add some more setting parameters here:
Temp: I have tried between 210C to 218C
Heat Bed: from 60C to 70C
I also I adjusted the z-offset increases from 0.00 to .002
I have clean the surface on the build plate with regular rubbing Alcohol.
If you can share with me your results with PLA black (Excellent, good, bad) and some of your settings it will be great. Thanks for replying.
Snapmaker PLA has been hit or miss for a long time, particularly the black. As far as we can tell, the actual supplier changes regularly based on whatever is cheap at the time, or the steady supplier has poor quality control. It’s a roll of the dice if your PLA is good or bad.
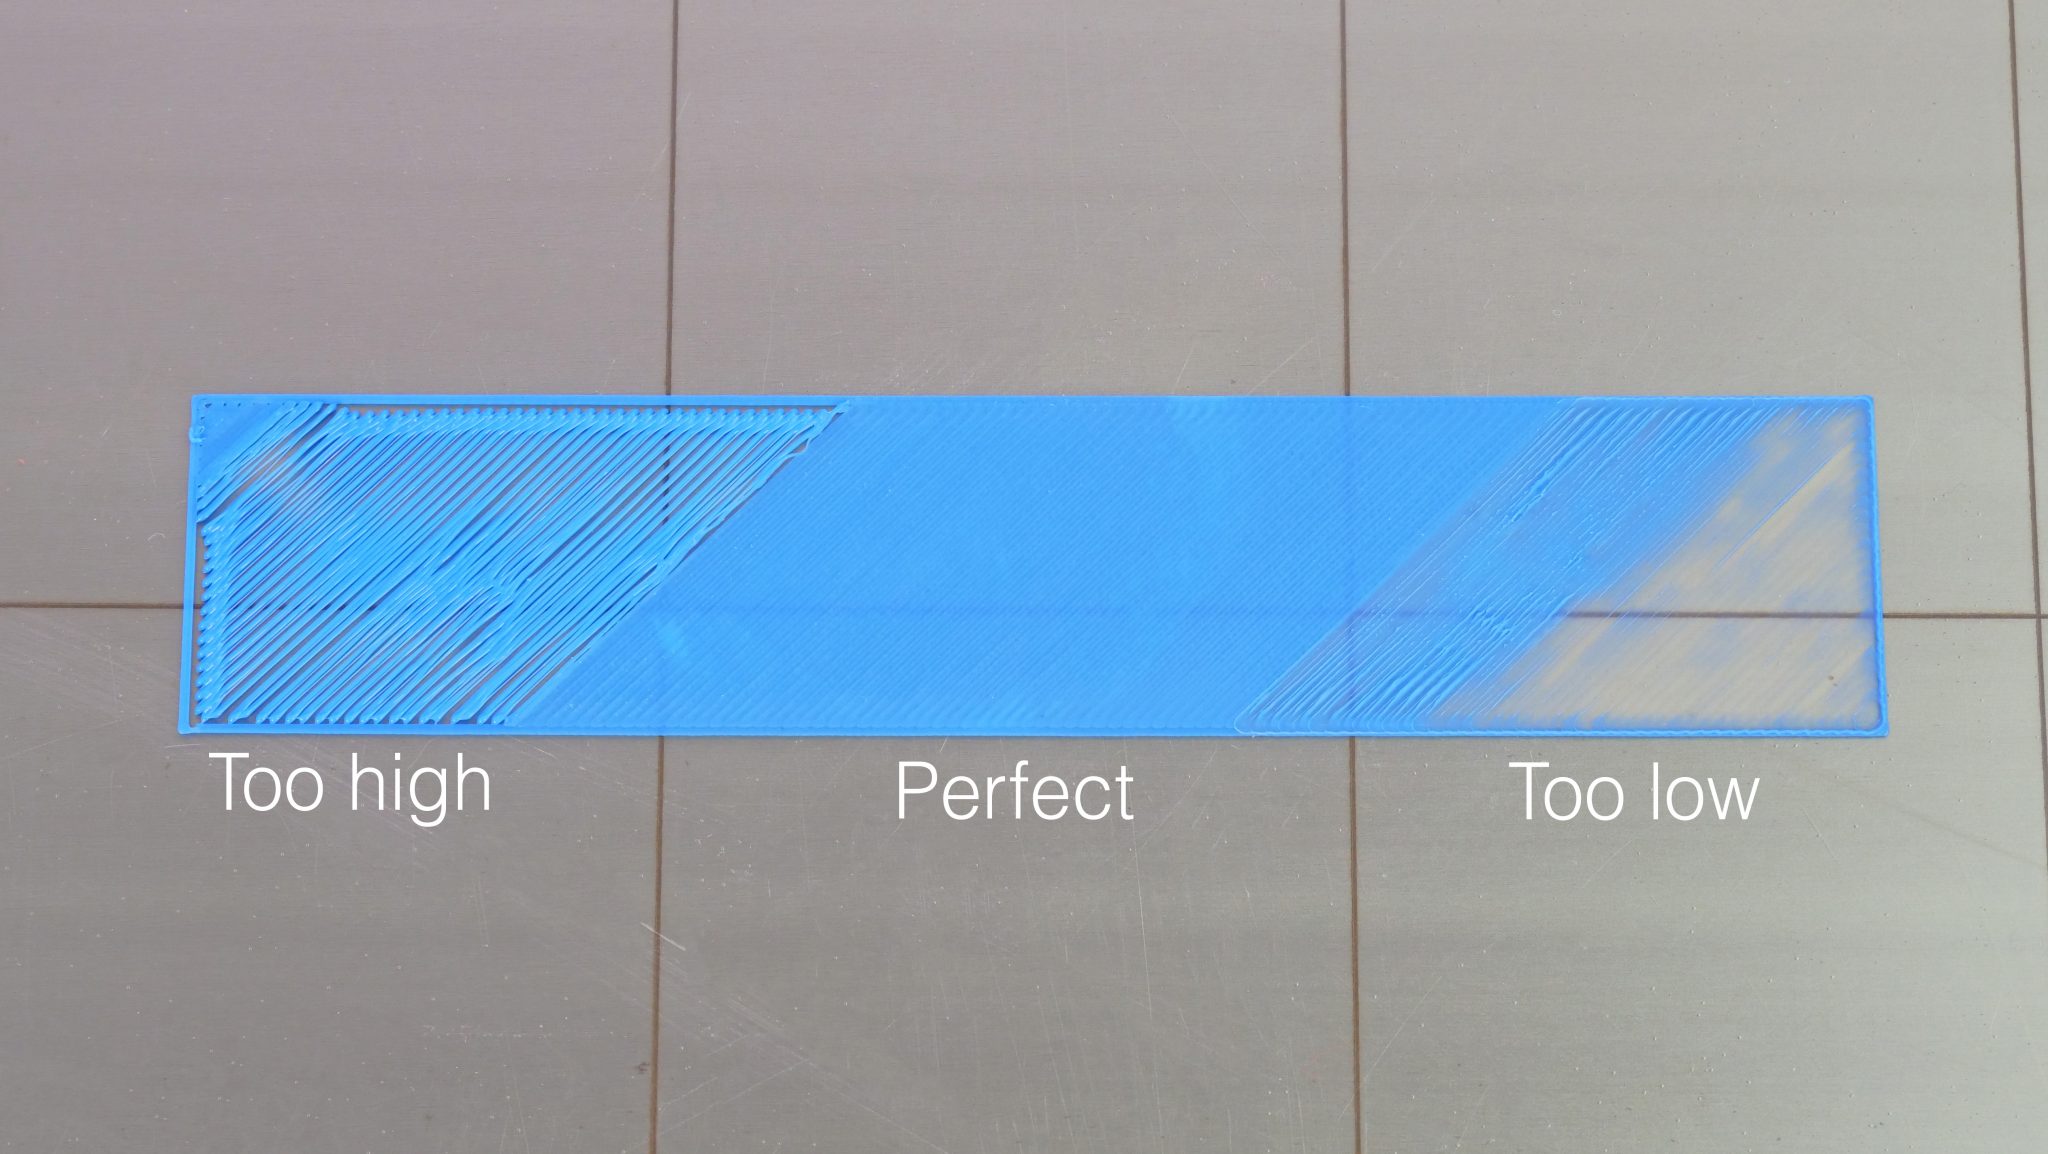
I agree with @Rwide that it looks like you’re a bit too high. Your pictures aren’t high enough resolution to zoom in, but it looks like the lines laid down aren’t smushing together. The lines of filament laid down should fuse into a solid surface. Take a look at https://blog.prusa3d.com/wp-content/uploads/2018/04/first_layer.jpg
As far as your temperature range, you’re not experimenting enough. I printed a temperature tower from 185C to 225C. That’s something you’ll want to do with every spool you get, because enough consistent brands might change a bit over time.
There is a guide for calibrating the V2: 3d Print Guide_Walk Through It includes a GCode temperature tower. I think it’ll work for Artisan too, but I don’t know if anybody has said for sure.
Thanks for your input… very very very useful. I took for granted that the Snapmaker material in the shipping had some assurance on quality as it is the first try of their new machine … I will try different ranges and check out your links.
I was also struggling, especially with the black PLA. Seems like the PEI build plate is really good if you get the settings right but otherwise quite unforgiving (compared to other plates I’ve used).
In the end, I varied the settings quite a lot to find a solution and I made some observations.
Measuring the temperature of the surface of the build plate, it seems to take some time until it corresponds to the on screen reported temp.
Increasing the initial temp (or waiting until temp is correct) and then lowering after the first layer helped with adhesion. Continuous temp above 60 degrees C seems to distort the final print (first 30 layers in general plus loads of warping in particular) so making sure the surface temp is around 55 deg C works for me.
The (only) other setting - in conjunction with the temp - affecting the adhesion has been the Z of the first layer. I run at -0.05 first layer and then bring it back (on the fly) to 0 going into the second layer. Seems this makes the filament smudge onto the build plate without then squishing the subsequent layers.
Would be good if someone can suggest a Luban setting to do this to avoid having to do it manually.
That is interesting. I don’t think there is a setting for that. There is however the initial layer thickness setting that can be combined with a low z-offset value to give the first layer some extra squish, but it doesn’t include adding an offset @ layer 2.
You could always open the gcode file and add the gcode text yourself. If i’m not mistaken, the following text could be inserted before layer 1:
G0 Z1
G92 Z1.05
And after layer 1 but before layer 2 you could add:
I forgot about “initial layer flow”.
Maybe you should try that one. It doesn’t do exactly what you do manually but ahives pretty much the same thing and is probably a better choice…
I have had inconsistent results with PLA as well. Even during long prints the ending layers will be different than the ones before. I have learned this is due to too much moisture. I now use a filament dryer to get the moisture level as low as possible and keep the filament inside a vacuum sealed box during printing. They say 30% or less is good, I like to try and keep things under 20% I have had much better and consistent results.


