U1 Touchscreen Tilt Mount

This project is a guide and a set of 3D-printable parts for mounting the Snapmaker U1 touchscreen at a tilted angle for better visibility and usability.

You can find full set of instructions and up to date models as well as the source file at Servergnome Prints / u1-touchscreen-tilt-mount · GitLab

There’s also the same stuff at Printables U1 Touchscreen Tilt Mount by horza | Download free STL model | Printables.com

If you like this model, please consider a donation

Update 2025-12-25:

  • made the screen and mount flush and friction-fit everything
  • replaced sticky tape mounting mechanism with brace and zip-tie
10 Likes

beautiful, great solution (the factory solution forces me to uncomfortable body positions)

Can you stop cooking for a weekend? :rofl:
Awesome mod, I have a screen coming as a spare part, wanted to do an articulated mount without printer downtime.

Awesome to have active modders in community!

3 Likes

Can’t wait for it!

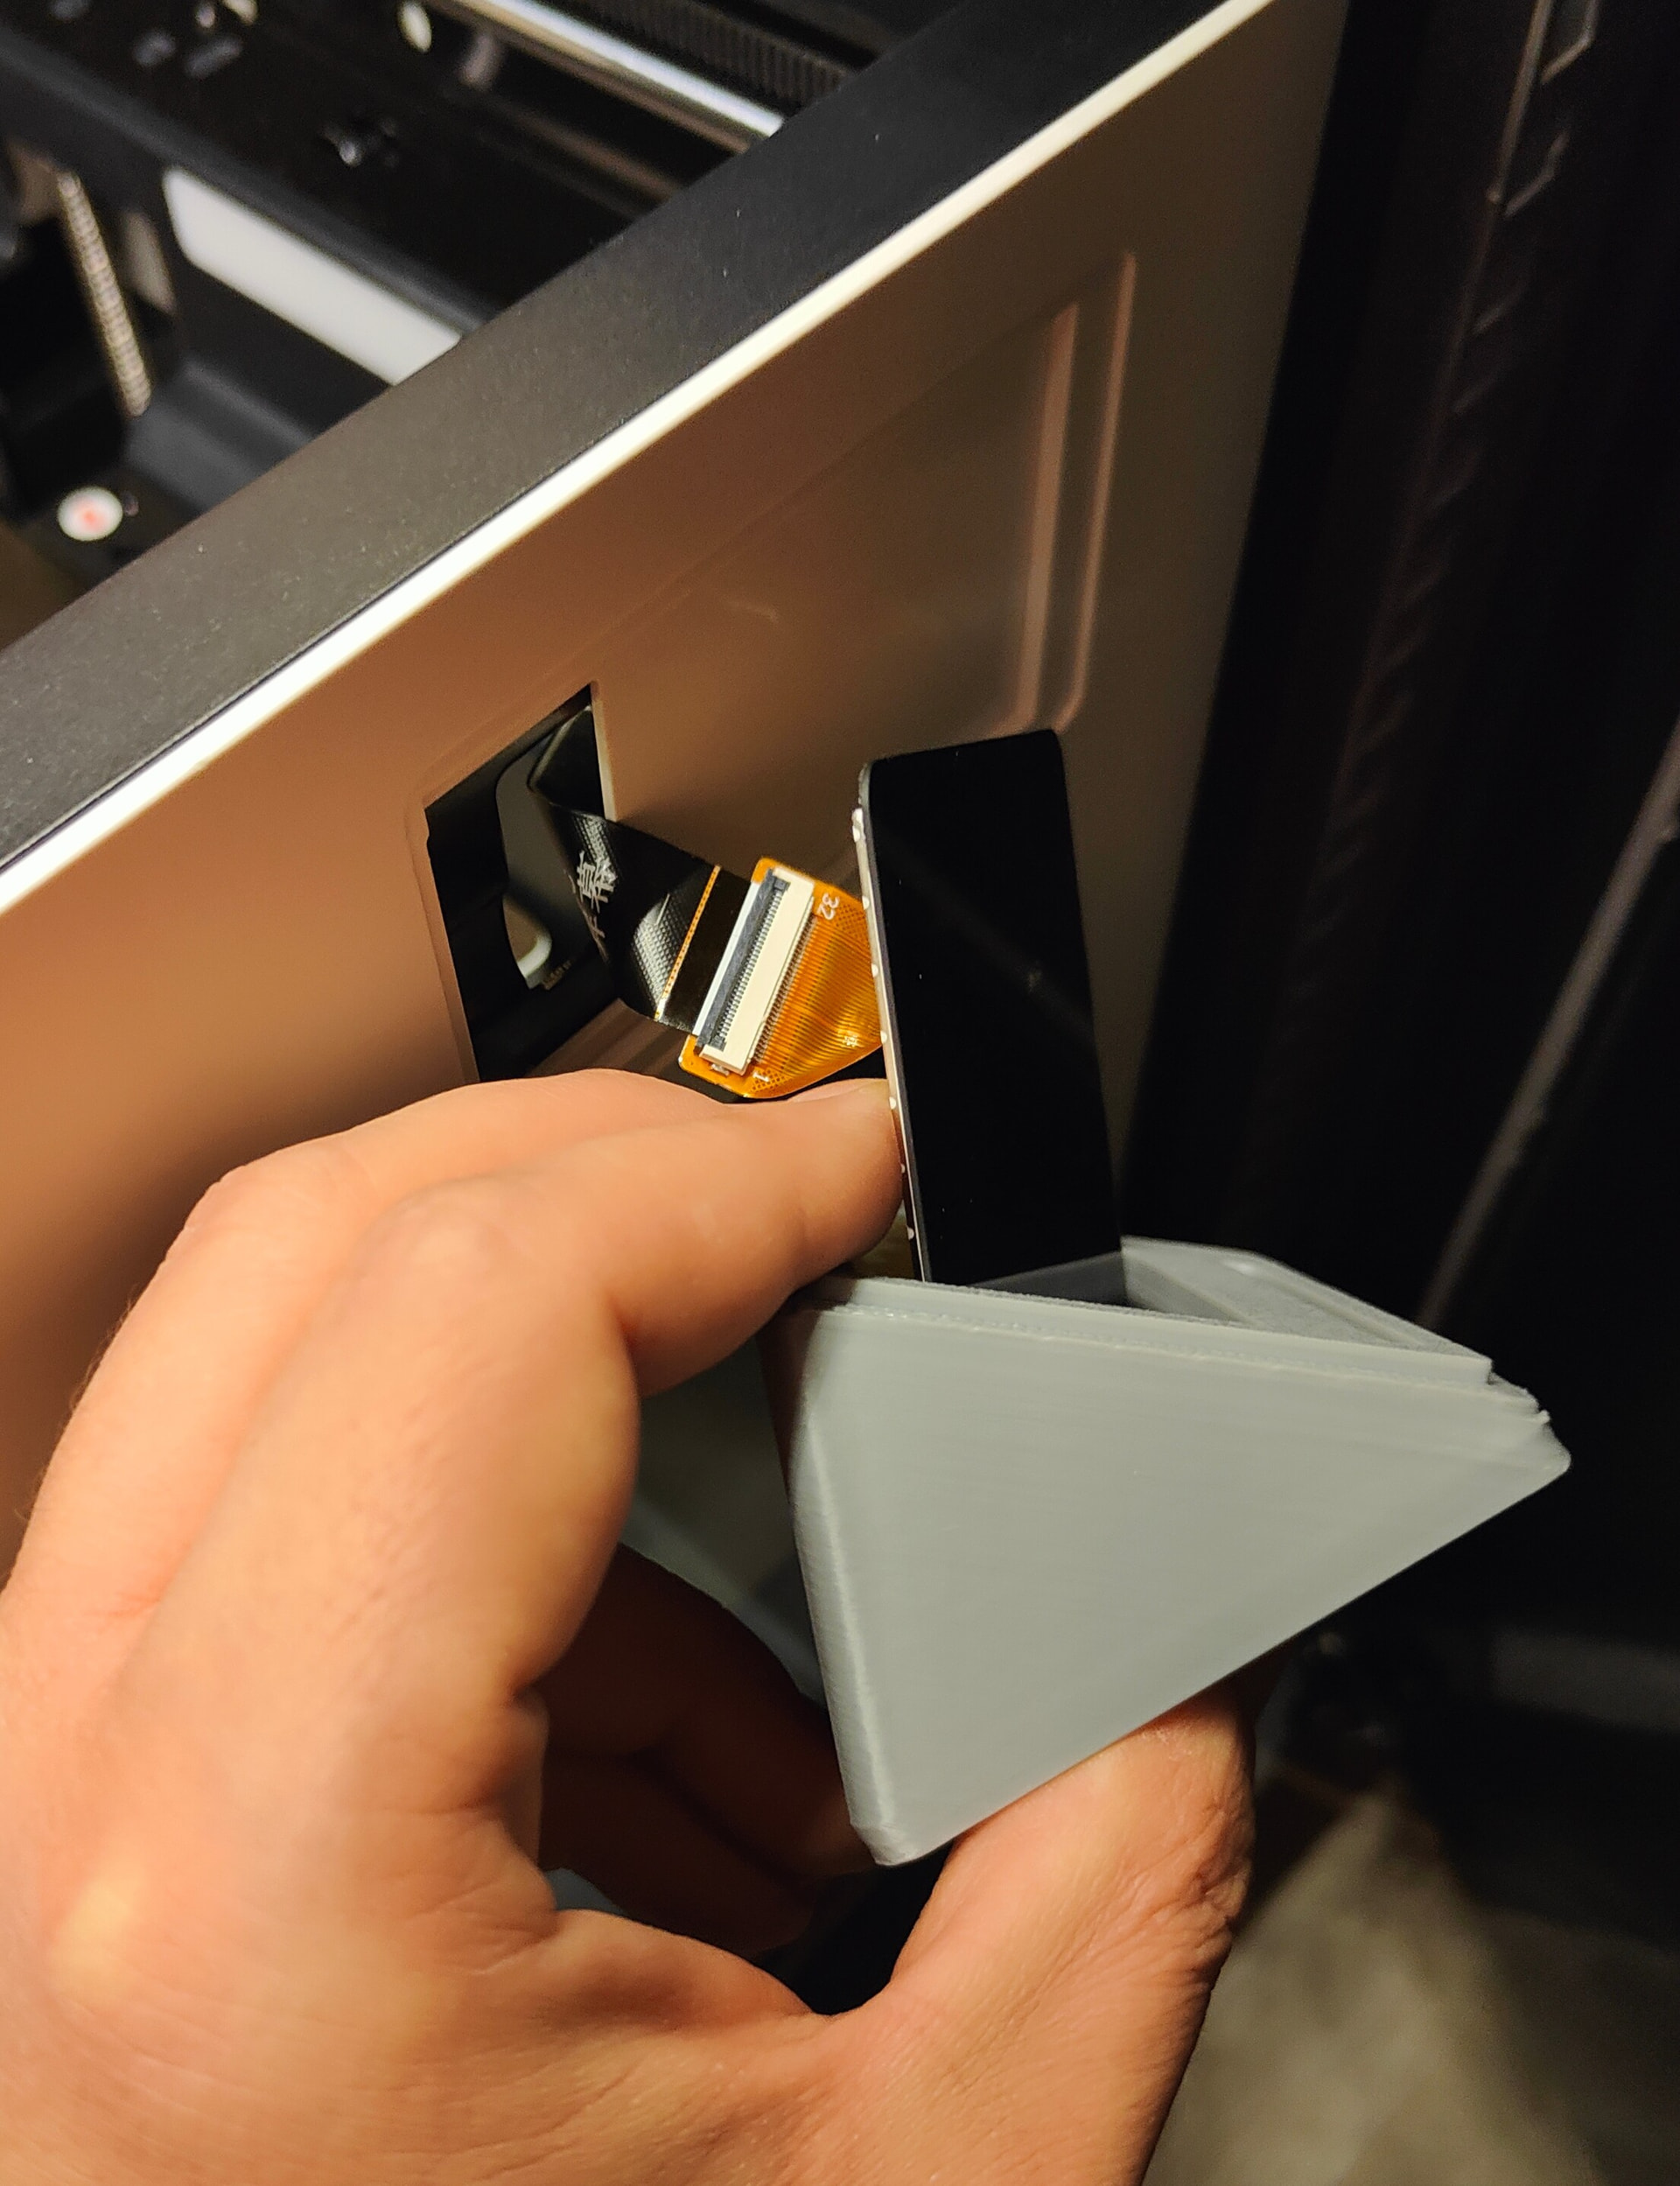
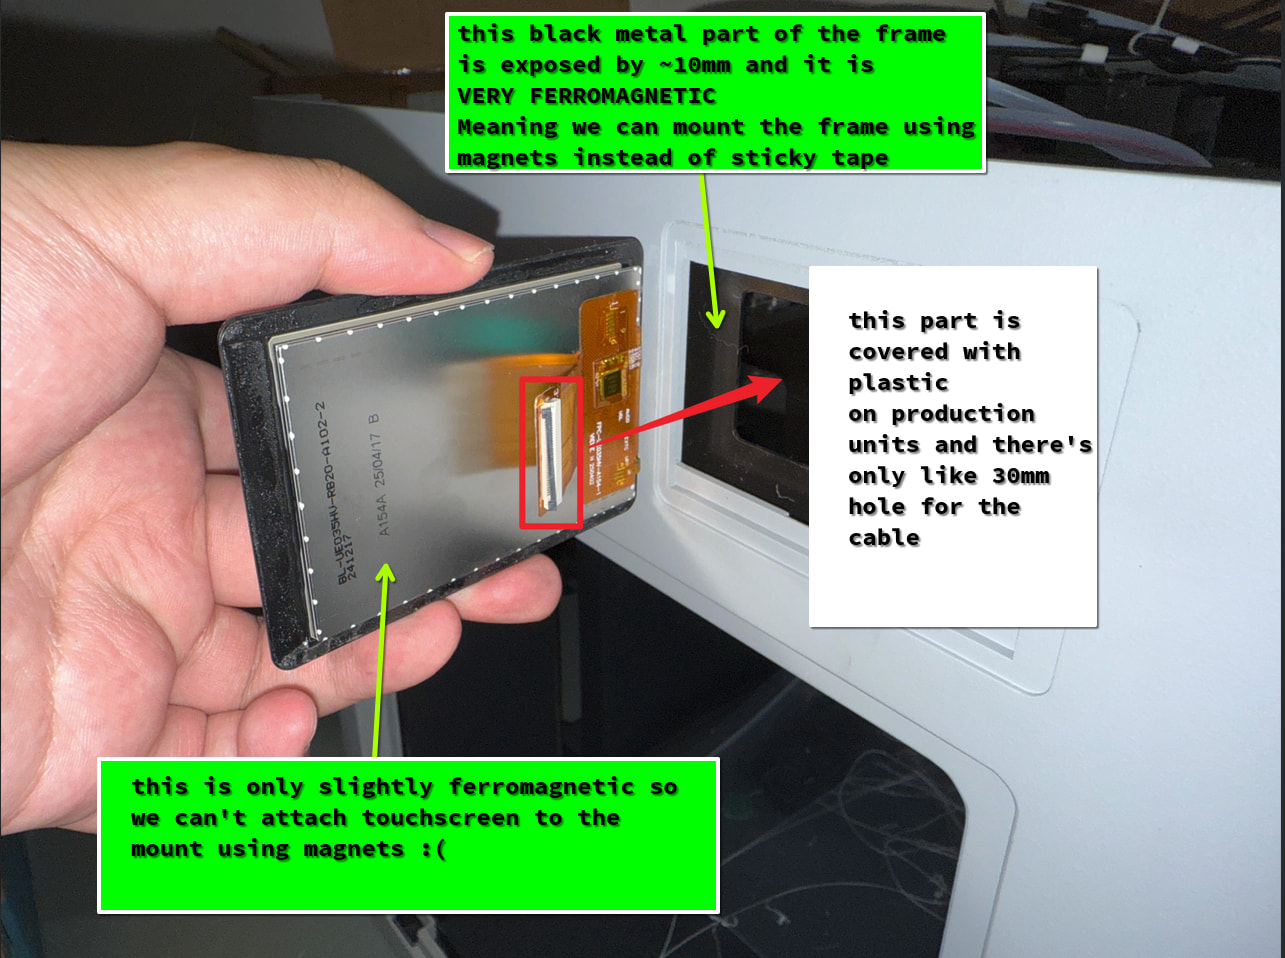
Need to also find an extension flat cable because it’s really fiddly to connect, even for this small distance. Would be much easier to just get an extension and leave a hole to tuck in extra cable.

I might have a source, how long do you think it needs to be? It’s a male on both ends, right?

I’d put it inbetween these. So male-female?

For the mount in the photo I’d go with ~5-10cm to be comfortable. For 50+ degree I wouldn’t go under 10cm.

For articulated mount that + how much it needs to articulate.

1 Like

Can you make it angle-adjustable?:star_struck:

I can’t because I got better things to do.

But my CAD file is there so you can use it as a starting point for remix.

BTW, @nweolu , the frame is very ferromagnetic so if you’re gonna make an articulated mount it might be worth exploring magnets :slight_smile:

Here…

3 Likes

Good point, noted!

How about flat but the right side out from the machine so it’s easier to see from the left. Here is how my printer sits so it would be nice to turn the screen some

won’t work, due to the tech limitations. Cable would be too long for the signal to stay reliable.

I see you don’t have the shielding sticker on the driver (flex pcb behind the screen), did you remove it or it was missing? Mine is covered with shielding, and it is not coming off easy. Could you snap a pic of the driver? It seems like we might be at the edge of the cable length there…

I don’t know what you mean by “shielding sticker” :slight_smile:
It has shielding, but only on a part of the flex cable, not the whole.
Could be that I removed it, not sure.

That’s what mine looks like. Sorry for the angle, I really don’t feel like opening it again :slight_smile:

I’m pretty sure that this cable didn’t have more shielding. It’s a production unit afaik, shipped to EU in the first kickstarter batch (not pre-prod).

1 Like


This portion is covered with something on my pre-prod, that I can’t easily remove. No worries tho. I’ll figure it out. Thanks for the pic!

Hello everyone,

I have also developed a display mount.

It is adjustable in all directions.

Video Project 6 (1)

The model can be found on Makerworld under number 2274761.

I had already written an assembly guide, but unfortunately the page froze. I stupidly hadn’t saved it in between. I will send the guide in the next few days.

Best regards :victory_hand:

9 Likes

Welcome in @Kaese666 ! Awesome project, can’t wait to take a look at it :sign_of_the_horns::sign_of_the_horns:

This design is so cool! Where can I download it?:star_struck:

1 Like

Hello Simon, You can download the model on Makerworld. I will add the assembly instructions today or tomorrow. You definitely need an extension for the cable from the touchscreen.

https://makerworld.com/models/2274761?appSharePlatform=copy

3 Likes