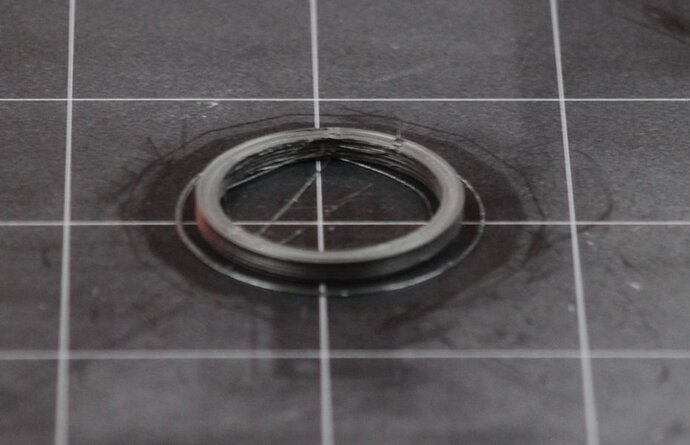
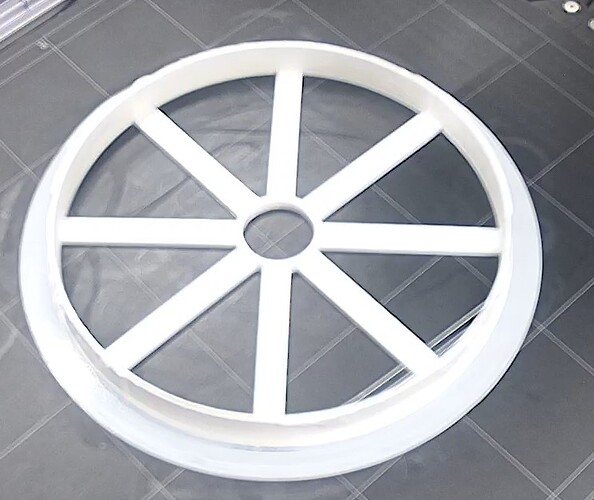
Yes, initial layer is bad, I usually run it at 65% speed and gets “ok”, I didn’t do it here for the test. Bed was cleaned with isopropanol, and machine is Z calibrated, if I would lower Z-offset, the nozzle would hit the bed. I tried the flow increase and better inner-to-outer-wall adhesion, and it improved. Only thing I hadn’t done yet is reduce outer wall line width.
Sometimes using isopropyl alkohol and paper tissue is not enough. It is good to use soap and water once in a while. Your first layer should adhere to the surface better than that.
Regarding the bridging: The reason you should use smaller outer wall line widh is to ensure that the nozzle hole overlaps the inner wall. A little extra flow for outer walls also helps.
Sorry, but i agree with @Rwide . Your z is to high. Skirt looks really terrible.
When the nozzle really scratches the surface (which is not how your layer looks like), then please recalibrate with huger calibration matrix. Here in forum is a manual how to run 11x11 points.
More cleaning, recalibration, 40% less speed for the initial layer, 0.2mm outer wall width, and I’d say it’s good enough now, still a bit of stringing but might need more filament drying, or I should turn on the fan.
I also have the Overture Black EcoPLA but I have relegated this specific brand type non-useable as its melting point is uneven within same spools there is no rhyme or reason for it that I’ve found. Its REALLY REALLY BAD
You did not mention what setting you used for outer wall flow. Hopefully you increased it to compensate for the reduced outer wall line width…
Personally I would have tried outer wall line width 0.3-0.35 and whatever outer wall flow that brings the line width back up to 0.4…
I had tried 0.3 before. Flow is globally at 105% seems ok. The filament is 3djake ecoPLA, so probably unrelated to Overture. I haven’t used more than one spool yet, so don’t know if the temperature settings will need varying.
Dont have read the whole thread, pls apologies.
Your first picture seems a bad e-step calibration causing underextrusion and or you seem too cold and or too fast which all cause bad layer adhesion.
What print head did you use? If its the single 3dp head the extruder calibration is a must.
it’s the single head. I did run the extruder calibration thing, following thoroughly the instructions to save the new value. i guess i’m compensating underextrusion now with the increased flow value.
Whats your new esteps?
One more, do you see holes in your print(s)?
Is your spool easily feeding the extruder?
It came from the factory with E212.21, and was calibrated with the process by me to E226.963. No holes in the print. Extruder has to work a bit, though, to pull the filament, as I’m using the enclosure, on top of which is placed a PolyBox II (bit of a wasted investment, to be honest, as the keep-dry-effect is nearly zero, humidity indicator doesn’t seem to attest to any effect of the silica gel inside), so the filament runs a few angles through a PTFE tube. I had some problems with this, but now found a setup where the filament is consistently pulled.
It seems your E steps is too low. Try calibrating once more, you should land at something about 250.
You wouldn’t believe what caused this, today I found out following a hunch.
It’s that pulling the spool is too hard. I have it on top of the enclosure, with a pet tube running a half circle to go inside. Added factor is that I was using a self printed ‘master spool’ for eco PLA, which is even more difficult to rotate.
So when I saw today again the bad print quality, I tried and pulled the filament by hand, so that the print head would have an easy task pulling the filament in. And that was it, printed super nicely.
So I’m going to dump the Polybox, which was anyway a superfluous investment (always shows 40% humidity no matter what), and put the spool back into the enclosure somehow, to minimise the force needed to pull it. I guess that’s a good future pointer if anyone encounters these apparent “underextrusions”.
Hello,
I have same problem with Dual Extruder, I’m trying to print Lithophane somthing like this
can you tell me where you install the filament inside enclosure to solve the problem ?
I try this
https://www.printables.com/model/434016-snapmaker-filament-spool-holder-support-dual-extru
with this
https://www.printables.com/model/167089-snapmaker-2-filament-guide
but same problem but not working with me
thank you
I use single extruder not dual. I just put the spool back onto roughly the same position it has by default when you don’t use the enclosure – on the spindle screwed to the left Y axis. I haven’t had time yet to finalise the mounting (adding a blocking disc), because now the filament tends to "jump off’ when the head goes to home position.
Hello,
sorry for late replay, thank you for info, I dry the filament and move the module to the Right it work for me now but need more test.
thank you

