Raspberry Pi Model B Plus Rev 1.2
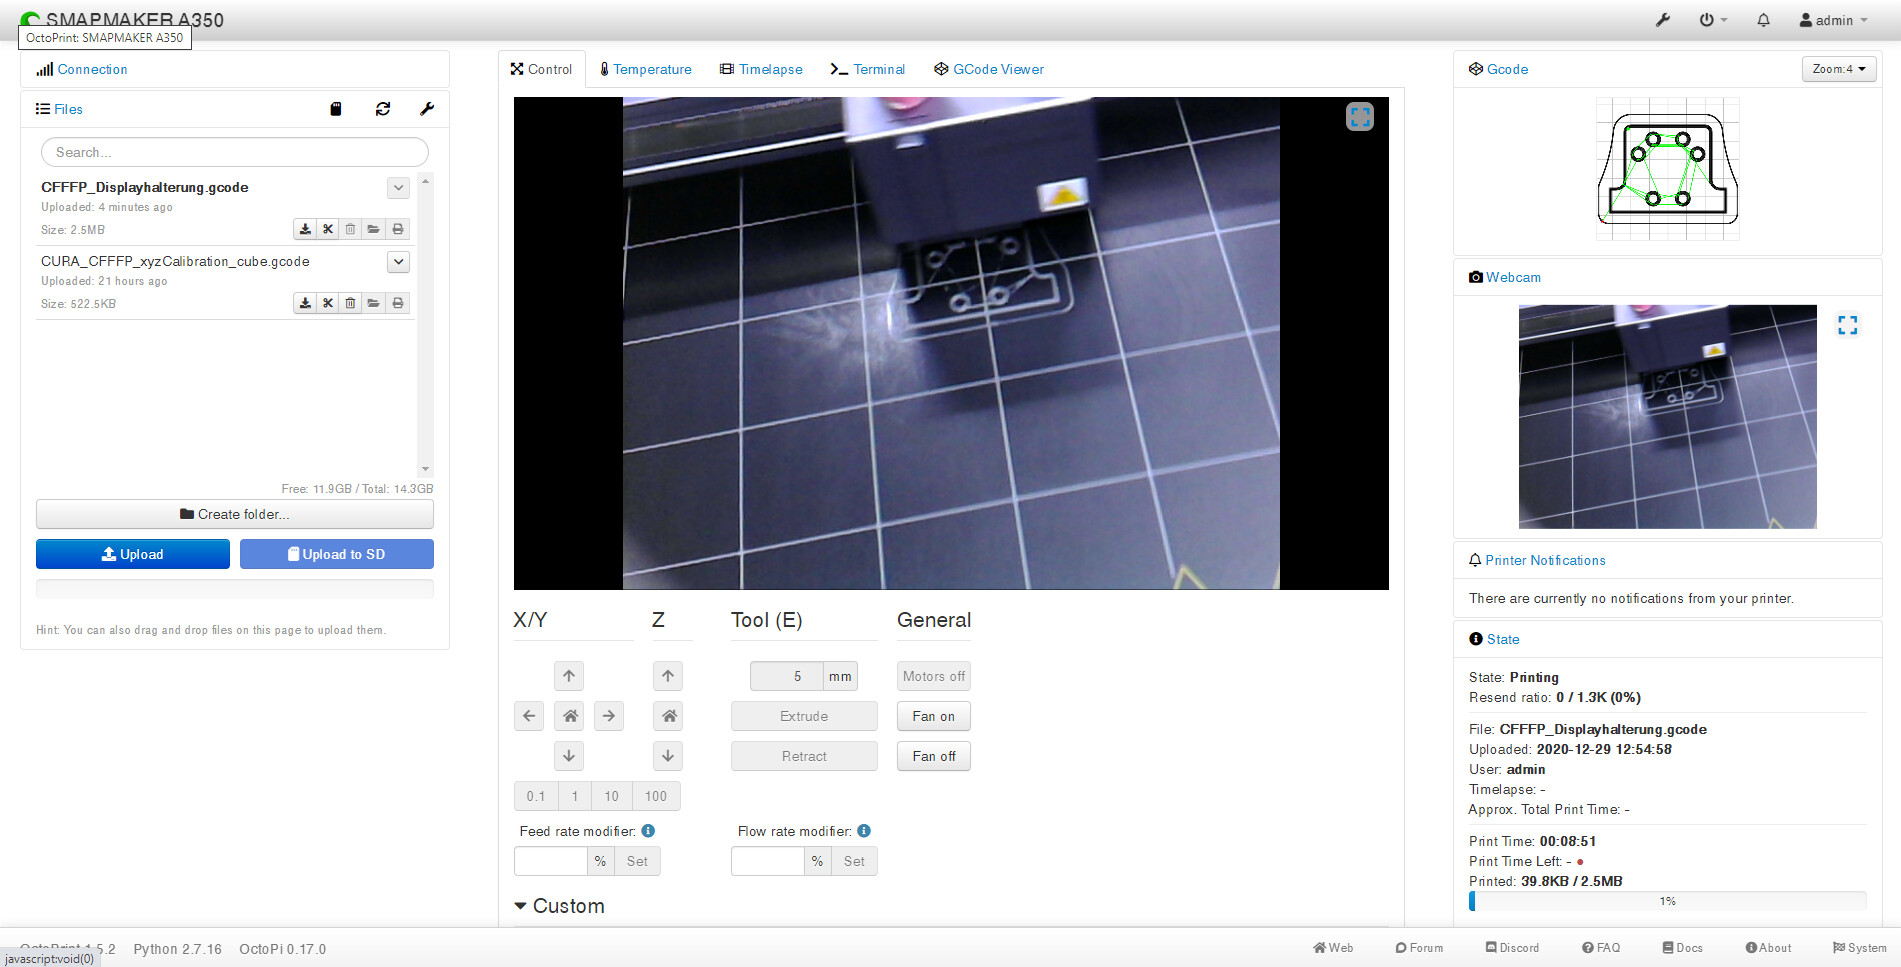
OctoPrint 1.5.2 Python 2.7.16 OctoPi 0.17.0
Cura 4.8
Core - 700MGz
Mem - 512Mb
Video Mem - 64Mb
processor : 0
model name : ARMv6-compatible processor rev 7 (v6l)
BogoMIPS : 797.66
Features : half thumb fastmult vfp edsp java tls
CPU implementer : 0x41
CPU architecture: 7
CPU variant : 0x0
CPU part : 0xb76
CPU revision : 7
Hardware : BCM2835
Revision : 1000010
Serial : 00000000ca9f99f0
Model : Raspberry Pi Model B Plus Rev 1.2
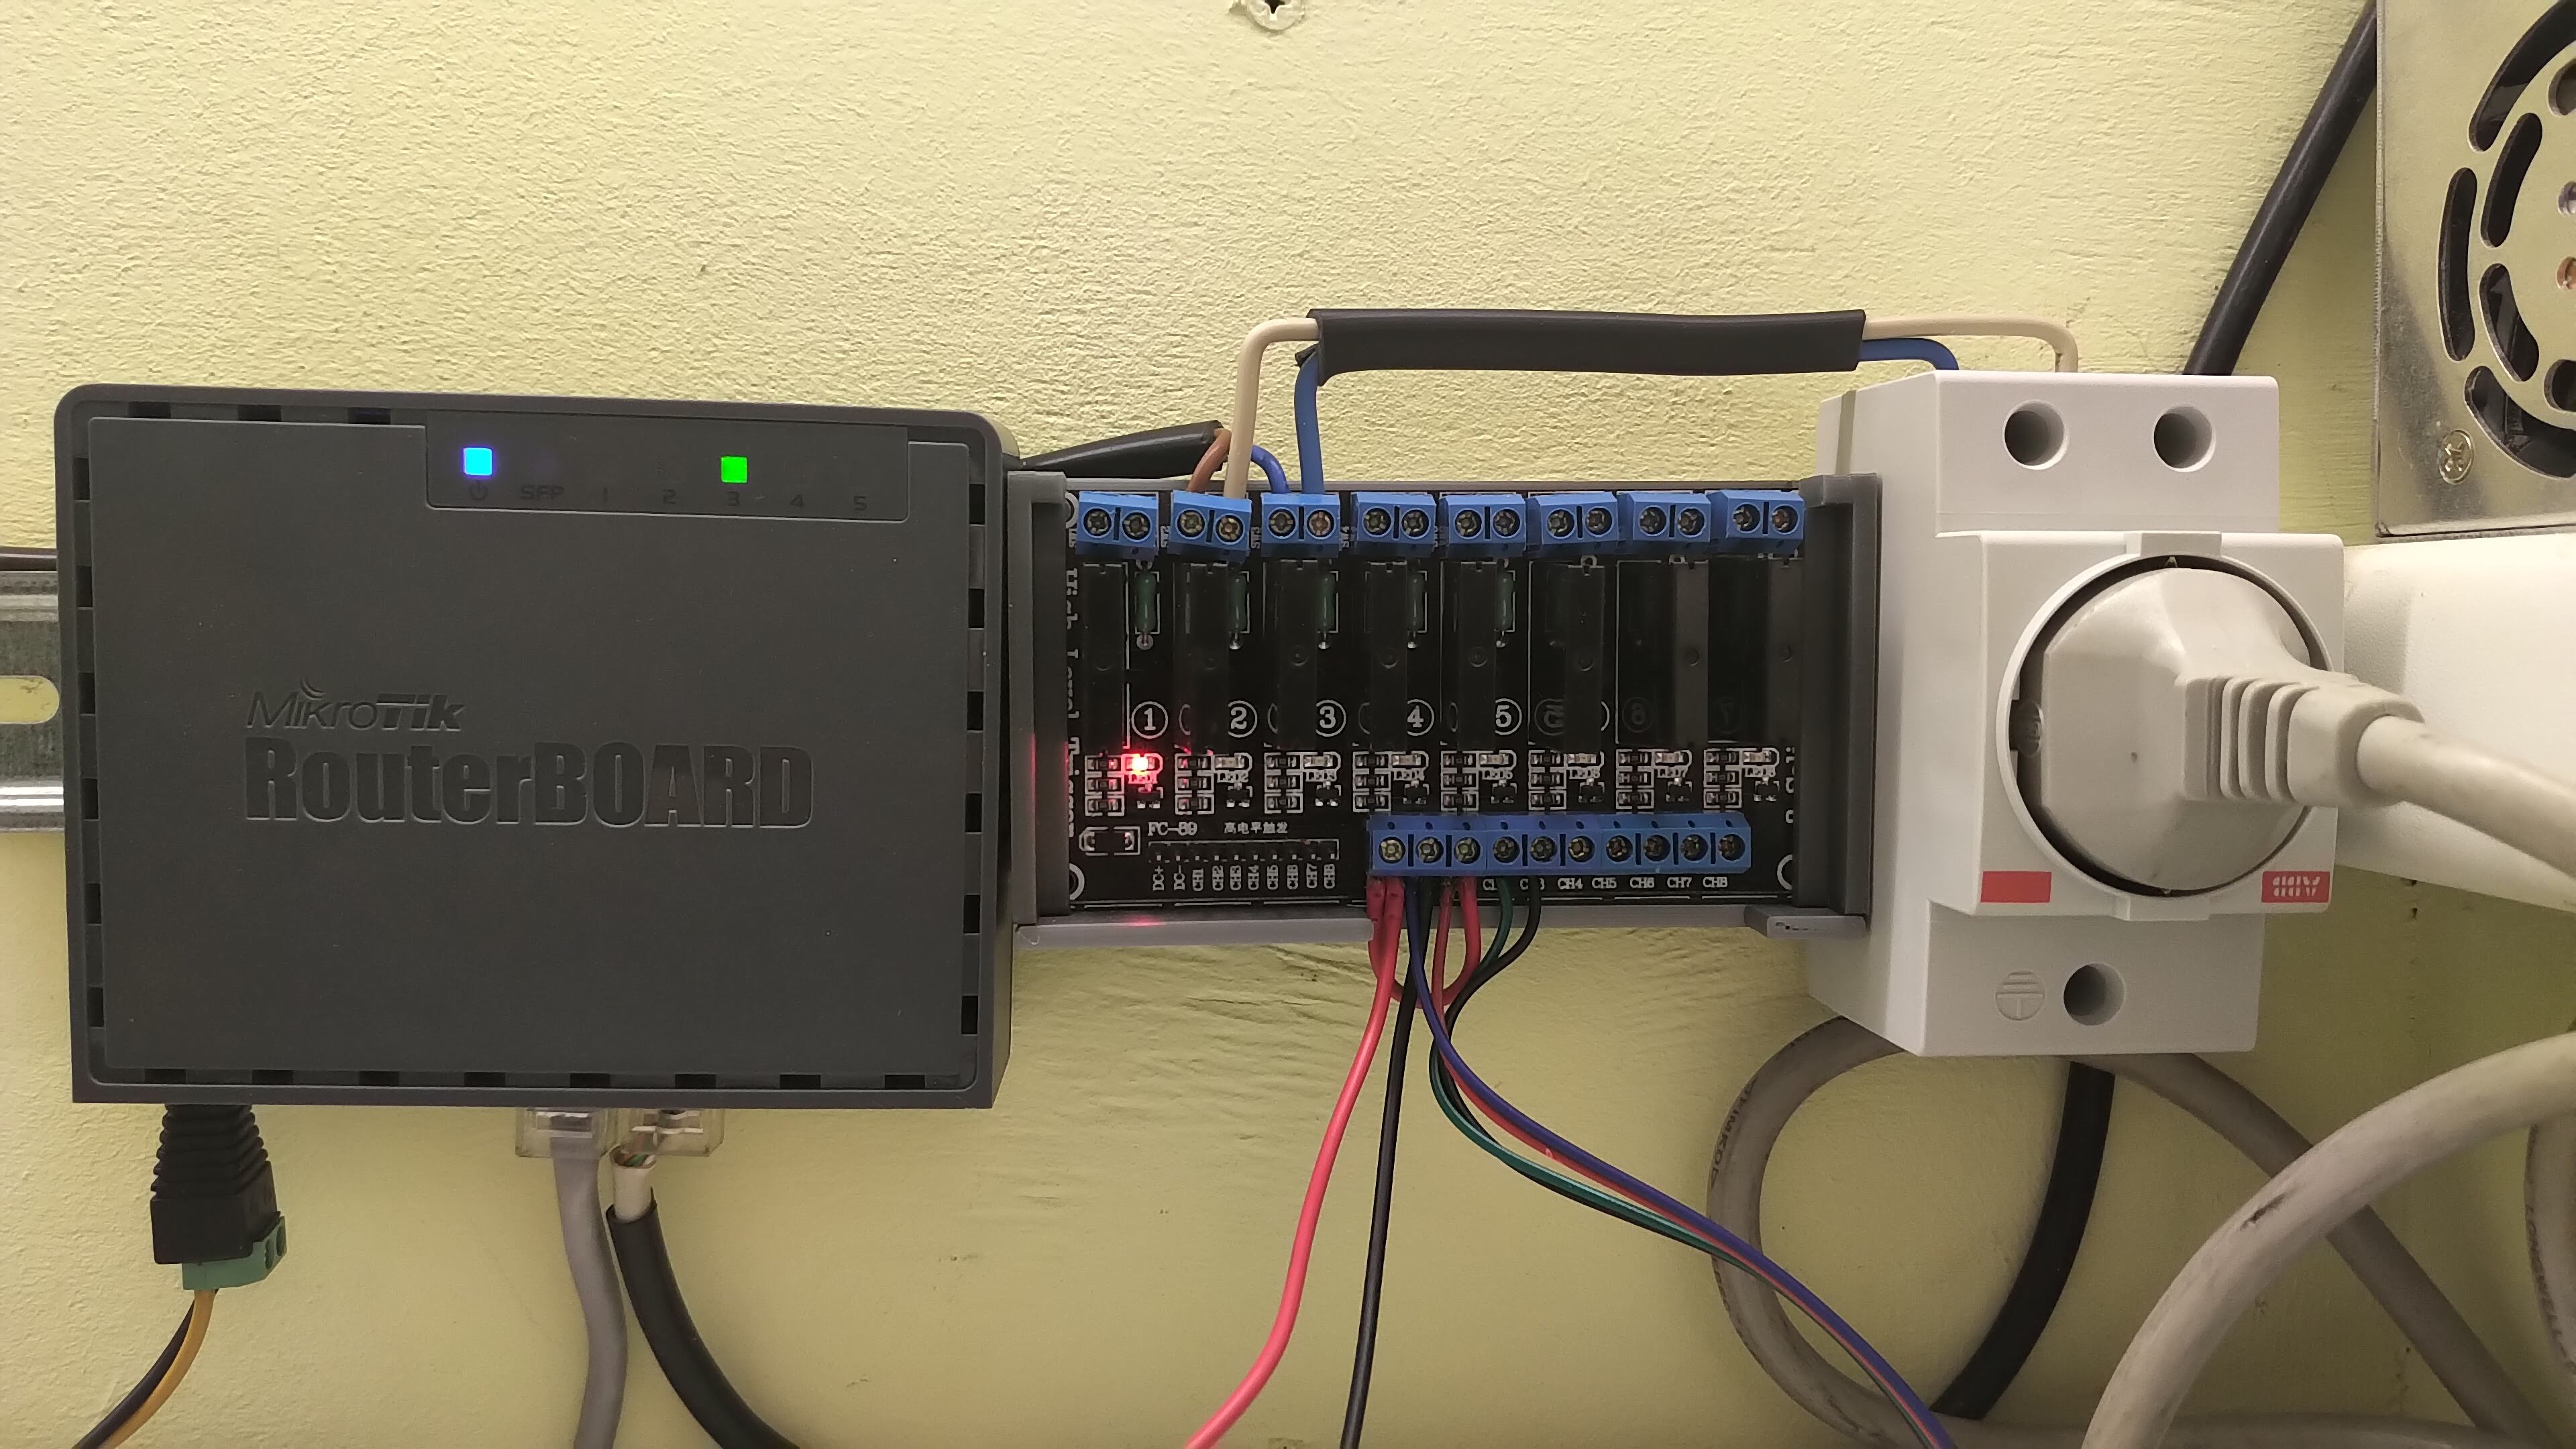
So. We supply power to the Mikrotik router - 12v everything is clear here.
Next, we supply 5V power to the DC + DC-Relay module and DC + we link with switch 1 (+ 5V), from it we take power to the Raspberry.
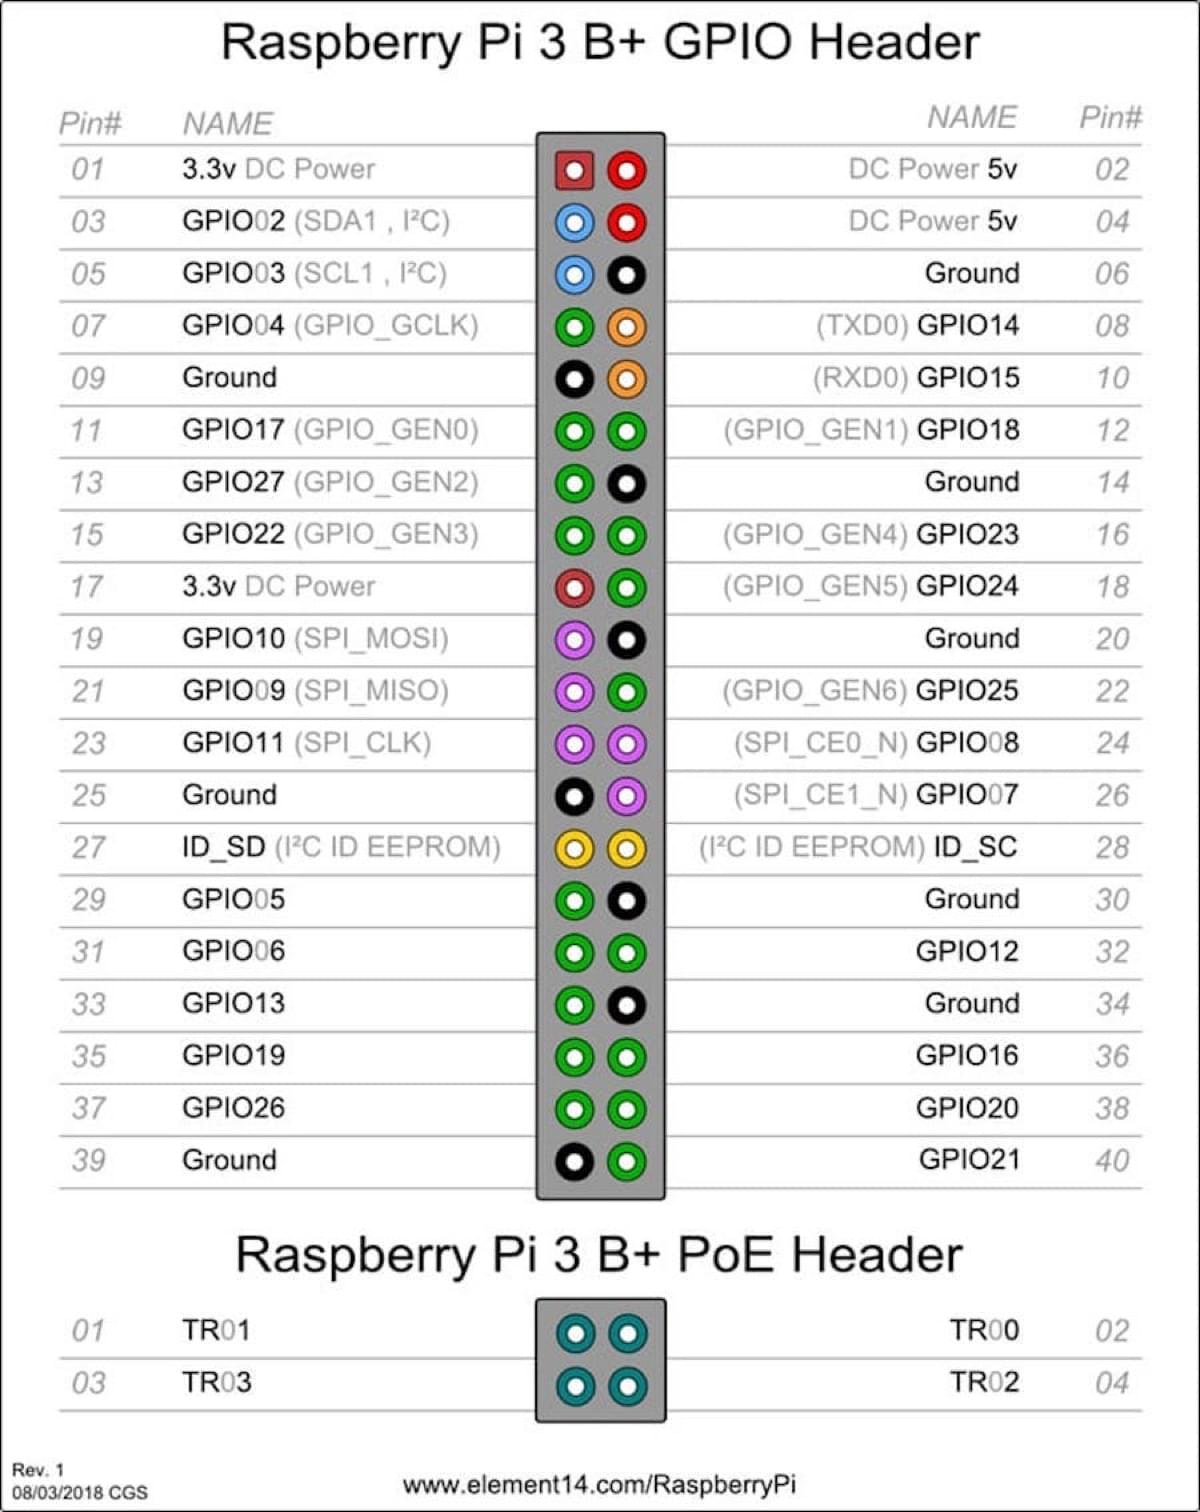
Ports 1 and DC-on the Relay connect to Raspberry gpio pins 2 and 6.
In this configuration, you can see that the LED on port 1 is on, which means that the voltage is supplied to the Raspberry.
Ports 2 and 3 on the Relay are connected to the Raspberry gpio pin 11 and 13 (GPIO17 and GPIO27) to control the outlet to which we connect our printer.
Add script - Power On
relay_up.sh
#! / bin / bash
gpio export 17 out
gpio -g write 17 1
gpio export 27 out
gpio -g write 27 1
Add script - Power Off
relay_down.sh
#! / bin / bash
gpio export 17 out
gpio -g write 17 0
gpio export 27 out
gpio -g write 27 0
Setting access rights
sudo chmod + x /home/pi/gpio/relay_up.sh
sudo chmod + x /home/pi/gpio/relay_down.sh
Configuring OctoPrint - config.yaml
Add the code.
system:
actions:
- action: power_on_relay2
command: sh /home/pi/gpio/relay_up.sh
confirm: Turn on Snapmaker A350.
name: Power on - Snapmaker A350
- action: power_off_relay2
command: sh /home/pi/gpio/relay_down.sh
confirm: Turn off Snapmaker A350.
name: Power off - Snapmaker A350
Slic3r has the ability to automatically upload files to Octoprint using the API Key.
Similarly, you can configure Simplify3D, although there are a little more body movements than just entering this key.
Further there will be a text for Windows users (in MacOS and Linux, steps 1 and 2 can be skipped)
I have a question. I have Snapmaker 2.0 A350 connected to OctoPrint 1.5.3 running on RPI 4B. I’m using Cura 4.8.0 as slicer and Fusion 360 for designing.
All works fine, but… when I slice the file and send to OctoPrint, then start it from Cura or OctoPrint, the bed and extruder will heat up, the print will start but the temperatures will be reset back to 0 and I need to manually rise them up again.
Did you have similar problem?
My suspect is that maybe I need to put Snapmaker start and end codes into OctoPrint not Cura? But Cura does slicing…
As soon as the power is turned on remotely (on my iPhone), preheating starts automatically. In octoprint, There is “OctoPrint Settings-> PRINTER → G-code Scripts → After connection to printer is established” I usually use the PLA filament (nozzle 215c, bed 80c). my preheat Gcode…
M190 S68 ;Wait For Bed Temperature of 85% (80c x 0.85 = 68c)
M104 S215 ;Preheat Nozzle to 215˚C
M140 S80 ;Start Warming Bed to 80˚C
M109 S215 ;Wait for Hotend Temperature
If snapmaker ready, I will goto the front of machine, and then, Install the filament and wipe the hot bed with disposable alcohol.
In my modeling job, Fusion360(tool-make-3D print-custum utility-prusa slicer) → Prusa slice (after slice, G code upload to printer host)
After all printing is end, filament are fully retraced from hotend by modified prusaslicer end G-code, and then In octoprint “PrintDone” event is sent to IFTTT by Octoprint-IFTTT plugin, IFTTT send power off signal to Smart Sockets Switches & notify to my iPhone
After recieving the print-done notification on my iPhone, I will goto the front of machine again, and then remove filament & keep filament to Container for moisture removal & remove model from bed…
I use two Prusaslicer printer setting one is “Snampmaker 2 A350 (filament remove)”
other is “Snampmaker 2 A350”
There is example end G code of prusaslicer for “Snampmaker 2 A350 (filament remove)” setting.
;End GCode begin
M140 S0 ;heated bed heater off (if you have it)
G90 ;absolute positioning
G92 E0
G1 E-2 F300 ;retract the filament a bit before lifting the nozzle, to release some of the pressure
G1 Z330 E-1 F3000 ;move Z up a bit and retract filament even more
G1 X0 F3000 ;move X to min endstops, so the head is out of the way
G1 Y350 F3000 ;so the head is out of the way and Plate is moved forward
G91 ;relative positioning
G1 E-70 F300 ; remove filament from hotend
M104 S0 ;extruder heater off
M84 ;steppers off
There is one problem that has not been solved yet.
After preheating of the nozzle and bed, when printing is ready, the event should be sent to IFTTT and delivered to my iphone. To do this, a “waiting event” or a “pause event” is generated with only G code to receive IFTTT notification, but the event cannot be received only by setting the octopi G code.(ie, M0, M1, M226)
If you have a good idea or solved it, please share it. please
My equipment and apps
raspberry pi 3(installed octopi) for octoprint
Smart Sockets Switch (blitzwolf)
snapmaker 2.0 A350
Logitech HD Pro C922
iPhone Apps
IFTTT - notification & auto power off
OctoClient or AstroPrint - Progress monitoring (camera included)
Smart Life - power on
internet services
IFTTT ( three applets are free … printdone &power off, printpause for color change)
NoIP (for free DNS domain of octoprint)
Many slicers have a G-code that sets the hotend temperature to zero before the bed temperature reaches the set temperature and waits for the bed temperature to rise. Check if there is such a thing in the G-code at the beginning of the program.
i.e a part my prusaslicer start G-code
;Start GCode begin
M140 S[first_layer_bed_temperature] ;Start Warming Bed
M104 S160 ;Preheat Nozzle ; no more needed
G28 ; home all axes
G90 ;absolute positioning
G1 X-10 Y-10 F3000
G1 Z0 F1800
G1 Z5 F5000 ; lift nozzle
M190 S[first_layer_bed_temperature] ;Wait For Bed Temperature
M109 S[first_layer_temperature] ;Wait for Hotend Temperature
preheat for nozzle is set to 160c at first, but The bed temperature does not rise to the set value and the nozzle temperature does not rise to the set value due to M190 S G-code.
If “M104 S160” wasn’t even there, you will see that the nozzle temperature drops to the room temperature no matter how high it is.
In Cura, You should check G-codes or temp setting in many set (profile, printer, material)
I hope it helps.