Hello…this is what my experience has been. We cannot use passthrough. I know that a lot of LB users use Imag-r or Da Big Gimpin’ plug in to pre process the image and when it is loaded into LB you are advised to use passthrough but don’t use those other products because SM does not seem to understand what to do if you use passthrough. In order to get out of the dithering inverted picture issue, I uninstalled LB including deleting the folder in programs and installed version 0.9.16. Newer versions may work as long as you never use passthrough. Before I uninstalled, I cleared out the LB preferences by going to File - Open Prefs folder. Once the folder is open, close out of LB and then delete everything in the folder. Once the folder is empty, then I uninstall. This has worked for me and everything has been good as long as I don’t use passthrough.
I’m having trouble getting LB to work with exported GCODE opened in Luban. I could have sworn that I read that this is fine to do, but I can’t seem to find that info now. The reason I’m doing it this way is that I just want to send the file with WiFi.
Here’s what I’ve done:
- I’ve followed the advice to set it up here: Snapmaker 2.0 A350 Setup Guide - Snapmaker - LightBurn Software Forum
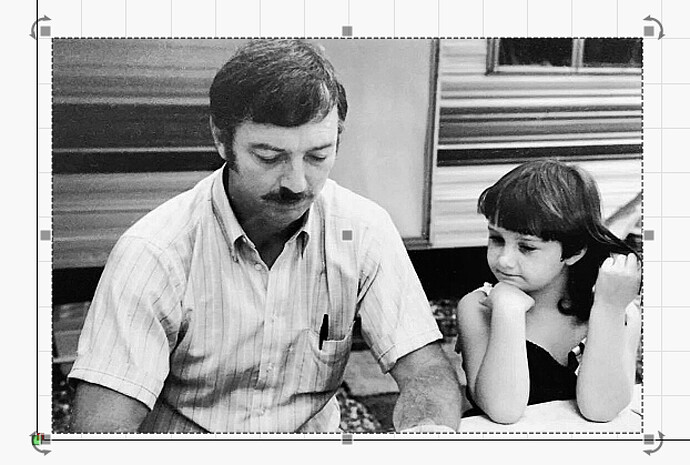
- I import a photo.
Here is what it looks like in LB:
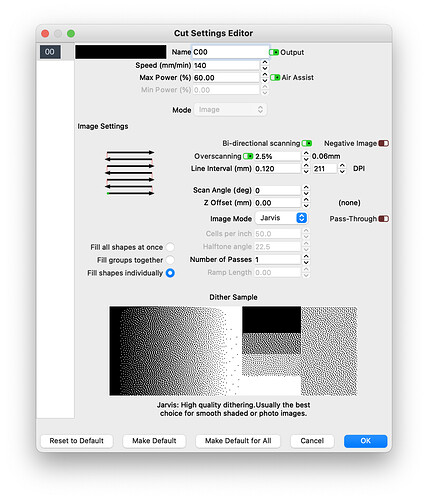
- Here are the cut settings:
- I save as GCODE.
- Rename file from .gc to .nc
- Open it in Luban Workspace. Luban’s preview is just black:
Given that Luban can’t render the GCODE preview, I’m hesitant to even send it to the printer for fear of causing a problem.
Any assistance is appreciated!
I don’t really value what Luban thinks of anything. The only way to settle this would be to post the gcode file, however I’m sure Lightburn generates valid gcode and it will be shown as much.
Thank you. I’ll give it a try!
Luban preview may just be showing you the toolhead path.
So it would be black everywhere the toolhead runs which on a grayscale photo would be the whole thing.
-S
Ah! Good explanation! I bet that’s it!
As always until you’re confident you should always run a test on scrap. And you don’t have to run the whole thing. When I do tests I’ll take a small square (10-15mm) of a critical part of the photo and then repeat it 5-10 times with a range of settings.
Also, if you’re doing it on wood, you usually have the option to sand it down and start over.
Lastly, you can always do multiple runs to make it darker.
-S
Once snapmaker includes a piece of code from github, you will be able to use Marlin.
It works way quicker.
The code is there already, compile it, load it and voila.


