Dear 3D-printing-experts
I have a problem with the delamination of the 1st layer and can’t determine the reason why.
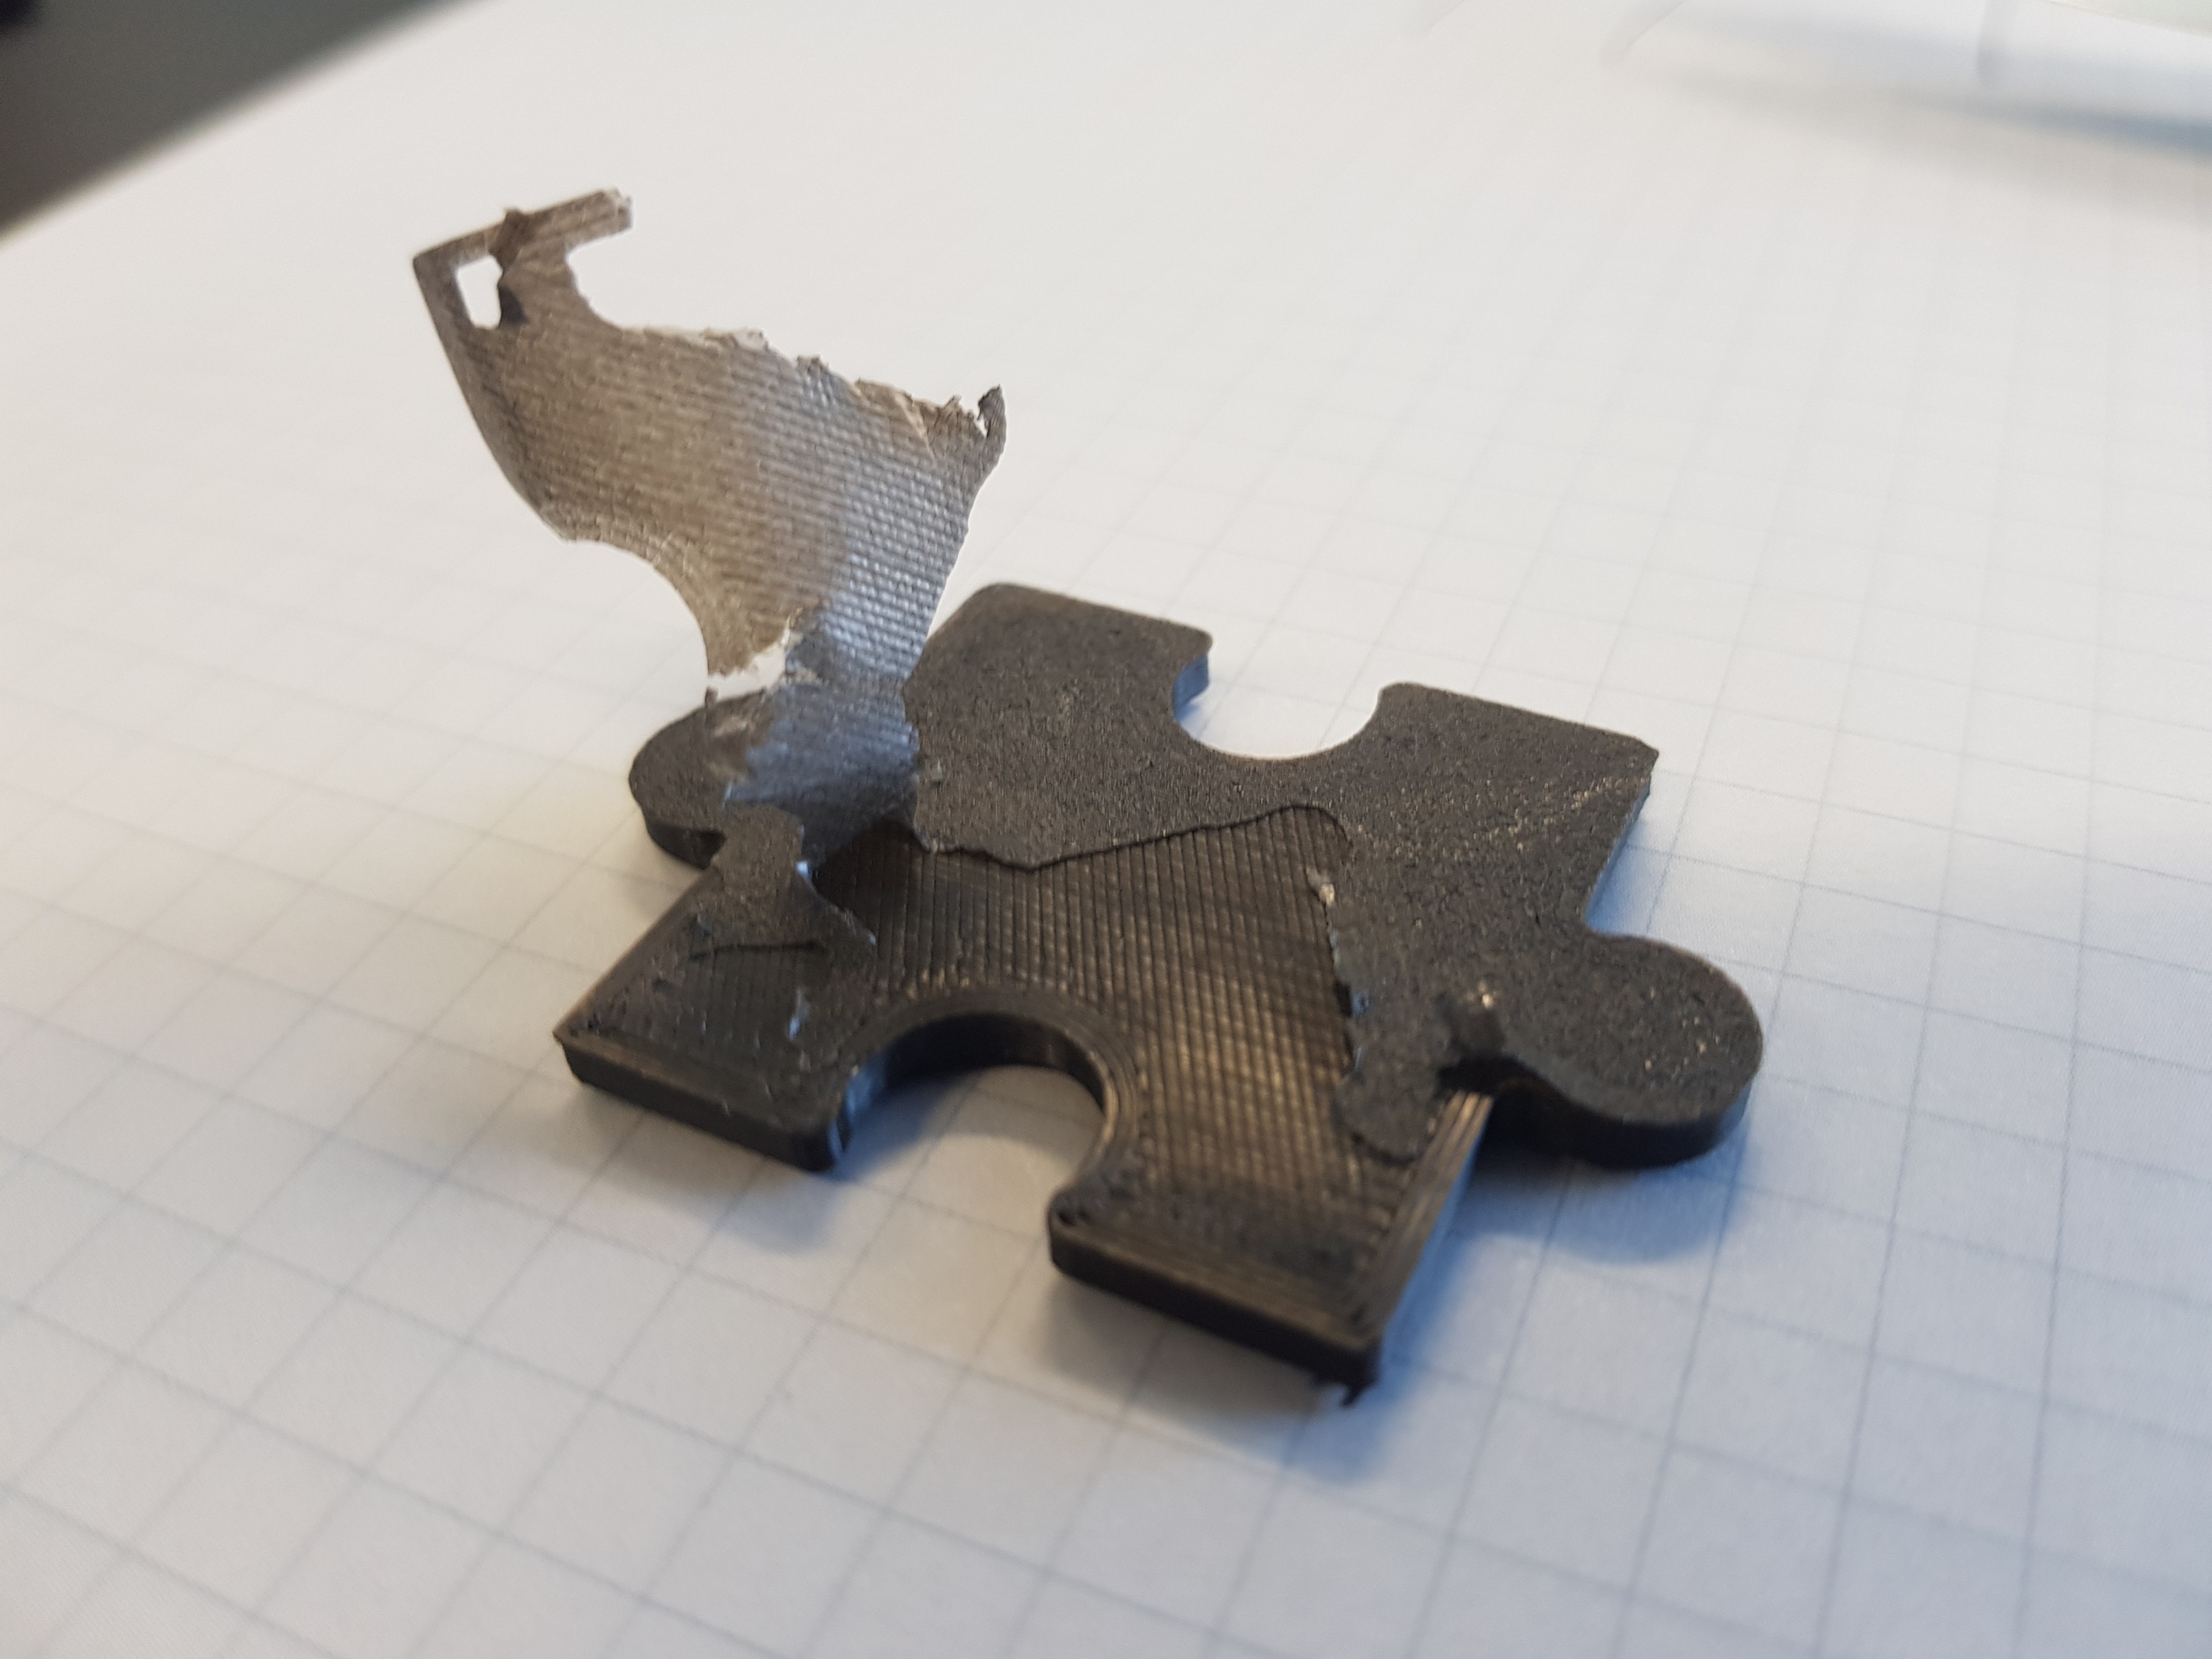
The material is black PET but I have the same Problems with other colours but with the black one it’s the worst.
I had this problem when I was using Snapmaker3d software. One thing I thought of trying was blue painters tape, but then I purchased a cut down piece of borosilicate glass and am using that instead.
So you think I should turn off the heating of the bed? I do not have Problems to get the 1st layer sticking to the bed but problems with the bonding of the 2nd layer in top of the 1st one.
I’m going with Simplify3D (Snapmaker3D only for testing purposes with the provided PLA to make beta tester feedback) but it’s not a Software Problem.
The configuration is making the Troubles…
What for? My print stiks perfectly to the platform sticker so I don’t see why to try this.
The Problem is that the 2nd layer doesn’t sick to the 1st one.
I’ve tried 90% layer height for the 1st layer as a suggestion from S3D to get better adhesion to the platform sticker but I changed back to 100% because I want to simply calcualte the layer by the tool Position (layer Position is Z-axis height / 0,15 mm for my configuration). When you set anouter value for the 1st layer you can’t do this the same way.
So I inceased the width of the 1st layer to 120% so more plastic Comes out of the nozzle. I thought this would be comparable to a lower layer with 100% feed rate.
So you suggest a HIGHER 1st layer (increase the 1st layer multiplier - no split process) - should I set a higher Extrusion rate too?
This is definitely not a part of any support - because I’m printing without (flat and not too small puzzle parts like shown in the Pictures don’t require any)…
In my first days of 3D-printing I did use the raft a lot (because of the very small parts I wanted to print) but This Problem is a single bottom layer (very thin and not nearly as thick as a raft).
The Initial layer was my problem for the last week and I’ve tried many things becaue the print won’t start (needed a few tries to get the plastic laying down). So i set down the speed to get a good base layer for the rest of the model.
After the replacement of the platform sticker (I removed the glue remains with a rubber eraser which worked pretty good) it works just fine again.
It seems to be that it is caused by the slow speed of the first layer but I’ll be watching it the next few days/prints. The layer gets narrower and very smooth so the following layer won’t stick enough to the bottom layer.
The print I made yesterday was way better than the last ones. I doubled up the speed for the 1st layer and gave it an extra 33% in height (0,2 instead of 0,15 mm).
It looks like you have a single layer at 100% infill then go straight into a reduced infill. Try doing 2 or 3 full shell layers on the bottom. Or is it possible your bed is too sticky and the delamination is because there is better adhesion to the bed then the next layer in your model.
I achieved better results by overfilling the first layer by about 20-25% with higher temperature (box sais 195-220°C but I’m printing at 235/228°C for first/rest of the layers) and keeping the speed down for the first 3 layers.
Cooling only for small parts required.
PS: My 100% solid infill white PET army is growing…
PS: No, I don’t play this game. It will be a birthday present.
Never had these problems again with PET-G. This delamination happens when the printing temperature is too low.
The “sweet spot” for my PET-G filaments on the snapmaker is about 245 °C (NOT the same settings like PLA!!! - and not 190-220°C like on the box from the reseller).
I have noticed that with a few filaments that I have tried 5 or 10c higher can make quite a difference. I am yet to try printing a Temperature Tow and see if I can find the sweet spot fro each filament. If it works I will publish my findings for each type of filament in Snaplinks.