I’d prefer to see the Ikea mod back in its own thread, where it can be discussed separately. The problem with lumping all the mods in to the same topic is that every comment/question needs to state which mod they are asking about.
I agree with your point—this is just a summary to help new users get a quick overview. The IKEA post didn’t come from the forum; I saw someone sharing it and simply copied the link here.
I was just watching Teaching Tech’s item on the top covers. I don’t own a U1 but I saw the IKEA version and was sold. But it uses 16 printed parts, a lot of pins and you need to disconnect the toolheads to place the adaptor ring.
So I don’t know why I dove into this but I took the files and redesigned it to be printed in 4 parts and on just two 270*270 plates:
I can’t upload files yet and add only one image (new user etc.) and I might have overlooked some important details, but is there somebody that is interested in this design and would like to try it out? Because I don’t want to be publishing stuff like this before it is tested.
My designer mind just went rushing in all directions when I saw the vast amount of parts needed for the mods mentioned above and I thought that printing it in another orientation could really reduce the amount of parts/plates needed.
Maybe one time I’ll also own a U1, for now I have to make due with dull printers.
@Rossero
I’ll try your version; the second part is printing right now. However, I’ve spread it across four plates, as otherwise the printing time would be too long for me.
I’ve already printed the version with 16 parts for my U1, but I’m inclined to print this version with 4 parts as well, just to see if I like it better. It definitely makes a good impression.
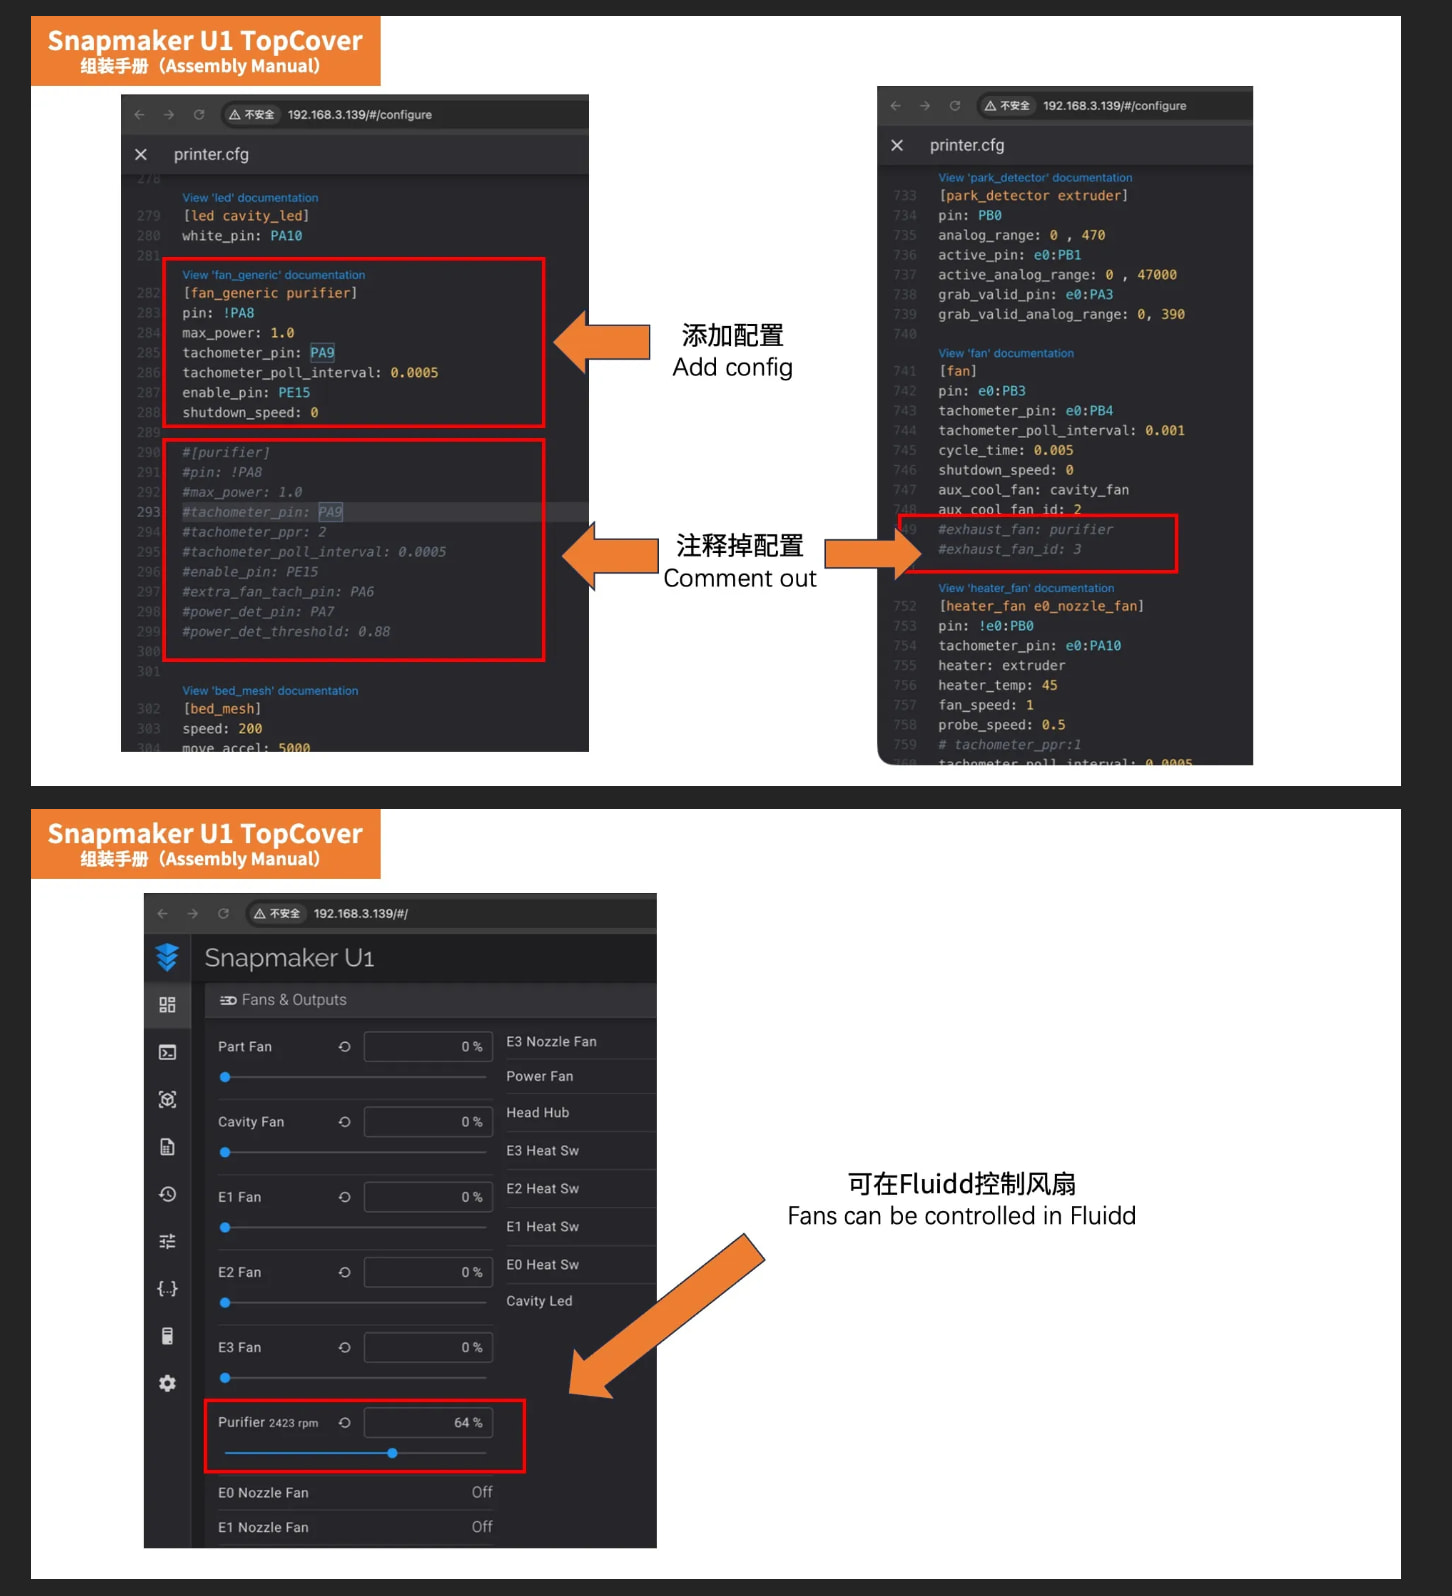
Both flag and flag2 are tied to GND, and attempts to enable the 24V power output have failed. Firmware version is 1.1.1.122. I don’t understand the design principle of this circuit—have you successfully obtained power?
I would like to use the port for connecting an LED to better illuminate the build area. However, I am not getting any voltage at the connection. It didn’t work with Orca using the exhaust fan. Unfortunately, the G-code M106 P3 also doesn’t work.
How can I activate the 24 volts on the AUX connection?




 Lowest Cost DIY Top Hat for Snapmaker U1・Free 3MF File for 3D printing・Cults