Snapmaker 2.0 laser module: Part 2.1 Component testing. Diode laser test. Conclusion: Test not completed.
Reason: Test equipment failure 

The diode laser. So far, that’s all we know. What little I could find about this only reveals that it is 1.6w. But there’s some ambiguity here. What exactly does that mean? Does 1.6w mean 1.6w of output power? Does 1.6w mean 1.6w of consumed power, meaning the output would be even less. If we could locate a datasheet on this particular unit we would have all our answers and testing criteria. But we don’t, so injecting a arbitrary amount of volts and amps into the thing could quickly burn out the led. The nice thing about leds is you can start putting power into them at a low level and work your way up without damaging them. I first tested the diode itself and found that it indeed has continuity and that tells me the diode “should” function. We shall see.
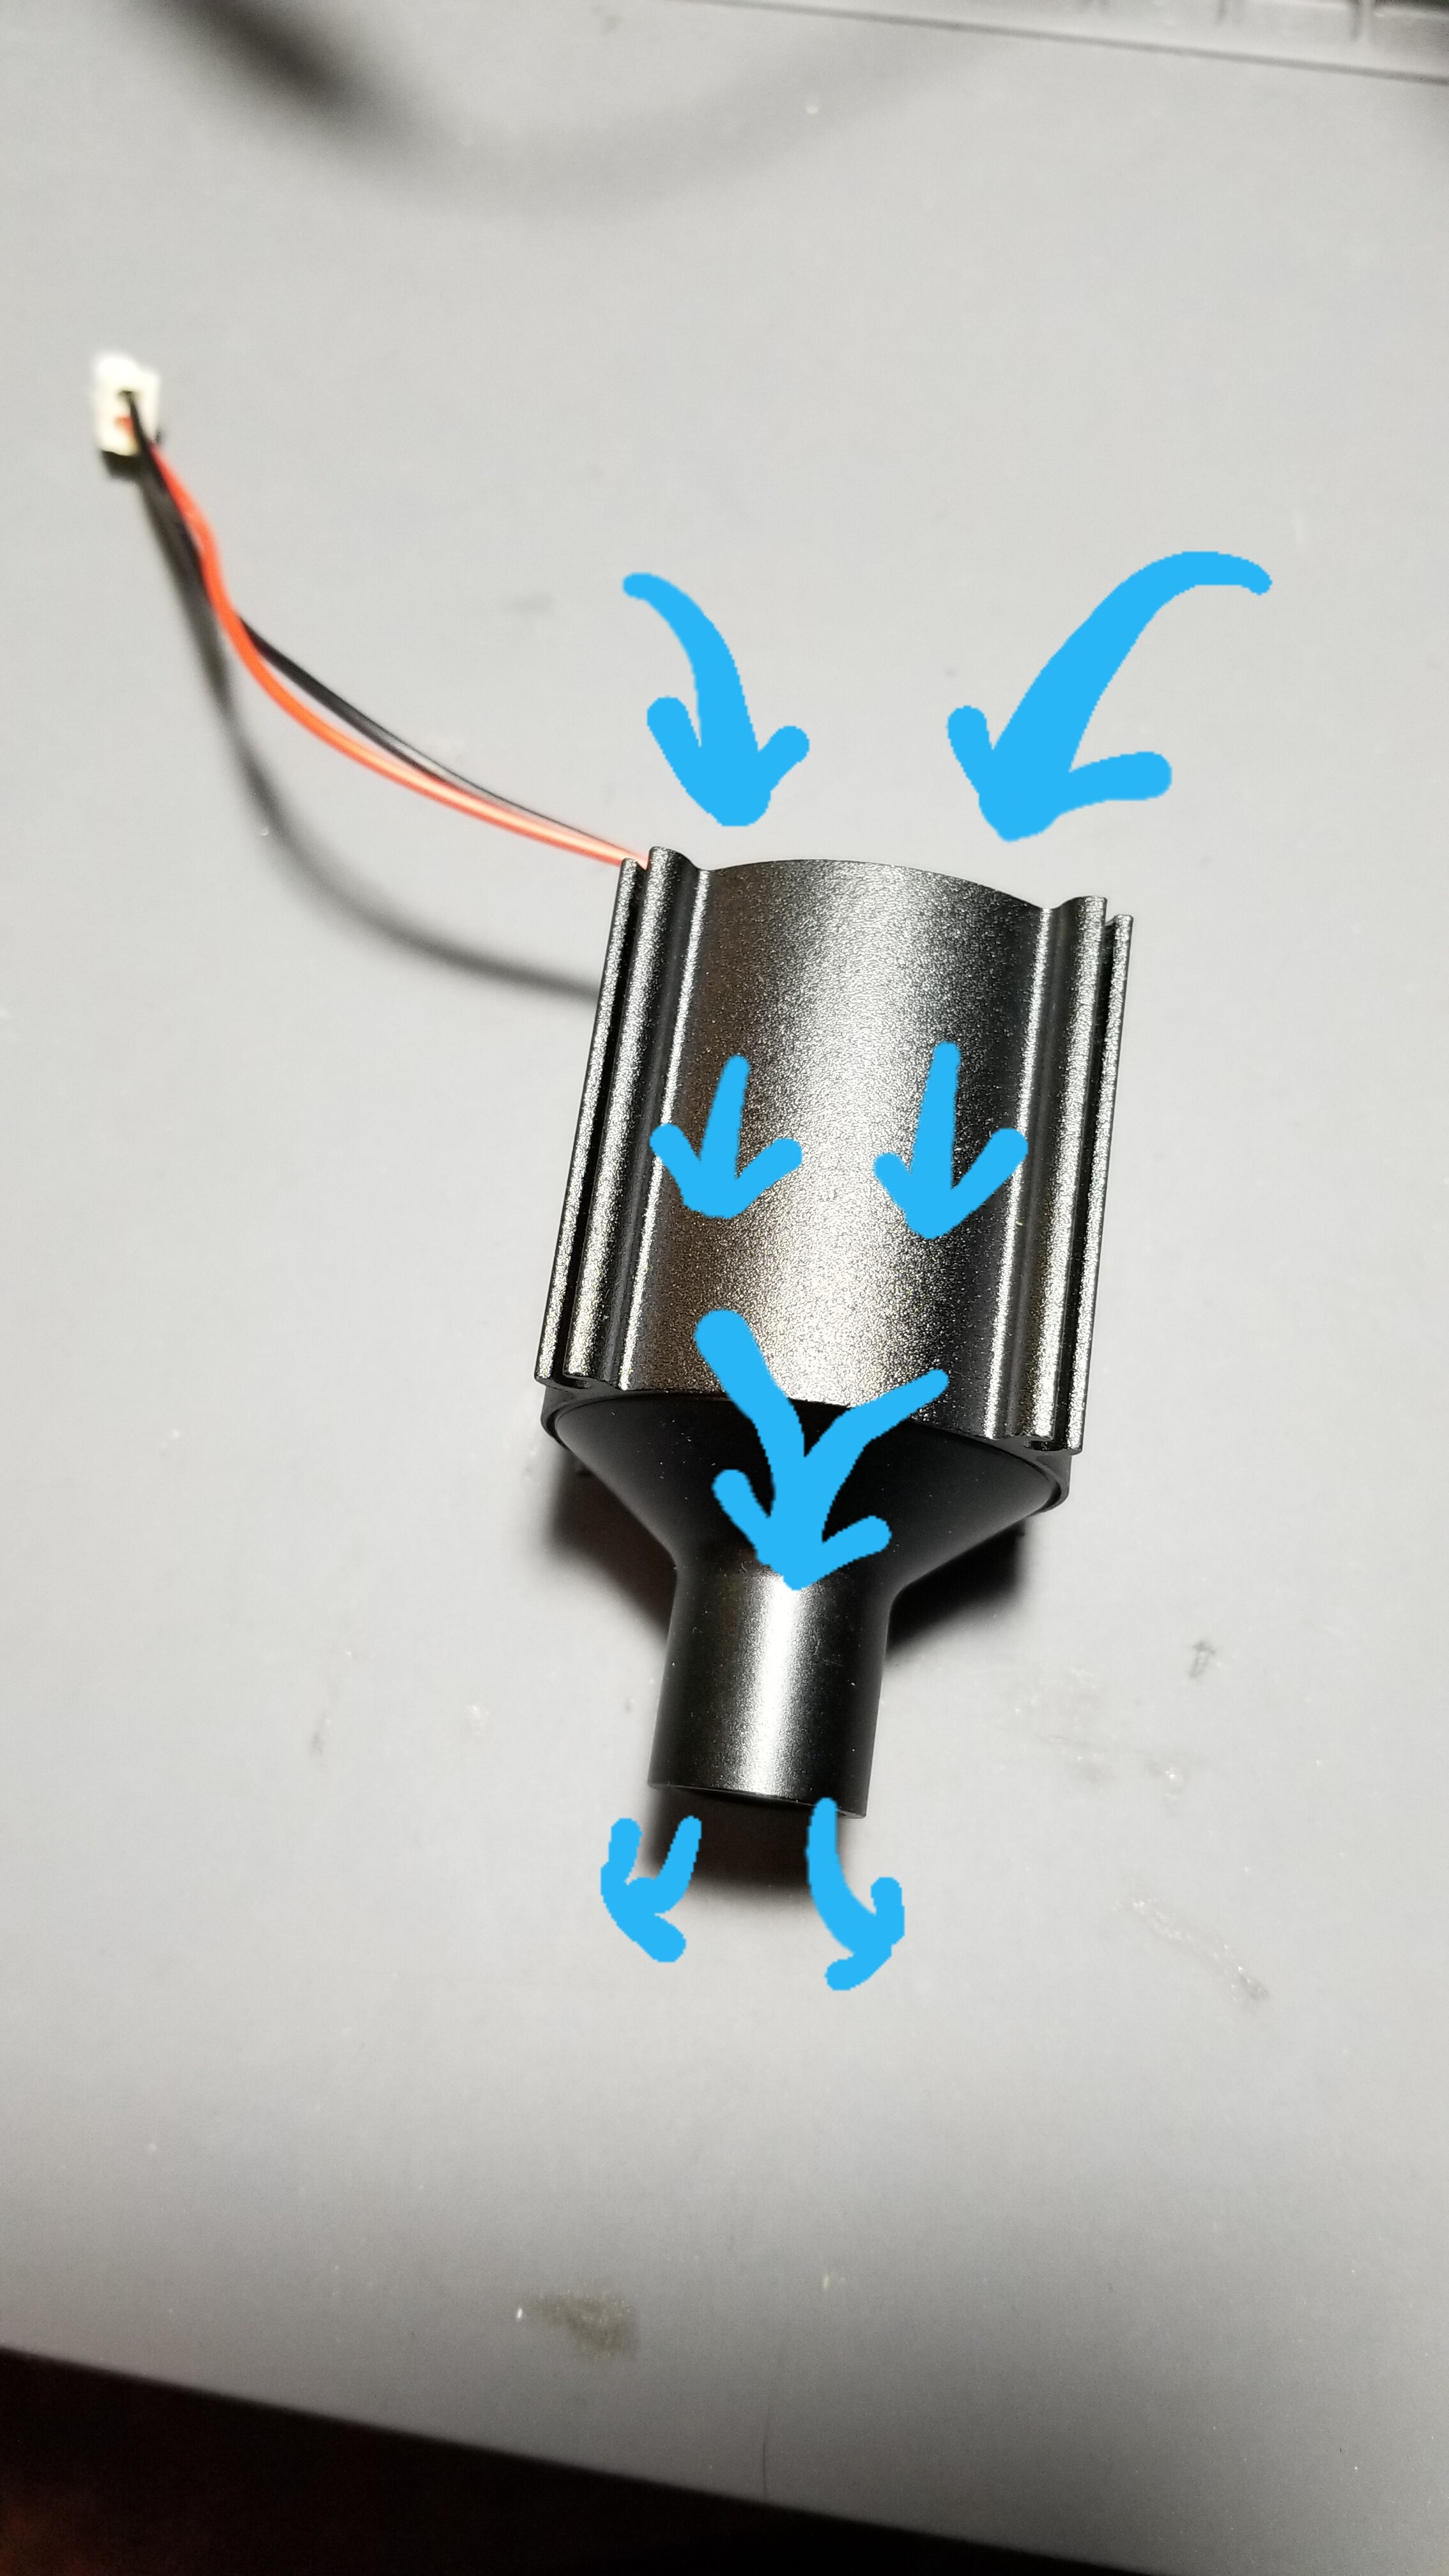
The shape of the heat sink is interesting. The fan sits on the top and the housing directs the air down past the inner heat sink fins and out of the housing where the laser outputs. Sort of a mild air assist you could call it. But the amount of air is likely only there to keep smoke from rising up into the housing and fouling the laser lens. Pretty clever.
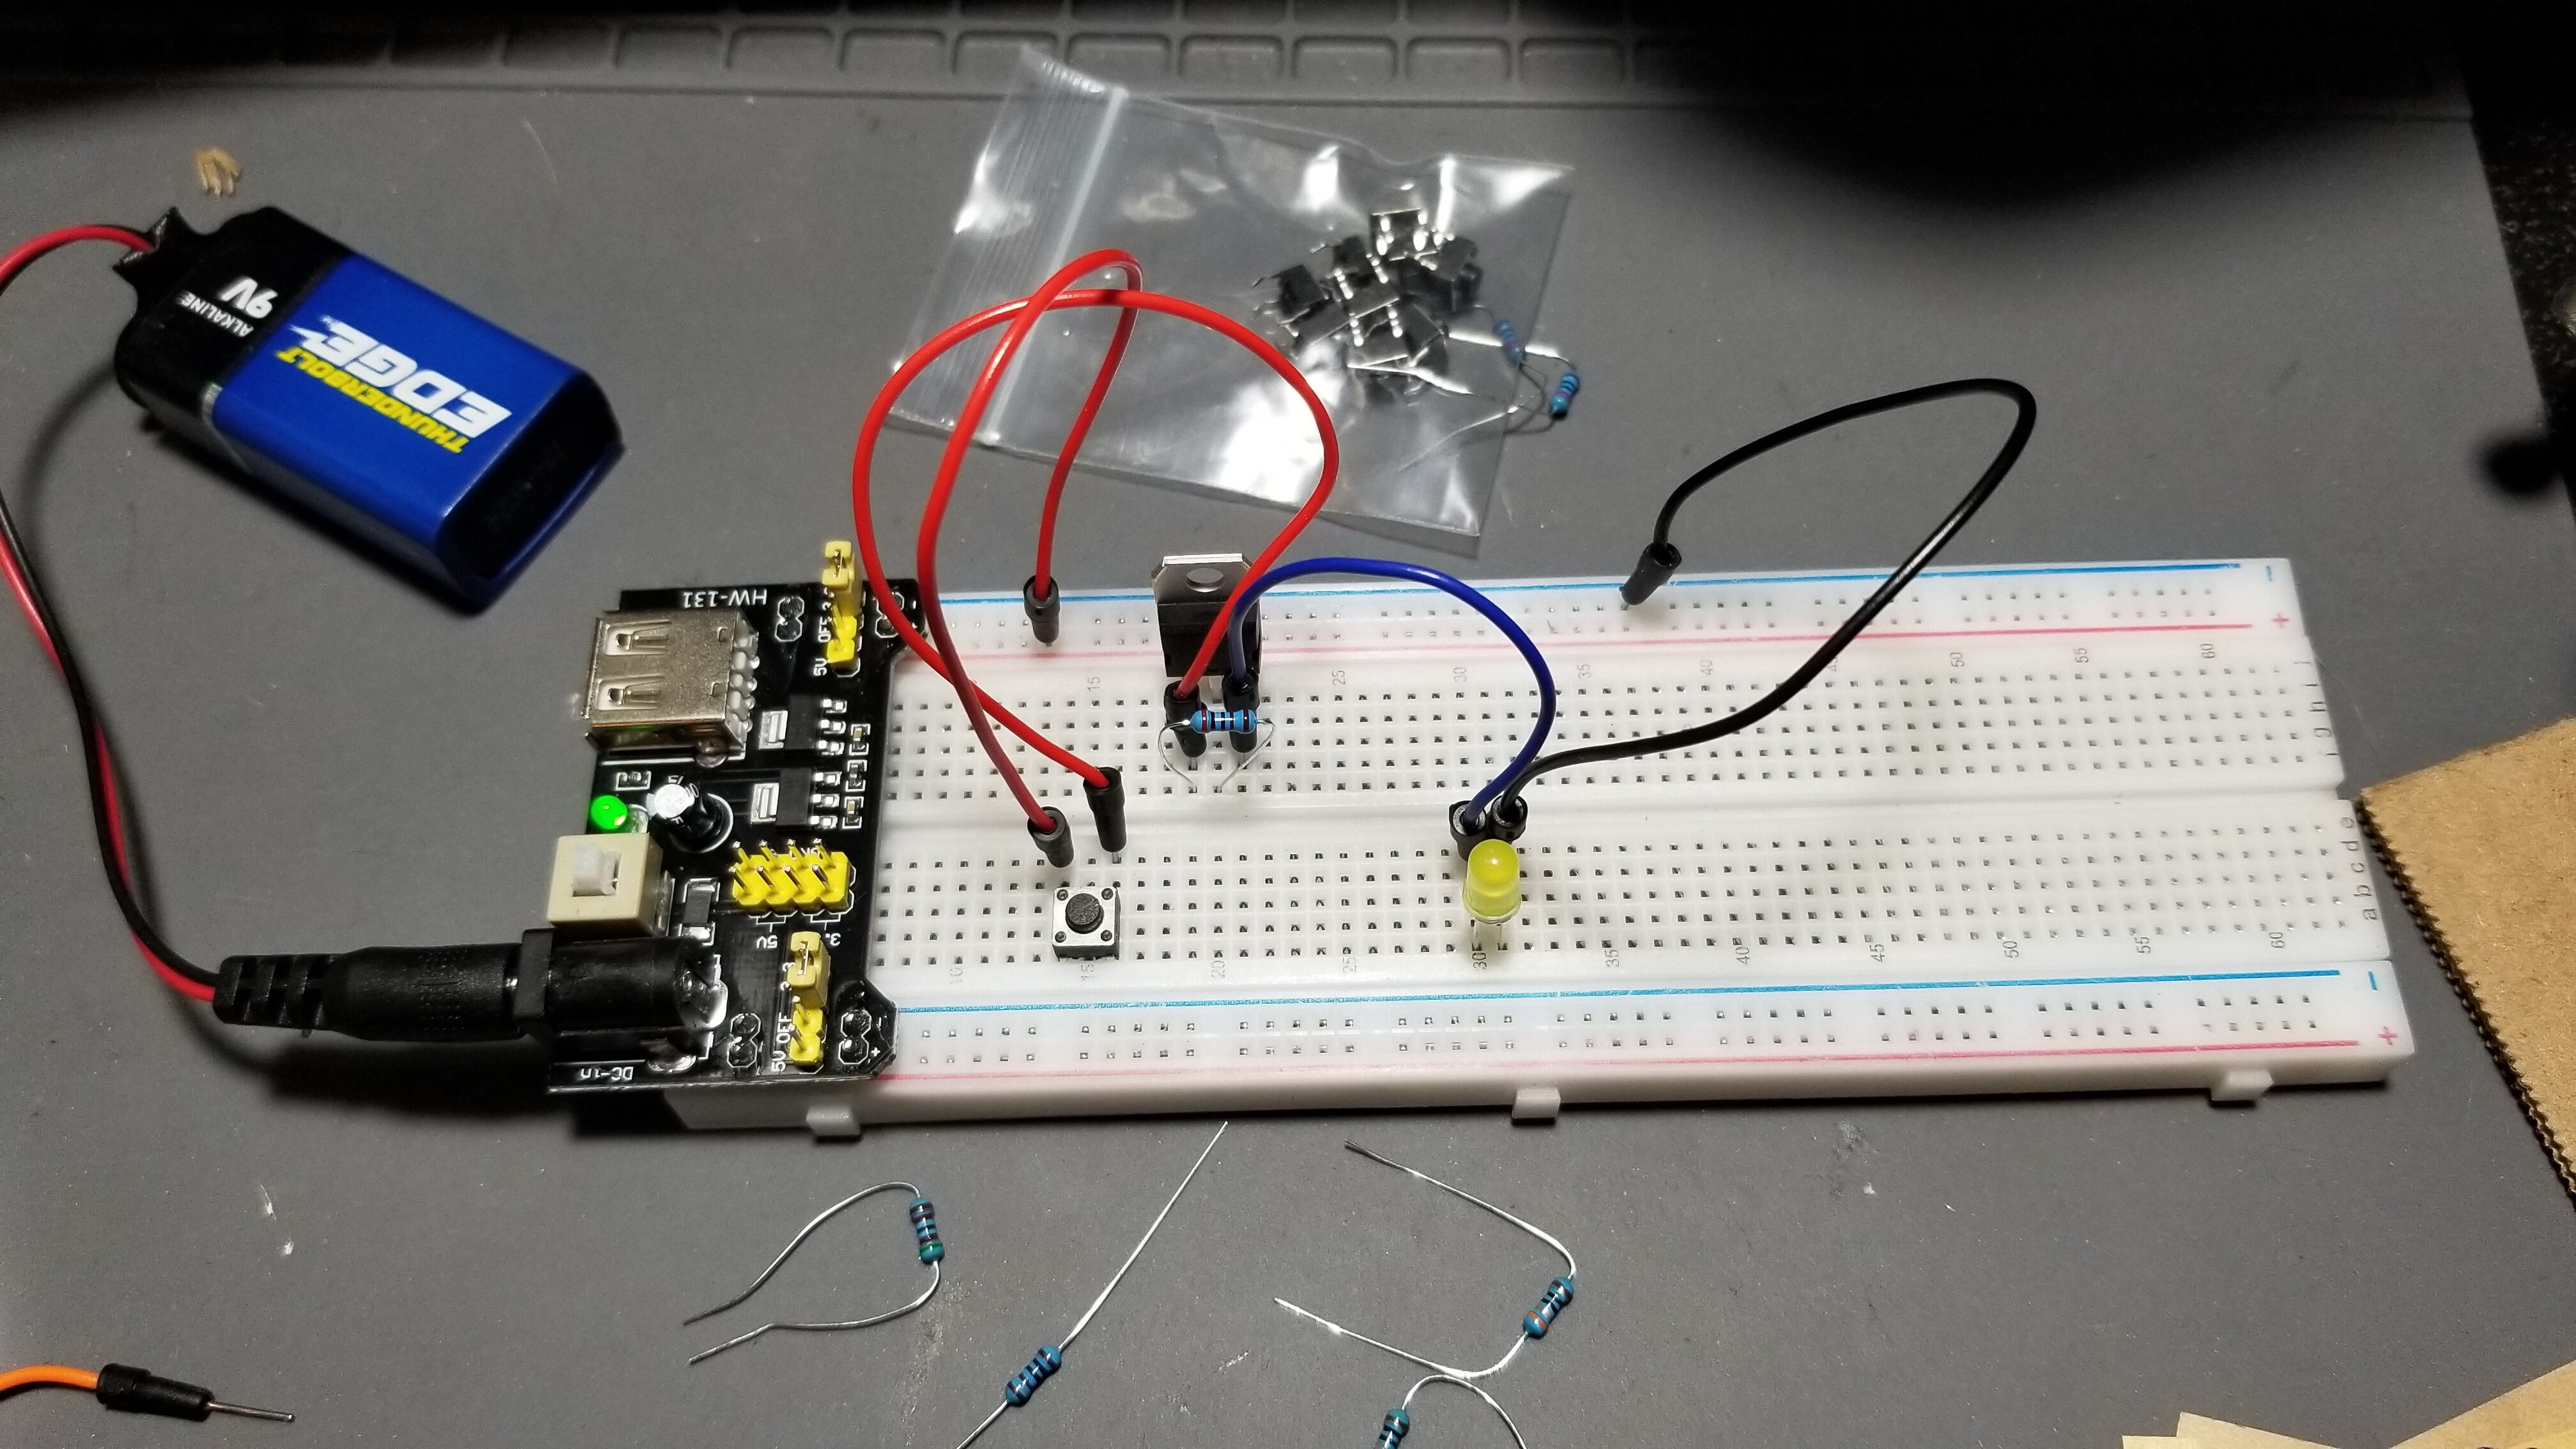
Here I set up my bread board to test my low power supply circuit. Why is is called a “bread board”? Good question. I don’t know. But I digress. My bread board has a power supply, this takes 9v and drops it to either 5v or 3.3v. I have it set to 3.3v for now. I ran the power into a switch then L7805CV linear voltage regulator IC run by a 2k ohm resistor then through a diode then to the ground. This keeps voltage nice and stable. Is it necessary? Probably not, but it gives me a warm and fuzzy feeling.

Pushing on the button lights the led. The circuit is functional. Always test your circuitry BEFORE applying to what you want to power. Pop a cheap doo doo led, no problem. Risk popping the only item you are trying to test and not sure if or when you can get another? Bad ju ju.
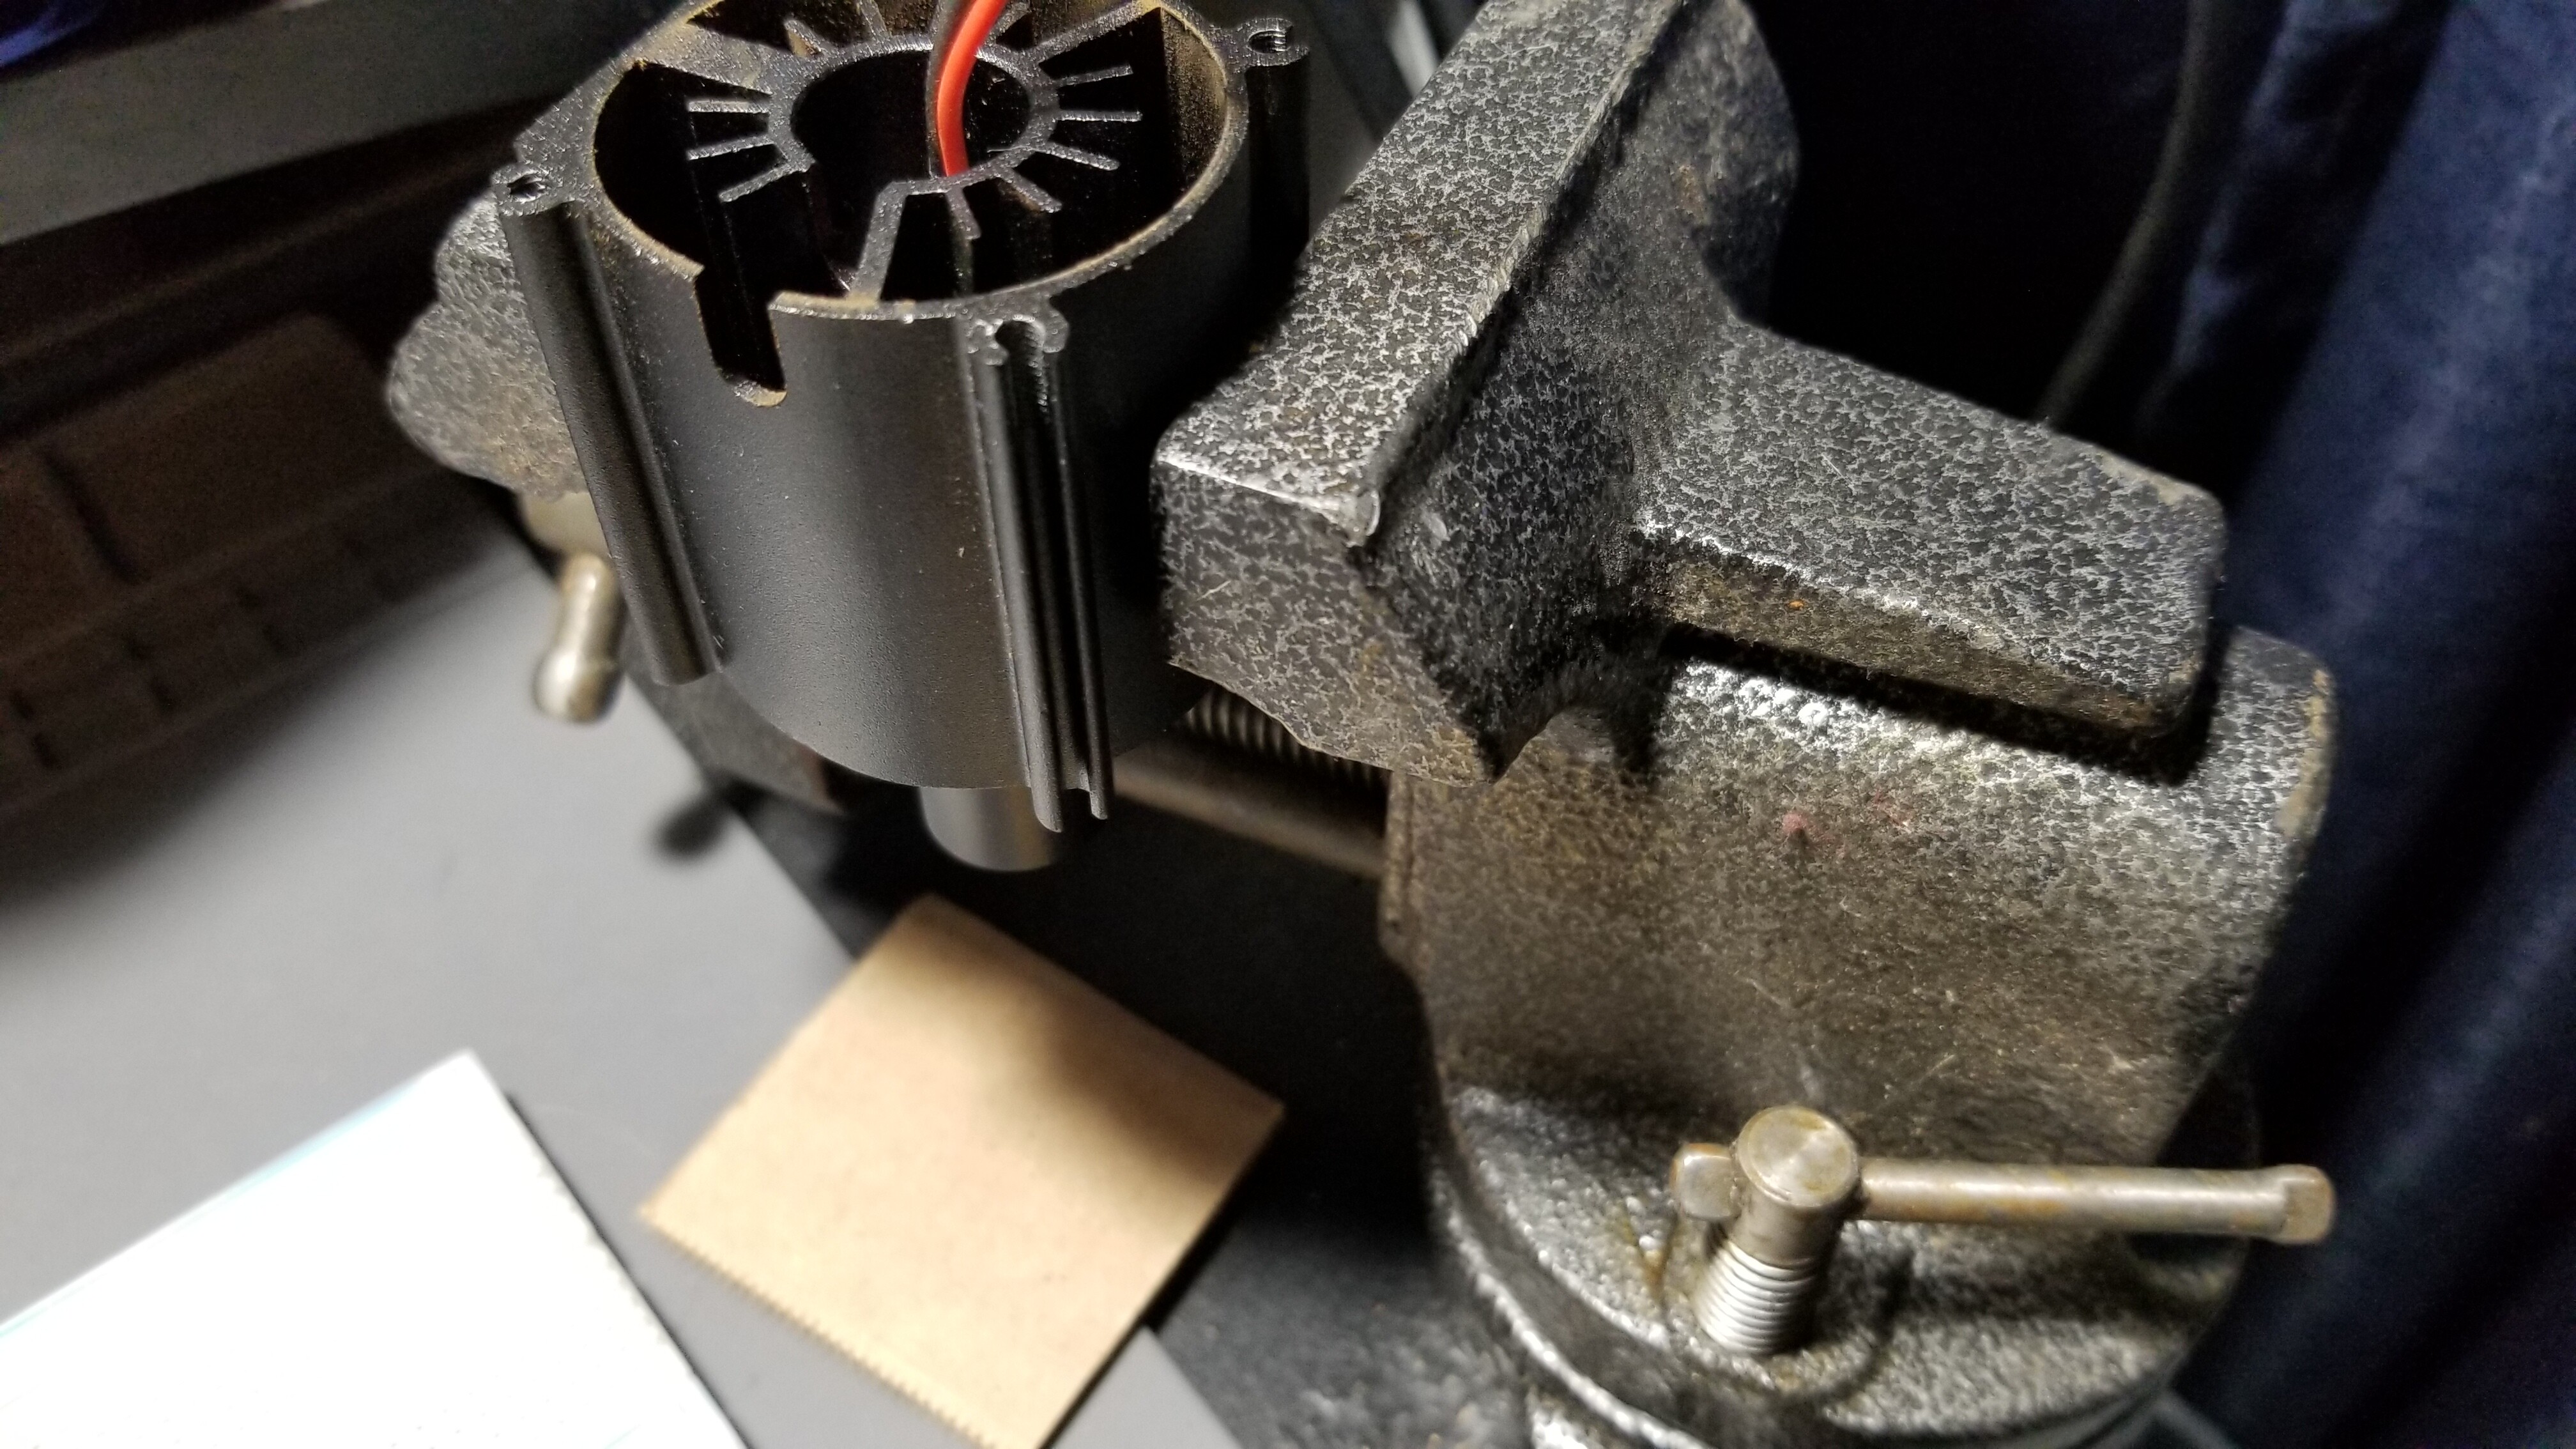
I mounted the laser in my freakishly small bench vise with the output facing down into my wooden table. Then placed a piece of cardboard under it. Now what? At this point I’m pretty sure I know what you are thinking, “Next we hook up the power and test it?” Wrong! Now you put your safety glasses on.

I already know the punny 3.3v won’t do much so I moved the jumper to 5v. This should probably provide an output of well under 200mAh. Just a guess, I could hook up my digital volt meter and test it but I’m being lazy…  The 9v battery has an output of around 490-500mAh, so this should be enough to at least make the laser illuminate.

OK. Safety glasses on? Check. Power to the bread board on? Check. Leads hooked to the laser? Check. Let’s do it.

How about that… The led laser works. Not nearly enough power to burn anything, but it made a dot. A super weak laser pointer. But still, progress is progress. Now to inject more POWER! AAAH HAHAHA! cough, excuse me…

Well poop. My DC power supply I was using to recharge lithium batteries decided to die. What timing… Darn.
To be continued…
Update. After doing the initial test I decided to rewire my bread board and put the full power of the 9v battery into it to see if the led laser could burn some paper. It did. Here’s the result. Not really visible here, I noticed the beam is elongated. Which I find weird. But it’s also not focused properly. I’m used to my 50w co2 laser. It seems the led laser is not the problem of this module after all. Unless it putters out over time. But I’m not running it long without a fan, more testing is needed. It’ll have to wait until the parts for my bench top power supply comes in. I can set this aside and try to move forward. Although, I’d like to have my power supply working before I do. Time to test the output voltage of the control board.


