I am getting some scarring on my bed level test with PETG. Not sure how to fix this. Please see attached photo. I am printing initial layer @ 245deg, 20mm sec, 0.2mm height, retraction=5mm.

I’m not sure what you mean by “scaring”? The ridges indicate that the head is too close to the bed, so the Z Offset needs to be increased. Also, while not related, the retraction should be ~1mm, and should never really be over ~1.5mm, since this is a direct drive extrusion system.
I recalibrated 0.05mm higher. I lowered nozzle temp to 230deg and used 1mm retraction. Results look worse than before. Now holes show in the corners and bed adhesion seems worse.

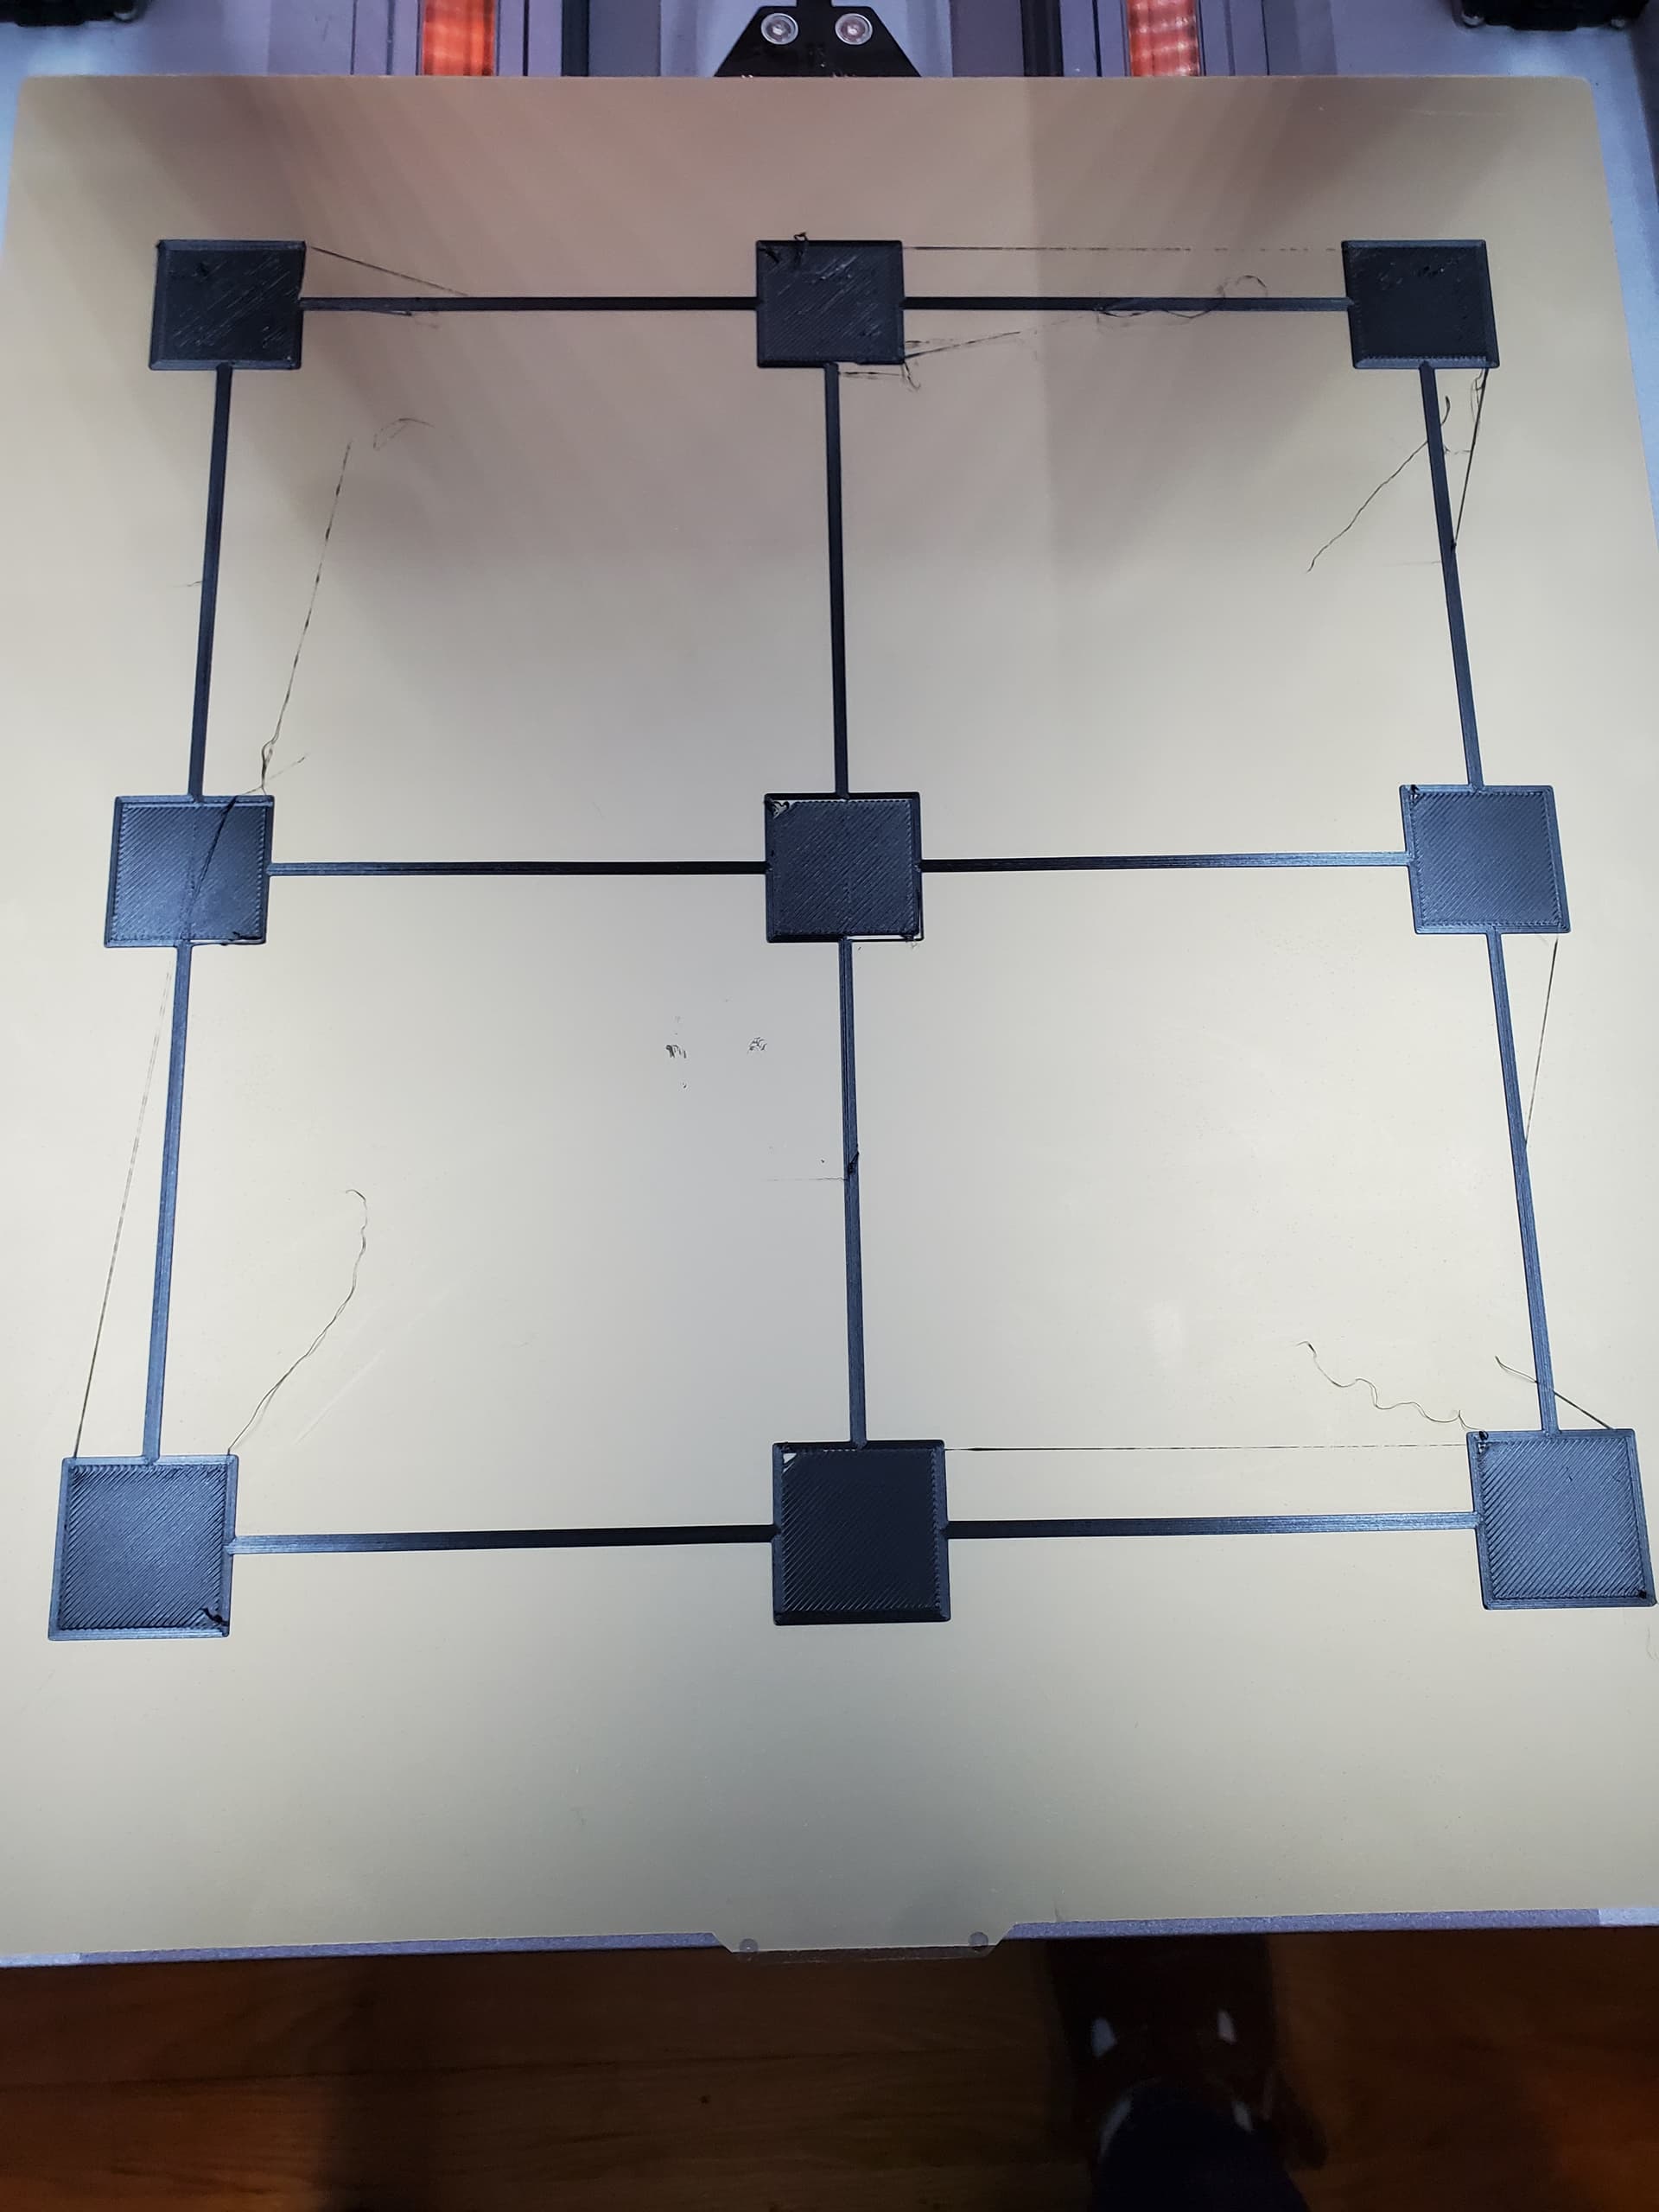
I am assuming that you’ve done some kind of glass bed conversion, correct? If so, you would probably get better help from someone who has done this conversion, but I’ll to help as much as I can. I can see a few issues, so ill list each one separately:
- There appears to be a first layer adhesion issue. PETG normally sticks like glue to plain glass, so are you using something like hair spray to prevent this? If you aren’t using anything, and you are having these adhesion issues, then there might be something wrong with your filament. PETG should be impossible to remove from glass when directly applied.
- The gaps are concerning, as they too indicate adhesion failure, which should not be an issue with PETG on glass. What brand of filament are you using?
- It looks like the horizontal center is bowing down, based on the print results. Are you performing a manual 5x5 leveling (Calibration)? The built-in 3d Printer Module sensor does not work properly when using a glass bed conversion. The front 2 left and right pads are the only ones that look like they are at the proper Z Offset.
That’s the best that I can do with what I can see. Hopefully this is helpful.
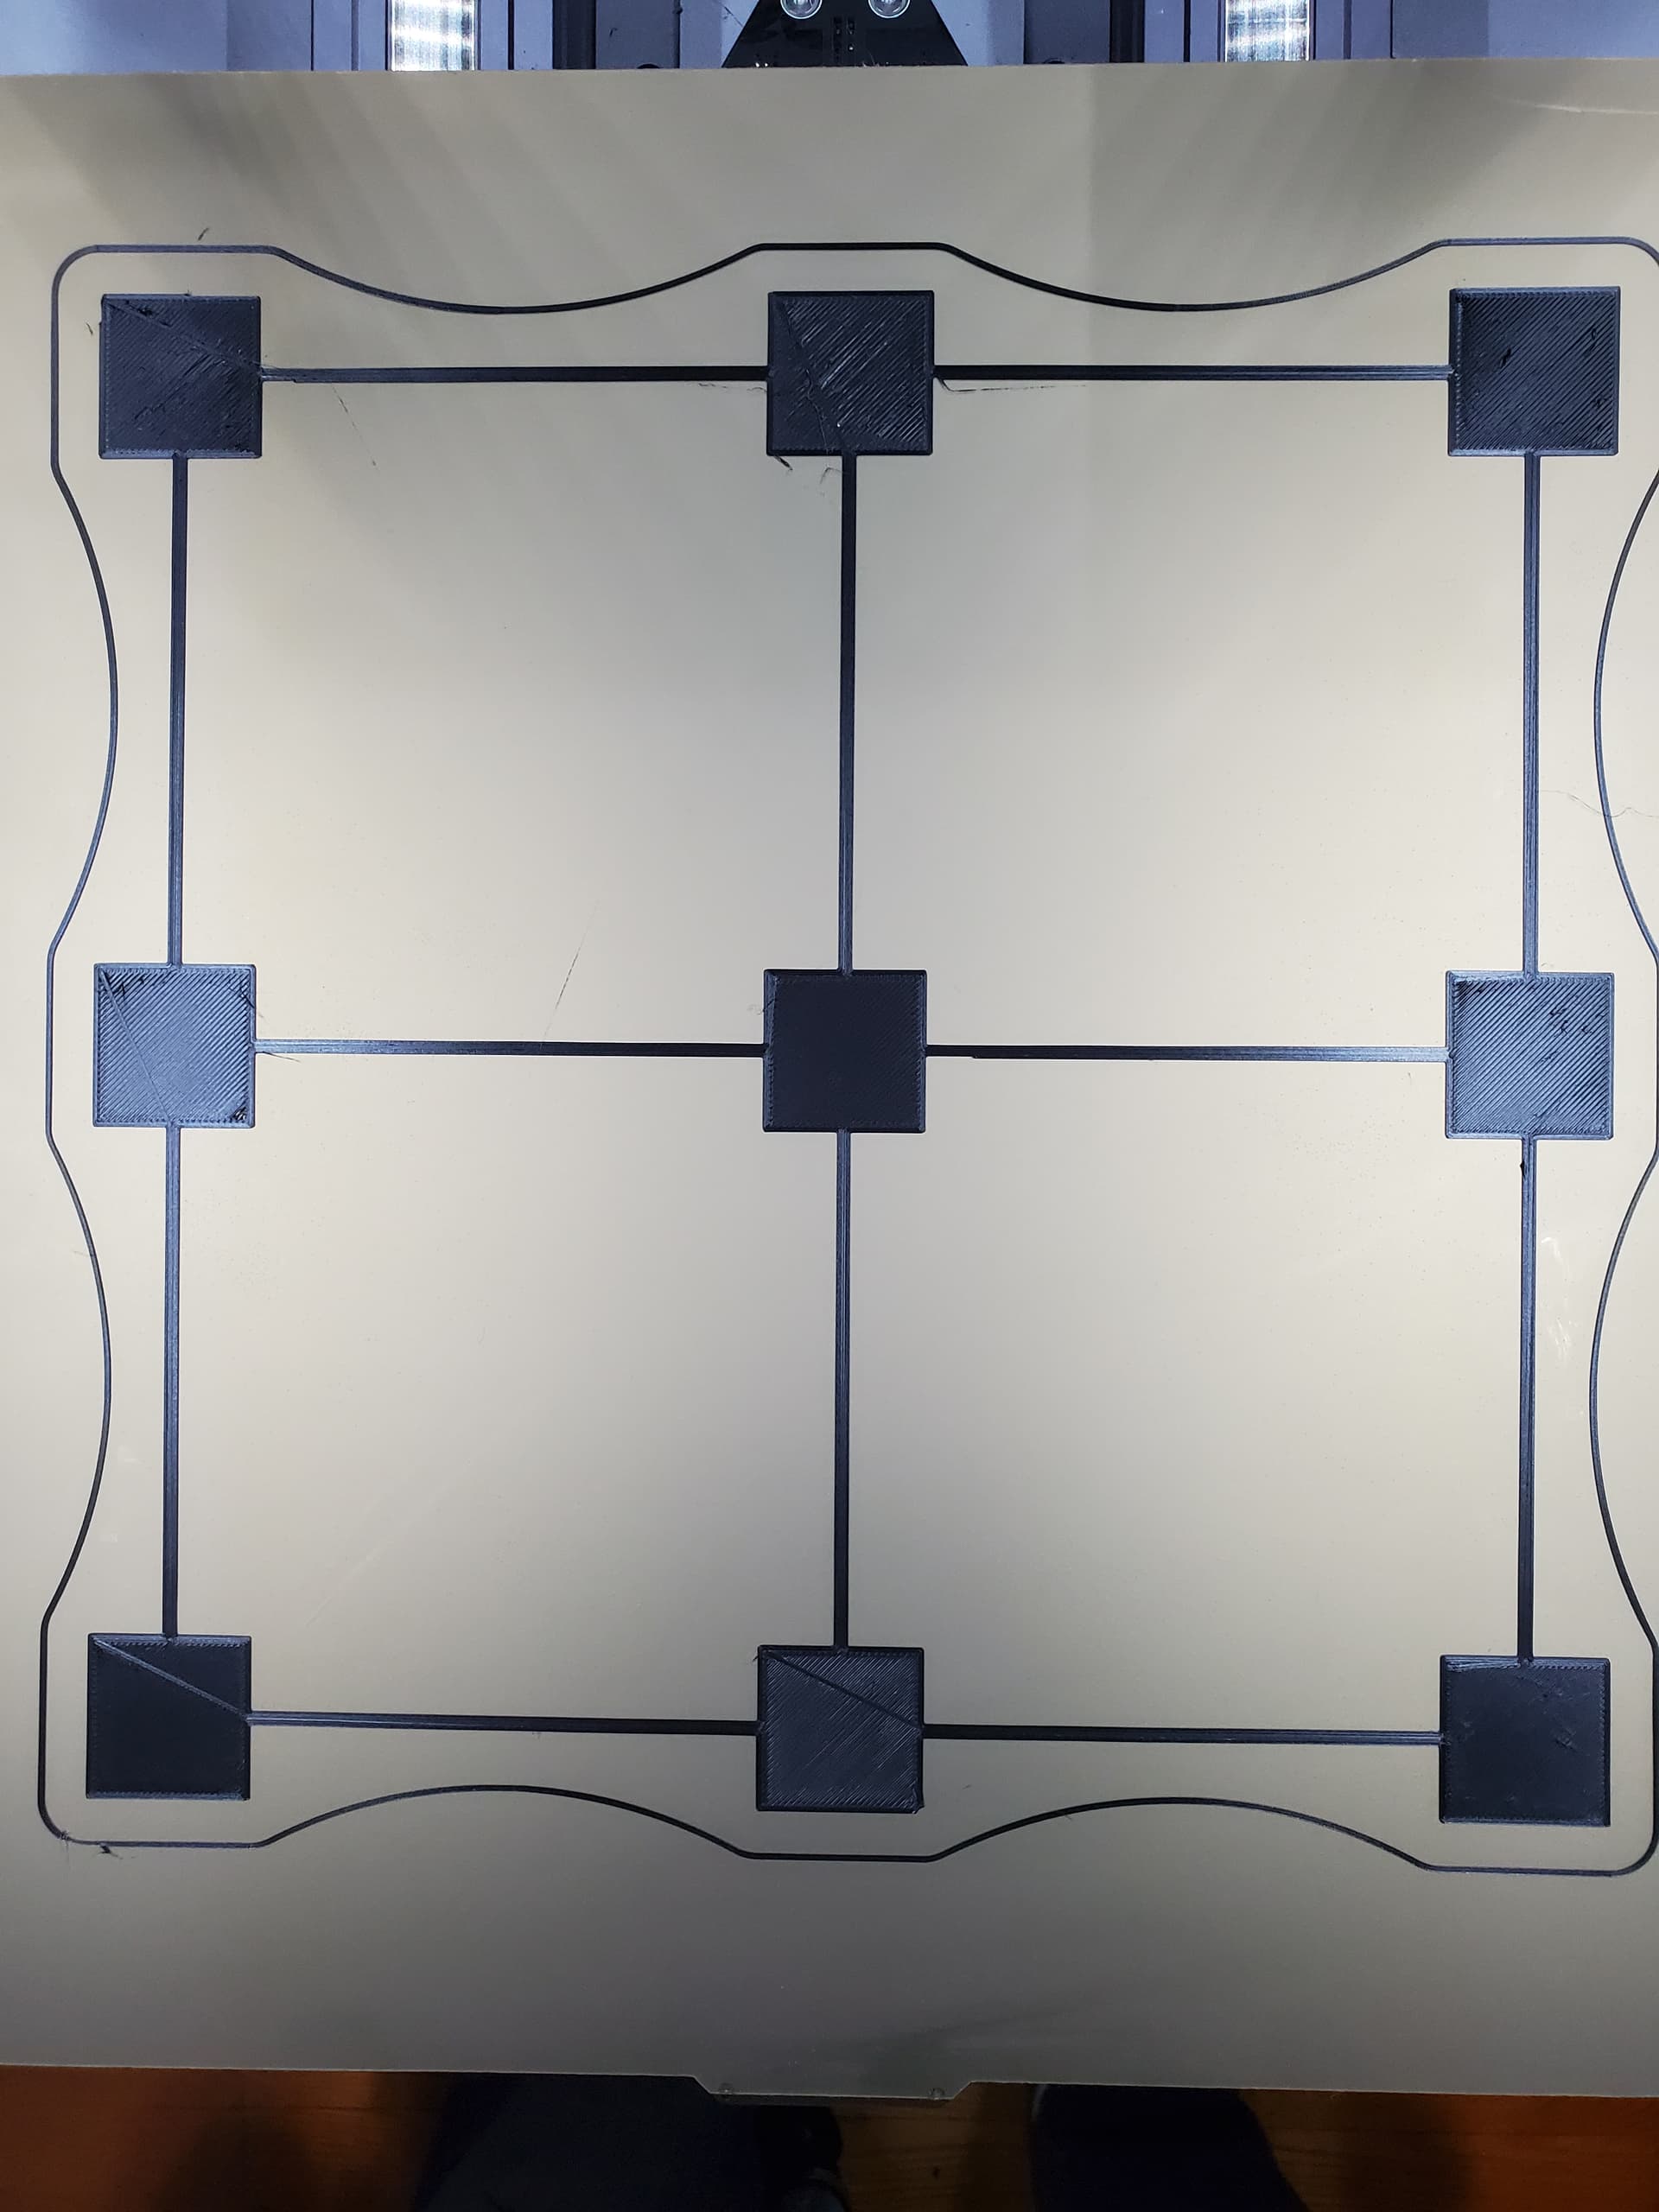
I am use a PEI smooth spring steel sheet so auto-calibration should be working fine. I am using a 5x5 calibration grid. I am using a PETG with 10% carbon fiber - please see link below:
Ok, this is making a little more sense. Smooth PEI may require glue stick in order for it to stick properly. What temperature is the bed? You may need to use somewhere between 60°C and 70°C. There is a good chance that your platform is very warped, beyond what the 5x5 can compensate for. Try doing an 11x11 cold (heated can’t be done at this time, and attempts will make it worse) and see if that helps.
Bare in mind I have been only at this 3d printing less than a month. Bed is at 80degrees. Platform looks flat when I put a straight accurate rule across the diagonals. But who’s to say that the bed is perpendicular to the nozzle at every point? How do you do an 11x11 calibration - I don’t see that option in the menu? I redid the calibration at 80degrees. I see that is usually the back (furthest) row that is messed up (rough surface).
80°C is too hot for PETG. Try 70°C, and then try 60°C to see if that is better. It requires experimentation, and every machine will behave differently. Under most circumstances, you don’t want the bed to be hotter than the “Glass Transition Temperature” of the filament that you are using. Sometimes you MAY want it to be ~5°C higher than this for the first layer, but not most of the time. Once you get it to stick properly, I think you’ll get much better results.
As for an 11x11 leveling (Calibration), you need to do it over USB. Here is something that I posted a while back:
A glass bed has practically eliminated about 90% of the issues I have with 3DP on my A350
How do fine tune the Z offset once you’ve done the 11x11 calibration. Can I use the Z offset +/- button in Luban GUI?
Are you printing from the machine?
The way I fine tune during printing is on the touchscreen after the print starts. It’s not obvious but there’s a little arrow on the right side of the print progress screen. I watch my skirt (always do about 4 rings) and based on how well I feel it’s squished and adhering, swipe to the left to bring up the adjustments page. At the bottom you can pick Z offset (same sort of UI as if you’re on the manual control page), set to 0.05mm increments, and then bump it down if it’s not good enough or up if it looks too smooshed. You’ll see the extrusion of the skirt kind of ‘skip a beat’ in XY traverse as the command takes effect so you can gauge it.
And FYI once you’ve dialed in the offset and let that print complete, it will remember it for following prints, until your next actual calibration. I tend to always run about -0.1 to -0.15mm from my calibration point even though I’m sure I’ve got a good firm pinch on that last manual adjust point. (Printing PLA on their supplied spring print bed.) Go figure…
I used to calibrate just about after every print, paranoid about removing and flexing the print sheet and replacing it ‘warped’ or whatever. Some time ago I stopped that, it kept working, and realized I’ve been printing willy-nilly without a re-cal or Z-offset adjustment thru filament color changes (all PLA) and whatnot ever since I swapped out my first hotend replacement…sheesh I don’t know, most of 2021 ago? [EDIT - just looked at my history I did the hotend swap in Sept 21, but I know I was printing without a new cal long before that. Sorry for exaggeration…]
(I was also on a waaaaay old firmware and still using Luban 3.15ish because I had no real need to update…but I just did so today in anticipation of the 10W Laser arrival soon…
One can go mental with all the calibration involved!
I meant from the Luban Gui using the +/- buttons I highlighted below:

Did you follow the instructions that I linked? It should describe exactly, step-by-step, what you need to do. For the Z Offset, it should say that you need to use the TouchPad.
I did follow the instructions and used the touchpad for the z offset. Problem is that the smallest increment is 0.1mm so I was not making any enough contact or too much contact. So I used the less contact as you suggested. Problem now is how to bring down the Z offset by 0.05mm to get the better bed adhesion?
Tried the trick with the z offset on the touchscreen after the print starts. I noticed a -0.5 z offset on the screen and moved it back to zero. Had less smooshing, but more bed adhesion issues.
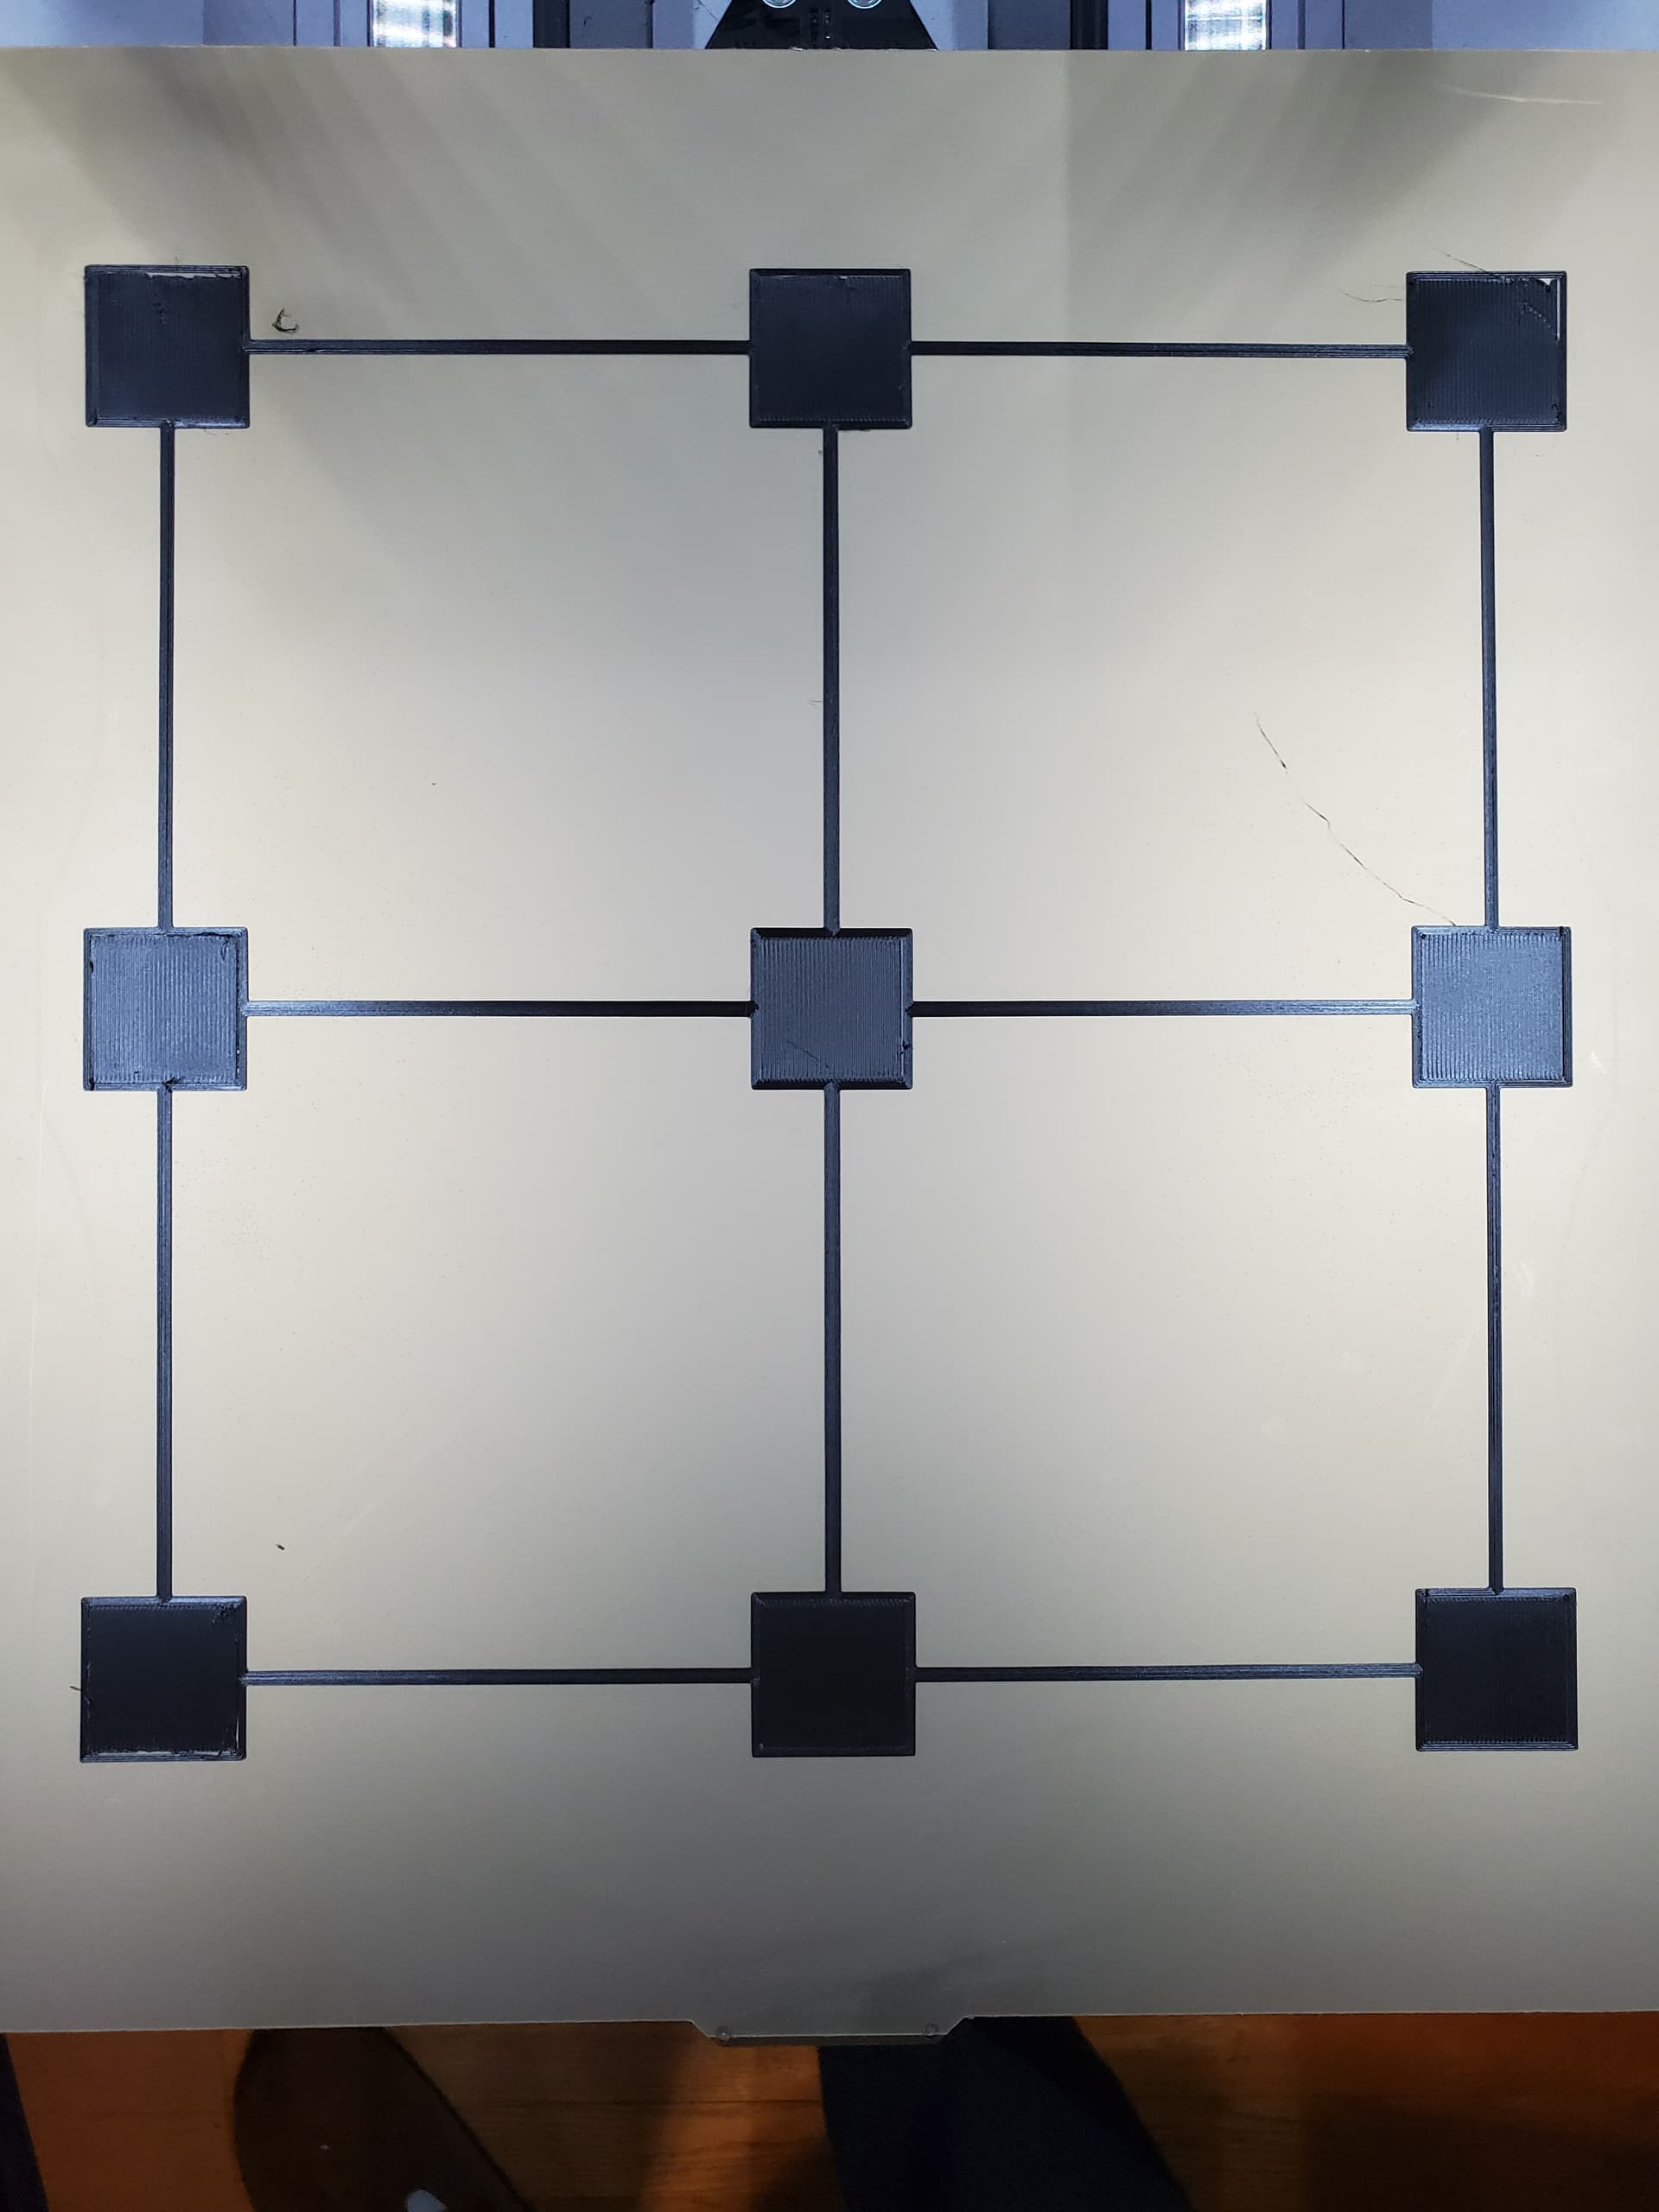
Actually, that looks really good. The bed adhesion issue is better, but PETG doesn’t stick all that well to smooth PEI w/o help. In order to get it to stick well, and release well, you will need to use either the glue stick that I previously recommended, or hair spray. If you had a powder coated PEI surface, you wouldn’t need anything. If you use hair spray, make sure you remove the build plate first and apply it somewhere like your shower, or outside. 
Strange, I wonder how it had arrived at an offset ahead of time, unless you were doing it in the Luban interface on prior tries and it effectively ended up ‘stacking’ on you.
Like I said, once you calibrate (and I’m talking about just using the available 5x5 down to 3x3 calibration options, whichever you’ve picked as your preference in Settings and then using the Touchscreen to calibrate) it should ZERO that offset, for the first print thereafter, as it assumes you’ve calibrated where you want. Then after you do alter an offset on the screen for a given print, any subsequent prints should remember that offset as their starting point, too, even after power cycling.
I have never run any sort of adhesion test to verify my whole bed, I just assume I’m not going to print much larger than about 50% of the surface area at any time, and rely on watching the skirt to dial that in if I’m printing out of my normal central zone. Since I also just print PLA anymore the provided beds are fine for adhesion for me; I probably do dial in a little more ‘squish’ than most people say is recommended for my first layer, but it’s worked for me. (I also have only the A250 I’m sure the 350 makes this all harder, too…)
I probably shouldn’t have butted in to this topic, all things considered. I’m not helping.
I think all the feedback was good and much appreciated! I am new to this stuff so probably asking some noob questions. I tried the same test on textured side with the exact same settings after a 5x5 calibration. Results are better, but had some gaps in the corners of the squares. Everything seems to be stuck pretty firm to the plate. Loosens up quite easily after the plate cools.

I don’t know anything about that filament you’re using, but those gaps between perimeter and infill almost look like underextrusion to me.
I’ll read back on the history of this thread but did you calibrate your extruder? Out of the box most of the SM’s have been set a little on the low side for extrusion feed rate. It’s also possible with a fiber-included filament (I think you said this one has carbon fiber in it) that you just get inconsistent flow, depending on the distribution / quality of the filament production.
Edit - also what are your retraction settings? The default retraction settings SM provides are like 4mm or something crazy. Almost everyone here I’ve read recommends turning that down to 1mm and 40mm/sec speed (or less). Otherwise it’s starving the nozzle so much when it goes from finishing an outline to moving over to the starting corner for infill that it takes a while to ‘restart’. Those low spots almost all look like they’re in the same corner…
That looks pretty normal for when you don’t use an additional adhesive like glue stick. If you need better adhesion, glue stick will provide that for you. You’ll need to experiment, and see what works best. PETG can be a little difficult to work with, but you are off to a good start. The first layer is the most critical, which is why we have this type of test.
Try some actual prints, and see how things work out. Glue stick is very inexpensive, and it washes off with soap and water, so you don’t need to worry about any damage. Just make sure that it doesn’t have acid in it. If it is white, is has acid. Best of luck!