Introduction
(Warning: lots of words follow, interspersed with some truly terrible pictures taken with a fifteen-year-old camera that I’ve forgotten how to use properly. I’d recommend not looking at the 100% size versions of the photos.)
PVB (polyvinyl butyral) is a comparatively new entrant into the printer filament field. According to the advertising, PVB has printing requirements similar to PLA’s, but with better mechanical properties, and it can be smoothed with isopropyl alcohol (or other alcohols, such as ethanol). Its main disadvantage (other than price) is that it absorbs water like a sponge.
Or at least, that’s what the people making and selling it claim. I happened to get a spool on sale at a pretty good price ($15CAD for 0.5kg), so I figured I’d play around with it a bit and report back.
Here’s someone else’s take on this stuff if you want more background:
First Impressions

As you can see, what I got my hands on was one of filaments.ca’s house brands. I’ve had pretty good luck with their PLA and PETG, so I expected the quality wouldn’t be too bad. You can also buy PVB from Prusament, and from PolyMaker (under the “PolySmooth” brand name). This spool is “natural” (translucent, undyed) PVB, not expected to be fully transparent. As filament, it looks a lot like my spool of natural PETG, off-white in colour.
First things first: After getting the packaging off, I attempted to bend the tip of the filament. It actually bent close to double without snapping off the way PLA would have—more like PETG. That suggests that the sellers are right about the plastic’s mechanical properties.
I mounted the spool on a horizontal spindle inside the repurposed dehydrator I have set up as a filament dryer, rather than putting it directly on the Snapmaker’s normal spindle. That turned out to be a good call, because when
I loaded the filament, what came out of the nozzle had as many bubbles in it as club soda, suggesting it was full of water despite having arrived vaccuum-sealed with dessicant. I turned on the dehydrator to 50C and left it for about half an hour before trying again.
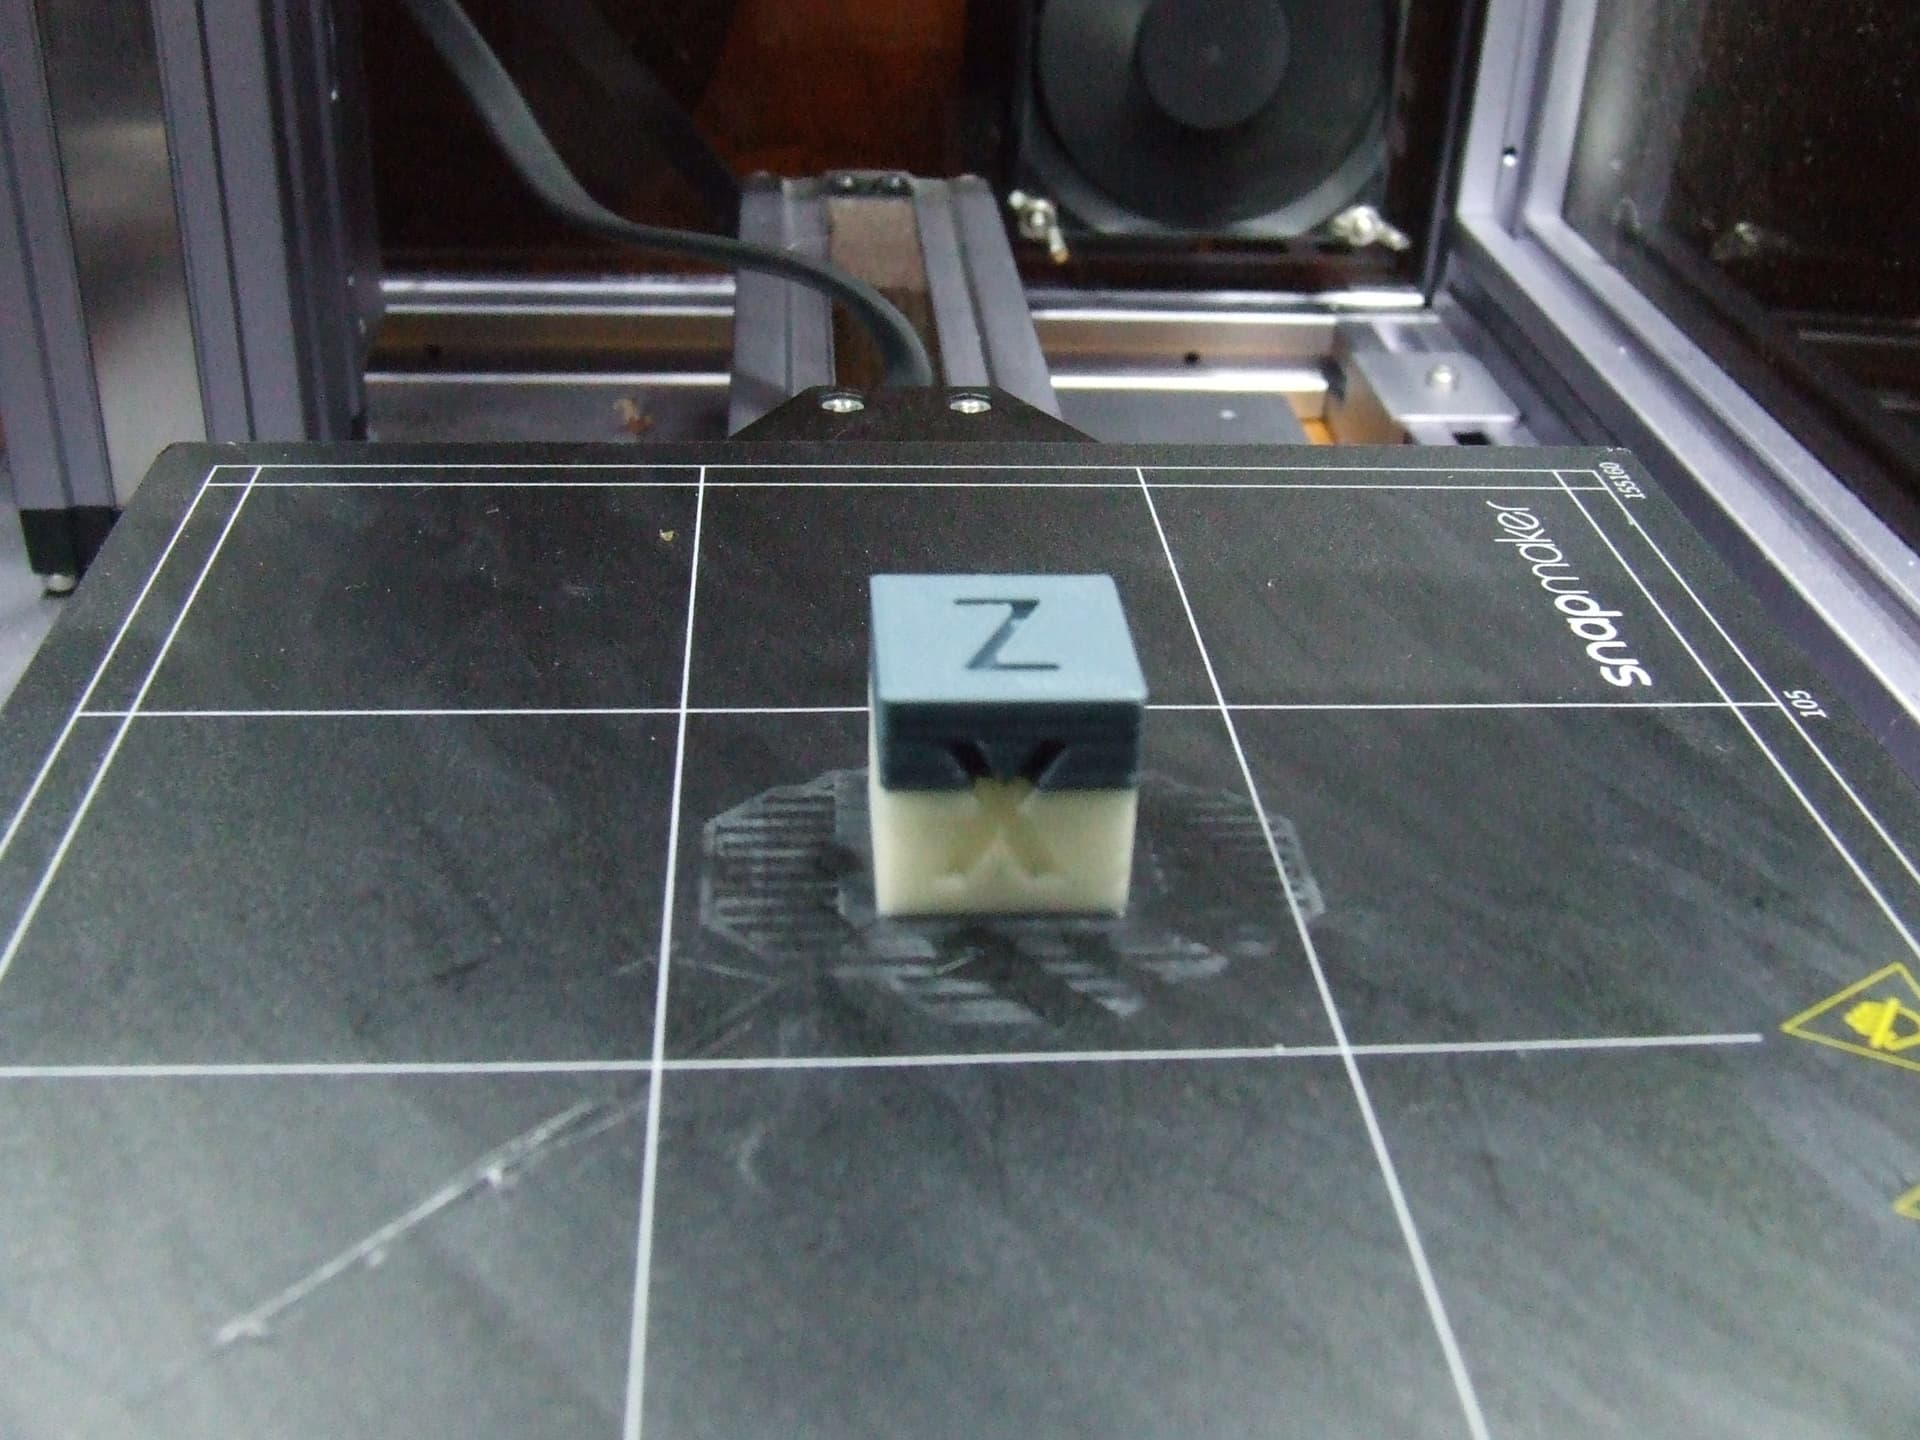
First print: Calibration cube
To start with, I printed a normal calibration cube using near-default Luban settings for PLA and Fast Print (the only setting I changed was bed adhesion, because I hate having to scrape unnecessary skirts off the build plate). The build plate itself had been scrubbed down with water and generic liquid soap, dried, and then had a light coating of acid-free glue stick applied to it. The filament was kept inside the dehydrator, which was still on.
I didn’t perform any calibrations specifically for the PVB, so e-steps, etc., were still using either values I’d determined for PLA or those set at the factory.
The result: It printed okay. Stuck to the bed immediately. No little knot of glop at the center of the X or Y, no surface bubbles. Slight elephant’s foot, but that’s usual for me. There are a couple of spots where flecks of
foreign material, possibly burnt remnants of other types of filament, lint, or cat hair, somehow got embedded. The quality of two of the vertical corners isn’t very good, but I put that down to the feed path of the filament being rather messed-up (I moved the dryer for the remaining prints to try to improve it). The dimensions of the cube seem to be correct, but I can’t give anything more exact than “a teeny smidge over 20mm” because the battery
in my calipers chose today to die. Bah.
As printed, it’s more translucent than my natural PETG calibration cube—when it’s backlit, you can see the fill structures inside.

(The other photos of the unsmoothed cube are unusably bad, alas.)
Second print: Temperature tower
I used the presliced tower for the A150 at PLAish temperatures provided in @xchrisd 's excellent thread 3d Print Guide_Walk Through

The overhangs aren’t great regardless of the temperature, but the optimum for everything else seems to be in the range 195C-200C, so the default PLA settings are Good Enough.
There wasn’t much more I could learn from the tower, so I used it for a quick mechanical stress test (in other words, I bent it until it broke).

It was pretty brittle—more so than the filament was when I bent it before printing—which suggests that the interlayer adhesion before smoothing is as poor as the all3dp article linked near the top says.
Third print: "Not a shot glass"
I wanted a thin-walled object to see how well light would transmit through this stuff, so I whipped up something with 0.8mm walls in OpenSCAD. It’s just a round-cornered cube with an open top, 30mm to a side.

Printed this thin, the optical qualities of the PVB are a lot like those of frosted glass.

(That’s a marble I happened to have on hand inside it. The rest of my marbles are long since lost.  )
)
Fourth print: Bimaterial cube
Just because I could, I printed a half-PVB, half-PLA calibration cube.
Then I tested it to destruction.

On the one hand, it took quite a bit of force to do this—much more than it took to destroy the temperature tower. On the other hand, it did split pretty much right along the material division line, so there is some weakness there.
So using the two filaments together works well enough for objects that aren’t going to be under a lot of mechanical stress.
Smoothing
I used a small margarine tub as a vapour chamber, placed some paper towel in the bottom, and then wetted the paper towel down with 99% isopropyl alcohol, put the calibration cube and “not a shot glass” test prints
inside, and sealed the lid. In the end, between the slow progress and some interruptions, they stayed in there for about 4.5 hours.
They were then left on a smooth surface to dry. Unfortunately, it turned out to be a smooth surface the melted PVB slime layer was willing to stick to. If I hadn’t set the not-a-shot-glass down upside-down, it likely wouldn’t have survived, and the underside of the calibration cube, after I pried it up as a test before it had finished drying . . . let’s just say it isn’t smooth, although you can’t tell it was 3D printed, either.
After 12 hours or so of drying, everything had solidified again. Almost. Even after almost a week, the not-a-shot-glass still feels like it’s made out of stiff vinyl or a rather rubbery flex—it can be bent and manipulated without breaking it.

So optimum results are likely to be obtained after between two and four hours, and place your piece on a perforated (and possibly waxed) surface after removing it from the vapour bath.
Conclusions
Mechanically, unsmoothed PVB-printed objects are brittle in the Z-direction. Then again, PLA objects aren’t always so great that way either. In the absence of smoothing, its mechanical superiority over PLA isn’t tremendous.
It really does polish pretty well with IPA. I put the remaining lumps in the surfaces of my test prints down to the print settings. It is, however, a slower process than acetone-polishing ABS, HIPS, or ASA is said to be. Spritzing or dipping the print might produce quicker results. The rubbery-thin-walls thing needs further testing to determine what the parameters are (how long, how much IPA contact, does the plastic ever return to being rigid).
Did I get the crystal-glass clarity you see in some photos of printed PVB objects? No, but I wasn’t expecting to. It was transparent enough that it should be possible to make out how full a thin-walled container printed from this filament is, and PVB filament marketed as “transparent” (and not just “natural”) may well actually be transparent.