I am using the snapmaker laser for the first time and am testing some settings with the wood material which came with the snapmaker.
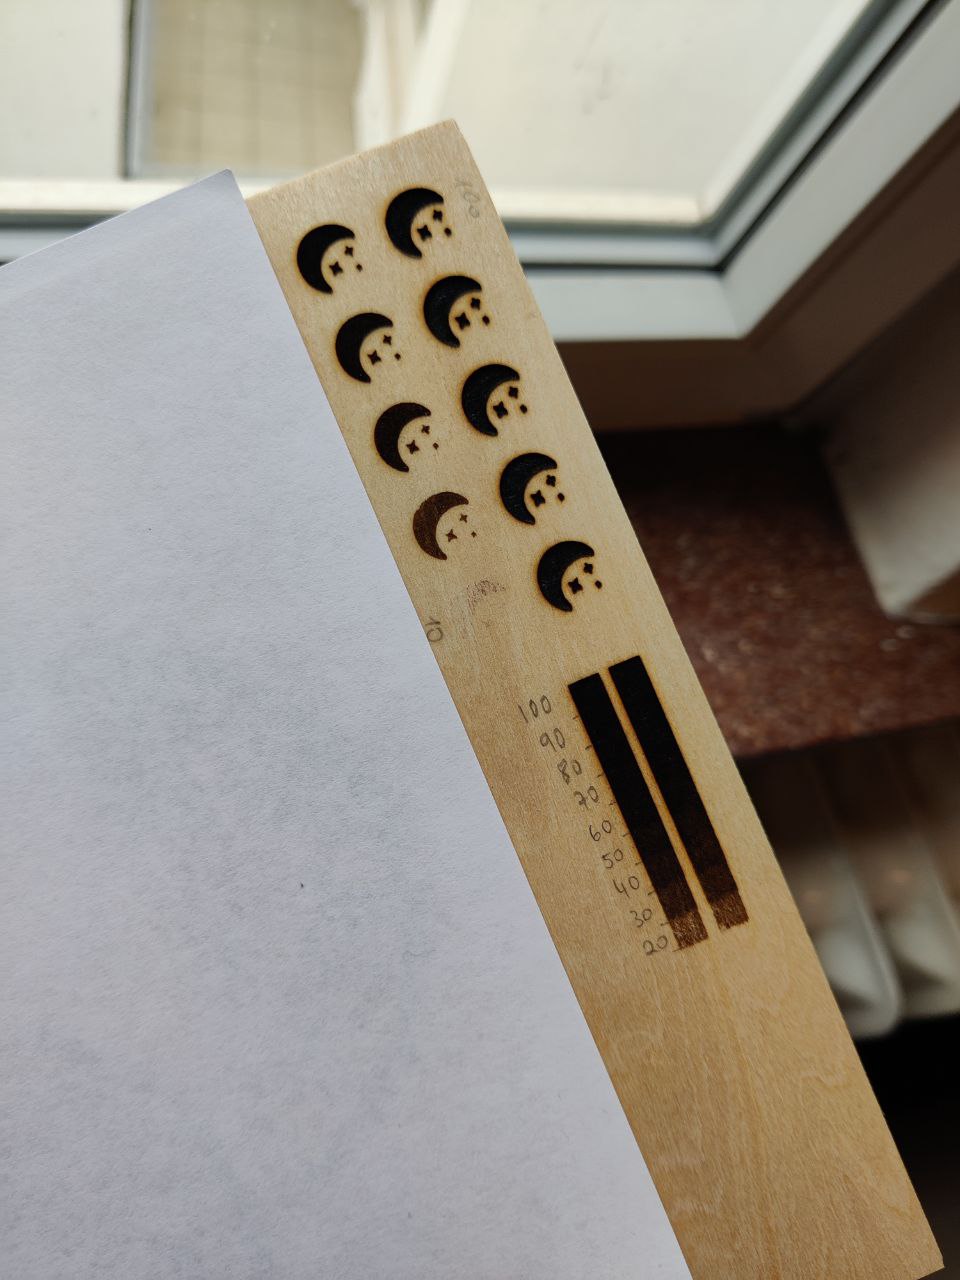
First I tested some laser power with the moon and stars you see in the image. The first moon was 100% laser power and the last one which you can’t even see was 10% laser power. Then I decided which of the blacks I liked (50% power and 40% power) and lasered 2 gradients with it.
The gradients in my file go from 100% black to 10% black (not even visible). And the difference in color showed me I don’t even have to bother with tones in the 100-50% range because they roughly look the same. This gave me only 3 colors to work with in my final image really… I wonder how the snapmaker team got such incredible results with their laser engraved gradient showcase pieces? You now we all want the result of their cat and owl images…
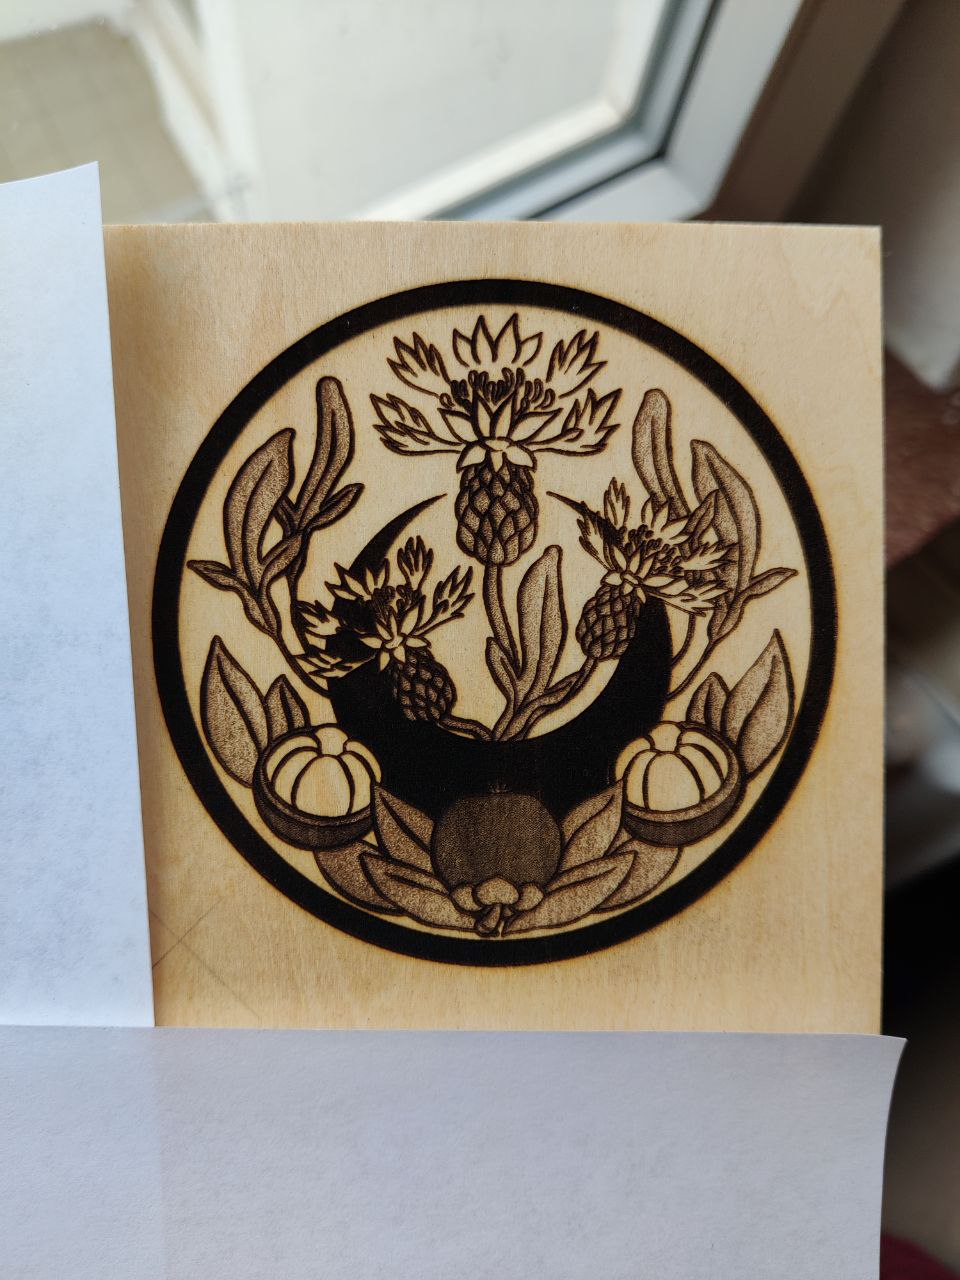
Well I colored my image accordingly and I got a barely human readable version off of it but it “prints” really different so in the image you can not see such difference in the round fruits vs the leaves but in the print you can tell.
I drew this image myself. If anyone wants to use it for non commercial personal projects: go ahead This image is meant to go on to a tea box. It shows cornflowers and mangosteen because these are the ingredients of the tea.
The settings I decided to print on were the follwing:
The print needed around 6 hours and I think this is a really long time for a 10x10 cm piece. Any advice on where to cut time is appreciated.
The final test result looks like this and today I am going to print it onto the tea boxes lid.
I still do not have any idea how to mount the lid to the laser bed though… Maybe I will try double sided tape… Since I do not have any space to put clamps or tape it down from above because the motif should almost go to the edge with a 3mm white border or something. I will update this post when it is finished.
I encourage you all to test you materials and settings a lot and post about your findings. It makes us a great community
What do the lids look like? Are they the same material as the wood you tested on? Various posters have pointed out the the laser’s quality changes quite a bit based on the material. Woods with very obvious grain patterns usually don’t work well, because the darker grain burns more than the lighter parts.
Double sided tape is probably enough for lasering. Several people have had success using it, and have posted so on the forums, although a quick search only turned up one example.
If you have reservations about it, or try it and it doesn’t work, other users have made lasering jigs to hold their work in place. There have been some clever jigs and clamping system that clamp from the side rather than the top of the work piece. Although some of my lids have silicon baffles on the side of the lid, and those might be harder to clamp from the sides.
You probably can get away without any clamps.
If the item is heavy enough it’s probably not going to shift.
You can also use the cnc bed instead of the laser ones. A little more surface contact and easier to use double sided tape with that. (Just make sure to account for extra thickness of bed if you’re using auto-focus height)
A few other ways to fasten stuff (especially for laser which isn’t that critical):
Blue tape
Play-doh/modeling clay
Hot glue gun
Earthquake/museum wax
Binder clips
Also a ton of different clamps, vises, hold-downs, cam systems on thingiverse.
-S
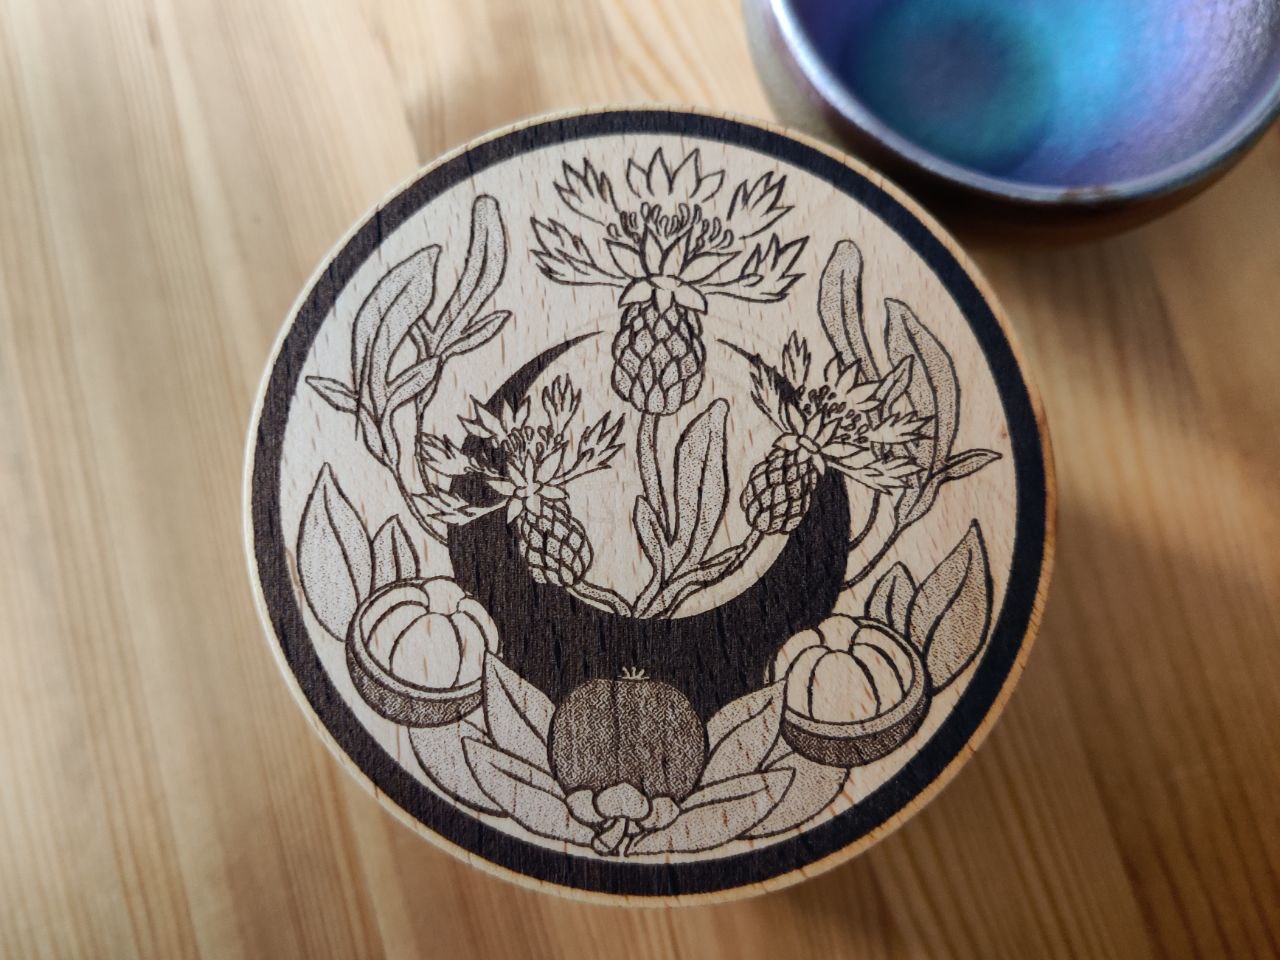
I accidentally forgot to change the density value from 7 to 10 as in my tests but that was actually a good thing. It cut the time from 6,5h to only 3,5h! Of course it has a little less color now since 1. the material is not as soft and 2. I printed less dots but I still love the result
I used double sided Tape and some of the silicone nubs on the laser bed to fasten the lid.
To center the image I traced the outline of the lid onto paper then cut it out. It was easy to fold it in half and half again. Then I placed it onto the lid and poked the tiniest dot with a pin into the lid where the lines met. This dot I matched with the laser dot and saved this as work origin. In Luban the image was centered on 0,0 too.

 This image is meant to go on to a tea box. It shows cornflowers and mangosteen because these are the ingredients of the tea.