How do we print with ABS?
My prints keep lifting off of the build plate and I haven’t been able to produce a successful print with ABS 
Do you guys have any tips and recommendations?
Thank you!
How do we print with ABS?
My prints keep lifting off of the build plate and I haven’t been able to produce a successful print with ABS
Do you guys have any tips and recommendations?
Thank you!
The only semi successful print I have had was using a raft support and have a slow initial print speed, but the support shrunk inside the print causing it to wrapped and split 
My prints always get to about half way and then pop off the build plate. I’ve tried using hairspray and that doesn’t work either
Same as your situation, I have tried more than one day, but still cannot successfully print with ABS.
Any can help?
Any successful case?
Thanks
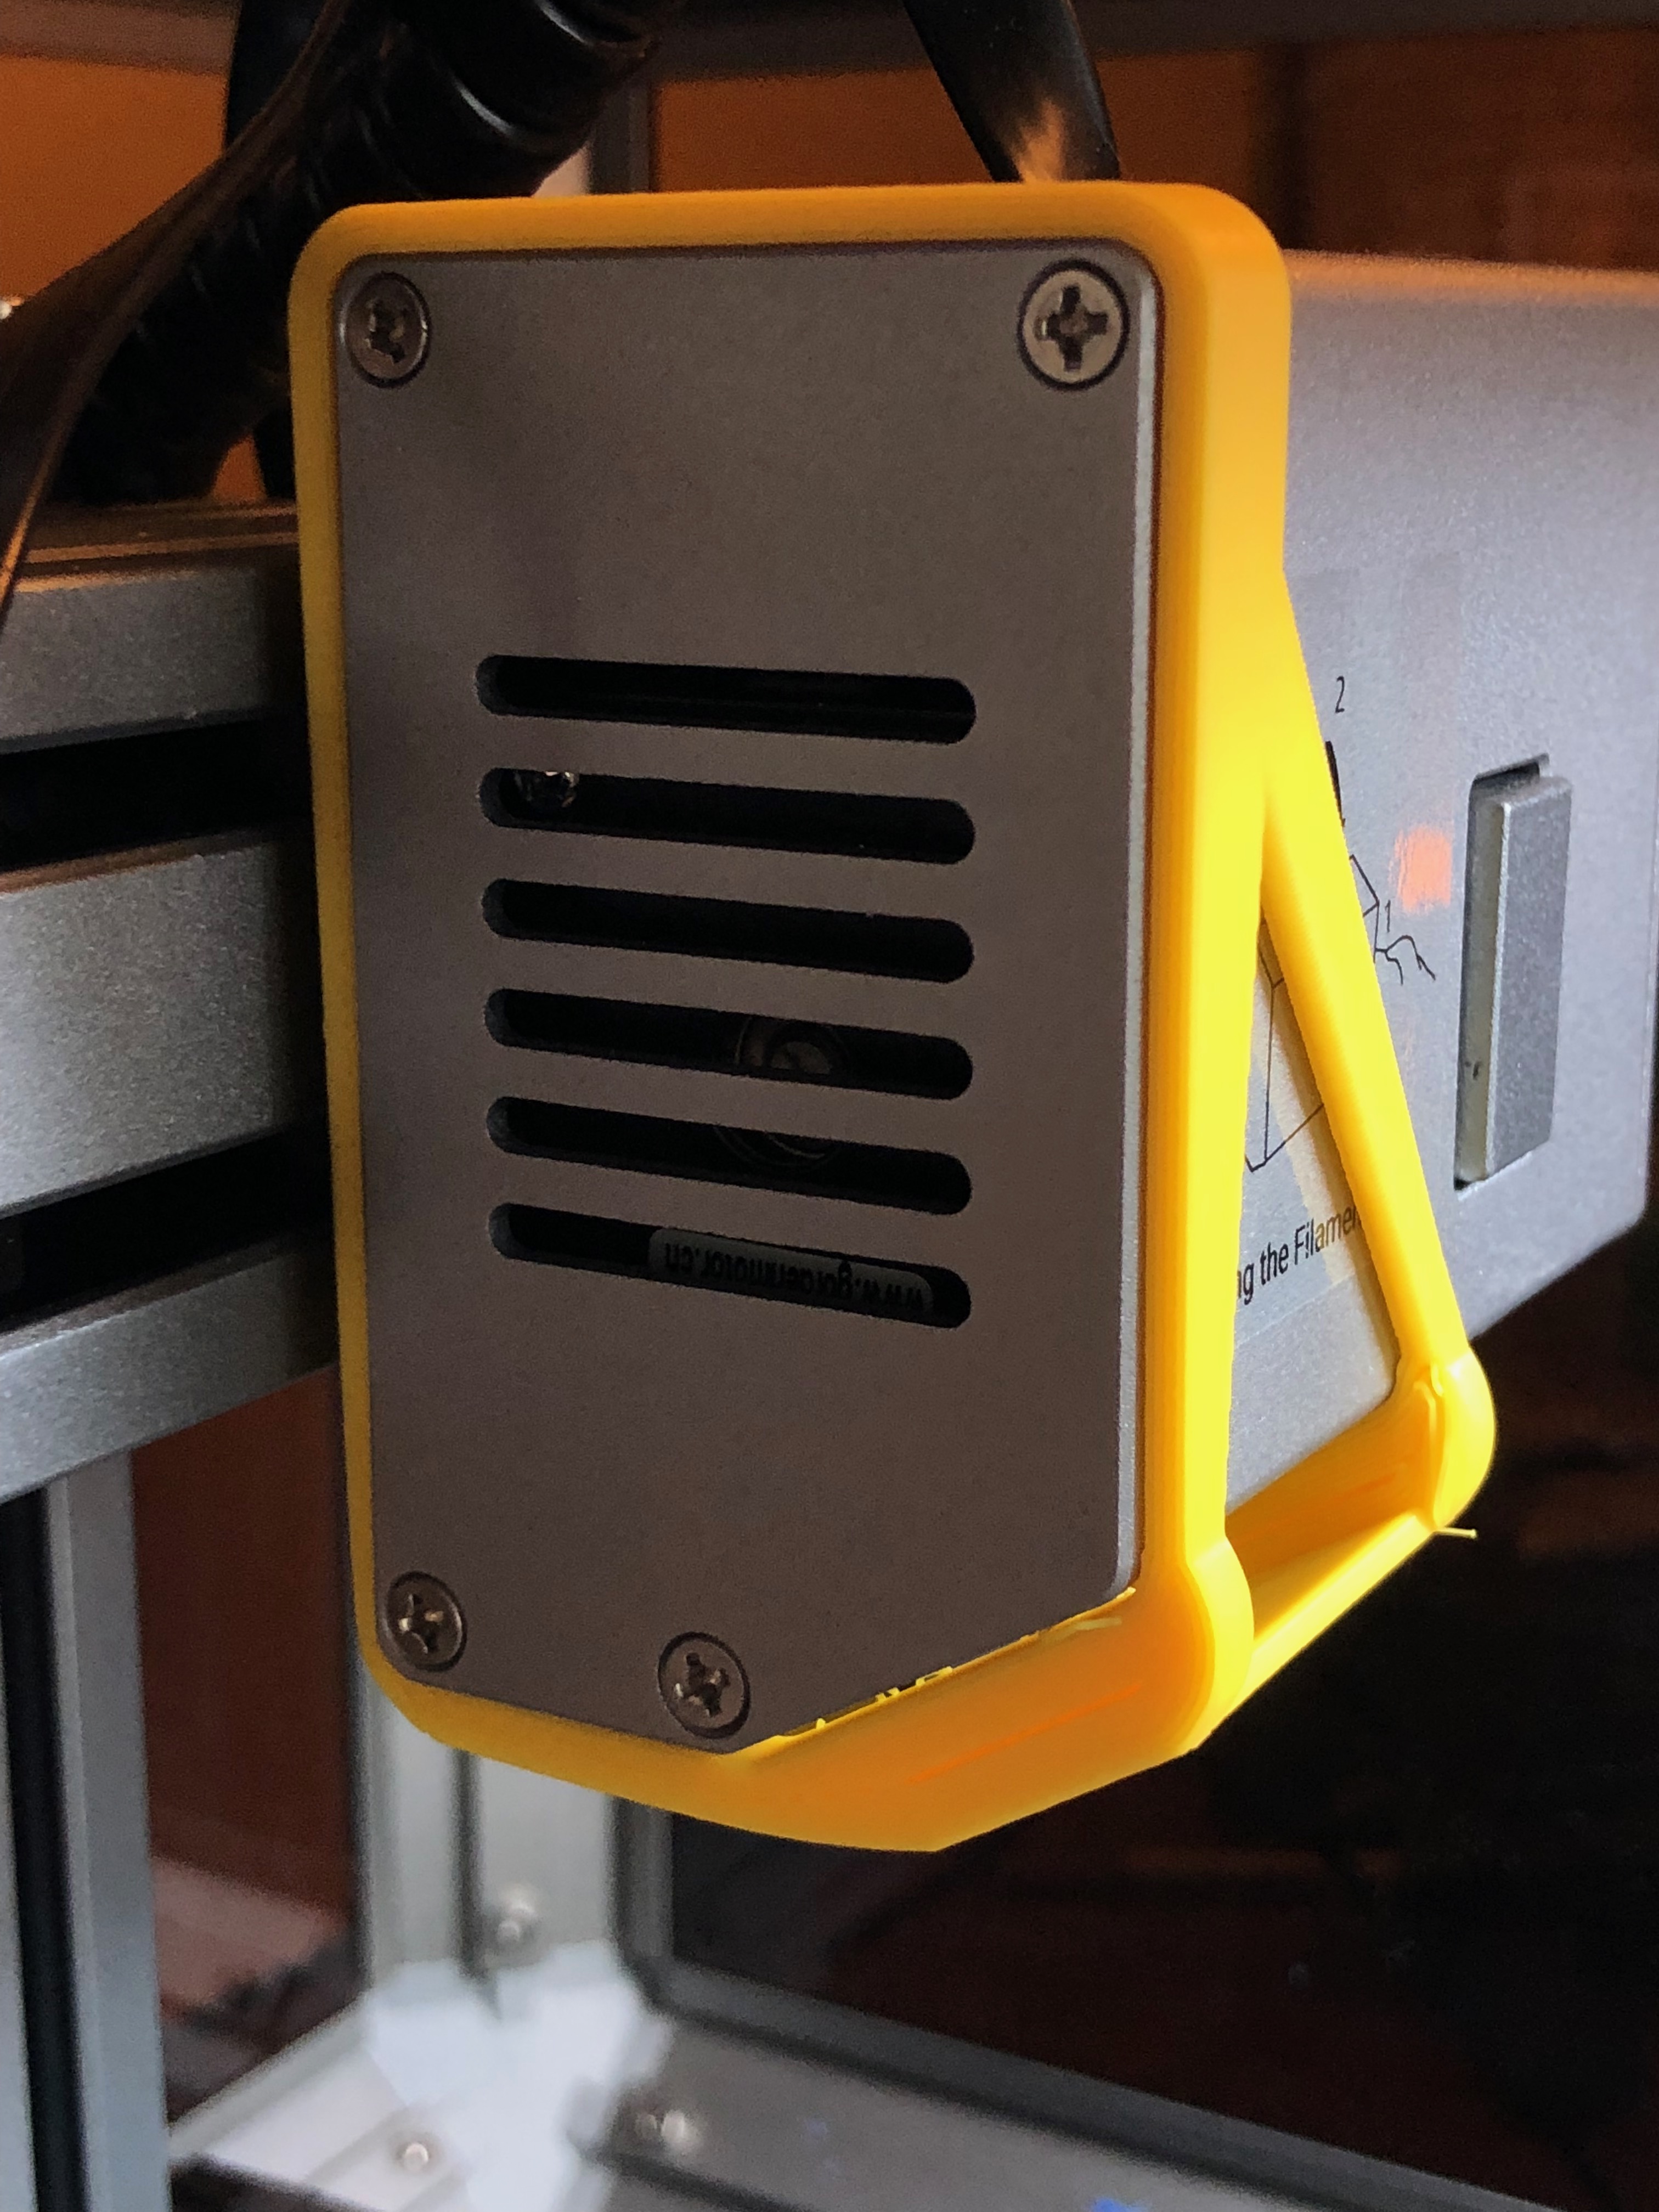
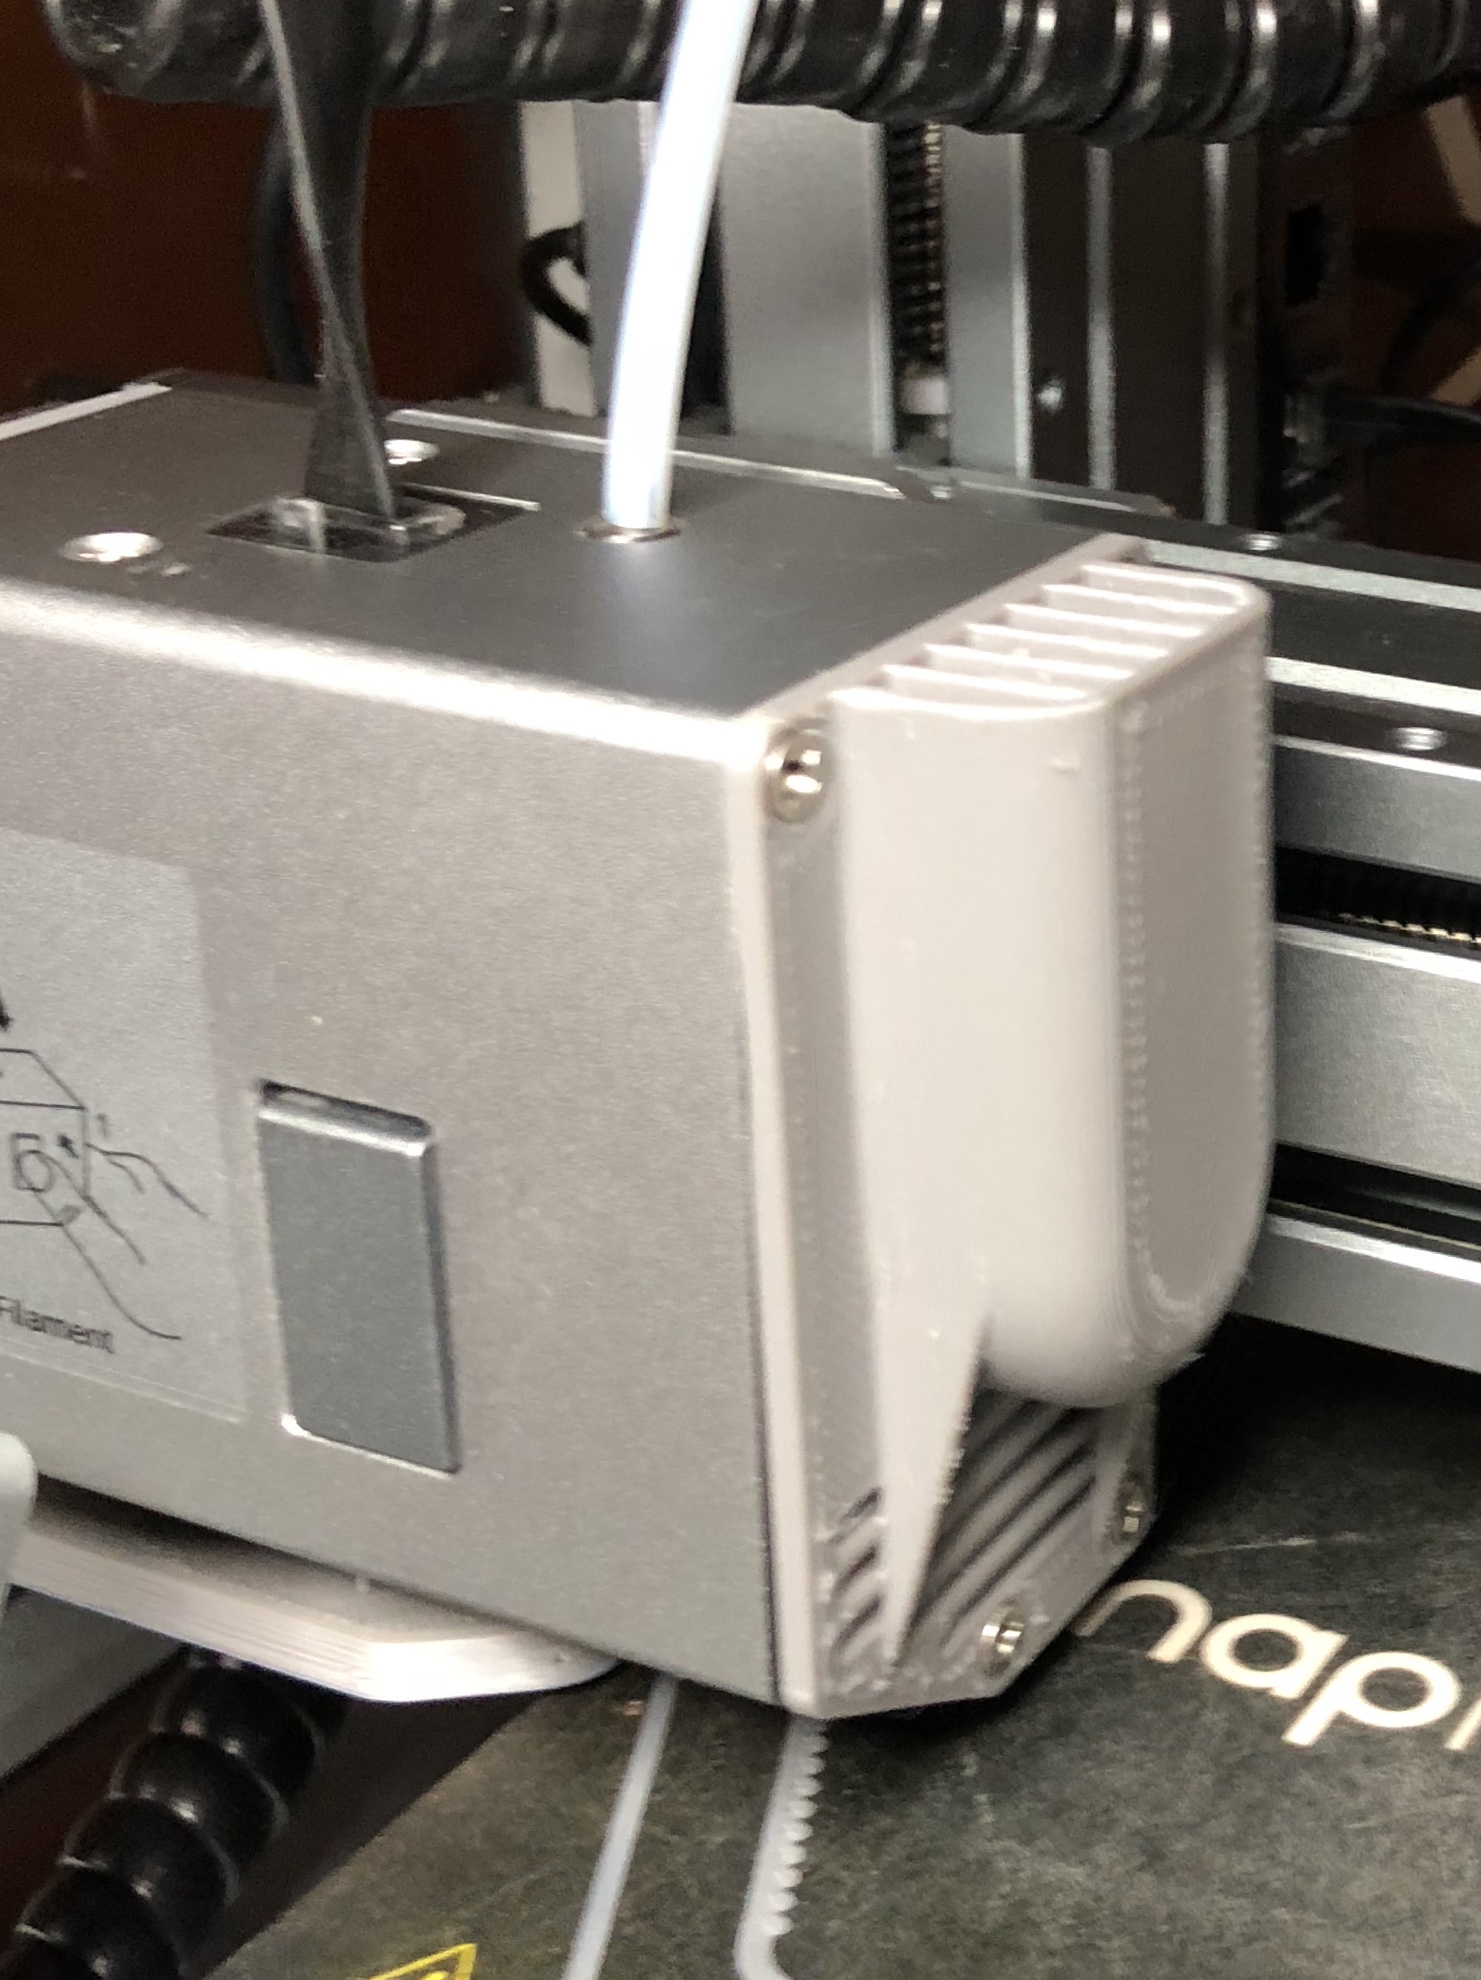
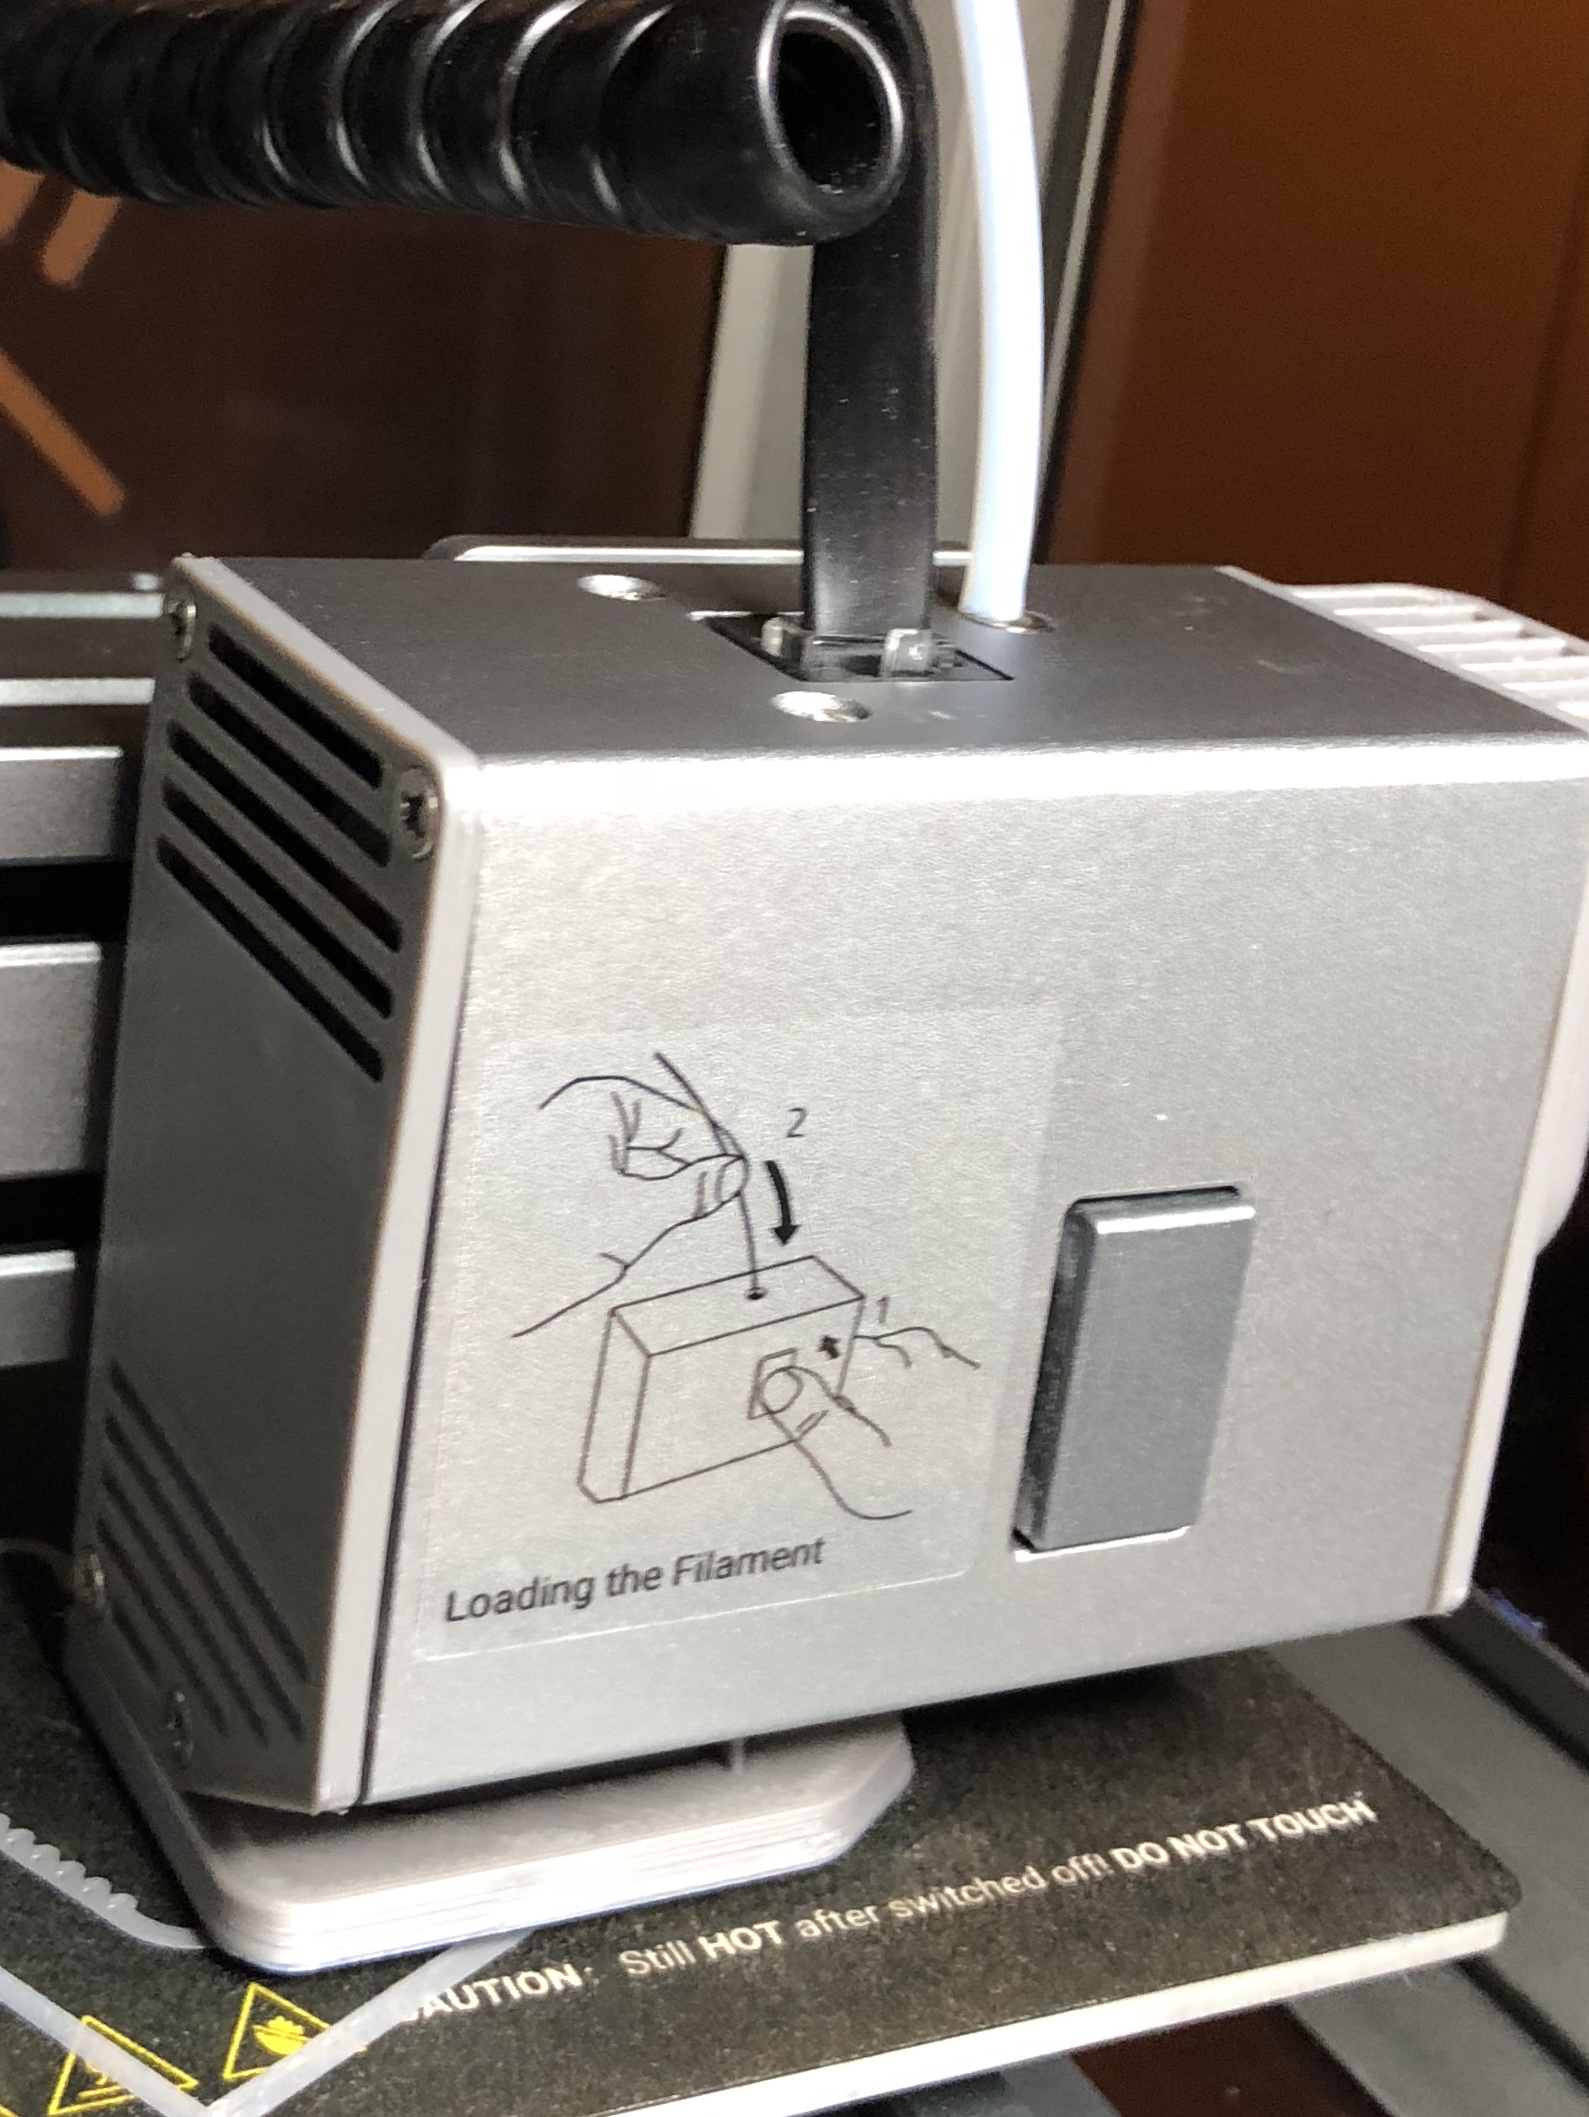
I forgot to mention! I designed this Fan Diverter that helps print ABS. It ensures that minimal (if any) air is forced onto the build plate which is the main problem. Since you cannot turn off the fans with the Snapmaker this was the only solution (unless you want to unplug the fans).
All you have to do after this is spray some hairspray onto the build plate (maybe quite a bit), set the temperature to 80 C (the build plate’s maximum) and then you should be good to go 
Hope this helps!
-Greg
I’ve “heard” that people have success when they print in a controlled temperature housing. I’m also guessing that controlled humidity (low) would help. If you live in a humid climate then the heated bed is a condensation magnet.
Yeah, some people have used dehumidifiers in the rooms and also had an enclosure of sorts around the printer. Seems to work well 
-Greg
YES, deflecting the cooling helps ABS.
Hi @X_Pilot
I printed your Fan Diverter. Great design, fits on the print head very well and stops the fan blowing across the nozzle. I have yet to buy some ABS but my
I hope it works as well for you as it did for me You will need some hairspray or something to keep the ABS stuck to the build plate, but apart from that it made it much easier for me to print ABS
Let me know how it goes!
I was going to make another iteration that directs the air towards the nozzle. That should technically help PLA and overhangs, but I haven’t gotten around to trying it yet.
Also, what filament is that? It looks really nice!
-Greg
Thanks Greg. That’s a good idea to design it to blow across the nozzle. What CAD software did you use?
The filament is eSun PETG. That’s actually a rough print. When it’s printing well it’s almost indistinguishable from a molded part (keeping in mind that I have old eyes!). The yellow is a great colour too. I have noted that some colours of the eSun PETG are harder to print than others, but the black and the yellow are the best so far.
Just thinking, the bracket you have designed could be a good basis for the design of a universal mount for things to attach to the print head.
Shout out to @Tone here. His heat shroud design is great. Here on Thingiverse: https://www.thingiverse.com/thing:3024111 . I’ve printed and am using his first version.
Seems to be working very well. It’s a bit weird not being able to see the nozzle though
The next version has better visibility.
@Tone, I’ve mounted the version 2 shroud. On home it’s hitting the build plate. You might want to check the dimensions - it could be the way I’ve printed and/or mounted it. It’s interfering with the plate by only a mm or so. I’m investigating and I’ll let you know if I find the cause.
@Tone. Just a thought. I am printing direct from Simplify 3D. It could be my start-up script causing the problem.
I had the first version hit the build plate and I just clipped off the corner where it hit. I did move it back in the design. It could be that variations in machines will cause it to hit. Just clip that corner back where it hits. I’ll move it back some more in the next version. I hope your left cover is not sitting on top of the wires. Its bulging out which may be due to warping but it could also be due to it sitting on top of the wires instead of the running close to the front edge of the housing.
Great, thanks. It’s only catching by a mm or so. The left cover is not pinching the wires - they are buried deep! It’s just a bit warped because the covers while flat, are interfering with some other parts on my machine. My v1 shroud that I have refitted is working great.