Can it cut anything? All info is its only used for engraving but it should be suitable to cut something right? ![]()
Would be nice if Snapmaker could give us also some CO2 laser tho if cutting acrylic needs that.
Agree, Snapmaker should be working on something to cut clear acrylic. I get tired of set up and clean up the CNC just to cut clear acrylic.
1 Like
C02 would require an entirely new machine and be ultra bulky. You can look into a K40, beamo, or makebox for that. The IR diode can likely only cut maybe ~0.05. I’ve attempted 0.1mm aluminum and best I’ve done is a deep score that I could fold and break, similar to perforation.
They said we dont get better cnc either and then we got 200W cnc with dual power cable and bracing kit … something could be done for sure ![]() … Interesting would be to have laser generator somewhere aside and leading the beam trough optical cable to the head but I suppose lasers/optical cables do not work this way sadly
… Interesting would be to have laser generator somewhere aside and leading the beam trough optical cable to the head but I suppose lasers/optical cables do not work this way sadly ![]()
I see, I did not meant necessarily metal but something less dense but interesting info.
My problem is space - I have max space for my A250 and nothing else sadly ![]()
![]() (Thats why I have Snapmaker in the first place)
(Thats why I have Snapmaker in the first place)
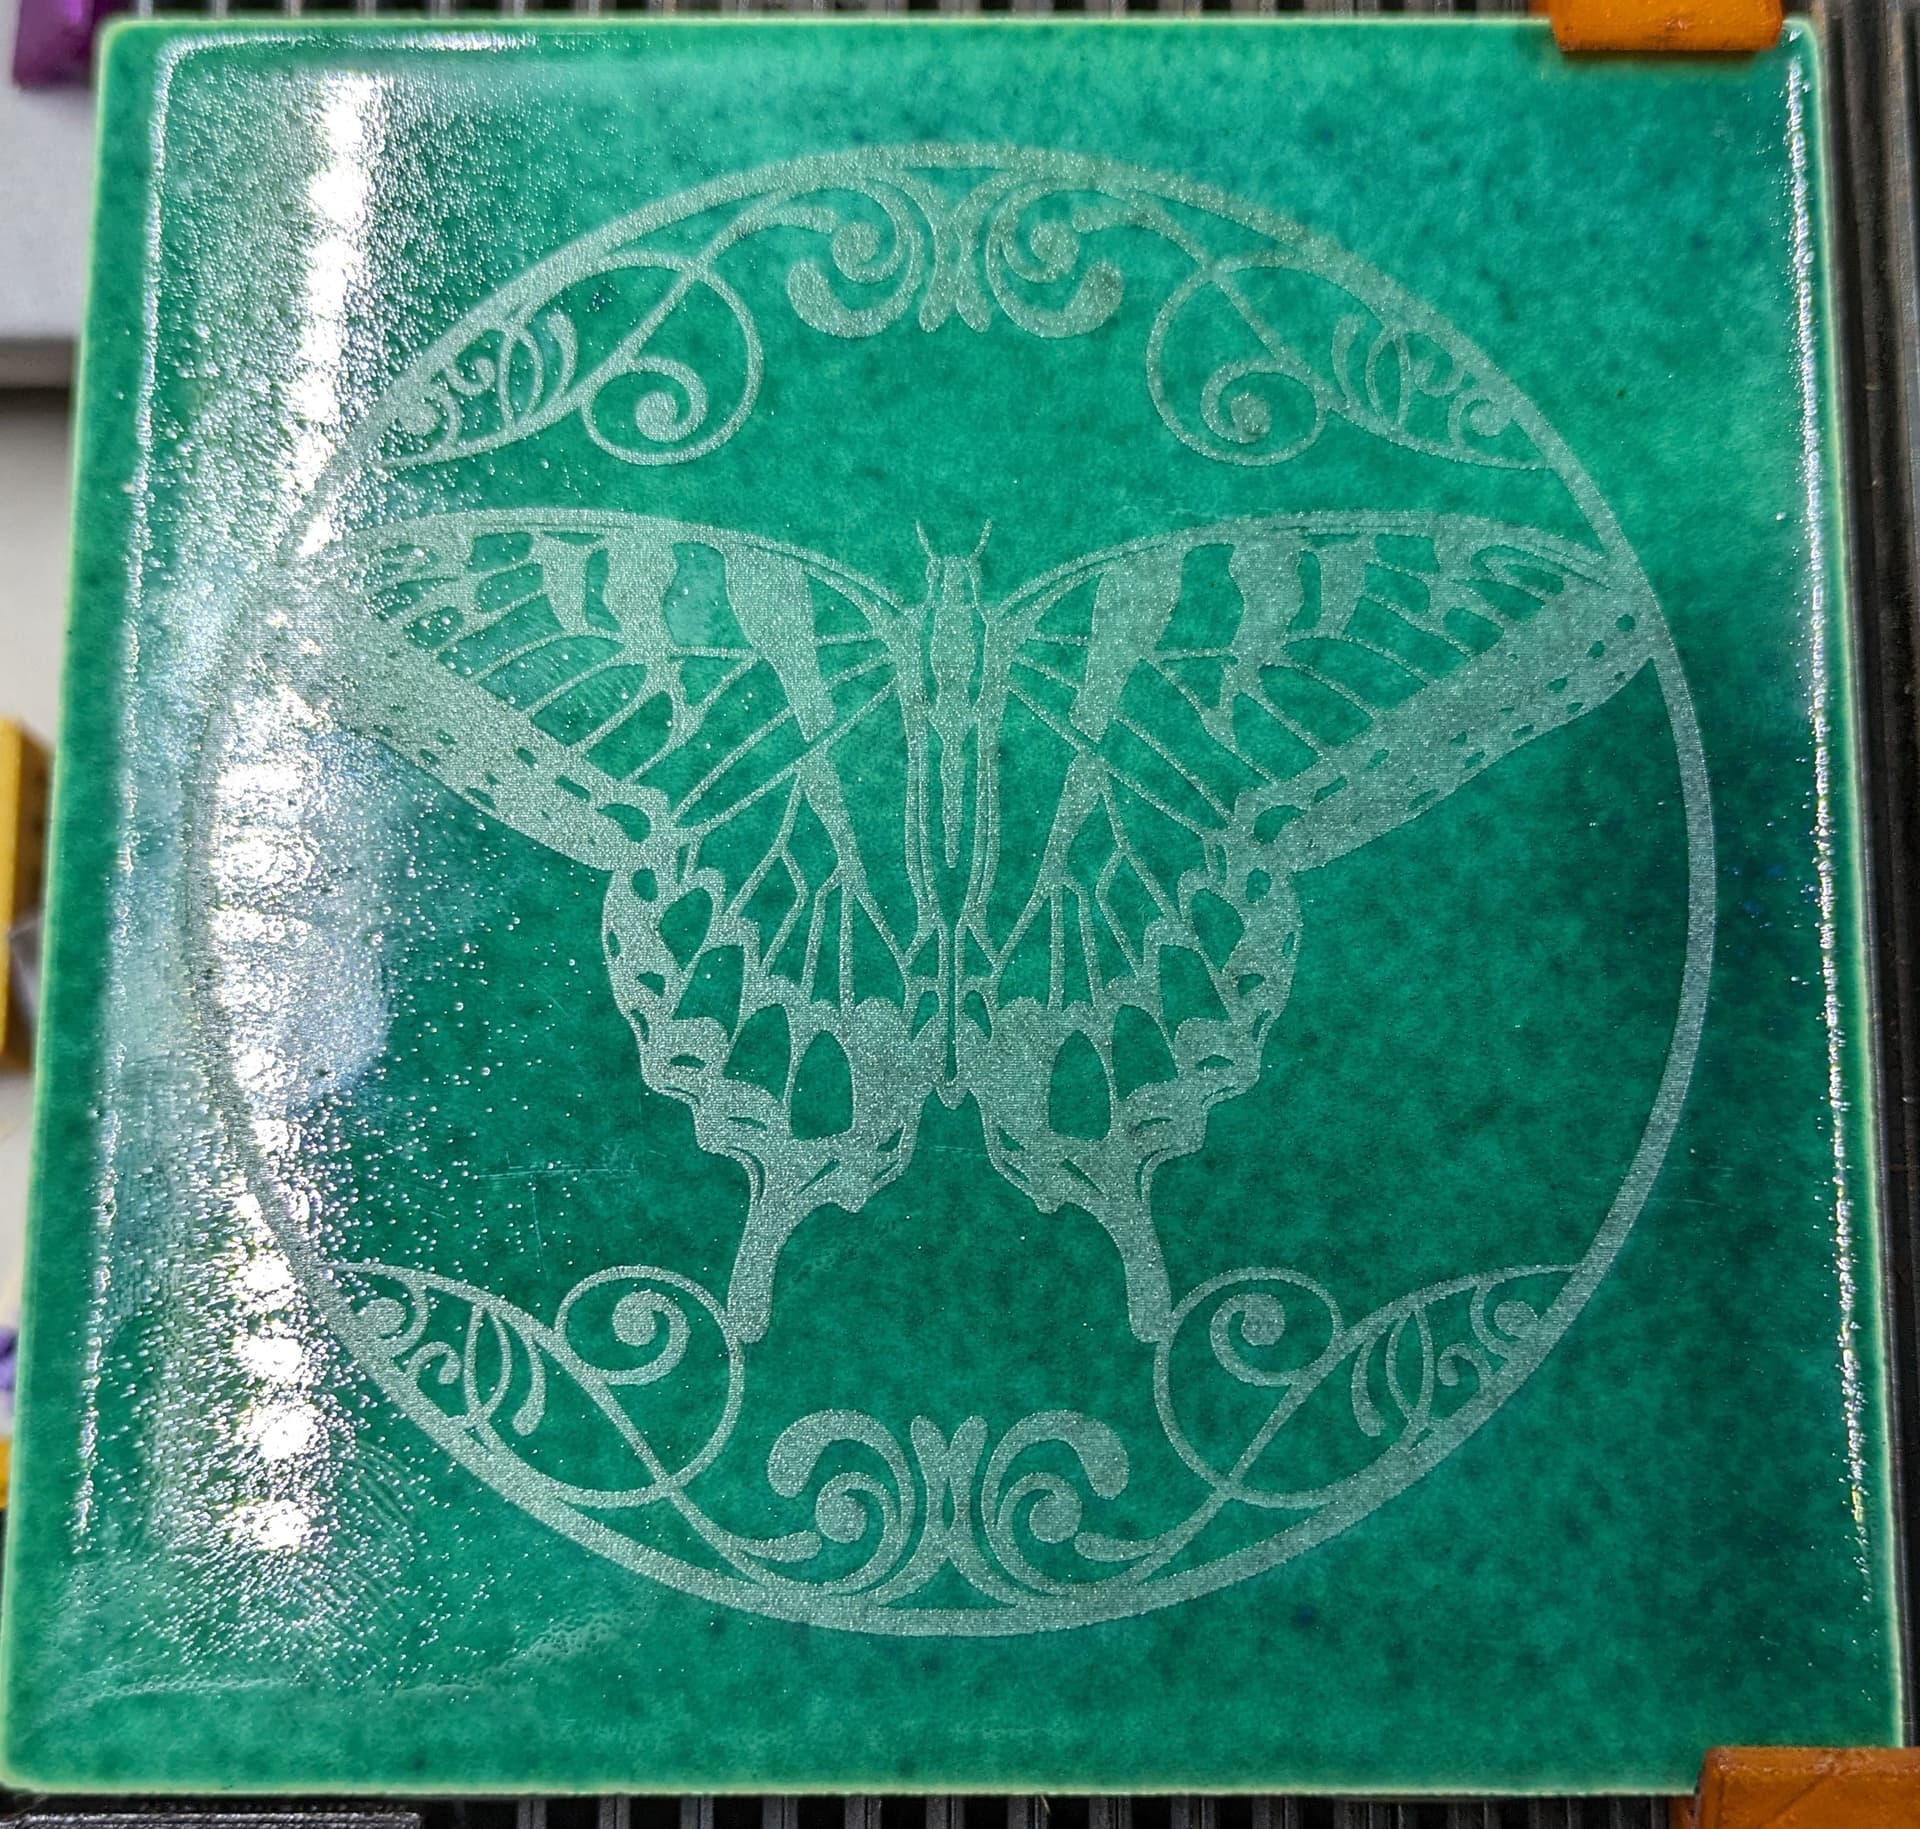
I’m excited for the IR laser module. I know the engraving is essentially just oxidation of the surface. My question is does this oxidation cause any long term issues that would require sealing the surface after engraving? I’m getting a lot of requests for engraved bare stainless steel and on the 40w module it’s pretty cool I can engrave “color” using 23.8-30% power in the 0.01-0.09 interval range.
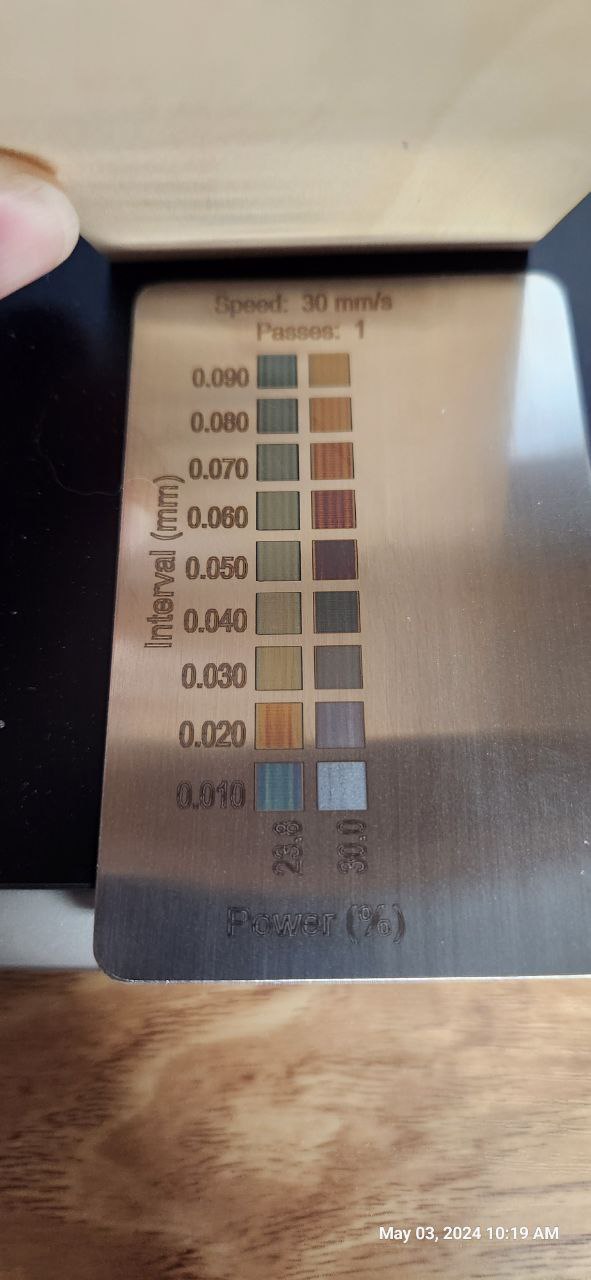
Unfortunately it’s so lightly engraved you can only really see it if reflecting a white or light colored surface.
Is there any interval or power settings that can change the look or darkness of the oxidative engrave on the IR? I suspect people like myself are going to be used to the ultra dark you get from marking paint to get that deep black on metals using the current laser modules.
2 Likes
Here’s another question: I find confusing information on if you nee a quick swap plate for the IR laser. Some post says: You need it for Artisan - the FAQ says you need one for the Snapmaker 2.0 QSK. Looking on the images it looks more like it would fit the Snapmaker 2.0 QSK…
Anyone of you lucky preview owners can shed light on this?
I can tell you on the 2.0, you don’t need the QSK. I don’t have one.
Sorry for the misleading question - IF you own the 2.0 QSK and you want to use it with the 2W IR laser - would you then need a toolhead plate?
Yes you’ll need an additional plate.
1 Like
Another Beta tester here. Yes, i have been able to use the IR to “cut” into steel, aluminum, copper and brass. Its slow going, but i was able to “drill” a 1mm hole in a piece of 0.5mm brass in about 40 minutes of laser time. I have not tried PCB, but it definitely cuts into pure copper. PCB should be well within its abilities.
4 Likes
Another beta tester here. I haven’t had much luck with the IR laser and color marking on steel. Pretty much just blues and browns. The 40W laser is much better at laser color on steel. I recommend trying a frosted steel, as i had much better luck with colors on that. Read my articles in the Snapmaker Academy for more details.
2 Likes

Ah, that makes me hope ![]()
I start to doubt that… the housing looks very much like the 20/40W housing. And these instructions: Installing the 20W/40W laser module on 350/250 models | Snapmaker Wiki show that the profiled back nicely slits into the QSK on SM 2.0.
@StevenTheiss Do you own the QSK, and did you need the adapter plate?
Whatever… When I pre-order I’ll not order a plate for the beginning. I’ll take the one I have on my 1.6W laser if needed - that one is sitting and catching dust anyhow since I’ve the 10W.
Oh it might be built in, I didn’t pay attention since I don’t have it to begin with. Herp derp ![]()
2 Likes
Hi, still new to the snapmaker but slowly learning what to do and how.
Can you point me in the right direction for the bed “adapters” you have in this photo?
They look a lot better to use than masking tape!
Many thanks
Can you suggest where you are getting your stainless steel “cards “ from? Please ![]()
The corners are mine found here;
https://www.printables.com/model/85447-snapmaker-laser-bed-square
The other clips I printed in TPU are found here:
1 Like
1 Like