ISSUE: * The Print Preprocessing screen asks, “Please select filament type.”
Setup:
- U1 connected to an internal network through a LAN connection only (wifi)
- U1 has firmware V0.9.4
- Snapmaker Orca (2.2.1) running on Windows PC within the same network as the U1
Snapmaker Orca detects downlevel U1 firmware and issues “unsupported unit” when binding the printer to the Snapmaker Orca application. I manually create the Snapmaker filament profiles for all four hotends. I am able to slice and send the GCODE to the U1. The U1 completes its task.
After this task has completed, I now do the following:
- I update the U1 firmware to V1.0.0 and restart the printer.
- I refresh the Snapmaker Orca main screen and I now see that the four filament fields are correctly populated and associated with the four SnapSpeed PLA spools still on the U1.
- I modify the project, save it, and then slice it in the Preview tab.
- I click on the Print button and select “Upload and Print.” The Print Preprocessing window opens.
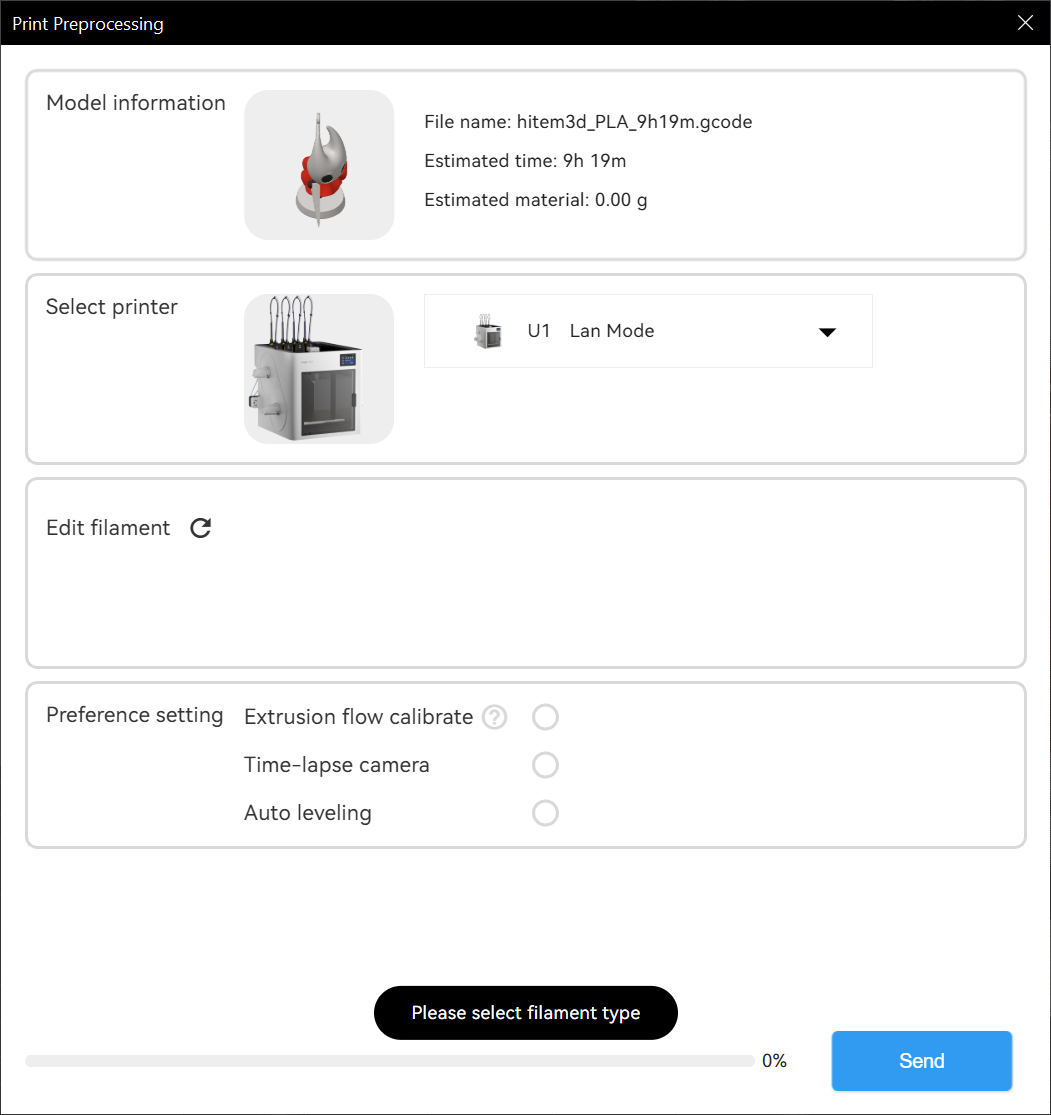
- I click the Send button. A black pop-up appears with “Please select filament type” NOTE: Below the “Select printer” section of the Print Preprocessing window is another section called, “Edit filament” with a refresh icon (circular arrow). This section is empty. [See Figure 2: Empty]
- I am not allowed to upload the GCODE to the U1 from this interface.
WHAT I DID TO FIX THIS ISSUE:
- From the “Filament” section of Snapmaker Orca, I select a different filament type for each of the four listed filament/hotends. I select “Generic PETD” from the system presets list. NOTE: I have installed Generic X filament types to use as baselines for new filaments I will add in the future. Each of the four sections now read, “Generic PETG.”
- I click on the Preview tab to run the slicing routine. I DO NOT TRY TO UPLOAD THIS PROFILE.
- I click on the Prepare tab and change the filament profiles to the proper color-coded Snapmaker PLA SnapSpeed profiles in the “Machine Filament” section of the pull-down for each of the four representations.
- I click on Preview tab to run the slicing tool again.
- When I click on the “Print” button and select, “Upload and Print,” the Print Processing window opens. This time the “Edit Filament” section is populated with the correct corresponding filament spools. [See Figure 3: Filled]
I guess this is a good workaround? I don’t know if it is successful because when I click the “Send” button, I still get the “Error 401: Unauthorized” block. See: Snapmaker Orca and U1 ISSUE: Error 401: Unauthorized.
I hope this workaround is useful to others until this inconvenience has been resolved.