Hello,
my name is Josef and I come from Germany. I bought a Snapmaker 2 A350 in June. I still have some trouble with the correct leveling, but I dont know, do I have to go with the nozzle closer to the bed ore am I to close?
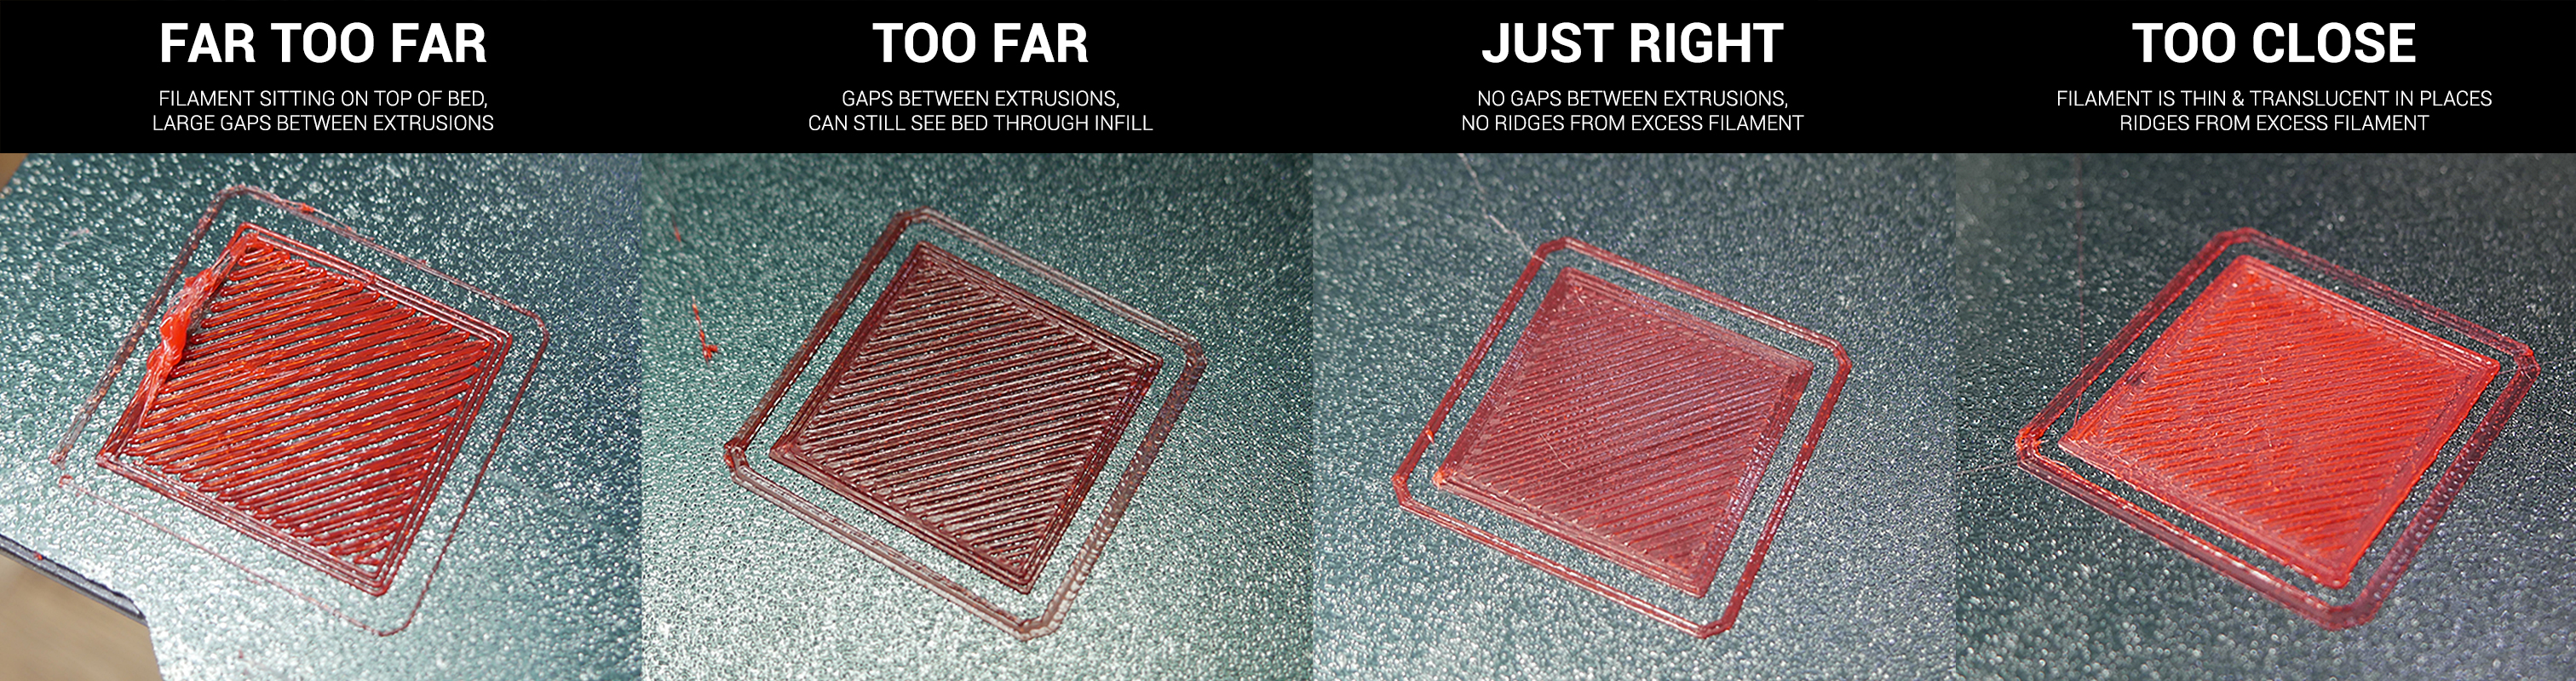
I recommend limiting your print to just the center square, and print a few of these in succession, raising or lowering the nozzle by 0.01mm for each print, until you see the optimal first-layer height. It’s fast and does not waste a lot of filament. If you continue past the optimal setting until it starts to look wrong (too high or too low, according to that image), you’ll have the range of values for your Z offset. You can then apply a value in the middle of the range using the touchscreen on your next print, and it will stick (the setting … and the print). So if you find that +0.02, +0.03, and +0.04 give good results, you would use +0.03 in the touchscreen.
Out of curiosity, did you calibrate your z offset with the tape in place, or did you apply the tape afterwards? If you applied it afterwards, you need to adjust your z offset in your slicer.
You’re referring to how much you have to lower the nozzle at the final step of caibration, correct?
5mm is a bit much but probably not in broken territory. The proximity sensor is 1mm higher than the nozzle, and it probably adds a hefty margin to that during calibration so as not to crash into the bed. It is possible your proximity sensor is a bit low, and you can adjust that though it is a bit awkward:
The simple way to check: when your nozzle is calibrated to be at print-height, slide a credit card (or anything else roughly 1mm in height; I often use a 6" engineer’s rule) under the print head. it should touch the side of the nozzle but be under the proximity sensor. If there is a large gap (half a millimeter or more) between the card and the proximity sensor the sensor is too high; if the rule won’t go under the proximity sensor, then the sensor is too low.
I wouldn’t worry too much about this though, sounds like it isn’t causing any problems.
