How to edit gcode? - Is it possible to salvage a job by restarting after a jammed extruder?

Stepped away for a bit, glad you’re making some progress! Yea, the G92 command is a way to set an arbitrary reference point for future commands. It sounds like you got it, but I’ll just reiterate: that G92 E0->G92 E115.7035 change was because over, say, 1000 lines of gcode 115mm of filament was extruded, and if I don’t change the reference as soon as the first G1 X Y E116 is executed it’ll extrude 116mm of filament. So you have to tell the machine that it’s starting at 115.7 so it extrudes 0.3, up to 116.

So I’m looking over your code. The start section looks good. These comments aren’t necessarily things wrong, just my thoughts:
Home, move off the bed, wait for temps, extrude 20mm of filament (a lot in my opinion), retract 5mm (also a lot, I use 1mm)

Let the bed start dropping to 50C (could change the previous on line 31 and 37 to only heat to 50 instead of 70), turn on the fan.

Line 55 will extrude 4233.57mm of filament - that’s a problem.

I think you should just remove line 55, looks like it’s not needed since it’s got no X and Y, it’s a pure extrusion.

Line 56 resets to 0 and it carries on, That’s great, seems like your print failed at the start of a layer, so the G92 to reset E to a non zero value doesn’t apply here.

Just as an example, if you needed to restart on what is line 63 here (E0.44612) since the immediately previous line is G1 X… Y… E0.33391 that would be changed to G92 E0.33391. Again, that’s because that command on line 63 extrudes 0.113mm of filament, and without the G92 E0.33391 it would instead extrude 0.446mm

Another thing - after your retraction of 5mm on line 43 nothing ever makes up that retraction distance. You don’t have a skirt anymore, so you’ll want to add a G1 F3600 E5 right before you start printing to prime the extruder.

Ah, got it. The G92 part was what I was missing!

The prior instance of setting an extruder axis value was near the end of layer 132:

G1 F3600 E4228.57092

I’m just now reading the updated version of your reply!

Yea, I post before I fully proofread, sorry.

Edit: spoiled by the edit-ability of this forum :slight_smile:

You are an amazing help. Thank you so much!

I have deleted line 55 (superfluous “G0 X71.858 Y97.167”).
I have edited lines 32 and 38 from 70 degrees down to 50 degrees.
I have deleted the now unneeded line 50 (“M140 S50 ;heat the bed to 50 degrees Celsius”).
Edited the key line to change this: “G1 F3600 E4233.57092” … to this: “G1 F3600 E5”

So now the start of the file reads as:

;Header Start

;FLAVOR:Marlin
;TIME:6666
;Filament used: 0m
;Layer height: 0.24

;header_type: 3dp
;thumbnail: data:image/png;base64, [SNIP]
;file_total_lines: 6551863
;estimated_time(s): 410868.23000000004
;nozzle_temperature(°C): 205
;build_plate_temperature(°C): 70
;work_speed(mm/minute): 3600
;max_x(mm): 0
;max_y(mm): 0
;max_z(mm): 0
;min_x(mm): 0
;min_y(mm): 0
;min_z(mm): 0

;Header End

; G-code for 3dp engraving
; Generated by Snapmaker Luban 3.10.2
; Wed Dec 02 2020 3:49:30

M82 ;absolute extrusion mode
;Start GCode begin
M104 S205
M140 S50
G28 ;home
G90 ;absolute positioning
G1 X-10 Y-10 F3000
G1 Z0 F1800
M109 S205;Wait for Hotend Temperature
M190 S50;Wait for Bed Temperature
G92 E0
G1 E20 F200
G92 E0
;Start GCode end
G92 E0
G1 F3600 E-5
;LAYER_COUNT:928 (which is 1062 - minus layers 0-133, a total of 134 layers)
;LAYER:0 – DELETED except for fan off command.
M107 ;fan off command

;LAYER:1
M106 S255 ;fan on full, 100%

;LAYER:133
G0 Z32.12
;TYPE:SUPPORT
G1 F3600 E5
G92 E0
G1 X71.887 Y97.173 E0.00118
G1 X72.133 Y97.987 E0.03512
G1 X72.903 Y99.307 E0.09611
G1 X75.026 Y100.65 E0.19638
G1 X73.49 Y103.123 E0.31257

Looks better. The line you deleted that you deemed superfluous is actually essential. You need to re-add G0 X71.858 Y97.167

Think about this: as you read down the file, how does the printer get to the print position? As it is written in your most recent edit, the only way is with G1 X71.887 Y97.173 E0.00118, an extruding move. So it will be extruding filament as it moves to the start position.

You need to get it close to the start with a non-extruding move, which is the purpose of that G0 command.

OK, I see. I was misunderstanding an earlier tip about extrusion, that said this:

I think you should just remove line 55, looks like it’s not needed since it’s got no X and Y, it’s a pure extrusion.

Ah, in whatever I’m looking at line 55 is G1 F3600 E4233.57092

I copy/pasted into notepad++, perhaps my line numbers are off from yours.

Got it! Thank you so much!!!

That section now reads as:

;LAYER:133
G0 Z32.12
G0 X71.858 Y97.167
;TYPE:SUPPORT
G1 F3600 E5
G92 E0
G1 X71.887 Y97.173 E0.00118

That will work, looks good.

Just for discussion’s sake, the previous line was G0 X71.858 Y97.167 Z32.12.
The difference is subtle.
The original will do a straight line move from the previous position (in this case -10, -10) to a given X Y Z coordinate.
The new way it’s written will do a dog leg. It will go down to the Z value, and then sideways.

Often the difference is moot, but in some circumstances, like with a fragile print, moving sideways across a print can drag the nozzle against the model and break things.

Even just flipping that so it goes to X/Y first, and then goes to Z would be a slight improvement.

Always a good idea to preview things, I loaded your most recent edits into ncviewer and noticed that there’s no G21, which makes sure the machine is in mm units instead of inches. It’s traditional to have that in a header, so it’s not relying on the assumption the machine is configured for mm units. You should consider adding that into your Cura profile start gcode.

Apparently ncviewer assumes inches by default, so I had to add a G21 at the start of your file.

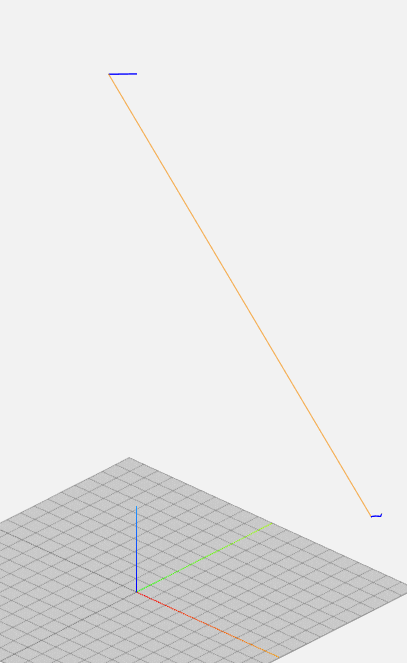
Here’s what I mean with the dog leg:
As written now:

vs how it was originally written

WAIT ncviewer noticed a problem I missed in reading the gcode. There’s a Z0 command still in the header, and that will crash through the model. Deleting the G1 Z0 F1800 line near the top looks better:

Here’s the final code I ended up with

;Header Start

;FLAVOR:Marlin
;TIME:6666
;Filament used: 0m
;Layer height: 0.24

;header_type: 3dp
;thumbnail: data:image/png;base64, [SNIP]
;file_total_lines: 6551863
;estimated_time(s): 410868.23000000004
;nozzle_temperature(°C): 205
;build_plate_temperature(°C): 70
;work_speed(mm/minute): 3600
;max_x(mm): 0
;max_y(mm): 0
;max_z(mm): 0
;min_x(mm): 0
;min_y(mm): 0
;min_z(mm): 0

;Header End

; G-code for 3dp engraving
; Generated by Snapmaker Luban 3.10.2
; Wed Dec 02 2020 3:49:30
G21
M82 ;absolute extrusion mode
;Start GCode begin
M104 S205
M140 S50
G28 ;home
G0Z300
G90 ;absolute positioning
G1 X-10 Y-10 F3000
M109 S205;Wait for Hotend Temperature
M190 S50;Wait for Bed Temperature
G92 E0
G1 E20 F200
G92 E0
;Start GCode end
G92 E0
G1 F3600 E-5
;LAYER_COUNT:928 (which is 1062 - minus layers 0-133, a total of 134 layers)
;LAYER:0 – DELETED except for fan off command.
M107 ;fan off command

;LAYER:1
M106 S255 ;fan on full, 100%

;LAYER:133
G0 X71.858 Y97.167 Z32.12
;TYPE:SUPPORT
G1 F3600 E5
G92 E0
G1 X71.887 Y97.173 E0.00118
G1 X72.133 Y97.987 E0.03512
G1 X72.903 Y99.307 E0.09611
G1 X75.026 Y100.65 E0.19638
G1 X73.49 Y103.123 E0.31257

Note, I added a G0Z300 immediately after the G28 so ncviewer would more accurately estimate where ‘home’ is on this machine, otherwise it assumes home is at 0,0,0, when in fact on this machine it’s not. That’s not necessary in the final code.

Thank you! While you were doing that previewing and posting, I was sending the flawed file to the printer. I soon ran into the fact that the “Z0” command at the start had the printer’s horizontal arm slamming onto the top of the existing print product!

If I edit the command at line 35, changing this:

G1 Z0 F1800

…to this:

G1 Z75 F1800

I’m in hopes that will prevent the horizontal arm from hitting the product.

And if make that change, it also would allow me to change this:

;LAYER:133
G0 Z32.12
G0 X71.858 Y97.167

…Back to this

;LAYER:133
G0 X71.858 Y97.167 Z32.12

And if I add in the G21 command, does that sound like I’m more ready?

Yea, or just delete it. Z is set later also.

I think so!

I spend quite a lot of time in the previewers playing the gcode - it’s an incredibly useful way of predicting print failures. Especially prints with overhangs or support, slicers like to start printing in mid-air quite frequently.

Sounds like the crash went OK, hope nothing broke :confused:

Good luck! And you might keep a laptop hooked up so that if you need to adjust the flow rate you can with M221 S100 or some other percent. For some reason flow rate was not added to the touchscreen, it can only be set via command line.

When the prints restart sometimes it will be over or under extruded. If it’s looking thin you can raise the flow percentage up to 103 or 105 and watch it for awhile. Keep as much of an eye on it as possible though, I watched mine for about an hour at the start tweaking flow since an overextrusion issue is what caused the failure in the first place, and then checked on it occasionally for the next 6 hours.

Flow can get away from you pretty quickly - if you make any large changes like going to 140% to fix a large area of underextrusion, be prepared to quickly issue a 60% or something to compensate. Small changes over time are the best rather than rapid fast changes.

Also flow percent overrides are not stored with a power cycle, every boot is 100%, however if you do back to back prints it will not be reset automatically between prints. Something to remember. Along with everything else, lol.

I will try to do that!!! Thank you!!

Update + Many thanks

Good news and not so good news. The file editing worked exactly as intended. I learned so much during this scenario. The not so good news is that after trying various different layers in the file, somehow no layer actually matched the height of the item. One layer below it was too low, the very next layer above it was too high. I am thinking that during the days the partially printed product sat, it perhaps absorbed moisture and its height changed. I finally decided to give up, re-slice, and start over.

Also, in the event that the original jam was possibly due to moisture in the monofilament, I’m making a dry box with a roller bed first, before re-attempting the Mandalorian helmet. More when I have more.

I want to finally say a huge Thank-You to @ brent113 and everyone else who have been so helpful. I am amazed at how helpful the folks in this community are. Thank you!

2 Likes

@ brent113

UPDATE: Disregard! I found my mistake! See added note below!

OK, I’m back again, needing to try the same type of rescue procedure, and I’m trying retrace the steps from above, but I’ve hit a snag.

I loaded the following altered (edited) Gcode into NC Viewer, and it seems OK. However, when I drag the new file into Octoprint, and try to run it, I get a hard stop warning about the file being outside the print area of the machine. I’m baffled as to what I’m doing wrong.

UPDATED TO NOTE…

Below is error in gcode: I had X and Y values in the line where I tried to hone in the extruder axis point.

; Most recent extruder axis value was LINE 422488:
G1 F1800 X295.587 Y166.01 E2595.09931
G92 E0

It should have said:

; Most recent extruder axis value was LINE 422488:
G1 E2595.09931
G92 E0
1 Like

@ brent113

Just wanted to say thanks again. I just now, for the first time, successfully rescued a print that got interrupted, using your help given above. The previous effort succeeded on code editing but failed on height issues and lack of confidence. That was (I finally determined) due to tangled monofilament. This time was due simply to running of monofilament, and Octoprint not being set up to catch that and warn about it. I had read elsewhere on the same subject of rescuing a print, that it’s OK to set your Z-height to intentionally redo the “last known” (partially completed) layer, as it can be better to have a slight bulge than to have a gap, and that gave me more confidence on this go round. I did indeed get a slight bulge, but the rescue effort succeeded, and I was very glad because it failed within the last 3% of a 2-day long print! :slight_smile:

1 Like

G92 E2595.09931 is probably what you’re after. G1 will extrude that much filament. G92 ‘resets the counter’ to that value, although I think the firmware may have safeguards against extruding massive amounts of filament.

Re. firmware limit on extruding:

There is definitely something in the firmware, although my recent experience with it (while manually issuing commands via Octoprint’s terminal console) was associated with the firmware thinking that the rate of extrusion I had instructed for was too high. I cannot yet tell if it also addresses amount, but I do think it addresses rate.

Ah, thank you. I think I was still misunderstanding how to use it. I thought the G92 command locked in whatever G1 E…x command had just previously come before it.

Somehow, even though I had it wrong, the rescue effort worked.

Maybe next time this happens I’ll finally get it “righter.”

Thanks again. I have now successfully rescued another print that got interrupted, using the help above. This time I got the G92 E…x command correct. I’m finally a little more confident with doing this.