I am making a mount for a Raspberry Pi for my SnapMaker. In order for there to be room I decided to move my controller down to the bottom most screw holes on the back of the Z linear module. When doing so the case for my controller popped open. The plastic tabs that hold it open look to have snapped. I took this as a sign that I should take a look at the chips on this board.
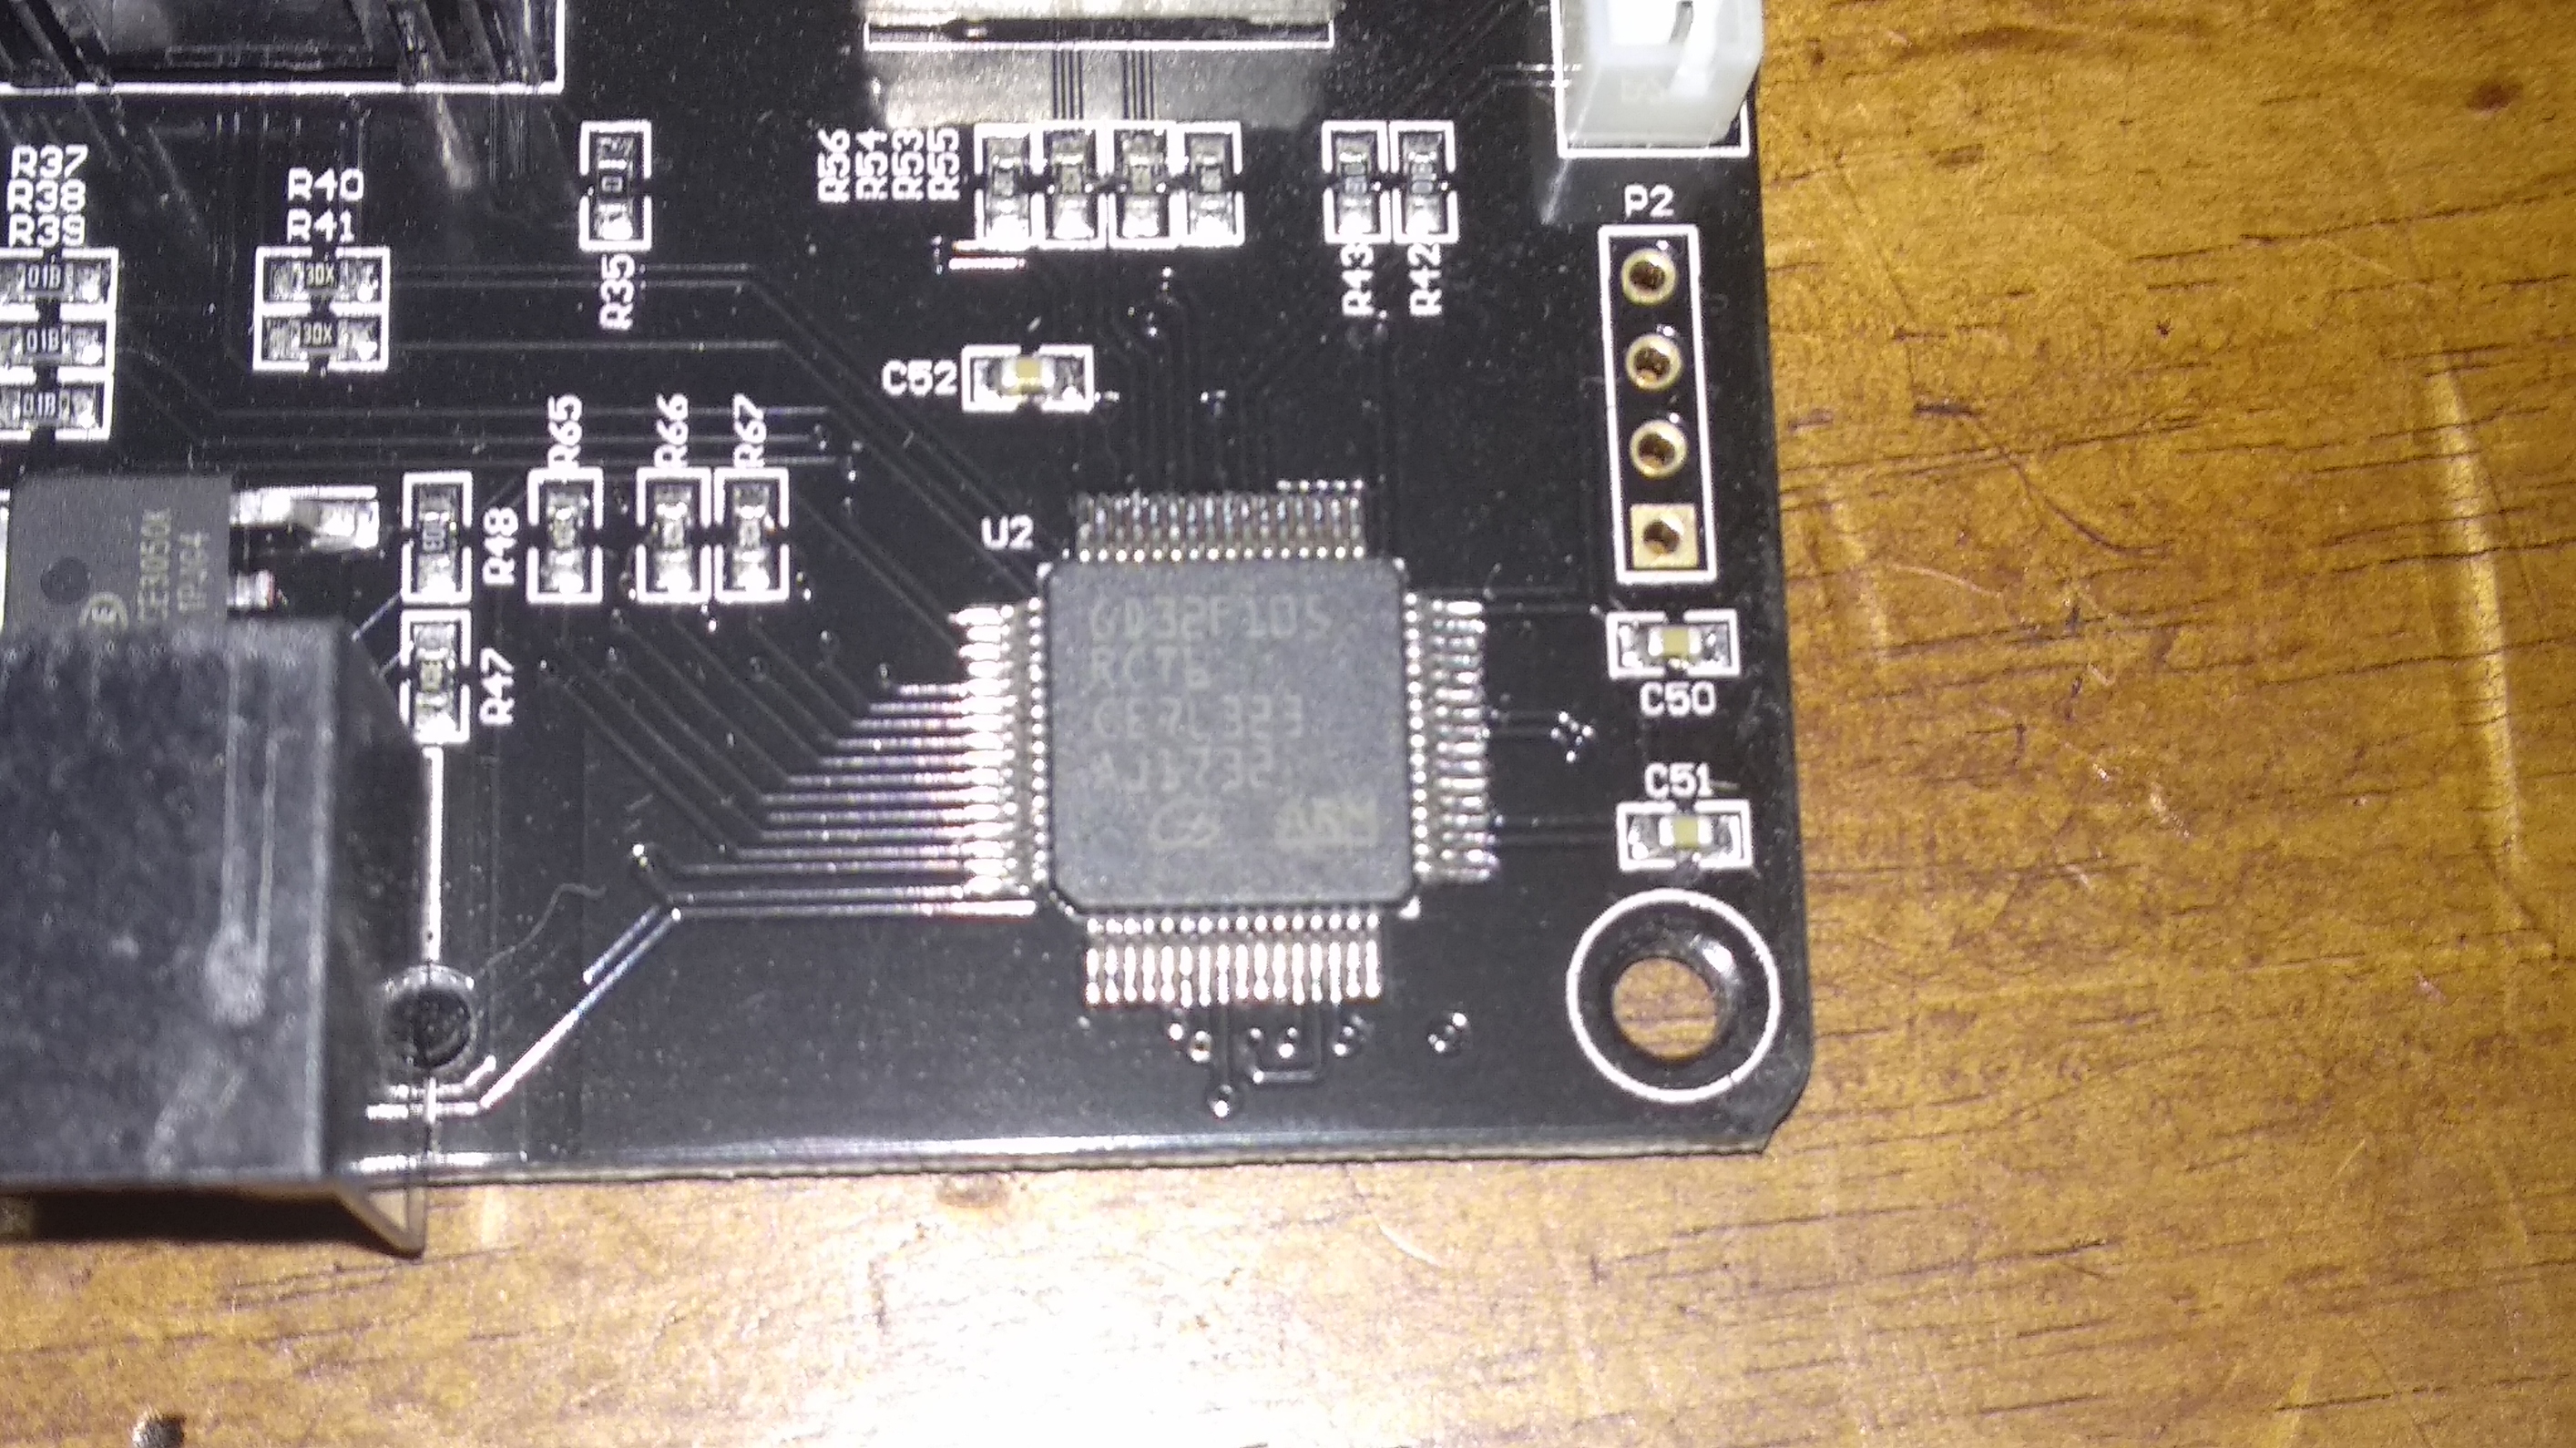
First thing that surprised me is that the controller is 32bit. It is running a GD32F105-RCT6 which is an ARM Cortex M3 chip. They also have the single wire debug port broken out from the chip, but it does not have a header. I am currently trying to find a spec sheet for this chip, but the download links seem to be broken or in Chinese.
It also has four A4988 stepper drivers with a rather beefy heatsink running across them.
It only has two power MOSFETs from what I can tell. One is for the heated bed. The other is for the hotend / laser / spindle. There are some smaller transistors on the board that I cannot make out the part numbers on. As such it is still possible that they have the fans hooked up to them, but I am not holding my breath.
This looks like an iteration of a MakeBlock and so do all of the parts, https://grabcad.com/library/data-of-makeblock-parts-1, I haven’t checked the processors to specification but the Auriga housing seems to have been extended and the main board must have been a copy of a MakeBlock concept and produced in mass for SnapMaker.
MB SMD V1
The Me Stepper Driver V1.0 driver is an easy-to-use, step-by-step stepper driver board based on an A4988 chip that accurately drives bipolar stepper motors. It’s ideal for 3D printing, digital controls, the Makeblock Music Robot and many other applications where you need to control every movement with precision.
1496/5000
The A4988 chip is a complete stepper motor micro-driver with built-in translator for easy operation. It is designed to drive bipolar stepper motors in Total, 1/2, 1/4, 1/8 and 1/16 modes.
Characteristics :
Stepper motor driver chip A4988
Compatible with 4-pin bipolar stepper motors
With potentiometer for stepper motor current control
On-board DIP switch (2 POS SIDE ACTUATED) supports Total, 1/2, 1/4, 1/8 and 1/16 modes
Built-in fuse protects the card and the chip from surges or any failure
Built-in cooler dissipates heat for max. 1.35A on the driver chip
Easy to use
Comes with an Arduino library for easy programming
Power indicator
Easy wiring thanks to the RJ25 6-pin interface
Marking with a red label and compatible with Me Baseboard
2.54 mm pins for connection to jumper wires
M4 mounting holes at 16 mm intervals, compatible with Makeblock bars
Specifications:
Current max. : ± 1.35 A
Max. Motor control voltage : 25V
Note: The maximum supply voltage of Me BaseBoard is 12 V
Logic voltage: 5 V
Dimensions: 48 mm x 24 mm (length × width)
Nomenclature :
1 x stepper motor driver Me V1.0
1 x HT3.96-4P
1 x cooler
I am sorry but I disagree with you on that. The only things I see similar is that Makeblock uses phone jacks and the they have a module that uses the A4988.
The A4988 is an extremely common stepper driver. It is very inexpensive compared to other drivers (less than a $1 if I remember correctly). It is also well supported by Marlin. From a design perspective it is a very tempting choice to use so I do not see that as much of a similarity.
The phone jacks on SnapMaker are in no way pin compatible with any MakeBlock modules. The phone jacks on MakeBlock are strictly for communication and power delivery. Motor drive is done through a screw terminal block. The only jack on SnapMaker that does communication is for the screen. MakeBlock is all about compatibility.
The differences between the two controllers are pretty major as well. The SnapMaker is 32bit, Makeblock is 8bit. The MakeBlock has tons of extra IO, SnapMaker has none. The SnapMaker is 24V, MakeBlock is 12V. The list goes on and on.
I think the biggest thing though is that the MCU SnapMaker is using makes no sense for MakeBlock. It only has like 50 GPIO pins many of which are eaten up by other functions like talking to the USB chip serial chip and the USB OTG port. There seems to only be enough to talk to the screen and control the stepper drivers / mosfets. Makeblock on the other hand wants as much functionality in their controllers as possible. They also break out anything they are not using for you to solder headers to.
It is quite possible that the idea of using RJ25 / RJ45 connectors was inspired by MakeBlock, but I think that is about it.
Do you happen to already have the pinout for the stepper motors at their connectors? I’m looking into making my own stepper motor smoother board. Starting a new thread on it, but since you’ve torn down the controller maybe I don’t need to reinvent the wheel? If you didn’t get this info, I’m not asking you to dig for it or spend a lot of time on it. This is just a path I’m wandering down for the time being to see if there is an easy / quick solution.
I’d love to see an OctoPi plugin to drive the Snapmaker display. I suspect it’d be a pretty heavy lift for the software, assuming the display uses a standard hardware interface.
Has anyone hacked the display yet? Firmware implies it’s ADAfruit display library ported to STM MCU.
If so, this is an SPI controlled display which should be easy to connect to OctoPi.
I’d love to see an OctoPi plugin to drive the Snapmaker display. I suspect it’d be a pretty heavy lift for the software, assuming the display uses a standard hardware interface. But there are already several simple Octoprint display panel plugins (using the IC2 LED display).
Thanks for your reply. Are you able to share what capabilities your team is planning to provide as part of a OctoPi integration? We’d be happy to supply suggestions if that would be valuable to your team. Also, any thoughts as to a deliverable timeline?
Does somebody know what the unused P2 connector is for? I’m lookin for serial input (rx/tx) to send gcode from an Arduino to Snapmaker directly like console input with Luban SW but without computer.